Advertisement
Intended Use
The cordless soldering iron is suitable for soldering electronic components.
The equipment is intended for use in the fi eld of DIY. It is not designed for commercial use. This equipment is not suitable for commercial use. Commercial use will invalidate the guarantee. Any other use that is not explicitly approved
in these instructions may result in damage to the equipment and represent a serious danger to the user. Adolescents over the age of 16 may use the device only under supervision. The operator or user is responsible for accidents or damage to other persons or their property. The manufacturer is not liable for damage which is caused through inappropriate use or incorrect operation.
General description
Extent of the delivery
Carefully unpack the appliance and check that it is complete. Return the packaging to a recycling centre when you have finished with them.
- Cordless soldering iron
- Soldering tip
- Solder, Ø 1.0 mm
- USB-C charging cable
- Station
- Sponge
- Instruction Manual
Functional description
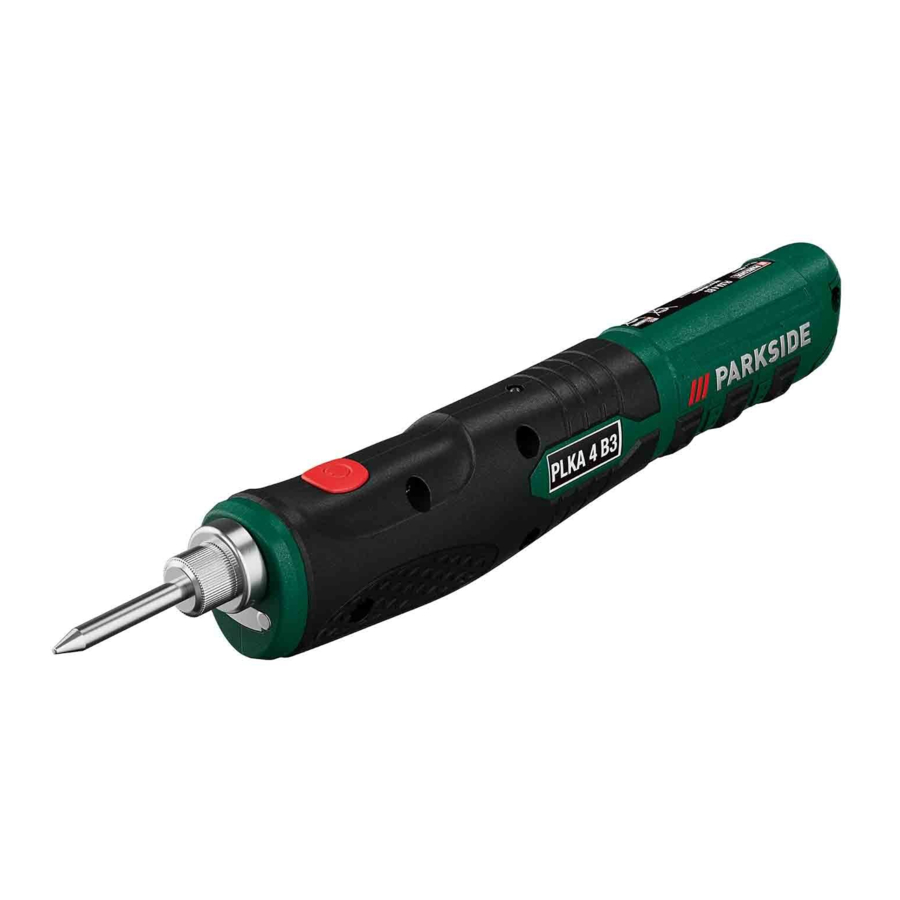
The PLKA 4 B3 cordless soldering iron with its ergonomic design and short warm-up phase (approx. 30 secs) is highly suitable for soldering without an annoying power cord. The soldering tip can be cleaned using the sponge on the station.
Refer to the following descriptions for a functional description of the controls.
Overview

|
|
 Charging socket of the soldering iron (USB-C port)
Technical specifications
Cordless soldering iron PLKA 4 B3
Safety class  III
III
Temperature max. 470°C
Weight 111 g
Battery (Li-Ion)
Nominal voltage
Umax 4 V 
Capacity C 1,5 Ah
Power P 8 W
Number of cells 1
Charging time approx. 1h*
* Only with power adapters JLH100501700G1/ JLH100501700B1.
Power adapter JLH100501700B1
Uptake voltage/ Input 100-240 V~
Input AC frequency 50-60 Hz
Power input 16 W
Voltage output/ Output 5.0 V
Charging current 1.7 A
Output power 8,5 W
Average active efficiency 79.7 %
Efficiency at low load (10%) 79.5 %
Power consumption at zero load 0,07 W
Safety class  II
II
Protection category IPX0
Safety information
This section describes the basic safety rules when working with the device.
Symbols and icons
Symbols on the device:
 Safety class III

Removable supply unit

Do not dispose of devices with a built-in battery in the household waste.
 Producer

UKCA mark indicates conformity with relevant Great Britain regulations applicable for the product.
Symbols on the power adapter:
 Read carefully before use.
 The charger is for indoor use only.
 Safety class II
 Electrical appliances must not be disposed of with the domestic waste.
Producer
UKCA mark indicates conformity with relevant Great Britain regulations applicable for the product.
Symbols in the manual:
 Warning symbols with information on damage and injury prevention.
 Instruction symbols with information on preventing damage.
 Advisory symbol with information on how to best use the device.
Special safety instructions

Risk of fi re! When putting the soldering iron down, make sure that the hot tip does not come into contact with combustible materials. Do not leave the device unattended while it is hot. Allow it to cool down before you store it away.
 The soldering tip reaches temperatures of over 400°C. Touching the metal parts can cause severe burns.
The device must always be placed on a non-combustible surface when it is not in use. There is a potential fire hazard
- Always turn the device on before it comes into contact with the material that is to be worked on.
- Vapours which are harmful to health are produced during the soldering process and when working on plastics. Ensure good ventilation or suitable vapour removal.
- Protect your eyes with safety gog-gles and your body with suitable working clothes against solder splashes and corrosive vapours.
- The device must never be used for heating up liquids or plastics.
- Never leave the device unattended when it is switched on.
![]()
This tool must be plugged into the station when it is not in use.- Ask our service centre to carry out any work that is not described in these instructions. Use only original parts.
- This device contains batteries that cannot be replaced.
![]()
Only use the pre-scribed removable power adapter to charge the battery.- Only use with supply unit JLH100501700G1 or JLH100501700B1.

SPECIAL SAFETY DIRECTIONS FOR BATTERY-OPERATED TOOLS
- Recharge the batteries indoors only because the battery charger is designed for indoor use only.
- To reduce the electric shock hazard, unplug the battery charger from the mains before cleaning the charger.
- Do not subject the battery to strong sunlight over long periods and do not leave it on a heater. Heat damages the battery and there is a risk of explosion.
- Allow a hot battery to cool before charging.
- Do not open up the battery and avoid mechanical damage to the battery. Risk of short circuit and fumes may be emitted that irritate the respiratory tract. Ensure fresh air and seek medical assistance in the event of discomfort.
- Do not use non-rechargeable bat-teries!
CORRECT HANDLING OF THE BATTERY CHARGER
- This appliance can be used by chil-dren aged from 8 years and above and persons with reduced physical, sensory or mental capabilities or lack of experience and knowledge if they have been given supervision or instruction concerning use of the appliance in a safe way and understand the hazards involved. Children shall not play with the appliance. Cleaning and user maintenance shall not be made by children without supervision.
- Use the charger only on a socket with a a residual current device (RCD) with a rated residual current of 30 mA or less.
- Before each use, check the charg-er, cable and plug and have them repaired by qualifi ed professionals and only with original parts. Do not use a defective charger and do not open it up yourself. This ensures that the safety of the device is maintained.
- Connect the charger only to a socket with an earth. Ensure that the mains voltage matches the specifi cations on the charger rating plate. Risk of electric shock.
- Disconnect the charger from the mains before closing or opening connection to the battery / power tool / device.
- Keep the charger clean and away from wet and rain. Do not use the charger outdoors. Dirt and the entry of water increase the risk of electric shock.
- Operate the charger only with the appropriate original batteries. Charging other batteries may result in injuries and risk of fi re.
- Avoid mechanical damage to the charger. This can result in internal short circuits.
- Do not operate the charger on a combustible surface (e.g. paper, textiles). Risk of fi re due to heating during charging.
- The battery is only partially pre-charged upon delivery and must be fully charged up before being used for the first time. For the first charge it is recommended that the battery should be charged up for approximately 1 hour. Insert the soldering iron into the base and connect the charger to the mains.
- Remove the mains plug when the battery is fully charged and disconnect the charger from the device. The charging time is about 1 hour. This charging time is only achieved using the power supply.
- Do not use the charger to charge non-rechargeable batteries. The device could become damaged.
- Do not connect a damaged cord to the power supply. Do not touch a damaged cable before it has been disconnected from the power supply, as you could come into contact with active parts.
Charging process

Do not expose the battery to extreme conditions such as heat and shocks. There is a risk of injury caused by leaking electrolyte solution! In the case of contact, rinse with water or neutraliser. Seek medical advice if the solution has come into contact with the eyes etc.
 The battery must only be charged up in dry areas.
The device cannot be used while it is being charged.
- The device may only be powered with SELV (Safety Extra Low Voltage) as indicated by the label on the appliance.
- Charge the battery installed in the device before using it for the first time.
- To safely charge the Li-ion battery integrat-ed in the device, use only power adapter JLH100501700G1/ JLH100501700B1, which you can purchase from our online shop.
- Recharge the battery when the heat output diminishes.
- Always comply with the latest safety infor-mation, as well as the regulations and information relating to environmental protection.
- Defects resulting from improper handling are not covered by the guarantee.
- Connect the USB charging cable (8) to the power adapter.
- Connect the charging plug (9) to the charging socket (11) on the device.
- Insert the power adapter into a socket. The indicator lamp (5) lights up:
red: The device is charging
green: The charging process has finished. The recommended charging time is 1 hour. - After charging, first remove the power adapter from the socket. Then remove the charging plug (9) from the charging socket (11).
Initial Operation
The soldering tip (1) has to be mounted before initial use.
Installing/eplacing the soldering tip

Make sure that the soldering iron is turned off and cold.
Hold the soldering iron tightly and unscrew the soldering tip that is already inserted, if there is one. Now screw the new soldering tip (1) into the holder (2).
Switching on and off
Make sure that the mains voltage matches the details on the type plate.
Caution, danger of burns! Do not touch the hot soldering tip ( 1).
1).
Before starting work, wet the sponge (7) in the station (6).
When starting work:
- Hold down the On/Off switch (4) for approx. 4 seconds.
- Hold the soldering iron in your hand like a pen (
![]() ).
).

 ).
).
The LED work light (3) lights up during operation.
Switching off:
- Briefly press the On/Off switch (4).
- Make sure that the hot soldering tip (1) does not touch anything until it has cooled down.
You can insert the soldering iron into the station (6) to allow it to cool down or for storage.
Operation
Working Instructions
- Before starting work, wet the sponge (7) to be able to dab the soldering tip (1) during and after use.
- In order to obtain a perfect soldering point, the soldering point must be completely clean and free of grease.
- Before initial use, the soldering tip has to be tin-coated, i.e. coated with soldering tin. Only good tin coating ensures perfect soldering and heat transfer.
- Make sure that the soldering tip is always clean and free of scaling and excess soldering tin. Clean the soldering tip regularly with a wet sponge. Never use a file for this purpose.
- Before soldering, establish a mechanical con-nection between the metals which are to be connected together if possible. For example, twist the wires together so that they do not slip. In this way you will obtain stable soldering points and avoid heat damage through excessive soldering.
- For the soldering of two metals, hold the soldering tip on the connection point and briefly add some solder. The solder melts and flows into the soldering point. If the tin has spread, remove the soldering iron and allow the soldering point to cool down without vibrations. Never heat solder directly and do not use too much solder.
- In the case of electronic components, the parts to be soldered must not be heated too much in order to avoid damage.
- Place the soldering iron on a heat-resistant surface to cool down or insert it into the station.
Cleaning/maintenance
Ask our service centre to carry out any work that is not described in these instructions. Use only original parts.
Before working on the device, ensure that the device is switched off. Risk of burns and electric shock.
The following cleaning and servicing should be done regularly. This will ensure a long and reliable service life.
Cleaning
Do not spray the appliance with water and do not immerse it in water. Electric shock hazard!
Do not use cleaning agents or solvents. You may otherwise irreparably damage the appliance.
- Wipe off the warm soldering tip (1) on the wetted sponge (7) after or during use.
- Wipe off the warm soldering tip (
![]() 1) after use on a damp sponge.
1) after use on a damp sponge. - Never scrape or file any solder residues off the soldering tip with hard objects, as this will damage the soldering tip!
 1) after use on a damp sponge.
General maintenance
Prior to every use, check the appliance for obvious defects such as loose, worn or damaged parts. Replace as necessary.
Storage
- Clean the equipment before putting it away.
- Allow the device to cool down completely before you store it away.
- Store the device in a dry, frost-free and dust-protected location out of the reach of children.
Waste disposal and environmental protection
Be environmentally friendly. Return the tool, accessories and packaging to a recycling centre when you have finished with them.

Electrical devices must not be disposed of with domestic waste.

Do not dispose of devices with a built-in battery in the household waste, a fire (risk of explosion) or water. Damaged batteries can harm the environment and your health if poisonous fumes or liquids escape. Dispose of the device with the battery discharged. Do not open the device or battery.
In accordance with the Directive 2012/19/ EU on waste electrical and electronic equipment, used electrical devices must be collected separately for disposal and recycled in an environmentally sound manner.
Depending on the implementation in national law, you may have the following options:
- Return to a shop,
- Return to an official collection point. For more information, please contact your local waste management provider or our service centre.
- Return to the manufacturer/distributor. We will dispose of any defective devices that you send to us free of charge.
This does not affect accessories enclosed with the old devices or tools without any electrical components.
Replacement parts/ Accessories
Spare parts and accessories can be obtained at www.grizzlytools.shop
If you have issues ordering, please use the contact form. If you have any other questions, contact the "Service-Center".
| Description | Order No. |
| Soldering tip | 91099427 |
| EU power adapter + USB cable | 80001038 |
| UK power adapter + USB cable | 80001039 |
| Solder Ø 1,0 mm + Ø 1,5 mm | 91099428 |
Trouble Shooting
| Problem | Possible cause | Corrective action |
| Soldering tip (1) does not heat up | Battery is flat | Charge the battery |
| USB charging cable (8) or power adapter defective | Repair by Service Centre | |
| Indicator lamp (5) flashing | Soldering tip (1) loose | Tighten the cold soldering tip (1) hand-tight with the device switched off |
| Temperature at the soldering tip (1) too low | Soldering tip (1) loose | Tighten the cold soldering tip (1) hand-tight with the device switched off |

Documents / Resources
References
Download manual
Here you can download full pdf version of manual, it may contain additional safety instructions, warranty information, FCC rules, etc.
Download Parkside PLKA 4 B3 - Cordless Soldering Iron Manual
Advertisement


Need help?
Do you have a question about the PLKA 4 B3 and is the answer not in the manual?
Questions and answers