
Subscribe to Our Youtube Channel
Related Manuals for Philips AWH1130


Summary of Contents for Philips AWH1130
- Page 1 Water Heater Electric water heater AWH1130 AWH1131 AWH1132 AWH1604 AWH1605 AWH1606 User Manual Petunjuk penggunaan...
-
Page 3: Table Of Contents
English Table of contents Precautions Installation Instruction Usage Method Product Description Maintenance Electrical Schematics Product Speci�cations Troubleshooting Guide Packing List Guarantee & Service... -
Page 4: Precautions
1. Precautions • The water heater which is used in situation It must be earthed and must be connected with the independent single-press three-plug connector which is also well earthed! • The water heater which is used for the �rst time must be �lled up with water before you switch on the current. - Page 5 • The appliance is intended to be permanently connected to the water mains and not connected by a hose-set. • Before use, make sure that the electric water heater is installed correctly and completely. When using it for the �rst time or after emptying it, the electric water heater must be �lled with water before it is allowed to connect to the power supply.
-
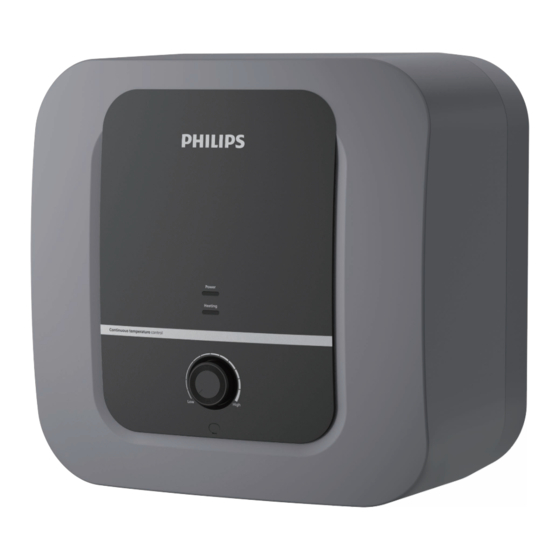
Page 6: Product Description
2. Product Description Product size and hanger size AWH1130 AWH1131 AWH1132 NUMBER AWH1604 AWH1605 AWH1606 A(mm) C(mm) D(mm) E(mm) G(mm) 1/2" 1/2" 1/2" Note: The allowable error range of the above parameters is ±10%... -
Page 7: Electrical Schematics
1. Hot water outlet 3. Hot water outlet pipe 2. Cold water inlet 4. Heating element 3. Electrical Schematics THERMAL CUT-OUT THERMOSTAT Brown Brown Yellow /Green Power Heating Blue Blue... -
Page 8: Product Speci�Cations
4. Product Speci�cations AWH1130 AWH1131 AWH1132 Project Unit AWH1604 AWH1605 AWH1606 Rated voltage 220~ 220~ 220~ Rated frequency Preset pressure Maximum temperature °C Rated volume Waterproof level IPX4 IPX4 IPX4 5. Packing List Model Electric Relief hose Safety Expansion Manual... - Page 9 Wall Expansion bolt Hook • Fasten it �rmly into position and check the wall plugs are not loose to ensure that the electric heater is �rmly mounted. • Connect the water heater intake and outlet with pipes or accessories that are able to withstand temperatures over 100°C at a pressure that exceeds working pressure (8 bar) .
- Page 10 Plug Water heater Hot water Into cold water Cold water valve Relief hose of safety valve Shower head Water mixing valve Figure 4 Note: When installing the safety valve, be sure to recognize the water �ow direction sign on the safety valve and install it correctly, and tighten the upper and lower installation nuts to avoid water leakage.
- Page 11 install G1/2 unions at the appropriate positions of the water heater inlet and outlet pipes. Determine the location of the water supply, connect the water inlet pipe and the tap water pipe to the water source respectively, �ll the inner tank with water, and check whether the waterway leaks.
-
Page 12: Usage Method
7. Usage Method Preparation before use • Water injection: Open the water mixing valve, lift the handle of the mixing valve, turn it clockwise to the highest point in the high temperature area, and then open the water inlet valve. At this time, water will be injected into the inner tank until the hot water outlet is normal. -
Page 13: Maintenance
• Adjust the knob of the water heater to set the heating temperature of the inner tank. The maximum water temperature is set to 75 °C. • Temperature adjustment knob, “Low” means low temperature, “High” means high temperature. Turn the knob clockwise to increase the temperature setting. Once the maximum temperature setting is reached, the knob will not continue to turn. -
Page 14: Troubleshooting Guide
10. Guarantee & Service If you need information or if you have any problem, please visit www,philips.com or contact the customer care center in your country. If there is no customer care center in your country, go to a local dealer. - Page 15 Indonesia Daftar Isi Tindakan Pencegahan Petunjuk Pemasangan Cara Penggunaan Deskripsi Produk Perawatan Skema Listrik Spesi�kasi Produk Panduan Mengatasi Masalah Daftar Kemasan Jaminan dan Layanan...
-
Page 16: Tindakan Pencegahan
1. Tindakan Pencegahan • Pemanas air yang digunakan ini harus di-grounding-kan dan harus dihubungkan dengan konektor tiga steker tekan tunggal independen yang juga di-grounding-kan dengan baik! • Pemanas air yang digunakan untuk pertama kali harus diisi air sebelum Anda menghidupkan daya listrik. - Page 17 • Sebelum pemasangan atau penggunaan, Anda harus membaca dan memahami petunjuk dan peringatan keselamatan. Jika Anda tidak mengikuti petunjuk dan peringatan keselamatan, hal ini dapat menyebabkan cedera serius atau kematian. • Pastikan catu daya cocok dengan daya terukur dan frekuensi terukur. Pastikan steker listrik tidak rusak untuk mencegah risiko sengatan listrik.
-
Page 18: Deskripsi Produk
2. Deskripsi Produk Ukuran produk dan ukuran gantungan AWH1130 AWH1131 AWH1132 Nomor AWH1604 AWH1605 AWH1606 A(mm) C(mm) D(mm) E(mm) G(mm) 1/2" 1/2" 1/2" Catatan: Rentang kesalahan yang diperbolehkan dari parameter di atas adalah ±10%... -
Page 19: Skema Listrik
1. Saluran keluar air panas 3. Pipa keluar air panas 2. Saluran masuk air dingin 4. Elemen pemanas 3. Skema Listrik THERMAL CUT-OUT THERMOSTAT Brown Brown Yellow /Green Power Heating Blue Blue... -
Page 20: Spesi�Kasi Produk
4. Spesi�kasi Produk AWH1130 AWH1131 AWH1132 Proyek Unit AWH1604 AWH1605 AWH1606 Tegangan 220~ 220~ 220~ Frekuensi Tekanan preset Suhu maksimum °C Volume Tingkat tahan air IPX4 IPX4 IPX4 5. Daftar Kemasan Selang Nama Pemanas Katub Baut Petunjuk Pengait pelepas nomor... - Page 21 Dinding Baut ekspansi Pengait • Kencangkan dengan kuat ke posisinya dan periksa steker dinding tidak longgar untuk memasti- kan bahwa pemanas listrik terpasang dengan kuat. • Sambungkan saluran masuk dan saluran keluar pemanas air dengan pipa atau aksesoris yang mampu menahan suhu diatas 100°C pada tekanan yang melebihi tekanan kerja (8 bar). Oleh karena itu, kami sangat menganjurkan agar tidak ada bahan yang digunakan yang tidak dapat menahan suhu tinggi.
- Page 22 steker Pemanas air Air panas Ke dalam air dingin Katub air dingin Selang pelepas katub pengaman Kepala pancuran Katub pencampur Gambar 4 Catatan: Saat memasang katup pengaman, pastikan untuk mengenali tanda arah aliran air pada katup pengaman dan pasang dengan benar, dan kencangkan mur pemasangan atas dan bawah untuk menghindari kebocoran air.
- Page 23 lokasi pasokan air, sambungkan pipa air masuk dan pipa air keran ke sumber air masing-masing, isi tangki bagian dalam dengan air, dan periksa apakah saluran air bocor. Jika ada kebocoran air, kedua pipa harus disambungkan kembali • Pasang katup pengaman dengan tekanan pengenal 0,7MPa (antarmukanya adalah G1/2”) pada pipa saluran masuk air searah panah pada katup pengaman (panah menunjuk ke pemanas air).
-
Page 24: Cara Penggunaan
7. Cara Penggunaan Persiapan sebelum digunakan • Injeksi air: Buka katup pencampur air, angkat pegangan katup pencampur, putar searah jarum jam ke titik tertinggi di area suhu tinggi, lalu buka katup saluran masuk air. Pada saat ini, air akan disuntikkan ke dalam tangki bagian dalam hingga saluran keluar air panas normal. Pada saat ini menandakan bahwa tangki bagian dalam telah terisi air, tutup katup pencampur air, dan putar pegangan berlawanan arah jarum jam ke titik terendah di zona suhu rendah. -
Page 25: Perawatan
• Sesuaikan kenop pemanas air untuk mengatur suhu pemanasan tangki bagian dalam. Suhu air maksimum diatur ke 75 °C. • Kenop penyetel suhu, "Low" berarti suhu rendah, "High" berarti suhu tinggi. Putar kenop searah jarum jam untuk menaikkan pengaturan suhu. Setelah pengaturan suhu maksimum tercapai, kenop tidak akan terus berputar. -
Page 26: Panduan Mengatasi Masalah
10. Jaminan dan Layanan Jika Anda memerlukan informasi atau memiliki pertanyaan, silakan kunjungi www.philips.com/sup- port atau kontak Pusat Layanan Konsumen di negara/wilayah Anda. Jika tidak ada pusat layanan konsumen di Negara/Wilayah Anda, silakan hubungi distributor lokal Anda. - Page 28 Speci�cations are subject to change without notice © 2023 AquaShield All rights reserved. Philips and the Philips Shield Emblem are registered trademarks of Koninklijke Philips N.V. and are used under license. This product has been manufactured by and is sold under the responsibility of Hong Kong AquaShield Health Technology Company Limited and Hong Kong AquaShield Health Technology Company Limited is the warrantor in relation to this product.
Need help?
Do you have a question about the AWH1130 and is the answer not in the manual?
Questions and answers