Mobotix S26 Flex Quick Install
Hide thumbs
Also See for S26 Flex:
- Manual (90 pages) ,
- Quick install (2 pages) ,
- Quick install (2 pages)
Table of Contents
Advertisement
Quick Links
Accessories
Mx-S26A/B* with
AudioMount with inte-
AudioMount
grated microphone and
(e.g., as door station/
intercom solution)
*Variant Mx-S26B supports MOBOTIX MxBus modules, door station func-
tionality available with camera software V5.2.x and higher, 2nd half of 2018)
S26 Standard Delivery
M.10
M.9
M.8
M.7
M.6
M.5
M.4
M.3
M.2
M.1
1.13
Standard Delivery
Item
Count
Part Name
1.1
1
Camera housing (with base plate)
1.2
1
Lens B016 (installed)
1.3
1
Dome (installed)
Mounting the Camera
1. Installation Using the Base Plate
Attach the camera using the supplied or other screws by affixing the base
plate to a suitable material
1
Note that you can also install the S26 behind faceplates of up to 6.4 mm/0.25 in
thickness using stud bolts
2
2. Installation With AudioMount (Accessory)
Using the self-adhesive AudioMount
a door station. This is explained in the product documentation «Quick
Install AudioMount» (suitable drilling template is supplied).
*Variant Mx-S26B supports MOBOTIX MxBus modules, door station func-
tionality available with camera software V5.2.x and higher, 2nd half of 2018)
To configure the door station, please follow the procedure in the S15 Camera Manual for the S15M (PDF, available on www.mobotix.com > Support >
Download Center > Documentation > Manuals).
Note on Variant Mx-S26A: This variant does not support MxBus modules and cannot be used as a full-fledged door station. To implement an intercom
solution based on an Mx-S26A, you can use the signal inputs and outputs of an MX-232-IO-Box connected to the camera via USB. In this case, the camera
uses its standard mechanisms (e.g., events and network messages) to process the input signals (e.g., from a door bell) and to control the signal outputs
(e.g., of a door opener). Please note that the auto configuration and other door station functions are not available in this case.
Connections and Initial Operation of the S26
You can find detailed information on the installation and connections of the S26 in the S15 Camera Manual for the S15M (PDF, available on www.mobotix.com >
Support > Download Center > Documentation > Manuals).
Please note that the boot options of this camera have changed compared to its predecessor (see «Boot Options of the S26») and the camera only has one
key ("L"). Regarding the rest of the initial operation of the S26, please see the S15 Camera Manual in Chapter 3, «Initial Operation». The first access follows
the procedure described in the same manual in the section «Initial Operation of the Camera». All other tasks require access to the camera's user interface
in the browser. Enter the camera's IP address into the address bar of the browser (user "admin", password "meinsm"; password must be changed upon
first login – camera software V5.1.x and higher).
L
USB
Ethernet patch cable
In special situations, you can attach an external sensor module to the S26. In this case, you need to attach the external sensor module to the "Cam1" con-
nector of the camera; then follow the instructions for attaching sensor modules to the S16. After configuring the external sensor module, the integrated
Image Sensor of the S26 will be deactivated.
Inserting/Exchanging the SD Card
All camera models can use the integrated MicroSD card (SDHC) to record video data. In order to exchange the MicroSD
card, please proceed as outlined in the following instruction. For information on reliable SD cards, please see the MOBOTIX
website www.mobotix.com > Support > Download Center > Documentation > White Lists in the document MicroSD Card
Whitelist for MOBOTIX Cameras.
When replacing the SD card, make sure that recording has been deactivated in the browser (Admin Menu > Storage > Storage
on External File Server / Flash Device; activate recording again in the same dialog).
1. Remove the SD card
Loosen the threaded plug at the top of the
housing (using a suitable coin, for example)
and remove the plug. Using tweezers, gently
press the SD card into the slot (as indicated by
the arrow) until you hear a click. The card is
protruding slightly and can be easily removed
with the tweezers.
Boot Options of the S26
By default, the camera starts as DHCP client and automatically tries to get
an IP address from a DHCP server. To start the camera in a mode different
from the default mode, you can activate the boot menu of the camera.
1. Preparing the Camera
• Disconnect the camera's power supply.
• Reconnect the power supply of the camera.
2. Activating the Boot Menu
The red LED lights up 5 to 10 seconds after establishing
the power supply and will stay on for 10 seconds. Briefly
press the key L indicated by the red circle in the figure.
The camera enters the boot menu, ready for selecting
one of the boot options.
The LED now flashes once and repeats the flash signal
after pausing for one second (the number of flashes
indicates the current boot option). To go to the next boot option, briefly
press the key again (< 1 sec). After the last boot option, the camera returns
to the first option (LED flashes once).
speaker
1.1
1.2
1.6
1.8
1.10
1.11
1.12
(see «Drilling Template» on page 2).
(see «Drilling Template» on page 2).
, you can install the Mx-S26B* as
3
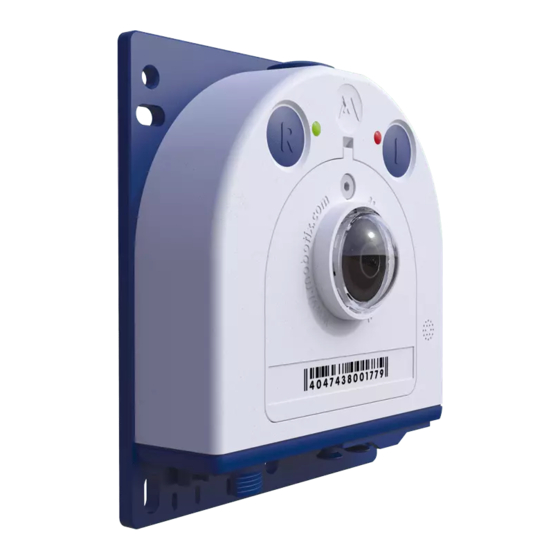
LEDs
Key L
Housing cover
Lens
B016
Base plate
Ethernet installation cable,
LSA terminal block
S26 Flex
Quick Install
Standard Delivery
Item
Count
1.4
1.5
1.6
1.7
1.8
1.3
1.9
1.10
1.4
1.11
1.12
1.13
1.5
Mounting Supplies
1.7
Item
Count
M.1
1.9
M.2
M.3
M.4
M.5
M.6
M.7
M.8
M.9
M.10
Microphone
MxBus
Speaker
2. Insert the SD card
Again using tweezers, insert the SD card as
shown (contacts facing forward) into the card
slot. Make sure that you hear a click again when
pushing the card into the slot. The card is now
locked and can be used. Insert the threaded
plug again and tighten it using the coin.
LED
Boot
flashes
Option
Auto Config-
1 x
uration
Factory
2 x
Defaults
Automatic
3 x
IP Address
L
Recovery
4 x
System
*Only on cameras with audio option and installed speaker.
3. Selecting a Boot Option
Press the key longer (> 2 sec) into the hole. The camera confirms the selec-
tion by flashing rapidly three times. After 20 sec, the camera will confirm
the selection by playing a sound according to the table above.
If nothing is selected, the camera will resume its normal boot process
after a certain time.
Part Name
1
Housing cover for S26 (installed)
3
Stainless steel Allen screw with flat head M4x8 mm (installed)
1
Sealing ring (installed)
1
Sealing plug blue, small (sensor modules, USB, mounted)
1
Sealing plug blue, large (Ethernet patch cable, mounted)
1
Cable lock with bayonet catch (Ethernet patch cable, mounted)
Eight-wire plug, white (Ethernet installation cable, microphone,
1
speaker, MxBus wires for variant Mx-S26B)
1
MicroSD card pre-installed (SDXC)
1
Threaded plug for SD card, blue (mounted)
1
Ethernet patch cable, 50 cm/19.7 in with sealing
Part Name
4
Stainless steel washers dia. 4.3 mm
4
Dowels 6 mm
4
Stainless steel wood screws with hex head 4x40 mm
2
Cable plug 5 to 7 mm, white (Ethernet installation cable)
1
Cable plug 3 to 5 mm, white (Ethernet installation cable)
1
Allen wrench 2.5 mm
1
Lens wrench (lens, dome)
1
Module wrench (sensor module, glass cover/filter insert)
Cable tie (Ethernet installation cable, microphone, speaker, MxBus
1
wires for variant Mx-S26B)
1
Screwdriver (terminals)
1
2
3
MOBOTIX patch cable or
MiniUSB
additional cable
Additional cable or net-
work installation cable
Meaning
Starts the auto configuration in order
to operate this camera as a door station
(variant Mx-S26B only, camera software
V5.2.x and higher, 2nd half of 2018).
Starts the camera with factory defaults
(factory default IP address, users and
passwords will not be reset).
Starts the camera as DHCP client and
tries to obtain an IP address from a DHCP
server. If a DHCP server cannot be found
or no IP address can be obtained, the
camera starts with its factory default
address.
Starts the camera with the recovery sys-
tem, e.g., in order to recover from a failed
update of the camera software.
Cam1
Audio
Confirma-
tion*
Phone ringing
Boing
Boing Boing
Alarm Sound
Advertisement
Table of Contents

Subscribe to Our Youtube Channel
Related Manuals for Mobotix S26 Flex


Summary of Contents for Mobotix S26 Flex
- Page 1 Connections and Initial Operation of the S26 You can find detailed information on the installation and connections of the S26 in the S15 Camera Manual for the S15M (PDF, available on www.mobotix.com > Support > Download Center > Documentation > Manuals).
- Page 2 MOBOTIX, the MX logo, MxPEG and MxActivitySensor are trademarks of MOBOTIX AG registered in the Euro- pean Union, the U.S.A., and other countries • Information subject to change without notice • MOBOTIX does not assume any liability for technical or editorial errors or omissions contained herein • All rights reserved •...
Need help?
Do you have a question about the S26 Flex and is the answer not in the manual?
Questions and answers