
Subscribe to Our Youtube Channel
Related Manuals for Sanotechnik LAHTI


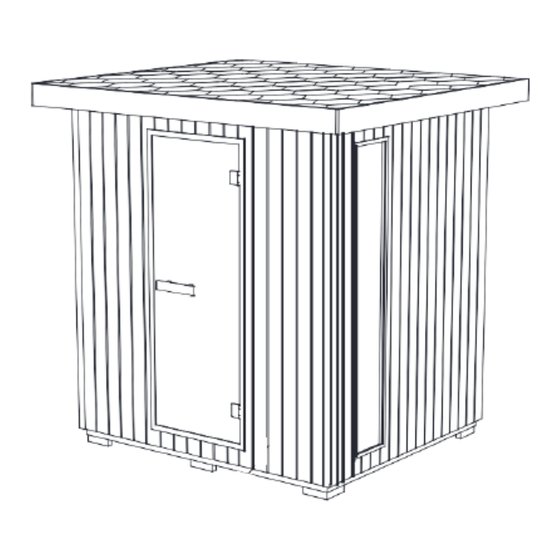
Summary of Contents for Sanotechnik LAHTI
- Page 1 Infrared makes life more healthy Due to our continued product improvement, product illustrated on this instruction manual may vary slightly from the actual product.
- Page 2 Recommendations Read this manual carefully before using your sauna for the first time. We recommend you keep it in a safe place for future reference. • Wood is a living element, to maintain its original appearance, it is important to treat the outside of the wood against moisture. Use a saturator only on the outside of the sauna.
- Page 3 Safety IMPORTANT : Please read the safety instructions carefully before installing and using your sauna cabin. They are essential for your safety, so please adhere strictly to them. Beware of hyperthermia, heat stroke or heat exhaustion which can be caused or aggravated by noncompliance with the safety instructions.
- Page 4 Description sauna...
- Page 5 Description sauna (1715x1820x54mm) 1x (1597x1820x54mm)1x (250x50x45mm )2x (1456x1820x54mm)1x (1456x1820x54mm)1x (1656x1420x42mm)1x (560x300x40mm)1x (2015x1815x120mm) 1x Cable (408x300x40mm)1x Sauna stove (1654x1454x55mm)1x (750x40x30mm )1x Wooden barrel (1592x350x90mm) 1x Wooden spoon (1592x450x90mm) 1x Hygrometer (1580x848x80mm) 1x Hourglass (680x340x115mm) 1x Water pan Ø5x50 Ø4x50 Ø4x30 Ø3x25 Ø6x50...
- Page 6 Read the assembly instructions carefully before starting. Choice of location Designed solely for exterior installation. Select a space: • In a dry area, on a flat stable surface that can support the weight of your sauna. • The height must be sufficient for you to reach the ceiling and carry out electrical connections and maintenance. •...
-
Page 7: Assemble Instructions
Assemble instructions Take out the bottom panel and place it on a flat ground for installation. Ø 4 x 30 6PCS Remove the rear panel and control box protective frame, and install the control box protective frame outside the rear panel control box with screws to provide protection. - Page 8 Assemble instructions Assemble steps Rear panel Place the assembled rear panel above the corresponding position on the bottom panel. Bottom panel Right side panel Left side panel The left and right side panels are fixed to the rear panel through a buckle connection. Outer buckle installation method...
- Page 9 Assemble instructions Assemble steps The front panel and left and right side panels are also fixed through a buckle connection. Outer buckle installation method Backrest Ø 4 x 50 4PCS Ø 4 x 50 8PCS...
- Page 10 Assemble instructions Assemble steps The sauna cable runs through the hole in the bottom plate and is fixed to the bottom plate with a wooden square. Ø 3 x 25 6PCS Installation diagram of sauna stove Sauna stove Sauna stove Cable(5*2.5mm²)...
- Page 11 Assemble instructions Assemble steps Install the inner top plate Install the outer top plate Ø 5 x 50 6PCS After installing the outer top plate, pay attention to connecting and fixing the wooden blocks on both sides of the top plate to the side plate through locking screws.
- Page 12 Assemble instructions Assemble steps Ø 4 x 30 4PCS Ø 4 x 30 2PCS Install the sauna stove protection frame Cable Power plug (5*2.5mm²) Front Back Overview of the complete machine after installation...
- Page 13 Timer switch Thermostat switch 1. Heater On Turnthe timerswitchto the ”on”section (section A in gure 2, 0–4 hours). The heater starts heating immediately. 2. Pre-setting Time (timed switch-on) Turnthetimerswitchto the”pre-setting” section(sectionBin 2,0–8hours). Theheaterstartsheatingwhenthe timer has turnedthe switchback to the ”on” section.Afterthis,the heaterwillbe on for about four hours.
- Page 14 Control panel operation Switch on/power off In energized state , the system is under standby , when first press button for 3 seconds, the system is switched on, the room temperature will display on the screen, when second press this button , the system and all loads will be turned off.if the button color shows green means on-state,and red color means closed Light wave function...
-
Page 15: Maintenance
Maintenance Protection of wood Brush each exterior barrel slat and apply a wood stain when full assembly to protect the wood. This wood stain had to be renewed according to the recommendations of the product used Maintenance IMPORTANT : Disconnect the cabin’s power supply cable before undertaking any work. Problems identified Possible reasons Solutions...
Need help?
Do you have a question about the LAHTI and is the answer not in the manual?
Questions and answers