Advertisement
Quick Links
Advertisement

Related Manuals for REP RR-4000 ARES


Summary of Contents for REP RR-4000 ARES
- Page 1 TROUBLESHOOTING GUIDE...
-
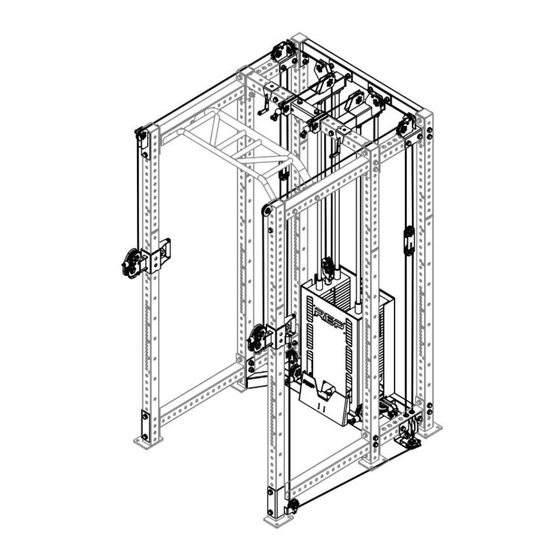
Page 2: Assembly Tools
ASSEMBLY TOOLS... - Page 3 STEP #1 – Loosen Rack Components Loosen hardware to allow a good amount of movement STEP #1A – Upper Crossmembers & Front Upper Bracket (25-0970) STEP #1B – Logo Plate Crossmember & Upper Rear Brace (25-0971)
- Page 4 STEP #1C – Lower Crossmembers & Front Lower Bracket (25-0966 & 25-0988)
- Page 5 STEP #2 – Loosen Ares Components Loosen hardware to allow a good amount of movement STEP #2A – Lat Pull Bracket (25-0968) & Upper Cross Brace (25-0983 & 25-0984) STEP #2B – Top Outer Bracket (25-0977 & 25-0979)
- Page 6 STEP #2C – 3-Pulley Bracket (25-0973 & 25-0975)
- Page 7 STEP #3 – Adjust & Tighten Rack Components STEP #3A – Lock Tension In Weight Stack Press headplate flush with weight stack + place weight pin at bottom of stack STEP #3B – Lower Rear Crossmember Apply upward tension to the crossmember while tightening hardware...
- Page 8 STEP #3C – Lower Front Crossmember & Front Lower Bracket Apply upward tension to the crossmember while tightening rear hardware; follow same process for Front Lower Bracket and front hardware STEP #3D – Upper Rear Crossmember Apply upward tension to the crossmember while tightening hardware...
- Page 9 STEP #3E – Upper Front Crossmember & Front Upper Bracket Apply downward tension to the crossmember while tightening rear hardware; follow same process for Front Upper Bracket and front hardware STEP #3F – Logo Plate Crossmember Apply downward tension to the Logo Plate Crossmember while tightening hardware...
- Page 10 STEP #3G – Upper Rear Brace Apply downward tension to the Logo Plate Crossmember while tightening hardware...
- Page 11 STEP #4 – Adjust & Tighten Ares Components STEP #4A – 3-Pulley Bracket Apply upward tension to the 3-Pulley Bracket while tightening hardware STEP #4B – Top Outer Bracket Apply downward tension to the Top Outer Bracket while tightening hardware...
- Page 12 STEP #4C – Upper Cross Brace Apply downward tension to the Upper Cross Brace while tightening hardware STEP #4D – Lat Pull Bracket Apply backward tension to the Lat Pull Bracket while tightening hardware...
- Page 13 STEP #4C – Release Weight Stack Tension Apply downward tension to the Upper Cross Brace while tightening hardware STEP #4D – Lat Pull Bracket Apply backward tension to the Lat Pull Bracket while tightening hardware...
- Page 14 STEP #4E – Release Weight Stack Tension Place weight pin at headplate (top of weight stack) DONE!
Need help?
Do you have a question about the RR-4000 ARES and is the answer not in the manual?
Questions and answers