Table of Contents

Subscribe to Our Youtube Channel
Related Manuals for Miele professional G 7783 MIELABOR


Summary of Contents for Miele professional G 7783 MIELABOR
- Page 1 Operating Instructions Laboratory Glasswasher G 7783 MIELABOR It is essential to read these operating instructions before installing or using the machine, to avoid the risk of accident or damage to the machine. M.-Nr. 03 885 802...
-
Page 2: Table Of Contents
Contents Contents Guide to the machine..........3 Warning and safety instructions. -
Page 3: Guide To The Machine
Guide to the machine Guide to the machine °C • • • • • • • • • • • • • • • • • • • • • • DESIN MIELABOR G 7783 MULTITRONIC 1 2 3 4 1 “Check water inlet/outlet”... - Page 4 Guide to the machine Guide to the machine 10 Connection for DOS-Module (at rear) 14 Dispenser for liquid rinsing agent with dosage selector 11 Filter combination 15 Level indicator 12 Dispenser for powder detergent 13 Connection socket for salt container (Water softener)
-
Page 5: Warning And Safety Instructions
Warning and safety instructions Warning and safety instructions The electrical safety of this ma- This machine conforms to current chine can only be guaranteed if safety requirements. Inappropriate connected to a correctly installed ear- use can however lead to personal thing system on site. -
Page 6: Warning And Safety Instructions (Detachable)
Warning and safety instructions Warning and Safety instructions Take care when handling liquids Never use an ordinary or a high such as detergents, wetting pressure hose on or in the vicinity agents, or neutralising agents. These of the machine. may contain irritant or corrosive ingre- Before any maintenance or repair dients, acids or alkalis. - Page 7 Warning and safety instructions Warning and Safety instructions For pre-treatment and / or cleaning In critical applications where very only use low-foaming detergents stringent requirements have to be and disinfecting agents which have met, it is strongly recommended that all been approved by Miele.
- Page 8 Warning and safety instructions Warning and Safety instructions Accessories The manufacturer cannot be held re- The only accessories to be used sponsible for any damage caused with the special commercial ma- through non-observance of these chine must be those supplied or ap- Warning and Safety instructions.
-
Page 9: Description Of The Machine
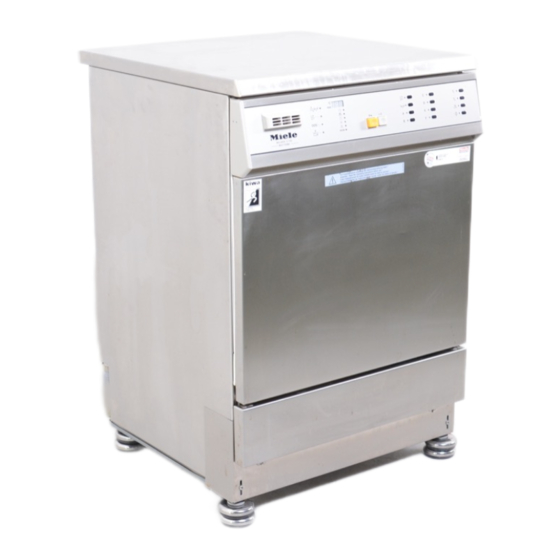
Description of the machine Description of the machine The G 7783 is a front-loading automatic The effective areas are defined as fol- machine for the efficient washing - neu- lows: tralising - rinsing - final rinsing of labora- A = Suitable for destruction of vegeta- tory glassware. -
Page 10: Setting The Water Softener
Setting the water softener Setting the water softener To avoid the build-up of calcium de- Time- °d mmol/ ° f °e posits on glassware and in the ma- set- CaCO 3 ting chine the water needs to be softened, 1,07 10,7 where the supply hardness exceeds 1,25... - Page 11 Setting the water softener Setting the water softener If the water hardness in your area is permanently below 107 ppm (6 d): Select setting “0". The control light k will not come on and the water softener does not need to be reactivated. See section on Reactivating the water softener.
-
Page 12: Opening And Closing The Door
Opening and closing the door Opening and closing the door To open the door a Press the release catch as far as it will go and, at the same time, grasp the door grip and open the door. The door should only be opened dur- ing operation for emergencies: e.g. -
Page 13: Applications And Loading
Applications and loading Applications and loading This laboratory glasswasher normally Please note: requires a top and a bottom basket. Load the glassware so that water will Depending on the type and shape of come into contact with all surfaces. the glassware, inserts can be supplied. Do not place items to be cleaned in- The diversity of the inserts is so great side other pieces where they may be... - Page 14 Applications and loading Loading the machine Important: Make sure that the spring adapter for water connection engages correctly when a basket, injector or mobile unit is inserted into the machine. It must be 4- 5 mm higher than the water connection inlet in the roof of the cabinet.
- Page 15 Applications and loading Loading the machine E 109 O 188 top basket frame Half insert, stainless steel, for 21 glass can take various inserts. beakers up to 250 ml, round and coni- cal flasks etc. E 106 U 174 bottom basket frame Half insert, st.
- Page 16 Applications and loading Loading the machine Adjusting the top basket Adjustable top baskets can be used in this machine. They can be adjusted up or down by 2 cm from the middle posi- tion set on delivery. In the middle position the top basket will accommodate: Vessels and glassware up to 19 cm in height,...
-
Page 17: Rinsing Agent
Rinsing agent Rinsing agent A liquid storage container incorporated Pour rinsing agent into the storage in the door has a capacity of approxi- container until the level indicator is mately 200 ml. The required amount of dark (see arrow in illustration). Use appropriate liquid rinsing agent (e.g. -
Page 18: Adding Neutralising Agent
Adding neutralising agent Adding neutralising agent Adding neutralising agent Re-fill the container in good time, it should never be allowed to empty To reduce the pH to neutral after al- completely. kaline cleaning, special neutralising acids can be used in programme stage 4. -
Page 19: Liquid Dispensing System Venting / Maintenance
Liquid dispensing system venting / maintenance Liquid dispensing system venting / maintenance Each time the system is vented any liq- Priming / venting the liquid uid which runs into the wash cabinet dispensing system must be washed out as follows: Before using the machine for the first Select programme “A”... -
Page 20: Adding Powder Detergent
Adding powder detergent Adding powder detergent Only use specific detergents for special cleaning applications. Do not use domestic dishwasher detergents. If not using liquid, fill dispenser in the door with powder detergent before each programme (See “Programme ’B’ and...” for exceptions). Fill the dispenser with the appropri- ate amount. -
Page 21: Programme Selection
Adding detergent Programme selection Adding detergent Programme selection For thermal disinfection programmes Programme: “B”, and when using a suitable mildly alkaline and O 187 and pipette holder: chlorine-free cleaner should be used. Under certain circumstances, i.e. spe- cial soiling, different combinations of detergents and other additives may be necessary. -
Page 22: Programme Chart
Programme chart Programme chart Programme When to use Detergent (when not using liquid agent) Follow manufacturer’s instructions A = COLD Pre-wash programme to pre-rinse glassware of problem chemicals or residues etc Thermal Disinfection to BGA-standard. 30 grammes on to the right B = SPECIAL Loosening / cleaning of particularly stubborn hand side door interior... - Page 23 Warning and safety instructions G 7783 Warning and safety instructions To the person responsible for this machine: Make this pull-out with the Warning and Safety instructions available to any operators of the machine. Place it near the machine, where it can be seen and not removed.
- Page 24 Warning and safety instructions Warning and Safety instructions Take care when handling liquids Never use an ordinary or a high such as detergents, wetting pressure hose on or in the vicinity agents, or neutralising agents. These of the machine. may contain irritant or corrosive ingre- Before any maintenance or repair dients, acids or alkalis.
- Page 25 Warning and safety instructions Warning and Safety instructions For pre-treatment and / or cleaning In critical applications where very only use low-foaming detergents stringent requirements have to be and disinfecting agents which have met, it is strongly recommended that all been approved by Miele.
- Page 26 Warning and safety instructions Warning and Safety instructions Accessories The manufacturer cannot be held re- The only accessories to be used sponsible for any damage caused with the special commercial ma- through non-observance of these chine must be those supplied or ap- Warning and Safety instructions.
- Page 27 Warning and safety instructions Programme cycle Miscellaneous *) see Pre- Pre- Main Interim Interim Interim Final- Drying “Programming liminary wash II wash & rinse I & rinse II rinse III rinse (extra special functions” pre- possible possibly prog. *) wash I thermal neutral- disinf...
-
Page 28: Switching The Machine On And Off
Switching the machine on and off Switching the machine on and off °C • • • • • • • • • • • • • • • • • • • • • • DESIN Programme Changes 1. Switching on Provided the “Start”... -
Page 29: Programme Sequence Indicator
Switching the machine on and off Switching the machine on and off c DRYING The programme is completed when no This may be selected immediately after indicator lights are left on (expect for choosing a wash programme (excep- “DESIN” for the “B” SPECIAL pro- tion: A “Cold”). -
Page 30: Programming Special Functions
Programming special functions Programming special functions The following special functions can be 1b. Hot water connection programmed where appropriate: Switch off the machine. and c at the same time, Press T 1. Setting water inlet to “level plus hold them in and also switch on the time control”... - Page 31 Programming special functions Programming special functions Press h. “SP” appears in the display. 3. Adding neutralising agent in the “In- terim rinse l” part of the programme. Press h again. The change has been recorded and the display field The machine is set at the factory for clears.
-
Page 32: Reactivating The Water Softener
Reactivating the water softener Reactivating the water softener When the k indicator light on the left Never fill the salt reservoir with dish- hand side of the control panel comes washer cleaning agent on during a programme the built-in this can lead to water softener is depleted and cannot –... - Page 33 Reactivating the water softener Reactivating the water softener Position the salt container as Switch on the machine follows: Open the stopcocks if previously closed. Close the door. Remove the bottom basket from the Press I-0. machine. Press the k touch pad. Press the "Start"...
-
Page 34: Cleaning And Care
Cleaning and care Cleaning and care Cleaning the filters in the water cabinet The filter combination in the base of the cabinet should be inspected regularly and cleaned if necessary. Caution Watch out for glass splinters which could cause injury. Cleaning the coarse filter To unscrew the micro-fine filter, take hold of the two lugs, turn twice in an... - Page 35 Cleaning and care Cleaning and care Cleaning the filters in the water inlet For the protection of the inlet valve(s), filters are incorporated in the screw connection of the water inlet hose. The filters must be cleaned when dirty, otherwise insufficient water flows into the wash cabinet.
-
Page 36: Correcting Minor Faults
Correcting minor faults Correcting minor faults With the aid of the following explana- The water in the wash cabinet is not tory notes, minor faults can usually be heated; the programme sequence corrected without contacting the Miele lasts too long. Service Department. -
Page 37: Installation
Installation Installation The machine lid must be removed as Please refer to the Installation diag- follows: ram supplied with the machine. The machine must be installed cor- Open the door. rectly and levelled. Any unevenness in the floor level can be compensated by adjusting the 4 screw feet. - Page 38 Installation Installation Position and secure the machine To ensure stability, the machine must first be aligned and then screwed to the worktop. With the door open, through each of the two holes in the front rim, left and right, screw the machine to the front edge of the continuous worktop.
-
Page 39: Electrical Connection U.k./Aus
Electrical connection U.K./AUS Electrical connection U.K./AUS All electrical connection work must be To remove service panel and cover carried out by a qualified electrician in plate: compliance with local and national regulations. Connection should be made via a suitable isolator, with an on-off switch which should be easily ac- cessible for servicing. - Page 40 Electrical connection U.K./AUS Electrical connection This page has been left blank intention- ally.
-
Page 41: Plumbing
Plumbing Plumbing Stopcocks with 3/4 “ BPS male Connection to the water inlet thread to be provided on site. They The machine must be connected to should be easily accessible because the water supply in accordance with the water supply must be turned off the local and national regulations, when the machine is not in use. - Page 42 Plumbing Plumbing The outlet of the purified water con- AD connection to purified water, press- tainer (non-pressurised) must be at urised, (1.5 - 10 bar) least at the height of the upper edge of The machine is delivered from the fac- the machine.
- Page 43 Plumbing Plumbing Drainage The drainage system is fitted with a non-return valve which prevents dirty water from flowing back into the ma- chine via the drain hose. The machine should preferably be connected to a separate drainage system on site. If no separate drain- age system is available, seek profes- sional advice.
-
Page 44: Caring For The Environment
Caring for the environment Caring for the environment Disposal of the packing ma- When disposing of an old machine terial first make it unusable. Disconnect, cut off the cable and any plug from The transport and protective packing the cable. For safety reasons en- has been selected from materials sure the machine is completely which are environmentally friendly for... -
Page 45: Technical Data
Technical data Technical data Noise emission in dB (A) Measurement of noise:... - Page 48 Alteration rights reserved / 002 0101 This paper consists of cellulose which has been bleached without the use of chlorine.
Need help?
Do you have a question about the G 7783 MIELABOR and is the answer not in the manual?
Questions and answers