Miele professional PG 8130 Operating Instructions Manual
Commercial dishwasher
Hide thumbs
Also See for PG 8130:
- Installations plan (10 pages) ,
- Operating instructions manual (96 pages) ,
- Installations plan (9 pages)
Table of Contents
Advertisement
Quick Links
Advertisement
Table of Contents

Subscribe to Our Youtube Channel
Related Manuals for Miele professional PG 8130


Summary of Contents for Miele professional PG 8130
- Page 1 Operating instructions Commercial Dishwasher PG 8130 / PG 8130 U / PG 8130i / PG 8131i en - AU, NZ It is essential to read these operating instructions before installing and using the appliance. This will prevent both personal injury M.-Nr.
-
Page 3: Table Of Contents
Contents Notes about these instructions................ 6 Guide to the machine .................... 7 Overview........................7 Control panel ......................8 Display........................9 Correct application ..................... 10 Warning and Safety instructions................ 12 Caring for the environment ................ 18 Energy-saving dishwashing................... 19 Commissioning.................... 20 Opening the door .................... - Page 4 Contents Time display ......................45 Energy management ..................... 45 At the end of the programme ................46 Switching off......................46 Unloading the dishwasher..................46 Interrupting a programme..................47 Changing a programme..................47 Programme options..................... 48 Options........................48 FlexiTimer with EcoStart ..................49 Programme chart ....................
- Page 5 Contents Connecting the drain hose ..................75 Technical data...................... 76 Settings menu...................... 77 Opening the Settings menu................... 77 Language ......................77 Time of day......................78 Water hardness ..................... 79 Rinse aid........................ 80 External dispensing ....................80 Temperature unit....................81 High temperature final rinse ..................
-
Page 6: Notes About These Instructions
Notes about these instructions Important warnings Information which is important for safety is highlighted in a thick framed box with a warning symbol. This alerts you to the potential danger of injury to people or damage to property. Read these warning notes carefully and observe the procedural instructions and codes of practice they describe. -
Page 7: Guide To The Machine
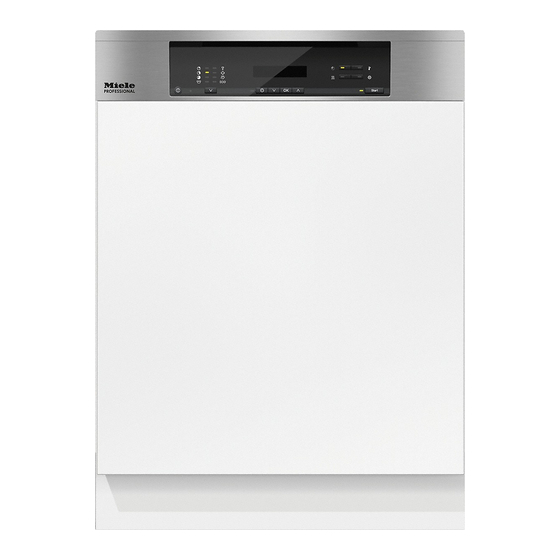
Guide to the machine Overview a Upper spray arm (not visible) g Filter combination b Cutlery tray (depending on model) h Data plate c Upper basket i Rinse aid reservoir d Middle spray arm j Dual compartment detergent dispenser e Air inlet for drying k Salt reservoir f Lower spray arm... -
Page 8: Control Panel
Guide to the machine Control panel a Programme selection f OK button b Display g button (FlexiTimer) with indicator light c Option buttons h Programme selector button d Start button with indicator light i On/Off button e Arrow buttons ... -
Page 9: Display
Guide to the machine Settings menu Display General The display is used to select or set the following: – the programme – the FlexiTimer (Delay start) – the Settings menu The Settings menu is used to alter the dishwasher's electronics to suit The display can show the following: different requirements. -
Page 10: Correct Application
Correct application This appliance complies with all current local and national safety requirements. Inappropriate use can, however, lead to personal injury and damage to property. Read the Operating instructions carefully before using the appliance for the first time. They contain important information on the safety, installation, use and maintenance of the appliance. - Page 11 Correct application The dishwasher is supplied with a special lamp to cope with particular conditions (e.g. temperature, moisture, chemical resistance, abrasion resistance, and vibration). This special lamp must only be used for the purpose for which it is intended, i.e. the lighting of the wash cabinet.
-
Page 12: Warning And Safety Instructions
Technical safety This dishwasher must only be installed, commissioned, repaired and maintained by Miele Professional Service or a suitably qualified service technician. Installation, repairs and other work by unqualified persons could be dangerous and Miele will not be held liable. - Page 13 The dishwasher must not be used if the electrical connection cable is damaged. If the cable is damaged, it must be replaced with a special cable available from Miele. For safety reasons, the replacement must only be carried out by Miele Professional Service or a qualified electrician. ...
- Page 14 Warning and Safety instructions The plastic housing of the water connection contains two electrical components. It must not be dipped in water. There are electrical wires in the water inlet hose. Do not cut the hose, even if it is too long. ...
- Page 15 Warning and Safety instructions Correct use This dishwasher is designed for operation with water and cleaning agents suitable for use in dishwashers only. Organic solvents and flammable liquid agents must not be used in it. This could cause an explosion, damage rubber or plastic components in the dishwasher and cause liquids to leak out of it.
- Page 16 Warning and Safety instructions When using cleaning agents and specialised products, it is essential that the manufacturer's instructions are followed. Cleaning agents must only be used for the purpose they are designed for by the manufacturer to avoid any material damage or the occurrence of strong chemical reactions (e.g.
- Page 17 Warning and Safety instructions Be careful when sorting items with sharp pointed ends and positioning them in the dishwasher that you do not hurt yourself or create a danger for others. Knives and other utensils with sharp points must be loaded with the pointed end facing downwards or placed in a horizontal position.
-
Page 18: Caring For The Environment
Caring for the environment Disposal of the packing Disposing of your old material appliance The transport and protective packaging Electrical and electronic appliances has been selected from materials which often contain valuable materials. They are environmentally friendly for also contain specific materials, disposal, and can normally be recycled. -
Page 19: Energy-Saving Dishwashing
Caring for the environment Energy-saving dishwashing This dishwasher is exceptionally economical in its use of water and electricity. You can make the most of your appliance by following these tips: – For most economical dishwashing, make full use of the baskets without overloading the dishwasher. -
Page 20: Commissioning
Commissioning Opening the door Closing the door Push the baskets right in. At the end of programmes with a drying phase (see “Programme chart”), the Then lift the door upwards and push door will open automatically a little in until it clicks into position. -
Page 21: Basic Settings
Commissioning Time of day Basic settings The display will then change to the Switch the dishwasher on with the screen for setting the time. button. The current time of day must be set The welcome screen will appear when before you can use the “FlexiTimer”... - Page 22 Commissioning Water hardness Finally, the information Miele@home enabled Set up finished will appear in The display will change to the screen the display. for setting the water hardness. After confirming these prompts with – The dishwasher must be OK, the messages Add salt programmed to the correct water ...
-
Page 23: Before Using The Appliance For The First Time, You Require
Do not fill the salt reservoir with powder or liquid detergent. Suitable products are available from Miele Professional. Only use special coarse grained dishwasher salt for reactivation, or Every dishwasher is tested at the pure evaporated salt. -
Page 24: Filling The Salt Reservoir
Commissioning Filling the salt reservoir Before filling the salt reservoir with dishwasher salt for the first time, you must fill it with approx. 2 litres of water to enable the salt to dissolve. Once the dishwasher has been used, there is always sufficient water in the reservoir. -
Page 25: Add Salt Reminder
Commissioning Add salt reminder After the salt reservoir has been filled, the refill reminder may still appear in the Fill the salt reservoir with dishwasher display if the salt concentration has not salt for reactivation when Add salt yet reached the correct level. -
Page 26: Rinse Aid
Suitable products are available from Miele Professional. Alternatively, you can use – household vinegar with an acid level no higher than 5% – 10% liquid citric acid. -
Page 27: Add Rinse Aid Reminder
Commissioning Add rinse aid reminder When the Add rinse aid message appears in the display, the reservoir contains sufficient rinse aid for 2 - 3 programmes only. Add rinse aid in plenty of time. Confirm with OK. The add rinse aid reminder disappears. If you do not want the salt and rinse aid reminders to appear, you can switch off both refill reminders for salt... -
Page 28: Loading The Dishwasher
Loading the dishwasher – The spray arms must not be blocked Notes by items which are too tall or hang Remove coarse food residues from through the baskets. If in doubt, test crockery. for free movement by manually rotating the spray arms. There is no need to rinse items under running water. - Page 29 Loading the dishwasher Items not suitable for dishwashers: Aluminium components (e.g. – Wooden cutlery and crockery or rangehood grease filters) must not be items with wooden parts: these may cleaned with caustic alkaline discolour and fade. The glue used in commercial or industrial cleaning these items is not dishwasher-proof agents.
-
Page 30: Flexassist
Loading the dishwasher Cup rack FlexAssist Raise the cup rack upwards using the The yellow coded FlexAssist parts yellow lever to make room for tall indicate which elements of the items. dishwasher baskets and cutlery tray are moveable. They also act as grips and Glasses can be arranged along the cup have symbols embossed on them to rack for support during the programme. - Page 31 Loading the dishwasher Hinged spikes Jumbo cup rack (depending on model) The rows of spikes can be lowered to The cup rack can be set at two different make more room for larger items such widths so that it can also accommodate as casserole dishes.
- Page 32 Loading the dishwasher Glass rail Adjusting the height This rail is designed to hold glasses You can set the glass rail at two with long stems securely. different heights. Lower the rail with the yellow lever Pull the rail upwards and click it back and lean tall glasses against it.
-
Page 33: Adjusting The Upper Basket
Loading the dishwasher Adjusting the upper basket Depending on the setting of the upper basket, the following plate dimensions In order to gain more space for taller can be accommodated. pieces of crockery in the lower or upper basket, the upper basket can be Dishwashers with cutlery basket adjusted on three levels with 2 cm (see data plate for model number) -
Page 34: Lower Basket
Loading the dishwasher Removable MultiComfort insert Lower basket The rear section of the lower basket is See “Loading the dishwasher - used for washing cups, glasses, plates, Loading examples” for examples of pots and pans. how to load crockery and cutlery. You can remove the MultiComfort insert ... - Page 35 Loading the dishwasher FlexCare glass holder Glass rail Silicone padding in the FlexCare glass This rail is designed to hold glasses holder provides a stable and secure with long stems securely. hold for delicate stemware. Stem glassware, e.g. wine glasses or champagne flutes, can be leaned against the glass holder or suspended from it.
- Page 36 Loading the dishwasher Hinged spikes Bottle holder The spikes at the front are used for The bottle holder can be used to wash washing plates, soup bowls, platters, narrow items, e.g. milk and baby dessert bowls and saucers. bottles. Both rows of spikes can be lowered to make more room for large items, e.g.
-
Page 37: Cutlery
Loading the dishwasher Cutlery Cutlery basket (depending on model) Fit it onto the cutlery basket if required. The cutlery basket can be placed anywhere on the front rows of spikes in the lower basket. To avoid the risk of injury, knives and forks should be placed with the handles upwards in the basket. -
Page 38: Loading Examples
Loading the dishwasher Loading examples Dishwashers with cutlery basket Upper basket Lower basket... - Page 39 Loading the dishwasher Cutlery basket Heavily soiled items...
-
Page 40: Operation
Only use tabs that are quick detergent pump, contact Miele for dissolving. Suitable tabs are advice on how to adapt the detergent available from Miele Professional. dosage to the particular circumstances. Add powder cleaning agent or cleaning tabs to the detergent ... - Page 41 Operation Refilling or changing containers Replace the empty container with a full one. The DOS module is equipped with a level indicator which shows the Push the siphon into the opening of message Refill detergent in the display the container and screw it on tightly.
-
Page 42: Changing Detergent
Operation Changing detergent If you want to change the cleaning agent, the dispensing system must first be rinsed with water in order to avoid a reaction due to the mixing of cleaning agents. Remove the siphon from the container and place it in another container filled with water. -
Page 43: Adding Detergent
Operation Do not inhale powder detergent. Do not swallow dishwasher cleaning agents. They can cause burning in the nose, mouth and throat. Seek medical attention immediately if cleaning agent has been swallowed or inhaled. Keep children away from cleaning agents. Keep children away from the dishwasher when the door is open. -
Page 44: Switching On
Operation Switching on Selecting a programme Make sure the spray arms are not Choose your programme according to obstructed. the type of load and how dirty it is. Close the door. The different programmes and their uses are described in the Programme ... -
Page 45: Time Display
Operation Time display Energy management The estimated duration of the To save energy, the dishwasher will programme selected appears in hours switch off automatically a few minutes and minutes in the display before the after the last time a button has been programme begins. -
Page 46: At The End Of The Programme
Operation At the end of the programme Switching off The programme has finished when At the end of a programme: Finished appears in the display and The dishwasher can be switched off the door has opened slightly (if at any time using the button. -
Page 47: Interrupting A Programme
Operation Interrupting a programme Changing a programme A programme is interrupted as soon as If the detergent dispenser flap has the door is opened. already opened, do not change the If the door is closed again, the programme. programme will continue from the point it was at before the door was opened. -
Page 48: Programme Options
Programme options Countdown indicator Options The Countdown indicator option is You can select and deselect the options selected as standard and displays the before starting the programme using time remaining until the end of the the appropriate buttons and the display. programme. -
Page 49: Flexitimer With Ecostart
Programme options Switch the dishwasher on with the FlexiTimer with EcoStart button. The FlexiTimer gives you three ways The Start indicator light will flash. of starting the programme by means of delaying the start. You can set the start ... - Page 50 Programme options Start at Finish at With the Start at function, you set the With the Finish at function, you set the exact time at which you want the latest time at which you wish the programme to start. programme to end. ...
- Page 51 Programme options EcoStart Changing or deleting set times EcoStart function allows you to take You can change the set times or start advantage of time variable economy the programme before the start time in rates of electricity. Before you can use the display is reached.
-
Page 52: Programme Chart
Programme chart Programme Cleaning agent The following dosages are based on Miele cleaning agents. Please follow manufacturer's instructions on dosage. Compartment I Compartment II For fresh, non-sticky food residues. 20 - 25 g Short or 1 tab For moderately dried-on food residues. 20 - 25 g Medium or 1 tab... - Page 53 Programme chart Programme sequence Pre-wash Main wash Interim Interim Final rinse Drying Extra AutoOpen rinse I drying rinse II 70 °C 65 °C 30 s 10 s 15 min 10 s 65 °C 65 °C 10 min 3 min 30 min 1.5 min 75 °C 65 °C 8 min 10 min 3 min 30 min 1.5 min 50 °C 60 °C...
- Page 54 Programme chart Programme Consumption Duration Electricity Water Cold water Hot water Cold water Hot water 15 °C 55 °C 15 °C 55 °C 2.3 kW 3.1 kW 2.3 kW 3.1 kW 2.3 kW 3.1 kW 2.3 kW 3.1 kW 2.3 kW 3.1 kW Short 1.6 kWh 1.0 kWh 14.5 l 53 min 39 min 36 min...
-
Page 55: Cleaning And Care
Cleaning and care Maintenance All surfaces of this appliance are susceptible to scratching. To prolong the service life of the dishwasher, it should be serviced by Contact with unsuitable cleaning agents can alter or discolour all Miele. surfaces. Please contact Miele for information regarding frequency and scope of Cleaning the wash cabinet maintenance performed by Miele. -
Page 56: Cleaning The Door And The Door Seal
Cleaning and care To avoid damaging external surfaces, Cleaning the door and the door do not use: seal – cleaning agents containing soda, Mould could build up on the door seal ammonia, acids or chlorides, and the sides of the dishwasher door as these surfaces are outside the wash –... -
Page 57: Cleaning The Spray Arms
Cleaning and care Cleaning the spray arms Particles of food can get stuck in the spray arm jets and bearings. The spray arms should therefore be inspected and cleaned regularly. Switch the dishwasher off. Remove the spray arms as follows: ... -
Page 58: Checking The Filters In The Wash Cabinet
Cleaning and care Checking the filters in the Cleaning the filters wash cabinet Switch the dishwasher off. The filter combination in the base of the wash cabinet retains coarse soiling from the suds solution, preventing it accessing the circulation system and re-entering the cabinet through the spray arms. - Page 59 Cleaning and care Replace the filter combination so that To clean the inside of the filter, the flap it lies flat in the base of the wash must be opened: cabinet. Press the catches together in the ...
-
Page 60: Problem Solving Guide
Please note: Repairs must only be carried out by the Miele Professional Service, a Miele authorised service agent or a suitably qualified technician in accordance with local and national safety regulations. Unauthorised or incorrect repairs could be dangerous and cause injury or damage to the appliance. - Page 61 Switch the dishwasher back on. Select the required programme. Press the Start button. If the fault message appears again, there is a technical fault. Call Miele Professional Service. The Waterproof system has reacted. Waterproof Turn off the tap.
-
Page 62: The Dishwasher Does Not Fill/Drain
Problem solving guide The dishwasher does not fill/drain Problem Possible cause and remedy One of the following messages appears in the display: Turn on the tap The tap is turned off. Turn on the tap fully. Water intake Before rectifying the problem, you must: ... -
Page 63: General Problems
Problem solving guide General problems Problem Possible cause and remedy The indicator lights and The display has switched off automatically to save display are dark. energy. Switch the dishwasher on again with the button. The interior lighting The interior lighting has been switched off doesn't switch on when permanently. -
Page 64: Noises
Problem solving guide Noises Problem Possible cause and remedy Knocking noise in the A spray arm is knocking against an item in a basket. wash cabinet. Interrupt the programme and rearrange the items which are obstructing the spray arm. Rattling noise in the Items of crockery are insecure in the wash cabinet. -
Page 65: Unsatisfactory Cleaning Result
Problem solving guide Unsatisfactory cleaning result Problem Possible cause and remedy The dishes are not The dishes were not loaded correctly. clean. See notes in “Loading the dishwasher”. The programme was not suitable for the load. Select a more suitable programme (see “Programme chart”). - Page 66 Problem solving guide Problem Possible cause and remedy Glassware has a brown This is caused by ingredients in the cleaning agent. or blue tinge, and film Change your detergent. cannot be wiped off. Glassware is dull and The glassware is not dishwasher-proof. The surfaces discoloured;...
- Page 67 Problem solving guide Problem Possible cause and remedy There are rust stains on A programme was not run after dishwasher salt was cutlery. added. Traces of salt have got into the wash cycle. Always run the Cold pre-wash programme after refilling salt.
-
Page 68: Maintenance
Maintenance Cleaning the water inlet filter A filter is incorporated in the screw connection of the valve on the water inlet hose. The filter must be cleaned when dirty, otherwise insufficient water flows into the wash cabinet. The plastic housing of the water connection contains an electrical component. -
Page 69: Cleaning The Drain Pump And Non-Return Valve
Maintenance Cleaning the drain pump and non-return valve If the water has not been pumped away at the end of a programme, the drain pump or the non-return valve might be blocked. They are, however, easy to clean. Disconnect the dishwasher from the mains electricity supply. -
Page 70: After Sales Service
Programme updates In the event of any faults which you cannot remedy yourself, please contact The programme update function is Miele Professional Service. designed to enable a service technician to update your dishwasher's electronics Contact information for Miele can be in keeping with advances in technology. -
Page 71: Optional Accessories
Optional accessories Accessories Some accessories may be supplied as standard, depending on model. Cappuccinatore insert The Cappuccinatore insert can be used for cleaning the individual parts of the Miele Cappuccinatore in the dishwasher. Cutlery basket The cutlery basket is placed in the lower basket and can be used to wash additional items of cutlery. -
Page 72: Electrical Connection
All work on the electrical shown on the data plate. connection must be carried out by This machine can be converted to a the Miele Professional Service different type of power supply in Department, a Miele authorised accordance with the conversion technician or a qualified electrician. -
Page 73: Water Connection
Water connection – This appliance must be installed The Miele Waterproof system according to AS/NZS 3500.1. As long as your dishwasher has been This appliance has been supplied installed correctly, the Miele Waterproof with a separate back flow prevention anti-leak system will protect you from device. - Page 74 Water connection – The water pressure (flow pressure at To avoid any damage to the the connection point) must be machine, the dishwasher must only between 50 and 1000 kPa (0.5 and be connected to a fully vented 10 bar). plumbing system. If the water pressure is lower than this, the fault message Water intake...
-
Page 75: Connecting The Drain Hose
Water connection Venting the drainage system Connecting the drain hose If the on-site drain connection is – The machine drainage system is situated lower than the guide path for fitted with a non-return valve, which the lower basket rollers in the open prevents dirty water from flowing door, the drainage system must be back into the dishwasher via the... -
Page 76: Technical Data
Technical data Dishwasher Standard height Model PG 8130, PG 8131i Height freestanding model 845 mm (adjustable + 35 mm) Height built-in model 805 mm (adjustable + 65 mm) Niche height from 805 mm (adjustable + 65 mm) Width 598 mm Niche width 600 mm Depth freestanding model 600 mm Depth built-in model 570 mm Weight... -
Page 77: Settings Menu
Settings menu Language Settings menu for changing standard settings The display can be set to appear in one of several different languages. Opening the Settings menu You can change the language in the Switch the dishwasher on with the display via the sub-menu. -
Page 78: Time Of Day
Settings menu Setting the clock format Time of day You can select either a 24-hour or 12- The dishwasher is delivered with the hour clock. time of day (clock) display deactivated. Select the Clock format option. To save energy, the dishwasher will switch off automatically a few minutes ... -
Page 79: Water Hardness
Settings menu Water hardness °d mmol/l °f Display Your dishwasher is fitted with a water softener. You need to programme the water softener to the water hardness level in your area. – The dishwasher must be programmed exactly to the correct water hardness for your area. -
Page 80: Rinse Aid
Settings menu Rinse aid External dispensing You can adjust the rinse aid dosage for Activate automatic dispensing of liquid best results. detergent if you have installed the The dosage amount can be set optional external dispensing module. between 0 and 6 ml. The DOS module is supplied with its The rinse aid dosage can turn out to be own installation instructions. -
Page 81: Temperature Unit
Settings menu DOS flow rate The “Pre-wash” programme is offered directly after the venting process is A flow rate of 60 ml/min is set as finished. Start the programme in order standard. The flow rate can be modified to dilute and drain any cleaning agent between 10 and 150 ml/min in that has escaped into the wash cabinet. -
Page 82: Ecostart
Settings menu Setting the electricity tariff times EcoStart Before you can use the EcoStart option, In order to run your dishwasher in the you must set at least one electricity most economical way, you can use the tariff time. EcoStart option to take advantage of your electricity supplier's time variable ... - Page 83 Settings menu Deleting the electricity tariff times You can delete the settings for an electricity tariff time and in doing so deactivate the EcoStart option for this time zone. Use the arrow buttons to select the electricity tariff time (T1-T3) you want to delete and confirm with OK.
-
Page 84: Network
Settings menu MielePro@mobile App Network The MielePro@mobile App is available Your dishwasher is equipped with an to download free of charge from the integrated Wi-Fi module. ® Apple App Store or from the Google In order to connect your dishwasher to Play Store. - Page 85 Settings menu WPS Push Button SmartStart As an alternative to networking your SmartStart function is used for dishwasher via the MielePro@mobile starting your dishwasher automatically App we recommend using WPS at a time when your energy costs are (Wireless Protected Setup). To do so, most economical.
- Page 86 Settings menu Remote control If the time of day (clock) display has been switched off (see “Settings menu Once you have installed the - Time of day”), the display will go out MielePro@mobile App on your tablet PC if you have activated a Delay start time or your Smartphone, you will be able to or remote control after a few minutes operate your dishwasher remotely.
- Page 87 Settings menu Module settings We recommend connecting your dishwasher to your Wi-Fi network with the help of the MielePro@mobile App or via WPS. If you would rather set up the connection to your router yourself, or you have a special network configuration, you can enter the relevant settings with the necessary technical knowledge.
-
Page 88: 2Nd Interim Rinse
Settings menu 2nd interim rinse Refill reminders You can increase the cleaning If you only ever use multi-function performance in the case of stubborn combination products in your soiling by selecting a second interim dishwasher, you can switch off both rinse. -
Page 89: Autoopen
Settings menu AutoOpen BrilliantLight (depending on model) At the end of programmes with a drying phase the door will open automatically The dishwasher is fitted with interior a little in order to help the drying lighting. process (see “Programme chart”). When the door is opened, the lighting In the ECO programme (if available) the switches off automatically after 15... -
Page 90: Showroom Programme
Settings menu Showroom programme Factory default settings You can reset all dishwasher settings to For demonstration purposes only. the factory default settings. The dishwasher is fitted with various Wi-Fi module settings (where demonstration programmes for applicable) have to be reset separately showroom use. - Page 92 Miele Australia Pty. Ltd. ACN 005 635 398 ABN 96 005 635 398 Melbourne: 1 Gilbert Park Drive Knoxfield, VIC 3180 Telephone: 1300 731 411 service.prof@miele.com.au www.miele-professional.com.au info@miele-professional.com.au Miele New Zealand Limited IRD 98 463 631 Level 2, 10 College Hill Freemans Bay Auckland 1011 New Zealand...
Need help?
Do you have a question about the PG 8130 and is the answer not in the manual?
Questions and answers