Flyer MOUNTAIN Manual
E-bike system integration
Hide thumbs
Also See for MOUNTAIN:
- Original instruction manual (412 pages) ,
- Translation of the original instruction manual (252 pages)
Table of Contents
Advertisement
Quick Links
Advertisement
Table of Contents

Related Manuals for Flyer MOUNTAIN


Summary of Contents for Flyer MOUNTAIN
- Page 1 FLYER FIT E-Bike System integration MOUNTAIN/CROSSOVER/TOUR/URBAN...
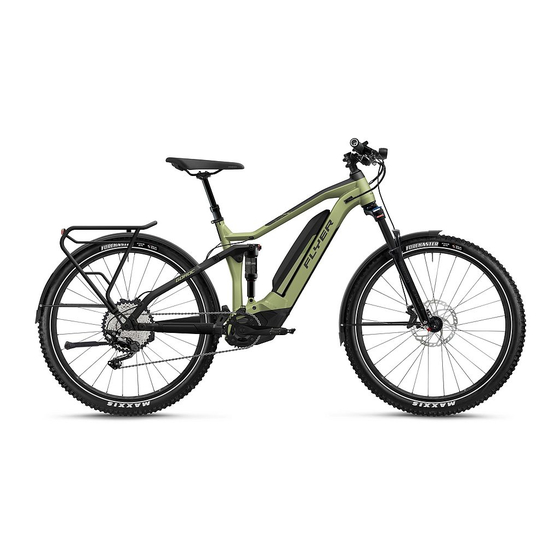
- Page 2 The FLYER e-mountainbikes and its parts Saddle Shift lever Seat post Brake lever Seat post clamp Brake cable/line Suspension rear fork/shock Shift cable Battery Headset Fork end Suspension fork Rear derailleur Disc brake calliper Chain Brake disc Electrical motor Wheel...
- Page 3 The FLYER Urban e-bike and its components Seat Shifter Seat post Brake lever Seat post clamp with quick release Shifter cable Rack Brake cable Rear light Stem bearing or headset Mudguard for the back tyre Front mudguard Battery Suspension fork...
-
Page 5: Table Of Contents
Type plate for pedelecs up to 25 km/h 48 FLYER RC1 and RC2 remote controls . . . .7 8 .2 Safety symbols . . . . . . . . . . . . . . . .48 5 .2 Operation . -
Page 6: Foreword
These original operating instructions contain the most important information required to familiarise Thank you for choosing a FLYER . Enjoy your yourself with your new FLYER, to get to know its journey of discovery on your FLYER technology, to attend to safety aspects and pre- and have a safe ride . -
Page 7: Safety Information
FLYER e-bike and its adaptation to the rider . always considering the dan- Ensure that under-age riders have learned safe gers to which you are subject and responsible handling of the e-bike –... -
Page 8: S Afety Instructions For All Electrical
Read all the safety instructions and regula- • If it is no longer possible to use the bike safely, tions. you may no longer use your FLYER . This is the Non-compliance with the safety instructions and case when live parts or the battery are dam-... -
Page 9: Flyer With Panasonic Drive And Fit
To turn off the electrical system, press the on/off Your FLYER with Panasonic drive is operated via button for at least one second . the FLYER RC1 or RC2 remote control and the If the system does not detect any rider activity FLYER D1 display . for ten minutes, it turns off automatically to save... - Page 10 General vehicle settings Info This display remains the same in all views and Charging status (top-left symbol) shows you key settings and information on the Distance travelled on current tour (trip) vehicle and the current journey . Average speed on current tour (trip) 1 .
-
Page 11: Menu Navigation And Settings
Navi 5.3.2 Quit menu Move the joystick to the left to return to the pre- vious menu . Moving the joystick to the left in the main menu will close the settings menu and the data screen will be displayed . 5.3.3 Select menu item Press the centre of the joystick to jump to the se- lected menu . -
Page 12: Menu Structure
. Localization Language ii . Time iii . Date iv . Units v . Time Format iii . My FLYER Assistance ii . Vibration feedback iii . Backlight The check mark indicates which language is cur- iv . Wheel circumference rently applied . -
Page 13: Units Menu
You can individually adjust the amount of as- sistance for the FLYER e-bike In the “My Flyer” menu, select the sub-menu “As- sistance” by pressing the “OK” button . If only the bar at the far left of the display is black, the minimum amount of assistance is set in the assistance levels “Eco”, “Standard”... -
Page 14: Feedback Menu
In the wheel circumference menu, the wheel cir- cumference used to calculate the speed can be adjusted . You can adjust the wheel circumference of your FLYER e-bike by ±5% . 5.5.9 Feedback menu In the feedback menu, you can configure the vi- bration feedback of the remote . The following set-... -
Page 15: Automatic Power Off Menu
Sequence when “Position 2” is selected: High Auto 5.5.14 Automatic gear changes If your FLYER e-bike has an “enviolo TR auto- matiQ integrated” gear hub, the automatic gear changes can be adjusted in manual mode . The following settings can be selected:... -
Page 16: Elevation Calibration Menu
Press the joystick to apply the new settings after confirmation. 5.5.17 enviolo TR automatiQ integrated If your FLYER e-bike has an “enviolo TR automa- tiQ integrated” gear hub, the hub may need to be recalibrated .This is the case if you suspect that you are not getting the full transmission range . -
Page 17: Komoot Navigation
3 . Activate komoot’s full range of maps using your voucher code: www .komoot .de/g . 4 . Connect your FLYER e-bike to the komoot app and enjoy your first tour with komoot. 5 . Please refer to section 5 .5 .19 onwards of the user manual for more detailed information . -
Page 18: About Menu
Bluetooth pulse band or pulse watch and estab- www .komoot .de/ lishes a connection . To deactivate the pulse function, select the sub- menu “Pulse Off” by pressing the “OK” button. If a pulse measuring device is connected to the FLYER e-bike, the pulse values are shown on the fitness screen. - Page 19 .komoot .com/g You must pair the app with your FLYER e-bike in order to use the navigation function . Follow the steps below to establish a connection: 1 .
- Page 20 . Important After this step, leave the komoot app open and switch to the FLYER display . 11 . Select “Pair with komoot“ to establish a connection . The komoot app must remain open on your smartphone and the connection activated in order 8 .
- Page 21 12 . Select your chosen device . To activate the navigation in the settings menu, select the sub-menu “Navigation On/Off”. The FLYER e-bike will now attempt to establish a connection . Depending on the smartphone or the security settings, you may need to grant permissi- Select “Navigation On” and press “OK” to confirm.
-
Page 22: Connection With Iphones
The e-bike is now in navigation mode . Pairing with the e-bike The app must be paired with your FLYER e-bi- ke in order for you to use the navigation function . Follow the steps below to establish a connection: 1 . - Page 23 4 . Select the sub-menu “Bluetooth” . 3 . Select the “Settings” symbol . 5 . Activate “Transfer navigation to device” . Pop- up messages may appear that prompt you to grant access rights to the app .
- Page 24 Leave the komoot app open 6 . Open the settings menu on the e-bike display 7 . Select the sub-menu “Connections” . 8 . Open the sub-menu “Navigation” . The display now indicates that it is searching for devices . If no devices are found, you can start a new se- arch by selecting “Pair with komoot“...
- Page 25 10 . Select your chosen device . To activate the navigation in the settings menu, select the sub-menu “Navigation On/Off”. The FLYER e-bike will now attempt to establish a connection . Depending on the iphone or the secu- Select “Navigation On” and press ““OK” to con- rity settings, you may need to grant permission for firm.
-
Page 26: Error Display
. If the fault cannot be acknowledged, troubleshoot it according to the fault table (section 5 .7 fault table) or contact your FLYER dealer . De- pending on the error code, the assistance is auto- matically stopped as necessary . You can continue... -
Page 27: Error Codes
The system can only be activated if a sufficiently charged battery is used . To turn off the electrical system, press the on/off button for at least one second . The FLYER D0 display is operated using the 1 Error text, 2 Category, 3 Code FLYER RC0 remote control operating console, so that your hands can remain on the handlebars 5.7 Operation with FLYER D0 dis- while you ride . - Page 28 Drive Speed 1 . Current speed 1 . Current speed 2 . Current time 2 . Average speed on current tour 3 . Remaining range 3 . Maximum speed on current tour 4 . Current gear with electronic speed gear Data 5 . Light (low beam/off) 6 .
-
Page 29: Error Display
. Trip Reset ii . Factory Reset ii . Basic settings Language ii . Time iii . Units iii . My FLYER Assistance ii . Light iii . Automatic light iv . Service v . Wheel circumference vi . Auto-Mode iv . -
Page 30: Reset Menu
1 . “Mode” button 2 . +/- assistance level button 3 . Light button 5.13 Reset menu In this menu, the trip data and the system can be reset to the factory settings . The check mark indicates which language is cur- rently applied . -
Page 31: Units Menu
You can individually adjust the amount of as- sistance for your FLYER e-bike . In the “My FLYER” menu, select the “Assistance” sub-menu by pressing the “Mode” button . If only the bar at the far left of the display is black, the minimum amount of assistance is set in the assistance levels “Eco”, “Standard”... -
Page 32: Light Menu
In the light menu, you can adjust the display back- 5.20 Service Menu lighting in the range from 10 to 100% . The service menu shows you when your FLYER specialist dealer next recommends that your bike be serviced . If the interval between services as... -
Page 33: Wheel Circumference Menu
In the wheel circumference menu, the wheel cir- cumference used to calculate the speed can be Auto adjusted . You can adjust the wheel circumference of your FLYER e-bike by ±5% . Sequence when “Position 2” is selected: High Auto 5.23 About menu... -
Page 34: Configuring The Assistance Modes
. You can configure the assistance level via the + Light button functions: Switch off the light by and – buttons on the FLYER RCO remote control pressing the light button . Switch the light back on operating console . by pressing the light button again . - Page 35 • Have any paint damage removed by your FLYER specialist retailer . Further important information concerning care for your FLYER e-bike is provided on the website of the respective component manufacturer . Speed sensor The speed sensor is used to show the speed in the FLYER display and correctly calculate the as- sistance needed .
-
Page 36: Down Tube Battery
1 LED battery charge indicator Shows the e-bike battery’s remaining capacity . Check the battery before you charge it If an error occurs, an error code is displayed (see for the first time or use it in your FLYER Chapter 5 .29 Battery error codes) e-bike . 2 Control button for battery charge level Let the LED battery charge level indicator blink to Completely charge the battery using the verify the remaining battery capacity . - Page 37 Completely charge the battery using the or charger . sists, contact charger before the first ride to ensure full Charging your FLYER battery performance . Read and adhere cannot be specialist to the operating instructions for the continued . retailer . charger when charging the battery . Do...
- Page 38 Such batteries must therefore be in- spected by a FLYER specialist retailer . Never try to open a battery or to repair it . Damaged batteries must not be posted . 3 Pull out the power plug from the plug socket...
-
Page 39: Seat Tube Battery Stb
Charging status indicator Prevent extreme overheating due to ex- The charging status of the battery is indicated by ternal effects or overloading. five LEDs. Only use the battery with your FLYER . A fast-flashing LED indicates that the battery has • Never use a damaged battery . If you been completely discharged . discover cracks, deformation of the... - Page 40 FLYER specialist retailer . Never try to open a battery or to repair it . Damaged batteries must not be posted . 3) Remove the plug from the power outlet Separate the mains plug from the mains socket after disconnecting the battery from the charger .
- Page 41 Battery charge indicator Each of the battery level indication lamps indicates about 20% of the remaining battery power. Battery level indication 5 lit 5 lit 4 lit 3 lit 2 lit 1 lit 1 blinking* lamps Percentage of battery power compared to fully 81% to 100% 61% to 80% 41% to 60%...
- Page 42 . tery and have your FLYER checked • This battery is only suitable for use with FLYER by a specialist retailer . Damaged bat- electric bicycle motors . There is a risk of inju- teries must not be posted .
-
Page 43: Battery-Related Error
Battery-related error code 5.29 Battery-related error In cold weather, only insert the battery Description Corrective action shortly before beginning riding. It must be replaced. Take the electric bicycle to your dealer. In this state, the battery is classified as having an unknown fault and Permanent error must not be transported in a vehicle or by ●... -
Page 44: Storing The Battery
. Do not use the pushing aid to ride the e-bike . All FLYER e-bikes are equipped with a pushing aid . This is limited to 6 km/h in the fastest gear . The FLYER can conveniently be moved out of underground parking or along steep paths by ac- tivating the pushing aid . -
Page 45: Error Tables Display D1 And D0
FLYER specialist retailer . Your FLYER e-bike is outside the permitted ECU overtemperature temperature range . Let the FLYER cool and restart the system . Restart the system . If the problem persists, ECU overcurrent contact your FLYER specialist retailer . - Page 46 Category Code Displayed text Remedy Your FLYER e-bike is connected to the mainte- ECU Maintenance nance software . Kickstand unfolded The side stand is unfolded (motor assistance not possible) . If this is not the case, ask your FLYER specialist retailer to inspect the sensor in the side stand .
- Page 47 Protection mode has been activated as the Battery overheat battery is overloaded . Let the battery cool and restart the system . Ensure that an original FLYER battery is con- Battery identification error nected and the battery connections are free of dirt . Restart the system .
- Page 48 Category Code Displayed text Remedy Restart the system . If the problem persists, ECU Safety Error contact your FLYER specialist retailer .
-
Page 49: Legal Requirements
. The warranty and guaran- Here you can gather information on how your tee will also be rendered void . FLYER must be equipped in order to ride it on • Make sure that the components approved for public roads . -
Page 50: Type Plate And Approval Number
. found on the type plate. The type plate is affixed to If no technical changes have been made to the the frame of your FLYER e-bike . There are thirteen series, pedelecs of a past model year can con- pieces of information on the type plate . -
Page 51: Range Of Use
S-Pedelecs mit Tretunterstüzung bis 8.5 Approval number for Geländefahrten, Strecken mit mäßiger Ste Anschrift des Herstellers zu finden. Das Typenlabel ist auf dem Rahmen ihres FLYER hmigungsnummer für S-Pedelecs mit Tretunterstüzung bis TÜV für S-Pedelecs im EWR. Die Genehmigungsnummer befindet sich auf dem Rahmen. - Page 52 Symbol Erklärung Uproc Full Suspension e-MTBs of vehicles for road traffic) ex works and therefore Auf dem Typenschild Ihres FLYER E-Bikes befinden sich Symbole für die Art des Pedelecs. are not authorised for use on roads . Please ask Allgemeine Warnung your FLYER specialist retailer about making your...
- Page 53 Auf dem Typenschild befinden sich folgend Allgemeine Warnung and approved for public roads FLYER e-MTBs with pedal assist up to 45 km/h Auf dem Typenschild Ihres FLYER E-Bikes befinden sich Symbole für die Art des Pedelec Symbol Erklärung If you own a Goroc Full Suspension...
-
Page 54: Riding Your E-Mtb Responsibly
In der Schweiz ist an Stelle der Genehigungsnummer lediglich das Typenlabel mit der 10. Before the first ride ads and cycle paths designed for motor Anschrift des Herstellers zu finden. Das Typenlabel ist auf dem Rahmen ihres FLYER vehicles of category L1e . Please read E-Bikes zu finden. - Page 55 Ensure that your legs have enough room ke lever is for the front wheel . Your FLYER dealer to manoeuvre . will record the brake lever settings in the service You must be able to dismount quickly booklet .
-
Page 56: Before Each Ride
. ments if it is to be used in public road traffic. If you are not sure that your FLYER is in perfect technical condition, do not start Check with your insurance whether your your ride . Have your FLYER inspected... -
Page 57: After A Fall
12. After a fall NOT continue cycling . Do not retighten any loose parts without first checking them and always use a torque wrench . Take the FLYER to your FLYER Have the vehicle and all components checked specialist retailer, describe the fall to them and for changes, damage, firm attachment and cor- have the bicycle checked out . -
Page 58: Operating Quick-Release Fasteners
2 . Now you can move and adjust the seat post . 3 . The quick-release fastener must be securely closed before using the FLYER . Completely fold down the quick-release lever for that pur- pose . Fully engage any possible safety devic-... - Page 59 2. Push in the axle until it clicks in which the axle is only inserted or screwed in and then fastened with a screw also exist. Refer to the attached component manufacturer instruc- tions and allow your FLYER specialist retailer to explain the system to you in detail. Ask your FLYER specialist retailer to ex- plain in detail how the wheels and all relevant parts are to be correctly and...
-
Page 60: Setting Up The Seating Position
. 4. Pull out the axle Find the ideal position by sitting on the FLYER at the vertical crank position and placing the heel of your bare foot onto the pedal in its lowest position . - Page 61 Seat position FLYER MT171 seat post If your FLYER E-MTB is fitted with a MT171 adjustable seat post, please note the following points . The FLYER MT171 allows you to cycle ef- ficiently and tackle technically demanding routes. ST OP SAFETY PRECAUTIONS Please read the user manual carefully before as- sembling and using the FLYER MT171 seat post .
- Page 62 Fahrt kann zum Kontrollverlust über die Sattelstütze führen. crank is horizontally aligned . ssig abgenutzten FLYER MT171 Sattelstütze. Modifizieren Sie die The horizontal adjustment of the seat may only rlöschen der Garantie und können zu unsichtbaren Schäden an der...
- Page 63 . The Twist system makes it possible to turn the handle- bars 90 degrees to save space while transporting and storing your FLYER . Open the quick-release lever of the Speedlifter (1) .
- Page 64 Then turn the handlebars back to the riding posi- must also be ensured that the unlocking tion (2) . The bolt must be re-latched (3) . bolt is latched in the front hole . Never ad- just the handlebars while riding . Read the instructions of the component 90°...
-
Page 65: Setting Up The Brake Levers
The chassis must be adjusted to the rider's weight suspension element and holds the rear wheel un- and type of use by a FLYER specialist retailer to der slight loads or if the ground is slightly uneven . ensure appropriate function of the suspension el- This increases grip and traction on rough terrain . - Page 66 . The air pressure in the rear damper must not exceed the maximum value specified in Suspension and chassis components the relevant operating instructions . are vital parts of your FLYER . Service Replace the air cap . and check your FLYER suspension at regular intervals . Have your FLYER in-...
-
Page 67: W Heels And Tyres
. Do not continue to use your FLYER if you comes to hose repair, but you can also benefit notice damage to one of the rims . Please allow from the improved driving performance of tube- a FLYER specialised retailer to check the rims . -
Page 68: Dealing With A Flat Tyre
. • If you do not have a brake quick-release fas- tener, deflate all of the air out of the tyre. If your FLYER is equipped with a disc brake, you can remove the wheel without further preparation . Please note: when fitting the wheel, the disc must be slotted between the brake linings of the brake calliper and ultimately be centred without contact . -
Page 69: B Icycle Gears
. Reattaching the wheel Ask your FLYER specialist retailer for detailed Reattach the wheel securely back in the frame or information about what you can do with these fork with the quick-release fastener or axle. -
Page 70: B Icycle Chain And Sprocket, Belt Drive
Bicycle chain maintenance Bicycle chains are subject to wear depending on how they are used . The degree of wear varies considerably . Have the chain of your FLYER reg- ularly checked by your FLYER specialist retailer . For instructions on how to configure the Enviolo • Hub gears: approx. 3000 km TR AutomatiQ integrated hub gears in the display •... - Page 71 . The wear and friction losses on the entire been removed . If the chain of your drive are therefore also higher . FLYER e-bike has fallen off the chain ring or sprocket, it is essential to switch Tightening the toothed belt...
-
Page 72: Brake
. tightness before each ride . Do not ride with your FLYER if fluid is leaking from the braking system . Allow a FLYER specialist re- tailer to undertake repair work on this part imme- diately . The danger of your brakes failing in this condition is very high . -
Page 73: Disc Brake
. Have the brake disc replaced if it is worn out or bent . This replacement procedure must be car- ried out by a FLYER specialist retailer . Air bubbles in disc brakes You can avoid this problem by applying... -
Page 74: Back Pedal Brakes
. Only original spare 18.1 Lights parts may be used . Otherwise it is possible that the functionality of your FLYER e-bike may be im- Different lighting systems are installed depending pacted or damaged . on the area of use and bicycle type . -
Page 75: Mudguard
. Replace defective reflectors or have them repaired . If you wish to use your FLYER mountainbike on public roads, you will need to ask your FLYER de- aler to fit the necessary active equipment (head- light and rear light) . Pay attention to the general information on lighting in the section below . -
Page 76: Riding With Additional Load
22 kg may not be transpor- ted in child trailers . The safe transport of children is the responsibility of the cyclist . FLYER AG cannot be held liable in connection with the transport of children and the resulting risks . -
Page 77: Before Your First Trip With The Approved Bicycle Trailer
. Unhook the loaded trailer from the cou- for 25 kg is used to carry a child seat . pling to the FLYER and hold it in your hand at Your FLYER specialist dealer can provide you the same height as the connection point . You... -
Page 78: Before Every Trip With The Child Seat
The rider is responsible for transport by car in 21.3 Roof and rear carrier on a car compliance with the applicable laws and regula- tions . FLYER AG cannot be held liable in connec- • Only use rear carriers which satisfy tion with the transportation of the FLYER on roof the applicable national legislation for or rear carriers . -
Page 79: Wearing Parts
Your FLYER is a technical product and therefore structions). Warranty claims shall also be exclud- requires regular inspection . ed in the event that the FLYER e-bike is modified Many parts of your FLYER are subject to very or repaired independently or used other than for rapid wear, depending on their function and the its intended purpose: racing and competition, extent of usage. - Page 80 • Check the headset proved by the manufacturer • Check the pedals Allow your FLYER specialist retailer to instruct Only use cleaning agents and lubricants you . that are recommended or approved by the component manufacturer .
-
Page 81: Maintenance And Replacement Of
. There is also an increased risk of accidents or falls . The safe functioning of your FLYER e-bike can only be guaranteed with regular maintenance . Maintenance work may only be performed by FLYER specialist retailers .
Need help?
Do you have a question about the MOUNTAIN and is the answer not in the manual?
Questions and answers