
Related Manuals for Terex Genie TX-34/20


Summary of Contents for Terex Genie TX-34/20
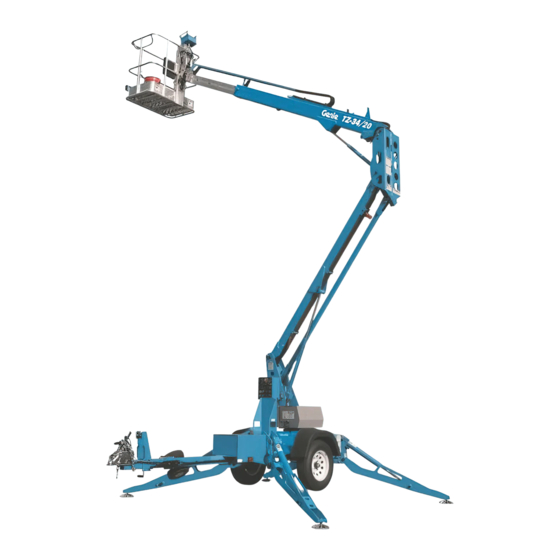
- Page 1 Service Manual Serial Number Range TZ-34/20 from TZ3413-596 to TZ3416J-3099 and from TZ34J-3100 Part No. 825934 Rev C5 August 2022...
-
Page 2: Introduction
Genie and is a registered trademarks of Terex South Dakota, Inc. in the USA and many other countries. "TZ" is a trademark of Terex South Dakota, Inc. Contact Us: Printed on recycled paper http://www.genielift.com Printed in U.S.A. -
Page 3: Revision History
August 2022 Revision History Revision Date Section Procedure / Schematic Page / Description 7/2013 New release 11/2014 Added rotation brake and EN280 updates 11/2015 Update bearing wear tolerance, pg 3-27 1/2018 3-26 updated turntable rotation bearing bolt torque spec's 4/2016 5-21 and 5-25 updated electrical schematics 8/2016 Updated front cover, Serial Number Information and Serial... - Page 4 August 2022 REVISION HISTORY, CONTINUED Revision Date Section Procedure / Schematic Page / Description REFERENCE EXAMPLES: Electronic Version Honda Engine_Section 2_Specifications. A-6,B-3,C-7_Section 3_Maintenance Procedure. Click on any procedure or page number 3-2, 6-4, 9-1_Section 4_Repair Procedure. highlighted in blue to view the update. 5-35, 5-56, 5-104_Section 5_Schematic Page #.
-
Page 5: Serial Number Legend
CE VEHICULE EST CONFORME A TOUTES LES NORMES QUI Manufacturer: Manufacturer: LUI SONT APPLICABLES EN VERTU DU REGLAMENT SUR LA SECURITE DES VEHICULES AUTOMOBILES DU CANADA EN European Representative: Terex USA, LLC. VIGUER A LA DATE DE SA FABRICATION Genie UK LTD 590 Huey Road V.I.N/N.I.V.: The Maltings... -
Page 6: Safety Rules
Section 1 • Safety Rules August 2022 Safety Rules Personal Safety Any person working on or around a machine must be aware of all known safety hazards. Personal safety and the continued safe operation of the machine should be your top priority. Read each procedure thoroughly. - Page 7 August 2022 Section 1 • Safety Rules SAFETY RULES Workplace Safety Be sure to keep sparks, flames and lighted tobacco away from flammable and combustible materials like battery gases and engine fuels. Always have an approved fire extinguisher within easy reach. Be sure that all tools and working areas are properly maintained and ready for use.
-
Page 8: Table Of Contents
August 2022 Table of Contents Introduction Important Information ...................... ii Serial Number Information ....................ii Revision History ......................iii Serial Number Legend ....................v Section 1 Safety Rules General Safety Rules ..................... iv Section 2 Specifications Machine Specifications ..................... 2 - 1 Performance Specifications .................. - Page 9 August 2022 TABLE OF CONTENTS Section 3 Scheduled Maintenance Procedures, continued Perform Hitch Maintenance - ANSI/CSA/AS ............ 3 - 8 Perform 30 Day Service .................. 3 - 9 Grease the Turntable Rotation Bearing and Rotate Gear ........3 - 9 Checklist B Procedures Inspect the Batteries ..................
- Page 10 August 2022 TABLE OF CONTENTS Section 3 Scheduled Maintenance Procedures, continued Replace the Hydraulic Tank Breather Cap Models with Optional Hydraulic Oil ..............3 - 20 Grease the Axle Wheel Bearings - CE ............3 - 21 Adjust the Brakes - CE .................. 3 - 22 Checklist D Procedures Perform Axle Maintenance - ANSI/CSA/AS ...........
- Page 11 August 2022 TABLE OF CONTENTS Section 4 Repair, continued Hydraulic Power Unit Hydraulic Power Unit Components ..............4 - 24 Valve Adjustments - Hydraulic Power Unit ............ 4 - 26 Hydraulic Pump ..................... 4 - 27 Manifolds Function Manifold Components ..............4 - 28 Valve Adjustments - Function Manifold ............
- Page 12 August 2022 TABLE OF CONTENTS Section 5 Schematics Introduction ....................... 5 - 1 Electrical Abbreviations Legend ................5 - 2 Wire Color Legend ..................... 5 - 4 Limit Switch Legend ....................5 - 5 Electrical Symbols Legend ..................5 - 6 Hydraulic Abbreviations Legend ................
-
Page 13: Specifications
August 2022 Section 2 • Specifications Specifications Machine Specifications Tires and wheels - ANSI/CSA/AS Axle Batteries Tire size ST205/75 R14 Type 6V DC Load range Group T-105 Lug nut torque, dry 100 ft-lbs Quantity 135 Nm Battery capacity 225AH Tire pressure, maximum (cold) 50 psi 3.4 bar Reserve capacity @ 25A rate... -
Page 14: Performance Specifications
Section 2 • Specifications August 2022 SPECIFICATIONS Performance Specifications Optional fluids Biodegradable Petro Canada Environ MV 46 Boom function speeds, maximum Statoil Hydra Way Bio Pa 32 from platform controls BP Biohyd SE-S (no weight in platform) Fire resistant UCON Hydrolube HP-5046 Primary boom up 14 to 22 seconds Quintolubric 822... -
Page 15: Manifold Component Specifications
August 2022 Section 2 • Specifications SPECIFICATIONS Manifold Component Function pump Specifications Displacement 0.101 cu in per revolution 1,66 cc Plug torque Flow rate @ 3500 rpm 1.3 gallons per minute SAE No. 2 50 in-lbs / 6 Nm 4.9 liters per minute SAE No. -
Page 16: Hydraulic Hose And Fitting Torque Specifications
Section 2 • Specifications August 2022 SPECIFICATIONS Hydraulic Hose and Fitting SAE O-ring Boss Port (tube fitting - installed into Aluminum) Torque Specifications (all types) Your machine is equipped with Parker Seal-Lok ™ SAE Dash size Torque ORFS or 37° JIC fittings and hose ends. Genie specifications require that fittings and hose 14 ft-lbs / 19 Nm ends be torqued to specification when they are... - Page 17 August 2022 Section 2 • Specifications SPECIFICATIONS Torque Procedure Seal-Lok™ fittings 1 Replace the O-ring. The O-ring must be replaced anytime the seal has been broken. The O-ring cannot be re-used if the fitting or hose end has been tightened beyond finger tight. Note: The O-rings used in the Parker Seal Lok™...
- Page 18 Section 2 • Specifications August 2022 SPECIFICATIONS 10.9 12.9 2 - 6 Genie TZ-34/20 Part No. 825934...
-
Page 19: Scheduled Maintenance Procedures
August 2022 Section 3 • Scheduled Maintenance Procedures Scheduled Maintenance Procedures About This Section This section contains detailed procedures for each scheduled maintenance inspection. Each procedure includes a description, safety warnings and step-by-step instructions. Observe and Obey: Symbols Legend Safety alert symbol—used to alert Maintenance inspections shall be completed by personnel to potential personal a person trained and qualified on the... -
Page 20: Pre-Delivery Preparation Report
Section 3 • Scheduled Maintenance Procedures August 2022 SCHEDULED MAINTENANCE PROCEDURES Maintenance Symbols Legend Pre-delivery Preparation Report The pre-delivery preparation report contains The following symbols have been used in this checklists for each type of scheduled inspection. manual to help communicate the intent of the Make copies of the Pre-delivery Preparation report instructions. - Page 21 Serial number Date Machine owner Inspected by (print) Inspector signature Inspector title Inspector company Terex South Dakota, Inc USA Genie UK 500 Oak Wood Road The Maltings, Wharf Road PO Box 1150 Grantham, Lincolnshire Watertown, SD 57201-6150 NG31- 6BH England...
- Page 22 Section 3 • Scheduled Maintenance Procedures August 2022 This page intentionally left blank. 3 - 4 Genie TZ-34/20 Part No. 825934...
-
Page 23: Maintenance Inspection Report
August 2022 Section 3 • Scheduled Maintenance Procedures Maintenance Inspection Report Model Checklist A Y N R A-1 Manuals and Decals Checklist C Y N R Serial number A-2 Pre-operation inspect C-1 Grease platform overload (if equipped) A-3 Function tests Date C-2 Test platform overload A-4 Lug Bolts -... -
Page 24: Checklist A Procedures
Section 3 • Scheduled Maintenance Procedures August 2022 Checklist A Procedures 3 Open the operator's manual to the decals inspection section. Carefully and thoroughly Inspect the Manuals and Decals inspect all decals on the machine for legibility and damage. Genie specifications require that this procedure be performed daily or every 8 hours, whichever comes Result: The machine is equipped with all first. -
Page 25: Perform Pre-Operation Inspection
August 2022 Section 3 • Scheduled Maintenance Procedures CHECKLIST A PROCEDURES Perform Pre-operation Torque the Lug Bolts - Inspection ANSI/CSA/AS Completing a Pre-operation Inspection is essential to safe machine operation. The Pre-operation Inspection is a visual inspection performed by the operator prior to each work shift. -
Page 26: Torque The Lug Bolts - Ce
Section 3 • Scheduled Maintenance Procedures August 2022 CHECKLIST A PROCEDURES Torque the Lug Bolts - CE Perform Hitch Maintenance - ANSI/CSA/AS Axle specifications require that this procedure be performed initially after 50 km, or 50 km after a Hitch specifications require that this procedure be wheel change. -
Page 27: Perform 30 Day Service
August 2022 Section 3 • Scheduled Maintenance Procedures CHECKLIST A PROCEDURES Perform 30 Day Service Grease the Turntable Rotation Bearing and Rotate Gear The 30 day maintenance procedure is a onetime procedure to be performed after the first 30 days or 40 hours of usage. -
Page 28: Checklist B Procedures
Section 3 • Scheduled Maintenance Procedures August 2022 Checklist B Procedures 5 Remove the battery vent caps from all batteries and check the specific gravity of each battery Inspect the Batteries cell with a hydrometer. Result: If any battery cell displays a specific gravity of less than 1.026, the battery must be replaced. -
Page 29: Inspect The Electrical Wiring
August 2022 Section 3 • Scheduled Maintenance Procedures CHECKLIST B PROCEDURES Inspect the Electrical Wiring Inspect the Electrical Contactor Maintaining electrical wiring in good condition is essential to safe operation and good machine performance. Failure to find and replace burnt, Genie requires that this procedure be performed chafed, corroded or pinched wires could result in every 250 hours or quarterly, whichever comes... -
Page 30: Test The Manual Override
Section 3 • Scheduled Maintenance Procedures August 2022 CHECKLIST B PROCEDURES 4 To close the valve, pull the thumbscrew out and turn fully in a clockwise direction and release. Test the Manual Override Note: The machine functions will not operate unless Testing the manual override for malfunctions is the valves are closed. -
Page 31: Test The Platform Rotation (If Equipped)
August 2022 Section 3 • Scheduled Maintenance Procedures CHECKLIST B PROCEDURES 11 Pull the thumbscrew out and turn fully in a clockwise direction to open the valve. Test the Platform Rotation Result: The thumbscrew should move easily. (if equipped) 12 To close the valve, pull the thumbscrew out and Testing the platform rotation for malfunctions is turn fully in a counterclockwise direction and essential for safe machine operation. -
Page 32: Perform Hydraulic Oil Analysis
Section 3 • Scheduled Maintenance Procedures August 2022 CHECKLIST B PROCEDURES Perform Hydraulic Oil Analysis Perform Axle Maintenance - ANSI/CSA/AS Replacement or testing of the hydraulic oil is essential for good machine performance and Axle specifications require that this procedure be service life. -
Page 33: Check The Wheel Bearings - Ce
August 2022 Section 3 • Scheduled Maintenance Procedures CHECKLIST B PROCEDURES Check the Wheel Bearings - CE Service the Hitch - CE Axle specifications require that this procedure be Axle specifications require that this procedure be performed quarterly or every 5000 km, whichever performed quarterly or every 5000 km, whichever comes first. -
Page 34: Perform Axle Maintenance - Ce
Section 3 • Scheduled Maintenance Procedures August 2022 CHECKLIST B PROCEDURES 6 Confirm that the brake cable is securely B-10 installed into the brake handle linkage. Perform Axle Maintenance - CE 7 Apply the hand brake. 8 Attempt to manually push the machine. Result: The machine does not move. -
Page 35: Inspect The Parking Brake
August 2022 Section 3 • Scheduled Maintenance Procedures CHECKLIST B PROCEDURES B-11 B-12 Inspect the Parking Brake Service the Tongue Jack A properly functioning parking brake is essential to Maintaining the tongue jack in good condition is safe machine operation. The parking brake is essential to safe operation and good machine manually activated. -
Page 36: Checklist C Procedures
Section 3 • Scheduled Maintenance Procedures August 2022 Checklist C Procedures Grease the Platform Overload Test the Platform Overload Mechanism (if equipped) System (if equipped) Genie specifications require Genie specifications require that this procedure be that this procedure be performed every 500 hours or performed every 500 hours or 6 months, whichever 6 months, whichever comes first. - Page 37 August 2022 Section 3 • Scheduled Maintenance Procedures CHECKLIST C PROCEDURES 7 Add an additional 44 lbs / 20 kg of weight to 12 Test all machine functions from the ground overload the platform. controls. Result: The platform overload indicator light Result: All ground control functions should should be flashing at both the ground and operate normally.
-
Page 38: Perform Axle Maintenance - Ansi/Csa/As
Section 3 • Scheduled Maintenance Procedures August 2022 CHECKLIST C PROCEDURES Perform Axle Maintenance - Replace the ANSI/CSA/AS Hydraulic Tank Breather Cap - Models with Optional Hydraulic Oil Axle specifications require that this procedure be performed every 6 months or 6000 miles, whichever The hydraulic tank is a vented-type tank. -
Page 39: Grease The Axle Wheel Bearings Ce
August 2022 Section 3 • Scheduled Maintenance Procedures CHECKLIST C PROCEDURES 8 Loosen the castle nut just until the cotter pin fits into the next hole. Install a new cotter pin and Grease the Axle Wheel Bearings lock into position. Install the dust cap. Note: Always replace the cotter pin with a new one when removing the castle nut or when checking the torque of the castle nut. -
Page 40: Adjust The Brakes - Ce
Section 3 • Scheduled Maintenance Procedures August 2022 CHECKLIST C PROCEDURES 6 Inspect the balance plate at the control cables. Adjust the Brakes - CE Result: The balance plate is at a right angle to the direction of towing. Result: The balance plate is not at a right angle to the direction of towing. -
Page 41: Checklist D Procedures
August 2022 Section 3 • Scheduled Maintenance Procedures Checklist D Procedures Perform Axle Maintenance - Check the Boom Wear Pads ANSI/CSA/AS Maintaining the boom wear pads in good condition is essential to safe machine operation. Wear pads Axle specifications require that this procedure be are placed on boom tube surfaces to provide a low performed every 12 months or 12,000 miles, friction, replaceable wear pad between moving... -
Page 42: Replace The Hydraulic Tank Return Filter
Section 3 • Scheduled Maintenance Procedures August 2022 CHECKLIST D PROCEDURES 4 Install the filter and tighten it securely by hand. Replace the Hydraulic Tank Return Filter Replacement of the hydraulic tank return filter element is essential for good machine performance and service life. -
Page 43: Check The Turntable Rotation Bearing Bolts
August 2022 Section 3 • Scheduled Maintenance Procedures CHECKLIST D PROCEDURES 6 Turn the key switch to ground controls and pull out the red Emergency Stop button to the on Check the Turntable Rotation position at both the ground and platform Bearing Bolts controls. -
Page 44: Inspect For Turntable Bearing Wear
Section 3 • Scheduled Maintenance Procedures August 2022 CHECKLIST D PROCEDURES 2 Working through the bearing bolt access, be sure that each turntable rotation bearing Inspect for mounting bolt is torqued in sequence to Turntable Bearing Wear specification. See below. Note: The rotate bearing bolt access is located next to the turntable rotate motor. - Page 45 August 2022 Section 3 • Scheduled Maintenance Procedures CHECKLIST D PROCEDURES 5 At the dial indicator, adjust it to "zero" the 8 Fully retract the primary boom. Raise the indicator. primary and secondary booms to full height. Visually inspect the dial indicator to be sure the needle returns to the "zero"...
-
Page 46: Checklist E Procedure
Section 3 • Scheduled Maintenance Procedures August 2022 Checklist E Procedure 3 Remove the drain plug from the power unit valve body and completely drain the tank into a Test or Replace the Hydraulic Oil suitable container. Refer to Section 2, Specifications , for capacity information. - Page 47 August 2022 Section 3 • Scheduled Maintenance Procedures CHECKLIST E PROCEDURE 7 Tag, disconnect and plug the hydraulic hoses 18 Install the hydraulic hoses onto the power unit. from the power unit. Cap the fittings. Torque to specification. Note: Do not disconnect the hydraulic filter lines 19 Install the brake line to the brake fitting under from the power unit.
- Page 48 Section 3 • Scheduled Maintenance Procedures August 2022 This page intentionally left blank. 3 - 30 Genie TZ-34/20 Part No. 825934...
- Page 49 Augus 2022 Section 4 • Repair Procedures Repair Procedures About This Section Most of the procedures in this section should only be performed by a trained service professional in a suitably equipped workshop. Select the appropriate repair procedure after troubleshooting the problem.
-
Page 50: Platform Components
Section 4 • Repair Procedures August 2022 Platform Components Platform Platform Rotator (if equipped) The platform rotator is a manually-operated gear How to Remove the Platform assembly used to rotate the platform. 1 Tag and disconnect the taillight control cable at How to Remove the the front of the platform. - Page 51 Augus 2022 Section 4 • Repair Procedures PLATFORM COMPONENTS 2 Remove the platform rotate mount, platform How to Adjust the mount and platform rotate gear assembly from Platform Rotator the machine. The platform rotator is designed to allow the 3 Remove the four bolts securing the cover over platform to slip in the event of striking an object to the rotate handle shaft.
- Page 52 Section 4 • Repair Procedures August 2022 PLATFORM COMPONENTS 7 Disassemble the gear assembly. 15 Thoroughly and heavily lubricate each tooth of the gear using multipurpose grease. Rotate the Note: For ease of assembly, note the order of gear case as required. disassembly of the gear assembly.
- Page 53 Augus 2022 Section 4 • Repair Procedures This page intentionally left blank. Part No. 825934 Genie TZ-34/20 4 - 5...
-
Page 54: Primary Boom Components
Section 4 • Repair Procedures August 2022 Primary Boom Components primary boom pivot pin mid-pivot primary boom latch primary boom lift cylinder ground controls cable tray secondary boom lift cylinder barrel-end pivot pin cable track turntable primary boom lift cylinder rod-end pivot pin secondary boom pivot pin cable bridge secondary boom link pivot pin... -
Page 55: Cable Track
Augus 2022 Section 4 • Repair Procedures PRIMARY BOOM COMPONENTS 2 Tag and disconnect two of these wire cables from their source at the ground control box. Cable Track 3 At the rear of the chassis, open the AC plug. Tag and disconnect the wiring from the plug. - Page 56 Section 4 • Repair Procedures August 2022 PRIMARY BOOM COMPONENTS 10 Tag, disconnect and plug the hydraulic hoses at How to Repair the Cable Track the mid pivot end of the cable tray. Cap the Component damage hazard. The fittings on the hydraulic hard lines. Refer to 'YY' cable track can be damaged if it is in the illustration.
-
Page 57: Primary Boom
Augus 2022 Section 4 • Repair Procedures PRIMARY BOOM COMPONENTS How to Primary Boom Remove the Primary Boom This procedure in this section How to Shim the Primary Boom requires specific repair skills, lifting equipment and a suitable 1 Extend the boom until the wear pads are workshop. - Page 58 Section 4 • Repair Procedures August 2022 PRIMARY BOOM COMPONENTS 5 Remove the battery charger cover at the rear of 11 Tag, disconnect and plug the hydraulic hoses to the machine and remove the cable clamp the platform level master cylinder. Cap the securing the power-to-platform plug to the fittings.
- Page 59 Augus 2022 Section 4 • Repair Procedures PRIMARY BOOM COMPONENTS 16 Tag, disconnect and plug the hydraulic hoses to How to the primary boom extension cylinder at the mid Remove the Boom Extension pivot end of the primary boom. Cap the fittings. This procedure in this section Bodily injury hazard.
- Page 60 Section 4 • Repair Procedures August 2022 PRIMARY BOOM COMPONENTS 5 Attach a lifting strap of suitable capacity from an 12 Pull the boom extension out of the primary boom overhead crane to the platform mount. Do not approximately 18 inches / 50 cm. apply any lifting pressure.
-
Page 61: Primary Boom Lift Cylinder
Augus 2022 Section 4 • Repair Procedures PRIMARY BOOM COMPONENTS 2 Attach a lifting strap of suitable capacity from an overhead crane to the lift cylinder. Primary Boom Lift Cylinder 3 Remove the pin retaining fastener from the lift cylinder rod-end pivot pin. The primary boom lift cylinder raises and lowers the primary boom. -
Page 62: Platform Leveling Cylinders
Section 4 • Repair Procedures August 2022 PRIMARY BOOM COMPONENTS Platform Leveling Cylinders How to Remove the Master Cylinder The master cylinder, located inside the mid pivot, acts as a pump for the slave cylinder, which is located at the platform end of the extension boom. platform level slave cylinder The master cylinder operates in a closed-circuit platform level master cylinder... - Page 63 Augus 2022 Section 4 • Repair Procedures PRIMARY BOOM COMPONENTS How to Remove the Slave Cylinder The slave cylinder, via a closed-circuit hydraulic loop, works in tandem with the master cylinder to maintain the platform in a level condition through the entire range of boom motion.
-
Page 64: Secondary Boom Components
Section 4 • Repair Procedures August 2022 Secondary Boom Components primary boom pivot pin mid-pivot primary boom latch primary boom lift cylinder ground controls cable tray secondary boom lift cylinder barrel-end pivot pin cable track turntable primary boom lift cylinder rod-end pivot pin secondary boom pivot pin cable bridge secondary boom link pivot pin... -
Page 65: Secondary Boom
Augus 2022 Section 4 • Repair Procedures SECONDARY BOOM COMPONENTS Remove the mid-pivot Secondary Boom 2 Attach a lifting strap of suitable capacity from an overhead crane to the primary lift cylinder. Raise the cylinder to a horizontal position. How to Remove the Secondary Boom 3 Remove the pin retaining fasteners securing the primary lift cylinder pivot pin to the mid-pivot. - Page 66 Section 4 • Repair Procedures August 2022 SECONDARY BOOM COMPONENTS 10 Attach a lifting strap of suitable capacity from an 18 Remove the pin retaining fasteners securing the overhead crane to the secondary link. Do not lift cylinder pivot pin to the secondary boom. apply any lifting pressure.
-
Page 67: Secondary Boom Lift Cylinder
Augus 2022 Section 4 • Repair Procedures SECONDARY BOOM COMPONENTS 2 Attach a lifting strap of suitable capacity from an overhead crane to the lift cylinder. Secondary Boom Lift Cylinder 3 Remove the pin retaining fastener from the lift cylinder rod-end pivot pin. The primary boom lift cylinder raises and lowers the primary boom. -
Page 68: Ground Controls
Section 4 • Repair Procedures August 2022 Ground Controls 2 Turn the key switch to ground control and pull out the red Emergency Stop buttons to the on Level Sensor position at both the ground and platform controls. Each machine is equipped with two types of level 3 Push and hold the yellow function enable button. - Page 69 Augus 2022 Section 4 • Repair Procedures GROUND CONTROLS If you are not installing a new level sensor, 14 Continue to lower the tank side of the machine proceed to step 10. until the turntable is 2.7° out of level. Result: The tilt alarm will sound at 180 beeps Install the level sensor: per minute.
- Page 70 Section 4 • Repair Procedures August 2022 GROUND CONTROLS 19 Using a digital level, lower the platform end of How to Install and Calibrate the the machine until the turntable is 2.4° out of Outrigger Level Sensor level. Tip-over hazard. Failure to install Result: The tilt sensor alarm should not sound.
- Page 71 Augus 2022 Section 4 • Repair Procedures GROUND CONTROLS 5 Locate the outrigger level sensor(s) behind the If you are not installing a new level sensor, inspection door on the ground control side of the proceed to step 10. machine. 6 Tag and disconnect the wire harness from the outrigger level sensor.
-
Page 72: Hydraulic Power Unit
Section 4 • Repair Procedures August 2022 Hydraulic Power Unit Hydraulic Power Unit Components The power unit is located under the side cover on the side of the machine opposite of the ground controls. Index Schematic Description Item Function Torque Hand pump ............ - Page 73 Augus 2022 Section 4 • Repair Procedures HYDRAULIC POWER UNIT Part No. 825934 Genie TZ-34/20 4 - 25...
-
Page 74: Valve Adjustments - Hydraulic Power Unit
Section 4 • Repair Procedures August 2022 HYDRAULIC POWER UNIT 8 Repeat step 4 to confirm the relief valve pressure setting. Valve Adjustments - 9 Bleed the hydraulic system by raising the Hydraulic Power Unit platform to full height. If the pump cavitates or platform fails to reach full height, add hydraulic How to Adjust the System oil until the pump is functioning correctly. -
Page 75: Hydraulic Pump
Augus 2022 Section 4 • Repair Procedures HYDRAULIC POWER UNIT 5 Tag and disconnect the power cables from the hydraulic power unit motor. Hydraulic Pump Electrocution hazard. Contact with electrically charged circuits may How to Remove the Hydraulic result in death or serious injury. Power Unit Remove all rings, watches and other jewelry. -
Page 76: Function Manifold Components
Section 4 • Repair Procedures August 2022 Manifolds Function Manifold Components The function manifold is located under the turntable cover. Index Schematic Description Item Function Torque Solenoid valve, 3 position 4 way with manual override ......AA ..Turntable rotate left/right ..... 7-8 ft-lbs / 9.5-10.5 Nm Solenoid valve, 3 position 4 way .. - Page 77 Augus 2022 Section 4 • Repair Procedures MANIFOLDS Part No. 825934 Genie TZ-34/20 4 - 29...
-
Page 78: Valve Adjustments - Function Manifold
Section 4 • Repair Procedures August 2022 How to Adjust the Secondary Boom Down Relief Valve Valve Adjustments - Function Manifold 1 Connect a 0 to 3000 psi / 0 to 200 bar pressure gauge to the test port on the hydraulic power How to Adjust the Primary Boom unit located in the chassis. - Page 79 Augus 2022 Section 4 • Repair Procedures How to Adjust the Primary Boom How to Adjust the Turntable Extend Relief Valve Rotate Relief Valves 1 Connect a 0 to 3000 psi / 0 to 200 bar pressure 1 Verify the boom is properly stowed and the hold- gauge to the test port on the hydraulic power down latches are secured.
- Page 80 Section 4 • Repair Procedures August 2022 8 Turn the key switch to ground control and pull out the red Emergency Stop button to the on position. 9 Press and hold the blue function enable button and press and hold the turntable rotate button. Observe the pressure reading on the pressure gauge.
-
Page 81: Outrigger Counterbalance Valve Manifold Components
Augus 2022 Section 4 • Repair Procedures MANIFOLDS Outrigger Counterbalance Valve Manifold Components The outrigger manifold is located under the hydraulic power unit cover. Index Schematic Description Item Function Torque Counterbalance valve ......AN ..Outrigger Retract ......... 19-22 ft-lbs / 25-30 Nm Counterbalance valve ...... -
Page 82: Valve Coils
Section 4 • Repair Procedures August 2022 MANIFOLDS How to Test a Coil Diode Valve Coils Genie incorporates spike-suppressing diodes in all of its coils. Properly functioning coil diodes protect How to Test a Coil the electrical circuit by suppressing voltage spikes. Voltage spikes naturally occur within a function A properly functioning coil provides an circuit following the interruption of electrical current... - Page 83 Augus 2022 Section 4 • Repair Procedures MANIFOLDS 2 Connect a 10Ω resistor to the negative terminal 3 Set a multimeter to read DC amperage. of a known good 9V DC battery. Connect the Note: The multimeter, when set to read DC other end of the resistor to a terminal on the amperage, should be capable of reading coil.
-
Page 84: Turntable Rotation Components
Section 4 • Repair Procedures August 2022 Turntable Rotation Components Turntable Rotation Motor How to Remove the Turntable Rotation Motor Note: When removing a hose assembly or fitting, the O-ring on the fitting and/or hose end must be replaced and then torqued to specification during installation. -
Page 85: Axle Components
Augus 2022 Section 4 • Repair Procedures Axle Components CE models: Axle 1 Lower the outriggers and adjust to level the machine and raise the wheels off the ground. How to Remove the Axle 2 Disconnect the parking brake cable at the tension equalizer. -
Page 86: Trailer Components
Section 4 • Repair Procedures August 2022 Trailer Components Hydraulic and Mechanical Parking Brake Brakes How to Adjust the Parking Brake Hydraulic Brake System - ANSI models: ANSI/CSA/AS Models 1 Adjust the brakes. Refer to the Dexter Axle Operation Maintenance Service Manual Repair procedures and additional axle information is (Dexter part number LIT-001-00). -
Page 87: Outrigger Components
Augus 2022 Section 4 • Repair Procedures Outriggers 5 Remove the pin retaining fasteners from the 10-1 outrigger cylinder barrel-end pivot pin. Outrigger Components 6 Place a rod through the hole in the outrigger cylinder barrel-end pivot pin and twist to remove How to Remove an Outrigger the pin. -
Page 88: Outrigger Cylinder
Section 4 • Repair Procedures August 2022 OUTRIGGERS 5 Attach a lifting strap from an overhead crane to 10-2 the lug on the rod end of the cylinder. Outrigger Cylinder 6 Remove the pin retaining fasteners from the outrigger cylinder rod-end pivot pin. How to Remove an Outrigger 7 Place a rod through the hole in the outrigger Cylinder... -
Page 89: Platform Overload Components
Augus 2022 Section 4 • Repair Procedures Platform Overload Components Determine the limit switch trigger point: 11-1 Platform Overload System 7 Gently move the platform up and down by hand, so it bounces 1 to 2 inches / 2.5 to 5 cm. Calibrate the Platform Overload 8 Check the continuity between the black and red System (if equipped) - Page 90 Section 4 • Repair Procedures August 2022 PLATFORM OVERLOAD COMPONENTS Confirm the setting: 11 Turn the key switch to platform control. 12 Lift the test weight off the platform floor using a suitable lifting device. 13 Place the test weight back onto the platform floor using a suitable lifting device.
- Page 91 Augus 2022 Section 4 • Repair Procedures This page intentionally left blank. Part No. 825934 Genie TZ-34/20 4 - 43...
- Page 92 August 2022 Section 5 • Schematics Schematics About This Section There are two groups of schematics in this section. An illustration legend precedes each group of drawings. Electrical Schematics Observe and Obey: Electrocution hazard. Contact with electrically charged circuits could Troubleshooting and repair procedures shall be result in death or serious injury.
-
Page 93: Electrical Abbreviations Legend
Section 5 • Schematics August 2022 Electrical Abbreviations Legend Item Description Item Description Battery Capacitor Battery Zener diode, 5.1V DC Zener diode, 3.3V DC Button Zener diode, 4.3V DC BN49 Outrigger auto level Zener diode, 5.1V DC BN50 Left rear outrigger 4700uF BN51 Right rear outrigger... - Page 94 August 2022 Section 5 • Schematics Electrical Abbreviations Legend Item Description Item Description Control Relay Light or LED CR71 Platform level Load sense at ground (load sense option) CR72 Outrigger Load sense at platform (load sense option) CR73 Function enable (ground controls) Left front outrigger CR74 Function enable (platform controls)
-
Page 95: Wire Color Legend
Section 5 • Schematics August 2022 Electrical Abbreviations and Wire Color Legends Item Description Wire Color Legend Resistor Item ........Description Function speed, 0-10K ohms BL ..........Blue 2000 ohm BK ..........Black 10000 ohm GN ..........Green 4300 ohm OR .......... -
Page 96: Limit Switch Legend
August 2022 Section 5 • Schematics Limit Switch Legend Item Description Schematic Boom limit switches LS18 / LS18A Outrigger limit switches LS12/LS13/LS14/LS15 Part No. 825934 Genie TZ-34/20 5 - 5... -
Page 97: Electrical Symbols Legend
Section 5 • Schematics August 2022 Electrical Symbols Legend Terminal 6V Battery Control relay Diode Resistor Fuse Power unit or motor KEY SWITCH Key switch Hour meter EMERGENCY STOP Emergency stop button, Motor controller normally closed Alarm Circuit breaker Battery charger Solenoid valve with diode N.C.H.O. -
Page 98: Hydraulic Abbreviations Legend
August 2022 Section 5 • Schematics Hydraulic Abbreviations Legend Item Description Item Description Test port Outrigger retract - left rear Outrigger extend/retract Outrigger retract - right rear Check valve - outrigger circuit Outrigger retract - left front Relief valve - outrigger circuit Outrigger retract - right front System relief Turntable rotate left/right... -
Page 99: Hydraulic Symbols Legend
Section 5 • Schematics August 2022 Hydraulic Symbols Legend 0.037 in 0.94 mm Solenoid operated Variable Orifice with size 3 position 4 way directional speed motor valve with manual over ride Relief valve Solenoid operated Fixed displacement Check valve 2 position 3 way pump directional valve with manual over ride... -
Page 100: Trailer Lighting Wiring Diagram - Ansi/Csa
August 2022 Section 5 • Schematics Trailer Lighting Wiring Diagram - ANSI/CSA RIGHT SIDE MARKER QD12 TRAILER PLUG BN/YL RIGHT REAR TAIL LIGHT 1 GN 2 YL 3 BN/YL LEFT SIDE MARKER 3 BN LEFT REAR 4 WH TAIL LIGHT Part No. -
Page 101: Trailer Lighting Wiring Diagram - Mechanical Axle, Ce
Section 5 • Schematics August 2022 Trailer Lighting Wiring Diagram - Mechanical Axle, CE Trailer Chassis Wiring Harness 1 RD/BK RD/BK RD/BK 2 BL 1 RD/BK 3 WH WH/BK WH/BK 2 BL 4 GN 3 WH 5 OR 4 GN 6 RD 5 OR 7 BK... -
Page 102: Trailer Lighting Wiring Diagram - Hydraulic Axle, As
August 2022 Section 5 • Schematics Trailer Lighting Wiring Diagram - Hydraulic Axle, AS Trailer Chassis Wiring Harness 1 RD/BK RD/BK RD/BK 2 BL 1 RD/BK 3 WH WH/BK WH/BK 2 BL 4 GN 3 WH 5 OR 4 GN 6 RD 5 OR 7 BK... -
Page 103: Ground Control Box Wiring Diagram - Ansi/Csa
Section 5 • Schematics August 2022 Ground Control Box Wiring Diagram - ANSI/CSA (to Serial Number TZ34J-3223) C3-B BN60 EMERGENCY STOP FUNCTION ENABLE (PLATFORM UP, BOOM UP, SWITCH ROTATE RIGHT AND OUTRIGGER RETRACT) TB16 BN59 FUNCTION ENABLE (PLATFORM DOWN, BOOM DOWN, ROTATE LEFT AND OUTRIGGER EXTEND) TB18... - Page 104 August 2022 Section 5 • Schematics Ground Control Box Wiring Diagram - ANSI/CSA (to Serial Number TZ34J-3223) CR71 PLATFORM LEVEL OR/BK C2-L OR/BK C2-K CR69 BOOM EXTEND BK/WH C2-J BK/WH C2-H CR67 PRIMARY BOOM RD/BK C2-G RD/BK C2-F CONTROL CR68 BL/BK SECONDARY BOOM C2-E...
-
Page 105: Platform Control Box Wiring Diagram - Ansi/Csa
Section 5 • Schematics August 2022 Platform Control Box Wiring Diagram - ANSI/CSA (to Serial Number TZ34J-3223) C1P-M CR78B TERMINAL 86 ALARM OR/BK C1P-L BK/WH C1P-K CR74 TERMINAL 30 BN65 BN67 EMERGENCY BOOM PLATFORM STOP EXTEND/RETRACT LEVEL C1P-A GN/BK C1P-F RD/BK C1P-J BN62... - Page 106 August 2022 Section 5 • Schematics This page intentionally left blank. Part No. 825934 Genie TZ-34/20 5 - 15...
-
Page 107: Ground Control Box Wiring Diagram - As/Ce
Section 5 • Schematics August 2022 Ground Control Box Wiring Diagram - AS/CE (to Serial Number TZ34J-3223) C3-B BN60 EMERGENCY STOP FUNCTION ENABLE (PLATFORM UP, BOOM UP, SWITCH ROTATE RIGHT AND OUTRIGGER RETRACT) TB16 BN59 FUNCTION ENABLE (PLATFORM DOWN, BOOM DOWN, ROTATE LEFT AND OUTRIGGER EXTEND) TB18... - Page 108 August 2022 Section 5 • Schematics Ground Control Box Wiring Diagram - AS/CE (to Serial Number TZ34J-3223) CR71 PLATFORM LEVEL OR/BK C2-L OR/BK C2-K CR69 C2-J BOOM EXTEND BK/WH BK/WH C2-H CR67 PRIMARY BOOM RD/BK C2-G RD/BK C2-F CONTROL CR68 BL/BK SECONDARY BOOM C2-E...
-
Page 109: Platform Control Box Wiring Diagram - As/Ce
Section 5 • Schematics August 2022 Platform Control Box Wiring Diagram - AS/CE (to Serial Number TZ34J-3223) ALARM CR78B TERMINAL 86 C1P-M OR/BK C1P-L BK/WH ONLY C1P-K BN65 BN67 EMERGENCY BOOM PLATFORM STOP EXTEND/RETRACT LEVEL C1P-A U35-5 GN/BK C1P-F C1P-D RD/BK U35-NO C1P-J... -
Page 110: Electrical Schematic_View 1 - Ansi/Csa/Ce/As
Section 5 • Schematics August 2022 Electrical Schematic - ANSI/CSA/CE/AS_View 1 5 - 20 5 - 19... -
Page 111: Electrical Schematic_View 2 - Ansi/Csa/Ce
Section 5 • Schematics August 2022 Electrical Schematic - ANSI/CSA/CE/AS_View 1 PLATFORM CONTROLS R101 GROUND CONTROLS CHARGER ES0441AA 5 - 20 TZ-34/20 Part No. 825934... - Page 112 August 2022 Section 5 • Schematics Electrical Schematic - ANSI/CSA/CE_View 2 PLATFORM CONTROLS REMOTE DISABLE RELAY GROUND CONTROLS (R8A) REMOTE DISABLE RELAY ES0441AA Part No. 825934 TZ-34/20 5 - 21...
- Page 113 August 2022 Section 5 • Schematics Electrical Schematic - ANSI/CSA/CE_View 2 5 - 21 5 - 22...
-
Page 114: Electrical Schematic_View 2 - As
Section 5 • Schematics August 2022 Electrical Schematic - AS_View 2 5 - 27 5 - 23... - Page 115 Section 5 • Schematics August 2022 Electrical Schematic - AS_View 2 BLT1 BLT1 BLT2 BLR SWITCH PLATFORM CONTROLS R101 BLT2 BLT1 BLT2 R101 GROUND CONTROLS REMOTE DISABLE RELAY (R8A) REMOTE DISABLE RELAY ES0441AA AUSTRALIAN BUMP LOAD RECOVERY OPTION 5 - 24 TZ-34/20 Part No.
-
Page 116: Bump Load Recovery Wiring Diagram
August 2022 Section 5 • Schematics AS Bump Load Recovery Wiring Diagram ALARM C1P-M AUSTRALIAN BUMP LOAD RECOVERY OPTION CE WIRING (WITH LOAD SENSE) C1P-N FAULT LED GRN/WHT C1P-D C1P-P DPDT INTERVAL ON TIMERS 10K POTENTIOMETER HORN OPTION U35-5 BLK/WHT TO BN61 C1P-K E-STOP... - Page 117 August 2022 Section 5 • Schematics AS Bump Load Recovery Wiring Diagram 5 - 25 5 - 26...
-
Page 118: Ground Control Box Wiring Diagram
Section 5 • Schematics August 2022 Ground Control Wiring Diagram (from Serial Number TZ34J-3224) 5 - 28 5 - 27... - Page 119 Section 5 • Schematics August 2022 Ground Control Wiring Diagram (from Serial Number TZ34J-3224) GROUND CONTROL BOX C2-L AUTOLEVEL C4-2 ORG/BLK HARNESS CR73 CR71 AUTOLEVEL BUTTON ORG/BLK PLATFORM LEVEL FUNCTION ENABLE C2-K AUTOLEVEL BUTTON LOAN ON TIME DELAY AUTOLEVEL C4-4 C5-3 LIMIT SWITCH HARNESS HARNESS...
-
Page 120: Ground Control Switch Panel Wiring Diagram
August 2022 Section 5 • Schematics Ground Control Switch Panel Wiring Diagram (from Serial Number TZ34J-3224) CE WIRING (WITH LOAD SENSE) ANSI WIRING HOUR METER ALARM HOUR METER ALARM 30 RELAY 10 30 RELAY 10 TB23 TB23 KEY SWITCH E-STOP UP ENABLE KEY SWITCH UP ENABLE... - Page 121 August 2022 Section 5 • Schematics Ground Control Switch Panel Wiring Diagram (from Serial Number TZ34J-3224) 5 - 29 5 - 30...
-
Page 122: Platform Control Switch Panel Wiring Diagram
Section 5 • Schematics August 2022 Platform Control Switch Panel Wiring Diagram (from Serial Number TZ34J-3224) 5 - 32 5 - 31... - Page 123 Section 5 • Schematics August 2022 Platform Control Switch Panel Wiring Diagram (from Serial Number TZ34J-3224) ALARM ALARM ANSI WIRING CE WIRING (WITH LOAD SENSE) C1P-M C1P-M ROTATE ROTATE WHT/BLK C1P-G WHT/BLK C1P-G BN66 BN66 BN64 BN64 SECONDARY SECONDARY HORN OPTION DOWN ENABLE BLU/BLK HORN OPTION...
-
Page 124: Platform Overload Option Wiring Diagram
August 2022 Section 5 • Schematics Platform Overload Option Wiring Diagram LOAD SENSE WIRING ALARM C1P-M PLATFORM CONTROL BOX GROUND CONTROL BOX C1B-P PLATFORM HARNESS FAULT LED TO LED C1P-A E-STOP U35-5 C1P-D CHASSIS HARNESS C3-A TB24 TB24 ALARM C1P-C 30 RELAY 10 C1P-N GRN/WHT... - Page 125 August 2022 Section 5 • Schematics Platform Overload Option Wiring Diagram 5 - 33 5 - 34...
-
Page 126: Telematics Option Wiring Diagram
Section 5 • Schematics August 2022 Telematics Option Wiring Diagram 5 - 36 5 - 35... - Page 127 Section 5 • Schematics August 2022 Telematics Option Wiring Diagram M7 TELEMATICS CONNECTOR PIN# CKT# COLOR TELBAT TELGND BLACK TELGND WHITE TELEMATICS 8 PIN CONNECTOR GENIE LIFT CONNECT 12 PIN CONNECTOR ORANGE KEY SWITCH ACTIVE BLUE PLATFORM STOWED BLACK/WH HOUR METER REMOTE DISABLE WHITE/BLK ORANGE...
-
Page 128: Hydraulic Schematic
August 2022 Section 5 • Schematics Hydraulic Schematic LEFT FRONT RIGHT FRONT OUTRIGGER OUTRIGGER SECONDARY BOOM PRIMARY BOOM EXTENSION PLATFORM CYLINDER CYLINDER LIFT CYLINDER LIFT CYLINDER CYLINDER LEVELING SLAVE CYLINDER 0.037 in 0.037 in 0.94 mm 0.94 mm TURNTABLE 3500 psi 3500 psi 241 bar 241 bar... - Page 129 August 2022 Section 5 • Schematics Hydraulic Schematic 5 - 37 5 - 38...
Need help?
Do you have a question about the Genie TX-34/20 and is the answer not in the manual?
Questions and answers