Sign In
Upload
Download
Table of Contents
Contents
Add to my manuals
Delete from my manuals
Share
URL of this page:
HTML Link:
Bookmark this page
Add
Manual will be automatically added to "My Manuals"
Print this page
×
Bookmark added
×
Added to my manuals
Manuals
Brands
Tascam Manuals
Recording Equipment
Sonicview 16XP
Reference manual
Tascam Sonicview 16XP Reference Manual
Multitrack recording console
Hide thumbs
1
Table Of Contents
2
3
4
5
6
7
8
9
10
11
12
13
14
15
16
17
18
19
20
21
22
23
24
25
26
27
28
29
30
31
32
33
34
35
36
37
38
39
40
41
42
43
44
45
46
47
48
49
50
51
52
53
54
55
56
57
58
59
60
61
62
63
64
65
66
67
68
69
70
71
72
73
74
75
76
77
78
79
80
81
82
83
84
85
86
87
88
89
90
91
92
93
94
95
96
97
98
99
100
101
102
103
104
105
106
107
108
109
110
111
112
113
114
115
116
117
118
119
120
121
122
123
124
125
126
127
128
129
130
131
132
133
134
135
136
137
138
139
140
141
142
143
144
145
146
147
148
149
150
151
152
153
154
155
156
157
158
159
160
161
162
163
164
165
166
167
168
169
170
171
172
173
174
175
176
177
178
179
180
181
182
183
184
185
186
187
188
189
190
191
192
193
194
195
196
197
198
199
200
201
202
203
204
205
206
207
208
209
210
211
212
213
214
215
216
217
218
219
220
221
222
223
224
225
226
227
228
229
230
231
232
233
234
235
236
237
238
239
240
241
242
243
244
245
246
247
248
249
250
251
252
253
254
255
256
257
258
259
260
261
262
263
264
265
266
267
268
269
270
271
272
273
274
275
276
277
278
279
280
281
282
page
of
282
Go
/
282
Contents
Table of Contents
Troubleshooting
Bookmarks
Table of Contents
Table of Contents
Introduction
Overview
Conventions Used in this Manual
Trademarks and Copyrights
About SD Cards
Precautions for Use
SD Card Write Protection
Note about Formatting
Features
Main Features
Main Specifications
Names and Functions of Parts
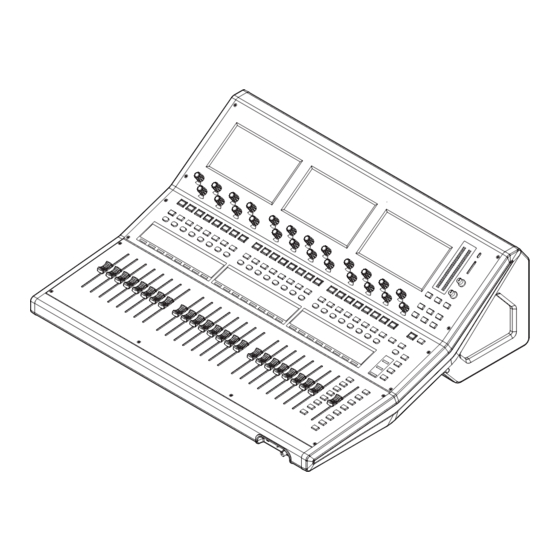
Top Panel
Front Panel
Rear Panel
GPIO Connector Overview
Basic Unit Operations
Home Screen
CH 1-40 Module Home Screen
ST in 1-2/FX RTN 1-4 Module Home Screen
MIX 1-22 and MAIN L/R Master Module Home Screen
DCA Module Home Screen
Menu Screen
Menu Screen Operations
Menu Structure
Preparation
Installing Expansion Cards (Sold Separately)
Turning the Power on and off
Setting the Built-In Clock Date and Time
Connecting and Disconnecting SD Cards and USB Flash Drives
SD Card Write Protection Switches
Preparing SD Cards and USB Flash Drives for Use
Mixer Configuration and Settings
SYNC CLOCK Screen
Setting the Sampling Frequency
Setting the Master Clock
PREFERENCES Screen
METER Screen
METER SETUP Screen
METERING POINT Page
METER HEADROOM Page
LOCK SETUP Screen
MIXER CONFIG Screen
CH 1-40 CONFIG Page
LOCATION CONFIG Page
BUS CONFIG Page
USER DEFINED CONTROLS Screen
USER DEFINED CONTROLS Screen Structure
User Key Page
Foot Switch Page
GPIO-IN Page
GPIO-OUT Page
Fader Start Level Setting
Layer Key SETUP Page
Custom Layer SETUP Page
Custom Layer Assignment Operation Procedures
Making Talkback Settings
Making Monitor Output Settings
MONITOR SOURCE ASSIGN Screen
Additional Settings Window
Making solo and Built-In Oscillator Settings
Dante SETUP Screen
Dante Settings Page
I/O Device Page
Using SB-16D Units
SB-16D Control
Using GPIO Extension Functions
Procedures for Dante Connection with SB-16Ds
Notes about Dante
Connecting to a Dante Network
Using Dante Controller
SLOT SETUP Screen
When an IF-DA64 (Dante) Card Is Installed
When an IF-AE16 (AES/EBU) Card Is Installed
When an IF-MA64/EX or IF-MA64/BN (MADI) Card Is Installed
When an IF-AN16/OUT (Analog Output) Card Is Installed
When an IF-MTR32 (Multitrack Recording) Card Is Installed
Network Setup Screen
Saving the Current Settings
Routing
Input Routing
Setting Input Sources for Multiple Channels at the same Time in Blocks
Setting Inputs Sources for Multiple Channels at the same Time in Batches
Direct out Signal Output Routing
Insert Input and Output Routing
Output Routing
Setting Output Ports for Multiple Channels at the same Time
Setting Output Ports for Multiple Channels at the same Time in Batches
INPUT SOURCE SELECT Screen
DIRECT out PORT SELECT Screen
INSERT SEND PORT SELECT Screen
INSERT RETURN PORT SELECT Screen
OUTPUT PORT SELECT Screen
Modules
MODULE Screen
MODULE Screen Overview
MODULE (OVERVIEW) Screen
CH 1-40 MODULE (OVERVIEW) Screens
ST in 1-2 MODULE (OVERVIEW) Screens
FX RTN 1-4 MODULE (OVERVIEW) Screens
MIX 1-22 and MAIN L/R Master MODULE (OVERVIEW) Screens
MODULE (INPUT) Screen
Setting Digital Trim Values in Batches
MODULE (FX) Screen
Effect Parameters
MODULE (GATE/EXPANDER/DE-ESSER) Screens
Dynamics Parameters
MODULE (EQ) Screen
MODULE (GEQ) Screen
MODULE (COMP/DUCKER) Screen
Dynamics Parameters
KEY in SOURCE SELECT Screen
MODULE (SEND/PAN) Screen
MODULE (OUTPUT) Screen
MODULE Menu
Other Module Parameter Setting Screens
SENDS on FADER Function
SENDS on FADER Screen
SEND OVERVIEW Screen
MIX 1-22 Bus SEND OVERVIEW Screen
FX 1-4 Bus SEND OVERVIEW Screen
MAIN L/R Bus SEND OVERVIEW Screen
SEND OVERVIEW Menu
Mute Group and DCA Functions
Mute Group Function
DCA (Digital Control Amplifier) Functions
Dca/Mute Group SETUP Screen
DCA Assign Page
Mute Group Assign Page
Mute Group Master Page
MODULE NAME Screen
Setting and Editing User Module Names
Changing Set Module Colors
Setting Module Icons
Saving and Recalling Setting Data
Snapshot Functions
Using Snapshot Functions at the Top of the Menu Screen
Storing Snapshots
Recalling Snapshots
Snapshot List Screen
Library Menu
Copying Snapshots
SNAPSHOT RECALL SAFE Screen
PARAMETER SAFE Page
MODULE SAFE Page
SNAPSHOT IMPORT / EXPORT Screen
Exporting Snapshots
Importing Snapshots
Various LIBRARY Screens
LIBRARY Screen Overview
MODULE RECALL SAFE Screens
All System Data Screen
Saving All System Data
Loading All System Data
Backing up All System Data
Restoring All System Data
Restoring Factory Default Settings
Various Information Displays
INFORMATION Screen
STATUS Page
ERROR Page
Error/Alert Message Display
OPEN SOURCE SOFTWARE LICENSE Screen
Sonicview 16XP/24XP Error Screen SYSTEM Error/Alert Message List
Media Manage Screen
Formatting Media
Version Information Screen
Firmware Update Procedures
10 - Recording and Playback
RECORDER/PLAYER Screen
RECORDER Section
PLAYER Section
BROWSE Screen
BROWSE Screen for Recording Folder Selection
BROWSE Screen for Playback Media, Folder and File Selection
Setting the Recording Folder
Setting the Playback Folder
11 - USB Audio Interface Functions
Installing the Dedicated Software
Installing the Windows Dedicated Software
Uninstalling the Dedicated Software
Uninstalling the Windows Dedicated Software
Opening the Dedicated Software
Windows
Input Latency
Setting Sound Properties
Simultaneous ASIO/WDM Playback
Setting Procedures for Use with OBS Studio and Other Streaming Applications
12 - Multitrack Recorder
Maximum Recording Time
Formatting SD Cards
Projects and Takes
MTR Operation Modes
MULTI TRACK RECORDER Screen
Using the AUTO ROUTING Function
Switching MTR Operation Mode
REC READY/INPUT MONITOR Settings
MULTI TRACK RECORDER - MENU Screen
MULTI TRACK RECORDER - BROWSE Screen
Folder Structure Overview
Folder Structure
Recording File Names
File Format Overview
Managing Projects
Viewing Project and Take Lists
Project Operations
Creating New Projects
Selecting Projects
Deleting Projects
Changing Project Names
Basic Recording
Selecting the MTR Input Source
Recording
Checking Recorded Audio (Playing Recordings)
Recorder Functions
Locate Function
Repeat Playback Function
Automatic Recording Function
Pre-Recording Function
Punch In/Out Function
Automatic Punch In/Out Function
Undoing Auto Punch In/Out Operations (UNDO Function)
Editing Takes
Changing Take Names
Deleting Takes
Importing Files that Have Been Recorded on Other Devices
File Name Format
Preparation before Importing
Using Imported Files with this Unit
Mark Function
Adding Marks
Moving between Marks
Clearing Individual Marks
13 - List of Shortcut Operations
14 - Troubleshooting
15 - Specifications and Ratings
Internal Processing
Audio Performance
Analog Audio Input and Output Ratings
Digital Audio Input/Output Ratings
Control Input/Output Ratings
Other Input and Output Specifications
Stereo Recorder Specifications
Multitrack Recorder Specifications
Operating System and Computer Requirements
Windows
Mac
Other
Dimensional Drawings
16 - Block Diagram
17 - Parameter Tables
Sonicview 16XP/24XP Mixer Basic Parameters
Sonicview 16XP/24XP Mixer Basic Parameters (FX)
Sonicview 16XP/24XP Preset List
Advertisement
Quick Links
Download this manual
D01417320D
Sonicview 16XP
Sonicview 24XP
Multitrack Recording Console
REFERENCE MANUAL
V1.5.0
Table of
Contents
Previous
Page
Next
Page
1
2
3
4
5
Advertisement
Table of Contents
Need help?
Do you have a question about the Sonicview 16XP and is the answer not in the manual?
Ask a question
Questions and answers
Related Manuals for Tascam Sonicview 16XP
Music Mixer Tascam Sonicview 16 Reference Manual
(226 pages)
Music Mixer Tascam Sonicview 16 Reference Manual
(188 pages)
Music Mixer Tascam Sonicview 16 Owner's Manual
(140 pages)
DJ Equipment Tascam Sonicview 16 Owner's Manual
(44 pages)
Recording Equipment Tascam 102i Series Owner's Manual
(88 pages)
Recording Equipment Tascam 12 Manual
(2 pages)
Recording Equipment Tascam TASCAM TA-1VP Owner's Manual
Vocal producer (44 pages)
Recording Equipment Tascam Sonicview 24XP Reference Manual
Multitrack recording console (282 pages)
Recording Equipment Tascam DP-02 Owner's Manual
Tascam digital porta studio owner's manual dp-02, dp-02cf (80 pages)
Recording Equipment Tascam PORTASTUDIO 424 MKIII Owner's Manual
Tascam recording equipment user manual (48 pages)
Recording Equipment Tascam CC-222MKII Owner's Manual
Tascam cd recorder/cassette deck cc-222mkii owners manual (40 pages)
Recording Equipment Tascam DA-P1 Owner's Manual
Tascam digital audio tape recorder owner's manual (24 pages)
Recording Equipment Tascam CC-222SL Owner's Manual
Tascam owner's manual cd recorder/cassette deck cc-222sl (36 pages)
Recording Equipment Tascam DR-10L Pro Owner's Manual
32-bit float field recorder and lavalier mic (41 pages)
Recording Equipment Tascam Portastudio MF-P01 Owner's Manual
(16 pages)
Recording Equipment Tascam 564 Digital Portastudio User Manual
Digital audio multitrack (6 pages)
This manual is also suitable for:
Sonicview 24xp
Sonicview 16
Sonicview 24
Table of Contents
Print
Rename the bookmark
Delete bookmark?
Delete from my manuals?
Login
Sign In
OR
Sign in with Facebook
Sign in with Google
Upload manual
Upload from disk
Upload from URL


Need help?
Do you have a question about the Sonicview 16XP and is the answer not in the manual?
Questions and answers