Table of Contents
Advertisement
Quick Links
Advertisement
Table of Contents

Related Manuals for Bosch HCE7442 3U Series


Summary of Contents for Bosch HCE7442 3U Series
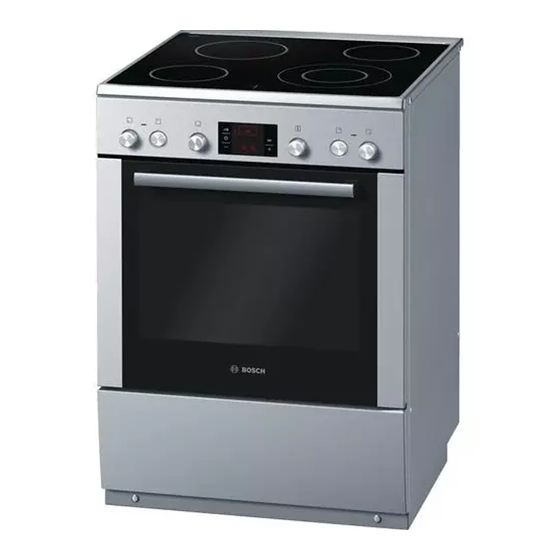
- Page 1 Free standing cooker HCE7442.3U [en] Instruction manual...
-
Page 3: Table Of Contents
Produktinfo Cooking area ..................8 The oven....................8 Additional information on products, accessories, replacement The cooking compartment ..............9 parts and services can be found at www.bosch-home.com and in the online shop www.bosch-eshop.com Your accessories ................9 Inserting accessories .................9 Optional accessories ..............10 After-sales service products ............ -
Page 4: Important Safety Information
: Important safety information Read these instructions carefully. Only then mains or switch off the circuit breaker in will you be able to operate your appliance the fuse box. safely and correctly. Retain the instruction A draught is created when the appliance Risk of fire! ■... - Page 5 content. Open the appliance door with installed. Refer to the instructions for care. installation. The hotplates and surrounding area Risk of electric shock! Risk of burns! ■ (particularly the hob surround, if fitted) Incorrect repairs are dangerous. Repairs ■ become very hot. Never touch the hot may only be carried out by one of our surfaces.
-
Page 6: Causes Of Damage
Never touch the appliance door. Allow the appliance to cool down. Keep children at a safe distance. Causes of damage Overview The following table provides an overview of the most frequent Caution! kinds of damage: Rough pot and pan bases scratch the ceramic. ■... -
Page 7: Installation And Connection
Installation and connection Electrical connection Opening the oven door The appliance must be connected to the mains by a licensed Press the lock upwards (picture A). expert. The regulations of your electricity supplier must be observed. Any damage arising from the appliance being connected incorrectly will invalidate the guarantee. -
Page 8: Cooking Area
Cooking area The oven Here is an overview of the control panel. The design depends Use the function selector and the temperature selector to set on the respective appliance model. the oven. Function selector Use the function selector to select the type of heating for the oven. -
Page 9: The Cooking Compartment
Temperature selector Buttons and display Use the temperature selector to set the temperature and the You can use the buttons to set various additional functions. You grill setting. can read the values that you have set in the display. Positions Function Button Zero position... -
Page 10: Optional Accessories
Optional accessories Enamel baking tray For cakes and biscuits. You can buy optional accessories from your after-sales service or from specialist retailers. You will find a variety of suitable Slide in the baking tray with the products for your oven in our brochures and on the Internet. sloping edge facing the oven door. -
Page 11: After-Sales Service Products
After-sales service products service, specialist retailers or (in some countries) online via the eShop. Please specify the relevant product number. You can obtain suitable care and cleaning agents and other accessories for your domestic appliances from the after-sales Cleaning cloths for stainless-steel surfaces Product no. 311134 Reduces the build-up of dirt. -
Page 12: Table Of Cooking Times
Table of cooking times Cooking times and heat settings may vary depending on the type of food, its weight and quality. Deviations are therefore The following table provides some examples. possible. When heating thick liquids, stir regularly. For bringing liquids to the boil, use heat setting 9. Ongoing cooking Ongoing cooking setting... -
Page 13: Setting The Oven
Setting the oven There are various ways in which you can set your oven. Here we will explain how you can select the desired type of heating and temperature or grill setting. You can select the cooking time and end time for your dish on the oven. Types of heating and temperature Example in the picture: 190 °C, Top/bottom heating. -
Page 14: Rapid Heating
Press the Clock button repeatedly until the End symbol The cooking time has elapsed flashes. A signal sounds. The oven switches off. Press the button You can see in the display when the meal will be ready. twice and switch off the function selector. Note: You can make changes as long as the symbol is flashing. -
Page 15: Childproof Lock
Childproof lock Oven To switch off: press and hold the key button until the symbol goes out. The oven has a childproof lock to prevent children switching it Notes on accidentally. You can set the timer and clock at any time. ■... -
Page 16: Detaching And Refitting The Rails
Cleaning the self-cleaning surfaces in the cooking Refitting the rails compartment First insert the rail into the rear socket, press it to the back The back wall in the cooking compartment is coated with a slightly (figure A), highly porous ceramic layer. This coating absorbs and and then hook it into the front socket (figure B). -
Page 17: Removing And Installing The Door Panels
Lift the panel up and pull it out (fig. C). Attaching the door Reattach the oven door in the reverse sequence to removal. When attaching the oven door, ensure that both hinges are inserted straight into the opening (figure A). The notch on the hinge must engage on both sides (figure B). -
Page 18: Troubleshooting
Troubleshooting Malfunctions often have simple explanations. Refer to the table Risk of electric shock! before calling the after-sales service as you may be able to Switch off the circuit breaker in the fuse box. remedy the fault yourself. Place a tea towel in the oven when it is cold to prevent Malfunction table damage. -
Page 19: Energy And Environment Tips
Energy and environment tips Here you can find tips on how to save energy when baking and energy losses. Note that cookware manufacturers often roasting in the oven and when cooking on the hob, and how to indicate the upper diameter of the saucepan. This is usually dispose of your appliance properly. - Page 20 more even browning. You can increase the temperature next Tables time if necessary. The tables show the ideal type of heating for the various cakes and pastries. The temperature and baking time depend on the If you preheat the oven, the baking time is shortened by 5 to 10 amount and composition of the mixture.
-
Page 21: Baking Tips
Small baked products Accessories Level Type of Temperature Cooking time heating in °C in minutes Choux pastry Baking tray 200-220 30-40 Puff pastry Baking tray 180-200 20-30 Universal pan + baking tray 180-200 25-35 2 baking trays + universal pan 5+3+1 160-180 35-45... -
Page 22: Meat, Poultry, Fish
Meat, poultry, fish Grilling When grilling, preheat the oven for approx. 3 minutes, before Ovenware placing the food into the cooking compartment. You may use any heatresistant ovenware. The universal pan is Always grill with the oven door closed. suitable for large roasts. As far as possible, the pieces of food you are grilling should be Glass ovenware is the most suitable. -
Page 23: Tips For Roasting And Grilling
Meat Weight Accessories and Level Type of Temperature Cooking time ovenware heating in °C, grill set- in minutes ting Sausages Sausages Wire rack Turn roasts, such as rolled turkey joint or turkey breast, halfway Poultry through the cooking time. Turn poultry portions after of the The weights indicated in the table refer to oven-ready poultry time. -
Page 24: Bakes, Gratins, Toast With Toppings
Bakes, gratins, toast with toppings Always place the ovenware on the wire rack. How well cooked the bake is will depend on the size of the dish If you are grilling directly on the wire rack, the universal pan and the height of the bake. The figures in the table are only should also be inserted at level 1. -
Page 25: Special Dishes
Special dishes Preheat the cooking compartment as indicated. Place the cups or jars on the cooking compartment floor and At low temperatures, 3D hot air is equally useful for incubate as indicated. producing creamy yoghurt as it is for proving light yeast dough. First, remove accessories, hook-in racks or telescopic shelves Proving dough from the cooking compartment. -
Page 26: Acrylamide In Foodstuffs
After 25 to 35 minutes of residual heat, remove the preserving Preserving jars from the cooking compartment. If they are allowed to cool Fruit for longer in the cooking compartment, germs could multiply, After approx. 40 to 50 minutes, small bubbles begin to form at promoting acidification of the preserved fruit. -
Page 27: Test Dishes
Test dishes These tables have been produced for test institutes to facilitate the inspection and testing of the various appliances. In accordance with EN 50304/EN 60350 (2009) and IEC 60350. Baking Baking on 2 levels: Always insert the universal pan above the baking tray. Baking on 3 levels: Insert the universal pan in the middle. - Page 28 Robert Bosch Hausgeräte GmbH Carl-Wery-Straße 34 81739 München Germany www.bosch-home.com *9000991930* 080494 9000991930...
Need help?
Do you have a question about the HCE7442 3U Series and is the answer not in the manual?
Questions and answers