
Related Manuals for SHOWTEC NanoQ 19 Q4 IP V1


Summary of Contents for SHOWTEC NanoQ 19 Q4 IP V1
- Page 1 MANUAL ENGLISH NanoQ 19 Q4 IP Ordercode: 43712 Highlite International B.V. – Vestastraat 2 – 6468 EX – Kerkrade – the Netherlands...
-
Page 2: Table Of Contents
NanoQ 19 Q4 IP Table of contents Warning ....................................3 Safety Instructions ................................. 3 Operating Determinations ............................5 Rigging .................................... 5 Connection with the mains............................6 Return Procedure ................................6 Claims ....................................6 Description of the device ..............................7 Features ..................................7 Beam angle: 25°, Spot angle: 55°... - Page 3 NanoQ 19 Q4 IP Troubleshooting ................................23 No Light ..................................23 No Response to DMX..............................23 Product Specification ..............................25 Dimensions ..................................26 Ordercode: 43712...
-
Page 4: Warning
Save the carton and all packing materials. In the event that a fixture must be returned to the factory, it is important that the fixture be returned in the original factory box and packing. Your shipment includes: Showtec NanoQ 19 Q4 IP Schuko to PowerCON connector power cable (1,5 m) ... - Page 5 If your Showtec device fails to work properly, discontinue use immediately. Pack the unit securely (preferably in the original packing material), and return it to your Showtec dealer for service.
-
Page 6: Operating Determinations
NanoQ 19 Q4 IP Operating Determinations ● This device is not designed for permanent operation. Consistent operation breaks will ensure that the device will serve you for a long time without defects. ● The minimum distance between light-output and the illuminated surface must be more than 1 meter. ●... -
Page 7: Connection With The Mains
NanoQ 19 Q4 IP Connection with the mains Connect the device to the mains with the power-plug. Always pay attention, that the right color cable is connected to the right place. International EU Cable UK Cable US Cable BROWN YELLOW/COPPER PHASE BLUE BLACK... -
Page 8: Description Of The Device
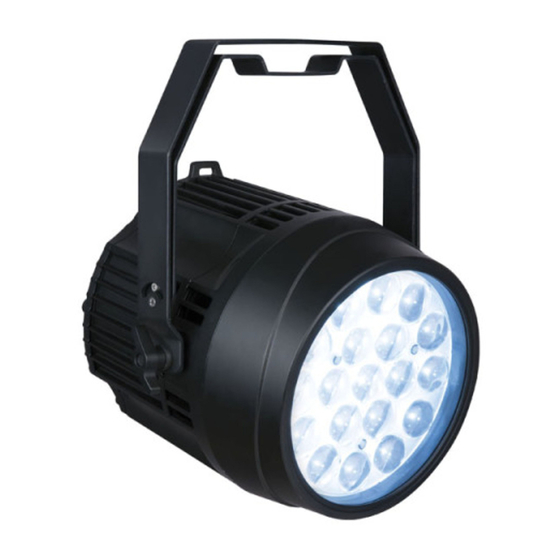
Features The Showtec NanoQ 19 Q4 IP is a rental outdoor LED spot with zoom function. It has a clear lens plate with an RGB backlight glare effect and a zoom range between 6° - 60°. It is equipped with 19 x RGBW 10W LEDs, to create a massive output. -
Page 9: Beam Angle: 25°, Spot Angle: 55
NanoQ 19 Q4 IP Beam angle: 28°, Spot angle: 55° Lux @ 1 - 5m 1346 Green 3834 Blue White 4874 1251 7570 FULL ON 8610 2212 1017 Beam angle: 10°, Spot angle: 29° Lux @ 1 - 5m 11150 4420 2093 1192... -
Page 10: Frontside
NanoQ 19 Q4 IP Frontside Fig. 01 01) 19 x 10W RGBW LEDs + 21 x RGB 5050 SMD 02) Adjustment screw 03) Double mounting bracket Ordercode: 43712... -
Page 11: Backside
NanoQ 19 Q4 IP Backside Fig. 02 04) LCD display + menu buttons 05) 3-pin DMX IP signal connector IN 06) PowerCON True1 power connector 100-240V IN 07) PowerCON True1 power connector 100-240V OUT 08) 3-pin DMX IP signal connector OUT Installation Remove all packing materials from the NanoQ 19 Q4 IP. -
Page 12: Control Modes
NanoQ 19 Q4 IP Control Modes There are 3 modes: Auto test Manual mode DMX-512 (5CH, 6CH, 7CH, 8CH, 9CH, 10CH, 14CH) One NanoQ (Auto test, Manual) 01) Fasten the effect light onto firm trussing. Leave at least 0,5 meter on all sides for air circulation. 02) Always use a safety cable (ordercode 70140 / 70141). -
Page 13: Fixture Linking
NanoQ 19 Q4 IP Fixture Linking You will need a serial data link to run light shows of one or more fixtures using a DMX-512 controller or to run synchronized shows on two or more fixtures set to a master / slave operating mode. The combined number of channels required by all the fixtures on a serial data link determines the number of fixtures the data link can support. -
Page 14: Control Panel
NanoQ 19 Q4 IP Control Panel LCD display MODE button SETUP button UP button DOWN button Fig. 04 Control Mode The fixtures are individually addressed on a data-link and connected to the controller. The fixtures respond to the DMX signal from the controller. (When you select the DMX address and save it, the controller will display the saved DMX address the next time.) DMX Addressing The control panel on the front side of the base allows you to assign the DMX fixture address, which is the... -
Page 15: Menu Overview
NanoQ 19 Q4 IP Menu Overview Ordercode: 43712... -
Page 16: Main Menu Options
NanoQ 19 Q4 IP Main Menu Options There are 7 menu modes: • 1. DMX Sets • 2. Option • 3. Backlight • 4. Man control • 5. Test • 6. Factory • 7. Reset The NanoQ19 Q4 IP starts up with screen: 1. -
Page 17: Curve
NanoQ 19 Q4 IP 2.1 Curve 01) Press the SETUP button to open the menu 02) Press the UP / DOWN buttons to scroll through the 4 curves modes. 03) Press the MODE button to go back to the previous step. 2.2 Dim mode 01) Press the UP / DOWN buttons to choose Dim mode. -
Page 18: Backlight
NanoQ 19 Q4 IP 3. Backlight With this menu you can set the backlight of the display. 01) Press the MODE button until the display shows 02) Press the SETUP button to enter the menu, the display shows 03) If you choose “Off”, the display will blackout after 15 seconds. 04) If you choose “On”, the display will always light up, even if there is no operation at the device. -
Page 19: Reset
NanoQ 19 Q4 IP 7. Reset With this menu you can reset the device. 01) Press the MODE button until the display shows 02) Press the SETUP button to enter the menu, the display shows 03) If you choose “Back”, you will go back to the main menu. 04) If you choose “Sure”, the device will reset. -
Page 20: Channels
NanoQ 19 Q4 IP Channel 10 – Background LED Colors (CH8 must be set between 001-255 1-17 18-35 Green 36-53 Blue 54-71 White 72-89 Red + Green 90-107 Red + Blue 108-125 Green + Blue 126-142 Red + Green + Blue (Full on) 143-192 Color pulse 193-224... -
Page 21: Channels
NanoQ 19 Q4 IP Channel 9 – Background LED Blue Dimmer intensity (CH1 must be set between 001-255 0-255 Blue from 0 – 100% Channel 10 – Zoom 0-255 Zoom from 0 - 100% 9 Channels Channel 1 – Total Dimmer 0-255 From black to brightest Channel 2 –... -
Page 22: Channels
NanoQ 19 Q4 IP Channel 5 – Background LED Red Dimmer intensity 0-255 Red from 0 – 100% Channel 6 – Background LED Green Dimmer intensity 0-255 Green from 0 – 100% Channel 7 – Background LED Blue Dimmer intensity 0-255 Blue from 0 –... -
Page 23: Channels
NanoQ 19 Q4 IP Channel 5 – White Dimmer intensity (CH1 must be set between 001-255 0-255 White from 0 – 100% Channel 6 – Zoom 0-255 Zoom from 0 - 100% 5 Channels Channel 1 – All LEDs Red Dimmer intensity 0-255 Red from 0 –... -
Page 24: Maintenance
NanoQ 19 Q4 IP Maintenance The Showtec NanoQ 19 Q4 IP requires almost no maintenance. However, you should keep the unit clean. Otherwise, the fixture’s light-output will be significantly reduced. Disconnect the mains power supply and then wipe the cover with a damp cloth. Wipe the front glass panel clean with glass cleaner and a soft cloth. - Page 25 Check that power is switched on and fixtures do not cables are plugged in. function at all. Internal fuse blown. ● Return the device to your Showtec dealer Fixtures reset The controller is not connected. ● Connect controller. correctly, but all 3-pin Out of the controller does not ●...
-
Page 26: Product Specification
NanoQ 19 Q4 IP Product Specification Model: Showtec NanoQ 19 Q4 IP Input Voltage: 100-240V AC, 50/60Hz Power consumption: 220W DMX linking: 30pcs Power linking @110V: 4 pcs Power linking @240V: 8 pcs Dimensions: 310 x 270 x 390 mm (LxWxH) -
Page 27: Dimensions
NanoQ 19 Q4 IP Dimensions Ordercode: 43712... - Page 28 ©2017 Showtec...
Need help?
Do you have a question about the NanoQ 19 Q4 IP V1 and is the answer not in the manual?
Questions and answers