Table of Contents
Advertisement
Quick Links
Styles and colo(u)rs may vary.
Made in China.
The owner's manual contains important safety information as well as assembly, use and
maintenance instructions.
The Ride-on Car must be assembled by an adult who has read and understands the
instructions in this manual.
Keep the package away from children and dispose of properly before use.
Keep this manual for future reference.
ASSEMBLY INSTRUCTION
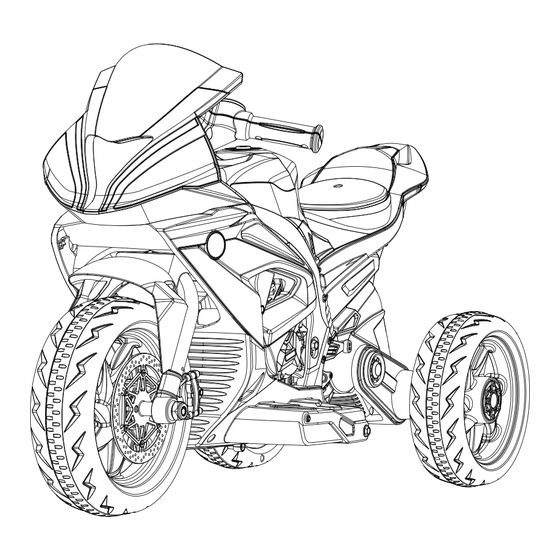
BMW HP4 RACE
BATTERY POWERED TRIKE
1/14
IN230300197V01_UK
370-211V70
Advertisement
Table of Contents

Summary of Contents for HOMCOM 370-211V70
- Page 1 IN230300197V01_UK 370-211V70 BMW HP4 RACE BATTERY POWERED TRIKE Styles and colo(u)rs may vary. Made in China. The owner’s manual contains important safety information as well as assembly, use and maintenance instructions. The Ride-on Car must be assembled by an adult who has read and understands the instructions in this manual.
-
Page 2: Specifications
About Your New Ride-On │ 1 On the purchase of your new BMW Ride-On. This ride-on will provide your child with many miles of riding of enjoyment. To help assure you and your rider a safe ride we ask you to please read this manual carefully, and keep it for future reference. -
Page 3: User Notice
User Notice │ 2 WARNING! • CHOKING HAZARD - Small parts. Not suitable for children under 36 months. The product contains small parts, keep children away when assembling. • ADULT ASSEMBLY REQUIRED. • Always remove protective material and poly bags and dispose before assembly. •... -
Page 4: Parts Diagram
Parts Diagram │ 3 HINT: Some parts shown are assembled on both sides of vehicle 4/14... -
Page 5: Parts List
Parts List │ 4 Q’ty (pcs) PART REMARKS PART NAME Vehicle body Left rear wheel Right rear wheel Ø10 washer Ø10 lock nut Hubcap Front wheel assembly Handle bar M5x35 machine screw Placed on the steering wheel Ø5 nut Placed on the steering wheel Faceguard Ø4x16 screw Spanner... - Page 6 Attach the Rear Wheels │ 5 Inside of right rear wheel Inside of right rear wheel Gear box Rear Bottom View Remove all the parts from the rear axle. Turn the vehicle body upside down. 1. Slide the right rear wheel onto the rear axle from the left side of the vehicle body, and make it match up with the motor on the vehicle body.
-
Page 7: Attach The Front Wheel
Attach the Front Wheel │ 6 Rear Bottom View Fork tube on the front wheel assembly Turn the vehicle body upright. 1. Raise up the vehicle body, insert the fork tube on the front wheel assembly passes through the hole in the bottom of the vehicle body. 2. - Page 8 Attach the Faceguard │ 7 1. Plug the connector on the faceguard in the connecotor on the vehicle body. And hide connectors into the hole in the vehicle body. 2. Fit the faceguard to the vehicle body. 3. Use a screwdriver to tighten two Ø4X16 screws to secure it. 8/14...
-
Page 9: Connect The Power Supply
Connect the Power Supply │ 8 1. Loosen the screws on the top of the seat with a screwdriver and remove the seat. 2. Plug the connector on the vehicle body into the connector from the battery. 9/14... - Page 10 Use Your Ride-on │ 9 IMPORTANT When not using, please turn the audio player off, avoid to reduce the battery life. IMPORTANT Always stop vehicle when changing the speed (if equipped) or direction to avoid damage the gears and motor. 1.
-
Page 11: Battery Disposal
Charging │ 10 WARNING! • ONLY an adult is allowed charge and recharge the battery! • This product with Charging Protection: when charging, all functions will be cut off. • The POWER SWITCH must be in the OFF position when charging. •... - Page 12 Maintaining │ 11 • It is the responsibility of the parent to check main parts of the toy before using. You must regularly examine for potential hazard, such as the battery,charge,cable orcord,plug,screwsare fastened,enclosure of other parts and that in the event of such damage, the toy must not be used until that damage had been properly removed.
-
Page 13: Troubleshooting Guide
Troubleshooting Guide │ 12 Possible Cause Solution Problem Vehicle does not run Battery low on power Recharge battery. Thermal fuse has tripped Reset fuse, see <Fuse> Check that the battery connectors are firmly plugged Battery connector or wires into each other. If wires are loose around the motor are loose contact your distributor please. - Page 14 If you have any questions, please contact our customer care center. Our contact details are below: 0044-800-240-4004 enquiries@mhstar.co.uk IMPORTER ADDRESS: MH STAR UK LTD Unit 27, Perivale Park, Horsenden lane South Perivale, UB6 7RH MADE IN CHINA Our products are suitable for ASTM F963;...


Need help?
Do you have a question about the 370-211V70 and is the answer not in the manual?
Questions and answers