Table of Contents
Advertisement
Quick Links
Advertisement
Table of Contents

Subscribe to Our Youtube Channel
Related Manuals for Broil King BSB405


Summary of Contents for Broil King BSB405
- Page 1 GAS GRILL CARE & USE / INSTALLATION BR0227-0-1222 Page 1 Page 1...
- Page 2 BROILMASTER Products • BSB324 ( N,P )- 1 GRILL MODELS: • BSB405 ( N,P )- 1 WA R N I N G Do not store or use gasoline or other flammable liquids or vapours in the vicinity of this or any other appliance. An propane cylinder not connected for use shall not be stored in the vicinity of this or any other appliance.
-
Page 3: Table Of Contents
TABLE OF CONTENTS BROILMASTER BBQ Models ......................2 Product Specifications ........................5 Overall Grill Dimensions ........................6 Control Identification ........................7 Warning Instructions ........................8 NOTICE: Commonwealth Of Massachusetts .................. 9 Grill Location..........................10 Location Of Your Grill (Using Your Grill During In Windy Conditions) ........11/12 Built-In Grill Dimensions ........................ -
Page 4: Product Specifications
Product Specifications Description 32" BSB324(N,P) 40" BSB405(N,P) Cooking Area, Sq. In. Total Cooking Area Sq. In. (Includes Warming Rack) Gas Type NAT (N) / LP (P) NAT (N) / LP (P) Conversion Kit, NAT to LP BR0225 (N only) BR0225 (N only) -
Page 5: Overall Grill Dimensions
Overall Grill Dimensions BSB324 / ” / ” 21 11/16” 32 7/16” 21 11/16” 32 7/16” 29” 29” BSB405 / ” / ” 21 11/16” 39 11/16” 21 11/16” 29” 39 11/16” 29” BR0227-0-1222 Page 5... -
Page 6: Control Identification
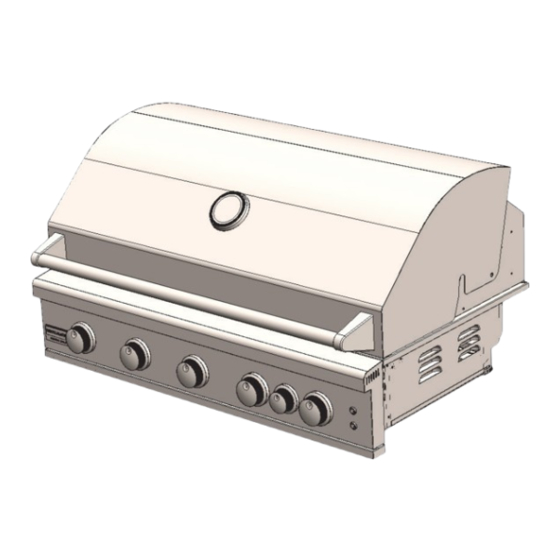
Control Identification BSB324 GRILL GRILL GRILL ROTIS GRILL LIGHT SWITCH BSB405 GRILL GRILL GRILL GRILL ROTIS GRILL LIGHT SWITCH Page 6 BR0227-0-1222... - Page 7 WARNING • Read this manual carefully and area away from heat and away from completely before using your grill, to where children may tamper with it. reduce the risk of fire, burn hazard Always leave tank outdoors. or other injury, and to ensure proper •...
-
Page 8: Notice: Commonwealth Of Massachusetts
NOTICE: Commonwealth Of Massachusetts 1. Massachusetts requires all gas be installed using a plumber or gas fitter carrying the appropriate Massachusetts license. 2. All permanently-installed natural gas or propane installations require a “T” handle type manual gas valve be installed in the gas supply line to this appliance. 3. -
Page 9: Grill Location
Grill Location WARNING • Never install this product into a combustible enclosure. Doing so could result in fire, property damage and personal injury. Combustible material is "anything" that can catch on fire. • Never locate the grill under a roof or overhang, in a building, garage, shed or other such enclosed area. -
Page 10: Location Of Your Grill (Using Your Grill During In Windy Conditions)
Location Of Your Grill USING YOUR GRILL IN WINDY BUT THERE ARE A FEW THINGS CONDITIONS: YOU CAN DO TO FURTHER PREVENT THE POSSIBILITY OF IMPROPER • As a high-performance gas appliance, HEAT BUILDUP: your BROILMASTER grill requires significant amounts of air to support •... - Page 11 Location Of Your GRILL (Cont'd.) BUILT IN LOCATION: • The grill drops into the cutout opening and sits on the sides and back of the grill. There is no need to fasten the grill • The BROILMASTER Built in model is to the island.
-
Page 12: Built-In Grill Dimensions
8 - 1/2" 20 - 1/2" 31" 32" 4 Burner BSB324(N,P) 8 - 1/2" 20 - 1/2" 38" 40" 5 Burner BSB405(N,P) 2 1/4” 2 1/4” 2 1/4” 21 11/16” 21 11/16” 21 11/16” 39 11/16” 32 7/16” 39 11/16”... -
Page 13: Vent Registers
Vent Registers LP Gas REQUIRED WHEN AN LP GAS TANK IS USED 10 Square Inch Minimum Each Register. 2 Per Side. 1 High And 1 Low 2-1/4" Minimum Ground To Vent Bottom INSULATED SLEEVE INSTALLATION INSTRUCTIONS IMPORTANT: Before you build the frame, you must take into consideration the total weight of the sleeve, grill and any finishing materials. -
Page 14: Built-In Sleeve Dimensions
32" 4 Burner BSB324(N,P) 38 - 7/16" 20 - 11/16" 8 - 3/8" 2 - 3/16" 2 - 3/16" 40 - 5/16" 40" 5 Burner BSB405(N,P) Cutout detail when countertop is overhung 4" square hole for gas and electrical connections, rear or bottom. -
Page 15: Electrical Requirements & Hook-Up
Electrical Requirements And Hook-up WARNING! ELECTRICAL GROUNDING • Product installation must meet local electric codes or, in the absence of local codes, the latest edition of the National Electrical Code ANSI/NFPA No. 70 or the Canadian Electrical Code CGA 1.6b2005. •... -
Page 16: Wiring Schematics
Wiring Schematics NOTE: This grill uses a transformer to provide power to the LED lights and work lights. The transformer should be secured to the island walls or cart back wall. Plug only into a Ground Fault Interrupter (GFI) protected circuit. FIREBOX LIGHTS, RIGHT AND LEFT LED LIGHTS... - Page 17 LP Gas Cylinder Safety LP Gas grill models are designed for use your gas grill is adjusted to have an outlet with a standard 20lb. Liquid Propane Gas pressure of 11" water column (W.C.) for (LP Gas) tank (sold separately. Never connection to an LP gas tank.
-
Page 18: Gas Requirements & Hook-Up
Gas Requirements And Hook - up LP GAS MODEL ONLY - TYPE 1 CHECK ALL CONNECTIONS CONNECTION WITH REGULATOR FOR LP GAS LEAKS. AND HOSE TO YOUR LP GAS TANK. Never test for leaks with an open flame. Prior to first use, at the beginning of each Connect and tighten the swivel nut of the season, or every time your LP Gas tank is gas hose to the grill manifold shown below. - Page 19 Gas Requirements And Hook-up (Cont'd.) CAUTION: DISCONNECTING A LIQUID PROPANE When the appliance is not in use the gas must be turned off at the tank. Place GAS (LPG) TANK FROM YOUR GRILL dust cap on cylinder valve outlet whenever the cylinder is not in use.
- Page 20 Gas Requirements And Hook-up (Cont'd.) CONNECTING TO A PERMANENTLY Whether the grill is built-in to a permanent structure, the use of a S/S Flex-Line is PLUMBED GAS LINE recommended from grill to gas supply. Follow the diagrams below when Connect the Swivel nut of the flex-line or connecting gas to your grill from a natural 12' Natural Gas Hose to the horizontal gas line or a permanently plumbed hard...
- Page 21 Gas Requirements And Hook-up (Cont'd.) GAS SAFETY INSTRUCTIONS CHECK ALL CONNECTIONS FOR GAS LEAKS Install a Shut - Off Valve at the gas supply source outdoors at a point after the gas Never test for leaks with an open flame. pipe exits the outside wall and before the Prior to first use and at the beginning flex-line or quick-disconnect hose.
-
Page 22: Important Safety Grilling Information
Important Grilling Safety Information 1. ALWAYS ENSURE THAT SOMEONE 8. Never use charcoal in this gas grill. IS AT THE GRILL AT ALL TIMES. 9. Be aware that cooking excessively 2. Prior to using grill ensure that all tie fatty meats and other such products down wires have been removed from will cause flare ups. -
Page 23: Converting Your Gas Grill
Converting Your Gas Grill Your BROILMASTER Gas Grill comes equipped to be converted to the opposite gas. Each grill comes "GAS SPECIFIC", and packed with a gas conversion kit. On the side of the GAS BBQ there will be a rating plate that specifies the "GAS TYPE" and orifice size as well as contains your SERIAL NUMBER for your warranty. - Page 24 Converting Your Gas Grill (Cont'd.) LOW HEAT ADJUSTMENT A. Remove knob. The valves on the grill feature an adjustable low setting. Due to fluctuations in gas pressure, heating value or gas conversion, you may feel it necessary to adjust gas flow in the low position.
-
Page 25: Converting Your Gas Grill Type
Converting Your Gas Grill Gas Type MAIN BURNER ORIFICE CHANGE #1 MOVE BURNER #2 REPLACE GAS ORIFICE #3 REPLACE BURNER #4 ADJUST AIR SHUTTER REAR BURNER ORIFICE CHANGE REMOVE AND REPLACE ORIFICE REMOVE BACK COVER BR0227-0-1222 Page 25... -
Page 26: Lighting The Burners
Lighting The Burners LIGHTING THE MAIN GRILL BURNERS: 1. Open BBQ hood . DO NOT ATTEMPT flow and hold for 2 seconds. Continue TO LIGHT GRILL WITH THE HOOD turning to the "HIGH" position. You CLOSED. should hear the "CLICK" and the 2. -
Page 27: Manually Lighting The Grill
Manually Lighting The Grill 1. Open the hood and wait five minutes allow any accumulated gas to dissipate. 2. Keep your face as far away from the burners as possible. 3. Light and insert a long-stem match, holding it near the Lighting Tube on the right side. 4. -
Page 28: Burner Type Identification
Burner Type Identification Your BROILMASTER grill comes standard with a Cast Stainless Steel burners and an infrared rotisserie burner. MAIN BURNER - This is the ROTISS BURNER - This is an standard main grill burner infrared burner found in the rear found under the vaporizers. -
Page 29: Direct Cooking Method
Direct Cooking Method Direct cooking involves placing food on grates over direct heat Burners. Use this method Direct cooking involves placing food on grates Turning too soon and too often is one of the for foods that take less than 20 minutes to cook or to sear larger items at the start of the over direct heat Burners. -
Page 30: Using The Rotisserie
Using The Rotisserie ( Optional Accessory ) WARMING RACK - Remove the warming THE BROILMASTER IR rotisserie system consists of three main parts - the motor, rack and, if needed, remove the grill racks the skewer which holds the food, and the to gain better clearance. -
Page 31: Cooking Tips
Cooking Tips COOK FOOD TO PROPER TEMPERATURES Cooking food safely requires that you raise the internal temperature of the meat high enough and for a long enough period of time to kill any food-borne bacteria that may cause illnesses. Color is not the best indicator that food is safe to eat. Use a high-quality probe thermometer to be sure your food is properly cooked. -
Page 32: Burner Cleaning And Adjustment
Burner Cleaning And Adjustment BETTER AIR ADJUSTMENT: Before removing burners ensure the gas supply is off and the knobs are in the “off ” position. Make sure the grill has completely Each grill burner is tested and adjusted cooled before proceeding. at the factory prior to shipment;... -
Page 33: Warnings
WARNING Spiders and small insects can spin webs and nest in the grill burner ventures which can lead to a gas flow obstruction resulting in a fire in and around the burner tubes. This type of “FLASHBACK FIRE” can cause serious grill damage and create an unsafe operating condition for the user. -
Page 34: Cleaning The Grill
Cleaning The Grill Proper care and maintenance will keep ROUTINE CLEANING OF THE GRILL INTERIOR - Burning-off excess food after your grill in top operating condition and every cookout will keep it ready for instant prolong its life. Follow these cleaning use. - Page 35 Cleaning The Grill (Cont'd.) CLEANING EXTERIOR STAINLESS TO HELP MAINTAIN THE FINISH OF STEEL SURFACES: STAINLESS STEEL FOLLOW THESE CLEANING PROCEDURES FOR THE Routine care and maintenance is required BEST RESULTS: to preserve the appearance and corrosion resistance of stainless steel. The fact is 1.
-
Page 36: Light Bulb Replacement
Light Bulb Replacement DO NOT TOUCH THE GLASS OF THE Avoid touching the glass of a new bulb. Halogen bulbs are very sensitive to the oils NEW REPLACEMENT BULB. found in human skin. Touching the bulbs may shorten their life. Pull the bulb straight Replace The Bulb out from the socket without twisting. -
Page 37: Warranty
WARRANTY TERMS FOR EMPIRE COMFORT SYSTEMS INC. BROILMASTER Stainless Steel Gas Grills Models: BSB324(N,P), BSB405(N,P) Empire Comfort Systems Inc. warranties this BROILMASTER stainless steel gas grill to be free from defects at the time of purchase and for the periods specified below. The grill must be installed by a qualified technician and must be maintained and operated safely, in accordance with the instructions in the owner's manual. -
Page 38: Master Parts Distributor List
MASTER PARTS DISTRIBUTOR LIST To Order Parts Under Warranty, please contact your local Empire dealer. See the dealer locator at www. empirecomfort.com. To provide warranty service, your dealer will need your name and address, purchase date and serial number, and the nature of the problem with the unit. To Order Parts After the Warranty Period, please contact your dealer or one of the Master Parts Distributors listed below. -
Page 39: Contacting Your Broilmaster Dealer
Contacting Your BROILMASTER Dealer Before calling your BROILMASTER Dealer, The serial number can be located on the please make sure you have the following rating plate which is located on the left side information: of the grill or on the pull-out drip tray lighting instructions and also on the underside of the •... -
Page 40: Broilmaster Parts List
Back Cover BR0196 BR0197 Warming Rack BR0198 BR0199 NOTE: Conversion kits contain 4 (BSB324) or (BSB405) main burner orifices and 1 rear burner orifice. LP Conversion kits contain 1 brass elbow. LP hose and regulator sold separately. Page 40 BR0227-0-1222... -
Page 41: Parts Diagram
Parts Diagrams 38a&b 39a&b 38a&b 38a&b 39a&b 38a&b 38a&b 39a&b 38a&b 39a&b 38a&b 38a&b 38a&b 39a&b 38a&b 39a&b 39a&b 39a&b 39a&b 39a&b BR0227-0-1222 Page 41... - Page 42 16" Insulated Sleeve BSASL16 BSABW16N Power Burner For Power Burner ACCESSORIES FOR ALL BROILMASTER STAINLESS STEEL GRILLS PART NUMBER DESCRIPTION FITS BSAGD12 Griddle, 12-Inch BSB324, BSB405 BSAMR32 Rotisserie Kit BSB324 BSAMR40 Rotisserie Kit BSB405 BSATY Smoker Tray BSB324, BSB405 NG12...
- Page 43 Sleeves, Side Burners, Covers And Island Accessories (Cont'd) DOORS, DRAWERS PART NUMBER DOORS AND DRAWERS (STAINLESS STEEL) BSAD1722 Single Door 17" W x 22" H BSAD2422 Single Door 24" W x 22" H BSAD2622D Double Doors 26" W x 22" H (Fits Under 26" Grill In Island) BSAD3422D Double Doors 34"...
- Page 44 BROILMASTER A Division of Empire Comfort Systems, Inc. Visit our web site at www.broilmaster.com GAS-FIRED If you have a general question about our products, please e-mail us at info@empirecomfort.com. If you have a service or repair question, please contact your dealer. BR227-0-1222...
Need help?
Do you have a question about the BSB405 and is the answer not in the manual?
Questions and answers