
Subscribe to Our Youtube Channel
Related Manuals for Metrohm 930 Compact IC Flex SeS


Summary of Contents for Metrohm 930 Compact IC Flex SeS
- Page 1 930 Compact IC Flex 930 Compact IC Flex SeS Manual – Short Instructions 8.930.8107EN / v3 / 2023-03-31...
- Page 3 Metrohm AG CH-9100 Herisau Switzerland +41 71 353 85 85 info@metrohm.com www.metrohm.com 930 Compact IC Flex 930 Compact IC Flex SeS 2.930.1400 Manual – Short Instructions 8.930.8107EN / v3 / 2023-03-31...
- Page 4 Disclaimer Deficiencies arising from circumstances that are not the responsibility of Metrohm, such as improper storage or improper use, etc., are expressly excluded from the warranty. Unauthorized modifications to the product (e.g. conversions or attachments) exclude any liability on the part of the manufacturer for resulting damage and its consequences.
-
Page 5: Table Of Contents
Connecting the leak sensor ............ 17 Connecting the eluent bottle ..........18 Installing the high-pressure pump ........20 Installing an inline filter ............. 21 Installing the pulsation absorber ........21 Injection valve ..............21 930 Compact IC Flex SeS (2.930.1400) ■■■■■■■■... - Page 6 Table of contents ■■■■■■■■■■■■■■■■■■■■■■ 5.10 Metrohm Suppressor Module (MSM) ....... 21 5.10.1 Inserting the rotors ..............22 5.10.2 Connecting the Metrohm Suppressor Module (MSM) ..... 23 5.11 Metrohm CO Suppressor (MCS) ........26 5.11.1 Connecting the MCS ............. 26 5.11.2 Installing the adsorber cartridge ..........
- Page 7 Removing the transport locking screws ..........15 Figure 4 Installing the tubing weighting and aspiration filter ......20 Figure 5 Metrohm Suppressor Module (MSM) – Connection capillaries ..24 Figure 6 Connecting the MCS ............... 26 930 Compact IC Flex SeS (2.930.1400)
-
Page 9: About This Quick Start Guide
In addition to an introduction, safety instructions and an overview of the instrument, you will also find information about instal- ling and operating the 930 Compact IC Flex SeS as well as information regarding the warranty. The comprehensive manual can be downloaded as a PDF file from the Internet. -
Page 10: Introduction
The software controls and monitors the device, evaluates the measured data and manages it in a database. The 930 Compact IC Flex SeS consists of the following modules: Housing The sturdy housing contains the instrument's electronic components, including their interfaces and one connector for a separation column. - Page 11 This lowers the background conductivity, improves detection sen- sitivity and minimizes the injection peak and system peak. Detector Metrohm offers a series of different detectors for various analysis tasks. A suitable detector type must be ordered as a separate device. Separation column The intelligent separation column separates different components accord- ing to their interactions with the column.
-
Page 12: Accessories And Additional Information
2.2 Accessories and additional information ■■■■■■■■■■■■■■■■■■■■■■ Accessories and additional information Additional information is available on the Metrohm website (https:// www.metrohm.com): Product family ■ Product versions ■ Accessories ■ Documents about the product ■ Downloading the accessories list NOTICE The accessories list is a part of the product documentation. Download the accessories list and store it as a reference. - Page 13 This symbol draws attention to a possible biological hazard. WARNING Warning of optical radiation CAUTION This symbol draws attention to possible damage to instruments or instrument parts. NOTICE This symbol highlights additional information and tips. 930 Compact IC Flex SeS (2.930.1400) ■■■■■■■■...
-
Page 14: Safety
3.1 Intended use ■■■■■■■■■■■■■■■■■■■■■■ 3 Safety Intended use The 930 Compact IC Flex SeS is used for the determination of anions, cati- ons or polar substances with sequential suppression using ion chromato- graphy. Sequential suppression consists of: Chemical suppression with a Metrohm Suppressor Module (MSM) and ■... -
Page 15: Requirements For Operating Personnel
The electrical safety when working with the instrument is ensured as part of the international standard IEC 61010. WARNING Only personnel qualified by Metrohm are authorized to carry out service work on electronic components. 930 Compact IC Flex SeS (2.930.1400) -
Page 16: Tubing And Capillary Connections
Damaged tubing ends lead to leakage. Appropriate tools can be used to loosen connections. Check the connections regularly for leakage. If the instrument is used mainly in unattended operation, then weekly inspections are manda- tory. ■■■■■■■■ 930 Compact IC Flex SeS (2.930.1400) -
Page 17: Flammable Solvents And Chemicals
The correct disposal of your old instrument will help to prevent negative effects on the environment and public health. More details about the disposal of your old instrument can be obtained from your local authorities, from waste disposal companies or from your local dealer. 930 Compact IC Flex SeS (2.930.1400) ■■■■■■■■... -
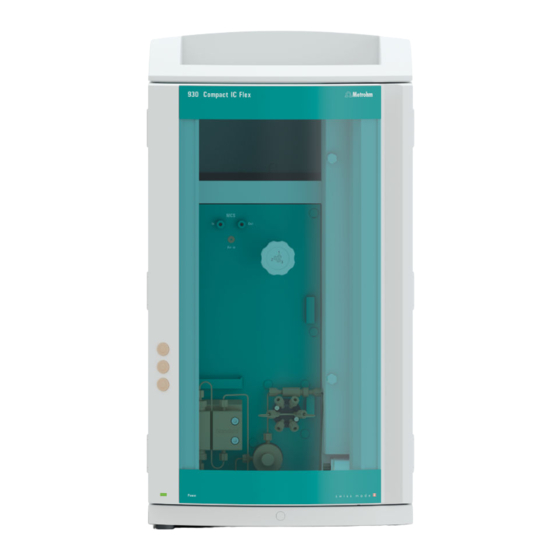
Page 18: Overview Of The Device
Offers space for the eluent bottle and addi- For hanging the separation column (iCol- tional accessories. umn). With column recognition. Column chamber Metrohm Suppressor Module (MSM) Inline filter Injection valve Pulsation absorber Base tray With leak sensor. ■■■■■■■■ 930 Compact IC Flex SeS (2.930.1400) -
Page 19: Rear
Room for the detector and the adsorption cartridge for the MCS. Rear Figure 2 Rear Bottle holder Drainage tubing connection For connecting the drainage tubing, which guides escaped fluids away from the bottle holder. 930 Compact IC Flex SeS (2.930.1400) ■■■■■■■■... - Page 20 For connecting the instrument to the com- Plugged with a stopper. puter with the USB cable (6.2151.020). 21 Power socket Power socket for connecting the power cable and power switch for switching the instrument on and off. ■■■■■■■■ 930 Compact IC Flex SeS (2.930.1400)
-
Page 21: Installation
(6.2739.000). ■ In order to achieve optimum analysis results, capillary connections in an IC system must be absolutely tight and free of dead volume. Dead volume 930 Compact IC Flex SeS (2.930.1400) ■■■■■■■■... -
Page 22: Removing Transport Locking Screws
These are located at the rear of the instrument and labeled with Transport security screws. Remove these transport locking screws before the initial start-up. Accessories For this step you need: 4 mm hex key (6.2621.030) ■ ■■■■■■■■ 930 Compact IC Flex SeS (2.930.1400) -
Page 23: Figure 3 Removing The Transport Locking Screws
Store the transport locking screws in a safe place. Reinsert the transport locking screws each time you transport the instrument a significant dis- tance. CAUTION The pumps may be damaged if you transport the instrument without inserting the transport locking screws. 930 Compact IC Flex SeS (2.930.1400) ■■■■■■■■... -
Page 24: Connecting The Drainage Tubing And Leak Sensor
Accessories For this step you need the following parts from the accessory kit: Vario/ Flex Basic (6.5000.000): 2 × silicone tubing (6.1816.020) ■ Y connector (6.1807.010) ■ You also need scissors. ■■■■■■■■ 930 Compact IC Flex SeS (2.930.1400) -
Page 25: Connecting The Leak Sensor
■■■■■■■■■■■■■■■■■■■■■■ 5 Installation Connecting the drainage tubing 5.4.2 Connecting the leak sensor Plugging in the leak sensor connection cable The leak sensor connection cable is coiled up in the base tray. 930 Compact IC Flex SeS (2.930.1400) ■■■■■■■■... -
Page 26: Connecting The Eluent Bottle
The tubing adapter for aspiration filter accessory set (6.2744.210) ■ This accessory set contains a filter holder, a clamping screw and tubing weighting. An aspiration filter (6.2821.090) ■ The adsorber tube (6.1609.000) ■ The SGJ clip (6.2023.020) ■ ■■■■■■■■ 930 Compact IC Flex SeS (2.930.1400) - Page 27 Always wear gloves when handling the aspiration filter. In order to avoid air bubbles after the installation of the aspiration fil- ter, we recommend pre-rinsing the aspiration filter with water or elu- ent. 930 Compact IC Flex SeS (2.930.1400) ■■■■■■■■...
-
Page 28: Installing The High-Pressure Pump
Tighten the aspiration filter to the filter holder. ■ Figure 4 Installing the tubing weighting and aspiration filter Installing the high-pressure pump The high-pressure pump is completely connected. No installation work is required. ■■■■■■■■ 930 Compact IC Flex SeS (2.930.1400) -
Page 29: Installing An Inline Filter
Rotor A (6.2844.000), must first be fitted into the adapter (6.2842.020), which can then be inserted into the suppressor housing. A connecting piece (6.2835.010) is used for all rotors for connecting the Metrohm Suppressor Module (MSM) to the IC system. 6.2842.020 6.2842.020 6.2844.000... -
Page 30: Inserting The Rotors
■ Connecting piece (6.2835.010) ■ Large rotors can be inserted directly into the rotor housing. CAUTION The rotor may be destroyed during start-up if not inserted correctly. Therefore, follow the following instructions exactly. ■■■■■■■■ 930 Compact IC Flex SeS (2.930.1400) -
Page 31: Connecting The Metrohm Suppressor Module (Msm)
5.10.2 Connecting the Metrohm Suppressor Module (MSM) The 3 entries and exits of the suppressor units, numbered 1, 2 and 3 on the connecting piece, each have 2 permanently installed PTFE capillaries. 930 Compact IC Flex SeS (2.930.1400) ■■■■■■■■... -
Page 32: Figure 5 Metrohm Suppressor Module (Msm) - Connection Capillaries
5.10 Metrohm Suppressor Module (MSM) ■■■■■■■■■■■■■■■■■■■■■■ Figure 5 Metrohm Suppressor Module (MSM) – Connection capillaries Outlet capillary for the eluent. Inlet capillary for the eluent. regenerant waste reg. Inlet capillary for the regeneration solution. Outlet capillary for the regeneration solu- tion;... - Page 33 To connect the bottles of the auxiliary solutions, you will need the follow- ing accessories: Accessories from the accessory kit: IC Vario/Flex SeS (6.5000.020) ■ Accessories from IC equipment: Dosino Regeneration (6.5330.190) ■ 930 Compact IC Flex SeS (2.930.1400) ■■■■■■■■...
-
Page 34: Metrohm Co Suppressor (Mcs)
Suppressor (MCS) ■■■■■■■■■■■■■■■■■■■■■■ 5.11 Metrohm CO Suppressor (MCS) 5.11.1 Connecting the MCS The MCS is connected between the Metrohm Suppressor Module (MSM) and the conductivity detector. Connecting the MCS Figure 6 Connecting the MCS Air aspiration capillary Pressure screw, short (6.2744.070) - Page 35 CW, through which air is aspirated. The CO adsorption cartridge CW is now ready for installation. NOTICE The new CO adsorption cartridge CW (6.2837.100) works without attached H O adsorption cartridge. 930 Compact IC Flex SeS (2.930.1400) ■■■■■■■■...
-
Page 36: Installing The Conductivity Detector
Until then, the detector inlet capillary has to be connected to the out outlet of the MCS using a long pressure screw (6.2744.090). Accessories For this step, you need the following accessories: Pressure screw, long (6.2744.090) ■ ■■■■■■■■ 930 Compact IC Flex SeS (2.930.1400) -
Page 37: Installing The Amperometric Detector
For this step, you need the following accessories: USB connection cable (6.2151.020) from the accessory kit: Vario/Flex ■ Basic (6.5000.000) Connecting the USB cable 1 Insert the USB cable into the PC connection socket on the rear of the instrument. 930 Compact IC Flex SeS (2.930.1400) ■■■■■■■■... -
Page 38: Connecting The Instrument To The Power Grid
Unplug the power plug immediately if you suspect that moisture has ■ gotten inside the instrument. Only personnel who have been issued Metrohm qualifications may ■ perform service and repair work on electrical and electronic parts. Connecting the power cord... -
Page 39: Initial Start-Up
Check whether the detector outlet capillary is connected to the Metrohm Suppressor Module (MSM)'s inlet capillary for rinsing solu- tion (labeled rinsing solution). - Page 40 Use the syringe to aspirate eluent until there are no more air bubbles in the eluent aspiration tubing. 5 Rinsing the instrument without columns Rinse the instrument (without columns) with eluent for 10 ■ minutes. ■■■■■■■■ 930 Compact IC Flex SeS (2.930.1400)
-
Page 41: Connecting And Rinsing The Guard Column
Guard column (suitable for separation column) ■ Connecting the guard column 6.2744.040 6.2744.070 6.2744.070 6.2744.070 Rinsing the guard column 1 Rinsing the guard column Place a beaker under the guard column's outlet. ■ 930 Compact IC Flex SeS (2.930.1400) ■■■■■■■■... -
Page 42: Connecting And Rinsing The Separation Column
(follow the information provided by the manufacturer). NOTICE Connect the separation column only after the initial start-up of the instrument. Until that point, insert a coupling (6.2744.040) instead of the guard column and separation column. ■■■■■■■■ 930 Compact IC Flex SeS (2.930.1400) - Page 43 Manual ▶ Manual control ▶ Pump – Flow: Increase gradually up to the flow rate recommended in the column leaflet. – On Rinse the separation column with eluent for approx. 10 minutes. ■ 930 Compact IC Flex SeS (2.930.1400) ■■■■■■■■...
-
Page 44: Conditioning
(arrow has to point in the direction of flow). Ensure that the eluent aspiration tubing is immersed in the eluent ■ and that there is enough eluent in the eluent bottle. ■■■■■■■■ 930 Compact IC Flex SeS (2.930.1400) - Page 45 4 Conditioning the system Continue rinsing the system with eluent until the desired stability level for the baseline has been attained . The instrument is now ready for measuring samples. 930 Compact IC Flex SeS (2.930.1400) ■■■■■■■■...
-
Page 46: Operation
■■■■■■■■■■■■■■■■■■■■■■ 6 Operation The 930 Compact IC Flex SeS is operated solely using the MagIC Net soft- ware. You can find information on operating the software in the tutorial for MagIC Net or in the online help. ■■■■■■■■ 930 Compact IC Flex SeS (2.930.1400) - Page 47 Equilibration ....... 32, 37 Capillary connection ... 26 Protection ......15 Connector of the cartridge . 26 Valve Installation ......26 See also "Injection valve" ..21 Filter see "Inline filter" ....21 930 Compact IC Flex SeS (2.930.1400) ■■■■■■■■...
Need help?
Do you have a question about the 930 Compact IC Flex SeS and is the answer not in the manual?
Questions and answers