Advertisement
OWNER' S GUIDE & INSTALLATION INSTRUCTIONS
TRIDUCER
®
Multisensor with Valve
Models: B744V, B744VL, B66V, B66VL, and SS544V
U.S. Patents: 4,898,029; 5,186,050, Re 33,982. Australian Patent 605,281
Canadian Patent 1,313,775. Japanese Patent 1851014.
IMPORTANT : Please read the instructions completely
before proceeding with the installation. These
instructions supersede any other instructions in your
instrument manual if they differ.
WARNING: B744V and B744VL
These models must be installed with a fairing (standard or
high-performance). If the multisensor is installed without a
fairing, there is insufficient surface area to seal the multi-
sensor to the hull. Water may leak into the hull causing
damage to the boat or possibly sinking.
WARNING: B744V, B744VL and SS544V
with a high-performance fairing
These models must be installed following the supplemental
instructions that came with the high-performance fairing. A
high-performance fairing requires an anti-rotation bolt. Failure to
install the anti-rotation bolt may result in the fairing rotating while
the boat is underway. The effect may be violent movement and
loss of steering. This could result in serious injury or death to
passengers and/or damage to the boat or other property.
CAUTION: Never Use Solvents!
Cleaners, fuel, paint, sealants, and other products may
contain strong solvents, such as acetone, which attack
many plastics greatly reducing their strength.
Applications
• Bronze housings recommended for fiberglass or wood hulls.
Caution: Never install a bronze housing in a metal hull because
electrolytic corrosion will occur.
• Stainless steel housing is compatible with all hull materials.
• Aluminum or steel hull —Use a stainless steel housing to
prevent electrolytic corrosion.
Caution: Installation requires an Airmar fairing and an isolation
sleeve .
• Caution : Never install a metal housing in a vessel with a
positive ground system .
Pretest
Connect the multisensor to the instrument and spin the
paddlewheel. Check for a speed reading (and the approximate air
temperature if applicable). If there is no reading or it is inaccurate,
return the instrument to the place of purchase.
Identify Your Model
The model name is printed on the cable tag.
Record the information found on the cable tag for future reference.
Part No._________________Date___________Frequency________kHz
B744V
Standard Fairing
Tools and Materials
Fairing ( mandatory for B744V, B744VL, SS544V )
Digital level or bubble level & protractor (installation with fairing)
Safety goggles
Dust mask
Band saw or hand saw (installation with fairing)
Rasp or power tool (installation with fairing)
Electric drill
Drill bit: 3mm or 1/8"
Hole saw: 51mm or 2"
Sandpaper
Mild household detergent or weak solvent (alcohol)
File (installation in a metal hull)
Marine sealant
Slip-joint pliers
Zip-ties
Water-based antifouling paint ( mandatory in salt water )
Installation in a cored fiberglass hull (see page 4):
Hole saw for hull interior: 60mm or 2-3/8"
Cylinder, wax, tape, and casting epoxy
Mounting Location
Acoustic Noise
Acoustic noise is always present and these sound waves can
interfere with the operation of the transducer. Background noise
from sources such as: waves, fish, and other vessels cannot be
controlled. However, carefully selecting the multisensor's
mounting location can minimize the affect of vessel generated
noise from the propeller(s) and shaft(s), other machinery, and
other echosounders. The lower the noise level, the higher the
echosounder gain setting that can be used.
Placement
Choose a location where:
• The water flowing across the hull is smoothest with a minimum
of turbulence and bubbles (especially at high speeds).
• The multisensor will be continuously immersed in water.
• There is a minimum deadrise angle.
• The transducer beam will be unobstructed by the keel or
propeller shaft(s).
• There is adequate headroom inside the vessel for the height of
the housing, tightening the nuts, and removing the valve
assembly and insert.
Caution : Do not mount the multisensor:
Near water intake or discharge openings
Behind strakes, fittings, or hull irregularities
Behind eroding paint (an indication of turbulence)
B744V
Advertisement
Table of Contents

Subscribe to Our Youtube Channel
Related Manuals for Airmar B66V


Summary of Contents for Airmar B66V
- Page 1 OWNER’ S GUIDE & INSTALLATION INSTRUCTIONS TRIDUCER ® Multisensor with Valve Models: B744V, B744VL, B66V, B66VL, and SS544V U.S. Patents: 4,898,029; 5,186,050, Re 33,982. Australian Patent 605,281 Canadian Patent 1,313,775. Japanese Patent 1851014. IMPORTANT : Please read the instructions completely before proceeding with the installation.
-
Page 2: Installation
• Orients the sound beam straight down by mounting the multisensor parallel to the water surface • Minimizes aerated water flowing over the transducer’s face by mounting it deeper in the water • High-performance fairing has a long streamlined shape for excellent performance above 15 knots (see Replacement Parts on page 6). - Page 3 Cutting the Standard Fairing 1. Measure the deadrise angle of the hull at the selected location using a digital level, or bubble level and protractor (see Figure 2). 2. Tilt the band saw table to the measured angle and secure the cutting fence (see Figure 4).
-
Page 4: Preparing A Cored Fiberglass Hull
top view of paddlewheel insert BOW ➤ paddlewheel insert housing and valve assembly paddlewheel insert detail Figure 6. Paddlewheel insert, blanking plug, and valve assembly (B744V shown) Installing the Paddlewheel Insert WARNING: The O-rings must be intact and well lubricated to make a watertight seal. -
Page 5: Check For Leaks
Use water-based antifouling paint only. Never use ketone-based paint since ketones can attack many plastics possibly damaging the transducer. Reapply paint every 6 months or at the beginning of each boating season. -
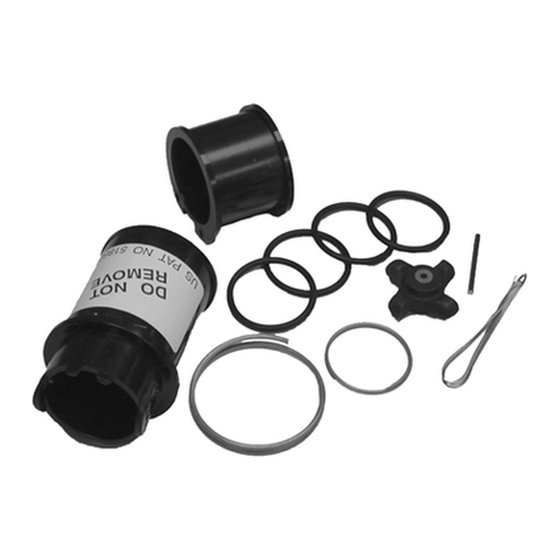
Page 6: Replacement Parts
Lost, broken, and worn parts should be replaced immediately and can be obtained through your marine dealer or instrument manufacturer. Model B744V B744VL 04-234-1 02-030 AIRMAR ® B66V B66VL sleeve SS544V 04-234-1 02-530-02 — Part Paddlewheel Kit spring Paddlewheel & Valve Kit...
Need help?
Do you have a question about the B66V and is the answer not in the manual?
Questions and answers