Advertisement
Quick Links
QUICK START GUIDE
Remove the Packaging
拆除包装
1:Unhook the latch on the wooden box and slowly open the ramp board
STEP
步骤
1:解开木箱上的锁扣,缓慢打开斜坡板
Take out the unboxing tool, unscrew the wooden box with an 8mm sleeve, remove all the
STEP 2:
plates, the ties, the stretch film
步骤
2:取出开箱工具,并用装有 8mm 套筒扳手,拆除木箱上的螺丝。移除所有的木板,去掉机器上
的固定带,泡沫和包装膜等外包装物
Use a 17mm open-end wrench, separate the 4 fixed supports from the wooden blocks and
STEP 3:
remove the 4 blocks below and the coaming under the machine
步骤
3:使用 17mm 的开口扳手,将 4 个固定脚撑与木块分离,取出下方的 4 块木块和机器下面的围
板
slowly move the machine from the base down the ramp board to the ground(At least
STEP 4:
two people needed)
步骤
4:慢慢将机器从底座沿斜坡向下移动到平稳地面(至少 2 人)
5: After moving the printer to the mounting position, rotate the four fixed support so that
STEP
they land on the ground to ensure that the printer's stability
步骤
5:将打印机移动到安装位置后,旋转 4 个固定脚撑,使其着地,确保打印机不会晃动
PN: 005-0801
FUNMAT PRO 410 Quick Start Guide
FUNMAT PRO 410 快速开机向导
1/ 20
REV: E08
Advertisement

Related Manuals for Intamsys FUNMAT PRO 410


Summary of Contents for Intamsys FUNMAT PRO 410
- Page 1 QUICK START GUIDE PN: 005-0801 REV: E08 FUNMAT PRO 410 Quick Start Guide FUNMAT PRO 410 快速开机向导 Remove the Packaging 拆除包装 1:Unhook the latch on the wooden box and slowly open the ramp board STEP 步骤 1:解开木箱上的锁扣,缓慢打开斜坡板 Take out the unboxing tool, unscrew the wooden box with an 8mm sleeve, remove all the...
- Page 2 QUICK START GUIDE PN: 005-0801 REV: E08 2/ 20...
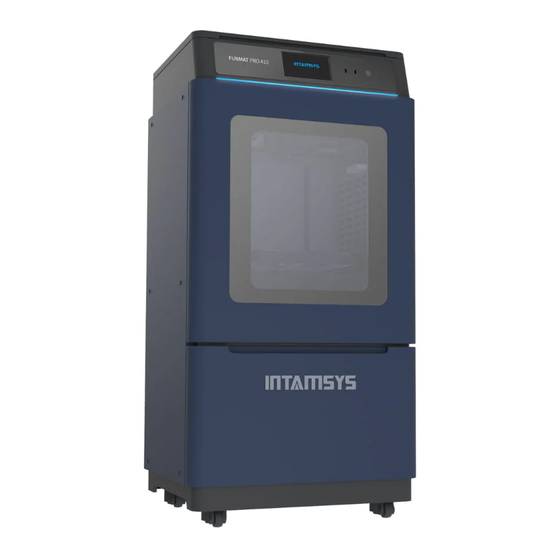
- Page 3 QUICK START GUIDE PN: 005-0801 REV: E08 Layout of Printer 机器整体结构 04Filament chamber/料箱 01Smart touch panel/智能触摸屏 05Filament shaft/料轴 02Top cover/机器顶部盖门 06Filament chamber door/料箱门 03Build plate/打印平台 07Liquid cooling unit/液冷系统单元 3/ 20...
- Page 4 QUICK START GUIDE PN: 005-0801 REV: E08 Prepare the Printer 机器开机前准备 1 Take out the accessory box 取出随机配件 1:Remove the back door screws with a special printed tool and remove the back door STEP 步骤 1:使用专用工具,移除后门紧固螺丝并拆卸后门 2:Rotate the z-axis screw clockwise manually to lift the Z-platform about 5cm STEP 步骤...
- Page 5 QUICK START GUIDE PN: 005-0801 REV: E08 2 Release extruder and XY modules 解除喷头和 XY 轴固定 1:Open the top door of the unit. STEP 步骤 1:打开机器前门 2:Unscrew and take away the stop block on the extruder linear guide. STEP 步骤 2:旋开并移除喷头上方直线导轨上的限位装置块...
- Page 6 QUICK START GUIDE PN: 005-0801 REV: E08 6:Cut the tie around the nozzle and remove it, then install the front cover back to the original STEP place. 步骤 6:剪断喷头上的固定扎带并取下,将喷嘴组前盖装回原处 3 Add coolant into the liquid cooling unit 添加冷却液 1:Unscrew the cover plate on the back of the printer. STEP 步骤...
- Page 7 QUICK START GUIDE PN: 005-0801 REV: E08 Take out the end of the tube. STEP 2: 步骤 2:将加注冷却液的管子取出 Take out the funnel from the accessory box and fix it on the end of the tube. Then STEP 3: feed750~950 ml Automotive Engine Anhydrous Coolant (with color preferred) into the liquid cooling unit.
- Page 8 QUICK START GUIDE PN: 005-0801 REV: E08 注:加入液体后,必须重新拧紧水管端盖。水冷系统单元液柜体积为 1000ml,低于 600ml 时会触发 液位传感器 4 Power on 启动机器 1. Check the power voltage of the socket: 220VAC 检查供电电源电压,确保满足220VAC要求 2. Insert one section of the power cord into the machine and one section into the socket prepared 将电源线一端接入机器,另一段插入准备好的电源插座...
- Page 9 QUICK START GUIDE PN: 005-0801 REV: E08 Click “System” icon, then press Arrow icon. STEP 2: 步骤 2:点击“系统”图标,然后按箭头图标 Click the icon. The printer will clear the former L-Clamper value and enter the setting STEP 3: screen. 步骤 图标。机器将清除之前预设的左侧喷头夹紧力值,并进入设置界面 3:单击 Click the “←” icon to let the two gears closer and closer. Pull the calibration bar up STEP 4: and down after every screen click until the calibration bar was just clamped by the gears and can be hold the position without your hand.
- Page 10 QUICK START GUIDE PN: 005-0801 REV: E08 步骤 4:单击“←”图标,让两个齿轮逐渐靠近。每次点击屏幕后,上下拉动校准棒,直到该校准棒 刚好被齿轮夹住,此时松开手校准棒也可保持该位置而不会下滑。然后,再一次点击“←”按钮,确 保夹得更紧。此时,传动齿轮刚好到达其合适的位置。然后点击“设置”保存值。值越高,夹紧力越 大。 Pay attention, the value cannot be too large, if it's too large it will be loose again. 注意,这个值不能太大,如果太大,又会变松 6 Install the build plate and junk box 安装打印平台和集料盒 6.1 Install the build plate 安装打印平台...
- Page 11 QUICK START GUIDE PN: 005-0801 REV: E08 步骤 2:选择上方“Move steps”中的“100mm” 选项后,点击“Z↓”(不多于 3 次)后将热床调 整到一个方便平台拆装的位置 Install the buildplate on the heating bed according to the buildplate insertion direction. STEP 3: 步骤 3:按照热床上标签显示方向插入打印平台 6.2 Install the junk box/安装集料盒 1:The z-axis is lowered to an appropriate position through screen operation to leave enough STEP operation space for the installation of the junk box.
- Page 12 QUICK START GUIDE PN: 005-0801 REV: E08 same with the one you want to load. 步骤 2:按下拉菜单选择材料。确保您选择的材料与您想要加载的材料相同。 3:And then press “Load” icon, there are in total 4 steps to load material, after 120 seconds STEP loading process ended, press “Finish”. (If the filament is not extruded out from the nozzle, long press “E↓”...
- Page 13 QUICK START GUIDE PN: 005-0801 REV: E08 8.1 Manual bed leveling/手动调平 1:Press the “Material” icon, and then press the icon. STEP 步骤 击“Material”图标,再点击图标。 1:点 Press the leveling icon , and then press Ok. STEP 2: 步骤 ,再点击 OK 2:点击调平图标 After the nozzle is heated up, press “Next”. STEP 3: 步骤...
- Page 14 QUICK START GUIDE PN: 005-0801 REV: E08 Press “Finish” to exit the process after adjustment is completed. STEP 5: 步骤 5:调平完成后,点击“Finish”键退出,结束调平过程。 8.2 Auto bed leveling 自动调平 Press the “Material” icon, and then press the icon. STEP 1: 步骤 图标 1:点击“Material”图标,再点击 Press the leveling icon, and then press OK.
- Page 15 QUICK START GUIDE PN: 005-0801 REV: E08 After the nozzle is heated up, the printer will test the leveling sensor. When seeing STEP 3: “Triggering succeeded”, then press “Next”. 步骤 3:待喷嘴加热后,机器将检测调平传感器。看到 “Triggering succeeded”提示信息后,点击 “Next”按钮确认。 Clean the nozzle and the buildplate, then adjust the Z axis with a leveling card with a STEP 4: thickness of 0.2mm according to the instruction on screen.
- Page 16 QUICK START GUIDE PN: 005-0801 REV: E08 The printer will perform a 3-points automatic leveling. STEP 7: 步骤 7:机器将进行三点自动调平 Press “Finish” after leveling is successful, the buildplate will move to the bottom of the STEP 8: chamber and then move upwards. 步骤...
- Page 17 QUICK START GUIDE PN: 005-0801 REV: E08 2:Press “Z↑” or “Z↓” to perform the left nozzle calibration by using a leveling card STEP with a 0.2mm thickness, and then press “Next”. (There are two steps for different adjusting accuracy, 0.05mm and 0.01mm.) 步骤...
- Page 18 QUICK START GUIDE PN: 005-0801 REV: E08 2:Check the printed model. Find the alignment line in X and Y direction and set the STEP corresponding offset X and Y values, press “OK”. 步骤 3:检查打印的模型。查找 X、Y 方向的对齐线,设置对应的偏移量 X、Y 值,按“OK”键。 If there are no lines are aligned with each other, set 15 first Lyon the corresponding direction (“+/-”), redo the printing and reset the offset value.
- Page 19 QUICK START GUIDE PN: 005-0801 REV: E08 Printing Process 打印过程 Insert the USB flash disk into the right socket on the panel, then press icon. STEP 1: 步骤 1:将 U 盘插入面板上正确的位置,然后点击 图标 Select the file, and then press “Open”. STEP 2: 步骤...
-
Page 20: Install Software
The detail warranty information please refer to user manual. 详细保修信息请参阅用户手册。 Support 技术支持 If you want to get more support, please contact the local reseller or regional technical support as below. 如果您想获得更多的支持,请联系当地经销商或 INTAMSYS 对应区域的技术支持: Asia Pacific: Support_APAC@intamsys.com; Europe, Middle East, & Africa:Support_EMEA@intamsys.com; North America /Latin America:Support_America@intamsys.com. 20 / 20...
Need help?
Do you have a question about the FUNMAT PRO 410 and is the answer not in the manual?
Questions and answers