Intamsys FUNMAT HT User Manual
Hide thumbs
Also See for FUNMAT HT:
- User manual (83 pages) ,
- Quick start manual (9 pages) ,
- Manual (2 pages)

Related Manuals for Intamsys FUNMAT HT


Summary of Contents for Intamsys FUNMAT HT
- Page 1 User Manual PN: 320-0207 REV: P02 FUNMAT HT 3D PRINTER User Manual High Performance Functional Materials 3D Printer...
- Page 2 3D models with the usage of Intamsuite, the user remains responsible to qualify and validate the application of the printed object for its intended use. INTAMSYS 3D Printers are open platform machines, meaning you can use any third party filaments, but to get the best results we recommend you use INTAMSYS certified filaments, as they are customized for made for INTAMSYS 3D Printers.
-
Page 3: Table Of Contents
CONTENTS ....................4 SAFETY AND COMPLIANCE Safety ....................................... 5 Hazards ....................................6 INTRODUCTION ............................7 About Intamsys ..................................8 Contact Details ..................................8 Printer Overview ................................. 9 Printer Specifications ..............................11 GETTING STARTED ..........................12 Accessories Checklist ..............................13 Unpacking The Printer ..............................14 Setting Up The Printer .............................. -
Page 4: Safety And Compliance
SAFETY AND COMPLIANCE It is very important to work safely with your FUNMAT HT 3D Printer. This chapter contains details about safety and hazards. Please read all information carefully to prevent accidents and injuries. -
Page 5: Safety
CE regulations and is protected against short-circuits, overloading, over voltage, and overheating. Make sure you only use the power supply cable you received from INTAMSYS. Mechanical Safety The machine has many moving parts, but the stepper motors do not have enough power to cause serious injuries. -
Page 6: Hazards
Caution: In case of emergency, disconnect the machine from the wall socket. Caution: The machine melts plastic during printing, and thus emits plastic odors. Make sure to set up the machine in a well-ventilated area. Please visit our website www.intamsys.com to learn more about support. -
Page 7: Introduction
INTRODUCTION INTAMSYS is an industrial 3D Printer manufacturer renowned for its “world’s most affordable PEEK 3D Printer”, FUNMAT HT. It has offices in Shanghai, Dongguan, and Nanjing, with resellers present across the world. -
Page 8: About Intamsys
Please visit www.intamsys.com for more information. Contact Details There are multiple ways to reach out to INTAMSYS as we have a strong online presence. E-mail: Send an e-mail to info@intamsys.com or support@intamsys.com, and we will... -
Page 9: Printer Overview
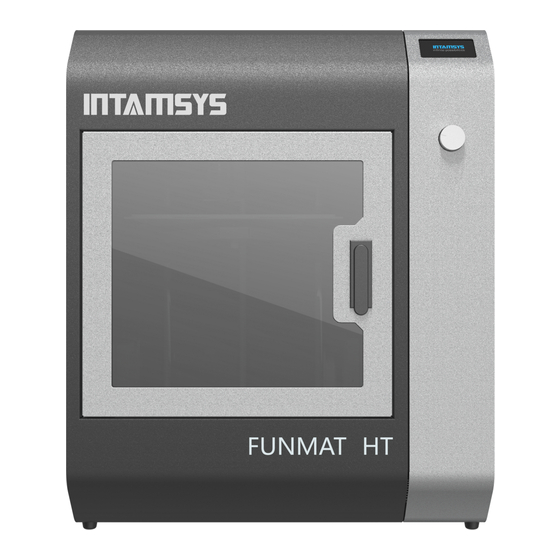
PRINTER OVERVIEW Printer Overview Display Screen Push/Rotate Button SD Card Slot Filament Box Front Door Lock Figure 2.1 Power Switch Power Socket USB Socket Figure 2.2... - Page 10 PRINTER OVERVIEW Cooling Nozzle Auto-Level Sensor Figure 2.3 Filament Tube Push Button--Control The Drive Gear Figure 2.4 Heating Bed (Under the Glass) Glass Plate Glass Holder Figure 2.5...
-
Page 11: Printer Specifications
PRINTER SPECIFICATIONS Printer Specifications PRODUCTS FUNMAT HT Printing Technology Extruder Single Extruder Diameter Swappable 0.25, 0.4, 0.6 and 0.8mm nozzle, default 0.4mm Layer Resolution 0.05-0.4mm Position Accuracy XY:0.025mm, Z:0.0025mm Print Speed 30-200mm/s Filament Diameter 1.75mm Build Platform PI + Glass Ceramics... -
Page 12: Getting Started
GETTING STARTED In this chapter you will find information on accessories, components of 3D Printers, and setting up your machine. -
Page 13: Accessories Checklist
ACCESSORIES CHECKLIST Accessories Checklist The accessories tray includes everything you need to use your FUNMAT HT 3D Printer. Below is the list of accessories included with the machine. Power Cord SD Card & Electronic Files Card Reader USB Cable Cutting Pliers... -
Page 14: Unpacking The Printer
UNPACKING THE PRINTER Unpacking The Printer Put the printer on flat ground before you unpack Step 1: Open the box. Figure 3.1 Step 2: Remove the accessories tray and take the machine out of the box. Figure 3.2 Figure 3.3... - Page 15 UNPACKING THE PRINTER Step 3: Gently place the printer on a flat, solid, and sturdy platform. Connect the power cable and power on your printer. Figure 3.4 Step 4: Lower down the build plate by clicking “Settings” → “Other Settings”→ “Buildplate to the bottom”.
- Page 16 UNPACKING THE PRINTER Figure 3.8 Please keep all packaging materials for warranty purpose.
-
Page 17: Setting Up The Printer
SETTING UP THE PRINTER Setting Up The Printer Release the Printing Head When you open the top door, you will find that the printing head is locked in position by four screws. Release the X & Y axes before you use the printer. - Page 18 SETTING UP THE PRINTER Figure 3.11 Figure 3.12...
- Page 19 Step 2: Flip the power switch to the ON (I) position. The printer will begin to boot. The touch- screen will turn on and the INTAMSYS logo followed by start-up code will be displayed for a brief period. Figure 3.15...
-
Page 20: Lcd Display Overview
LCD DISPLAY OVERVIEW The LCD Display can be broadly divided into seven sections. In this chapter, you will find a brief overview of the LCD Display. - Page 21 Figure 4.1 Introduction This is the screen that gets displayed when you switch on the machine. The Startup screen includes: a) Intamsys Logo; b) Screen Firmware Version, e.g. “LCD3P2 V2.0”; c) Machine Firmware Version “HT1.5_190313” Figure 4.2 Main Screen The welcome screen is immediately followed by the main screen as shown on the right.
- Page 22 LCD DISPLAY OVERVIEW Print Screen When you select the "Print" option, it will ask you to choose the file you wish to print. Once you choose your file, the screen on the right appears. On this screen, you can find the temperature of the nozzle, the build plate, and the chamber, as well as the material type being used, the total print time, and the print progress.
- Page 23 LCD DISPLAY OVERVIEW Axis In this screen, you can perform axis movement tasks such as homing the axis, moving the nozzle mechanism in the X, Y direction, and modifying retraction settings. Figure 4.7 Settings On this screen, you can modify nozzle temperature, build plate temperature, and chamber temperature.
-
Page 24: Regular Operation
REGULAR OPERATION This chapter provides information about regular day-to-day usage of the printer. - Page 25 LEVELING THE BUILD PLATE Leveling The Build Plate Build plate leveling is a prerequisite for successful printing of models. The objective of this exercise is to make sure the build plate is flat and at an exact distance from the nozzle. In order to adjust the gap between the nozzle and the print platform glass to about 0.2mm (about the thickness of a standard leveling card), you only need to use a leveling card...
- Page 26 LEVELING THE BUILD PLATE Manual Leveling Step 1: Take out the leveling card from the accessories tray. If you lose the card, you can also use two standard sheets of A4 paper (~0.2mm). Enter the main interface of the machine and click "Buildplate."...
- Page 27 LEVELING THE BUILD PLATE Step 3: Now repeat the same procedure for the left and right screws underneath the build plate. Figure 5.6 Figure 5.7 Step 4: For more accuracy, you need to repeat the manual level again, then complete leveling, you are ready to load the filament into the nozzle.
- Page 28 LEVELING BUILD PLATE Auto Leveling Step 1: Verify the auto leveling sensor is healthy. Go to the main menu, click “Settings” → “Other Settings” → “Test” → ”Leveling sensor”. The nozzle will be heated up. Wait for approx. 2 minutes, follow the instruction on the screen, use a removal Figure 5.9 tool to touch the nozzle, and then lift the...
- Page 29 LEVELING THE BUILD PLATE Step 2: Go back to the main menu, and click “Buildplate” → “Level-Sensor Calibrate”. Follow the instruction to complete the calibration. The nozzle heating temperature depends on the selected material. Figure 5.12 Figure 5.13 Figure 5.14 Note: This step is not required every time, if you change the nozzle set or leveling sensor, this step...
- Page 30 LEVELING THE BUILD PLATE Step 3: Click “Auto Level”, printer will automatically finish the auto leveling process without any human interference. Firstly, the machine will preheat the buildplate and chamber for a specific time, then preheat the nozzle. The preheating temperature and time follow the material selected.
- Page 31 CHOOSE MATERIAL Choose Material There are two ways to choose the material you want to print. Choose material directly in the default material list, like PLA, ABS, PC,…. And settings are shown in the screen bottom. Update material settings or name a new material. Figure 5.20 Step 1: Click “Customize”...
- Page 32 CHOOSE MATERIAL Figure 5.23 Figure 5.24 Figure 5.25...
- Page 33 LOADING FILAMENT Loading Filament Step 1: Open the door on the right side of the machine and place the filament spool on the bracket. Figure 5.26 Step 2: Take the end of the filament from the spool holder and pass it through the limit switch into the guide tube to reach the extruder.
- Page 34 LOADING FILAMENT Step 4: Refer to the guide on the screen and wait for the nozzle temperature to rise to the required temperature. Figure 5.30 Figure 5.31 Step 5: Select "Material" and choose the material you wish to load. Then select “Load Material.”...
- Page 35 LOADING FILAMENT Step 7: According to the timer on the screen, wait until the filament extrudes smoothly from the nozzle. The filament is now loaded. Figure 5.34 Figure 5.35 Figure 5.36 Figure 5.37...
- Page 36 LOADING FILAMENT Figure 5.38 Caution: The nozzle is very hot when the material is being extruded. Be careful not to touch the nozzle during the loading process.
- Page 37 PRINT FILE glue. Print File Step 1: Prepare the build plate for printing with Figure 5.39 Step 2: Insert your SD card with the file you wish to print. Select the “Print” button and select the file you wish to print. Wait for the machine to heat up to the required temperature.
- Page 38 PRINT FILE Step 3: When you select the settings icon during the printing process, the following screen will be displayed. Here you can change temperature, print speed, fan speed, material flow, and retraction settings. Figure 5.43...
-
Page 39: Change Material
CHANGE MATERIAL Change Material Change Material During Printing Step 1: Select the pause icon from the display. Figure 5.44 Figure 5.45 Step 2: When the nozzle stops, click settings and Select “Change Material”, then follow the instruction to pull out the guide tube and filament. - Page 40 CHANGE MATERIAL Step 3: When loading the new material, insert the material directly between the feed gear and groove and push a small amount of material through the nozzle by hand. Be sure to change the temperature settings to those required for your new material.
- Page 41 CHANGE MATERIAL Change Material When Filament Is Absent This printer has a function of Filament Absence Warning, that means the printer will pause and give the warning when filament is used up. After loading the new replaced filament, the printer will continue the printing.
- Page 42 CHANGE MATERIAL Change Material After Printing Step 1: If you want to change to a new material, go to "Material " then "Unload Material.” Figure 5.50 Step 2: Refer to the guide on the screen and wait for the nozzle temperature to rise to the required temperature.
-
Page 43: Other Functions
OTHER FUNCTIONS Other Functions Axis Movement The Axis section is for manually using the motors to adjust the X, Y, & Z coordinates. Figure 5.54 Home Select this function to refurn to the home X, Y, & Z positions. Figure 5.55 This function changes the X, Y, &... - Page 44 OTHER FUNCTIONS Retraction This option is used to set the max retraction length and max retraction speed. Retraction is mainly used to pull the filament back when the nozzle is traveling. Figure 5.57 Extruder This option is used to move the filament up or down.
- Page 45 OTHER FUNCTIONS Settings In the settings section you have the option to change the temperature of the nozzle, the build plate, and the chamber, as well as the language & some additional parameters. Figure 5.60 Nozzle Temperature Increase or decrease the nozzle temperature. On this screen, you have desired temperature and actual temperature.
- Page 46 OTHER FUNCTIONS Chamber Temperature Increase or decrease chamber temperature. On this screen, you have desired temperature and actual temperature. You can modify the desired temperature here. Long press (+) / (-) or use the dial to modify the temperature. Figure 5.63 Language Change the language.
-
Page 47: Change Nozzle Set
CHANGE NOZZLE SET Change Nozzle Set You will receive two nozzle sets with your printer. The one installed in the printer is the normal nozzle. It is designed for printing PLA, ABS, PC and materials with melting temperatures lower than 270℃. - Page 48 CHANGE NOZZLE SET Step 3: Use the screwdriver to take out the screws fixed on the nozzle set cover and the nozzle set. Figure 5.71 Figure 5.72 Step 4: Unplug the connectors (circled in the picture) behind the nozzle set. Be careful to pinch the buckles on the connectors when pulling them out.
- Page 49 CHANGE NOZZLE SET Step 5: Replace with the new nozzle set, ensure the upper PEEK tube is securely inserted into its position and the micro switch is just touch to the top surface of the nozzle set. Then plug the 6-pin connector into Pin Board’s P4 and plug the 2-pin connector into Pin Board’s P2.
-
Page 50: Change Nozzle Only
CHANGE NOZZLE ONLY Change Nozzle Only If you only want to change a nozzle, refer to the following steps. Step 1: To exchange the nozzle, first you need to remove all material from the nozzle. Figure 5.75 Step 2: Use the screwdriver to take out the screws fixed on the nozzle set cover. - Page 51 CHANGE NOZZLE ONLY Step 4: Load filament to push the residual material in the break, and cut off the filament end. Then retract the filament. Note: If the Teflon tube is accidently pushed out, remember to put it back. Figure 5.78 Step 5: Install the new nozzle and reassemble the nozzle set cover screws.
-
Page 52: Remove Print & Clean Supports
REMOVE PRINT & CLEAN SUPPORTS Remove Print & Clean Supports Once your 3D print is completed, it must be removed from the build plate when it is still in temperature maintain screen. Removing a print after it is cooling down may cause break of glass plate because the print may shrink more rapidly than the glass plate. -
Page 53: Maintenance
MAINTENANCE It is extremely important that the FUNMAT HT is always maintained properly. In this chapter, you will find various steps for doing so. -
Page 54: Updating Firmware
UPDATING FIRMWARE Updating Firmware Periodically, a new version of the INTAMSYS firmware is released. To keep your INTAMSYS FUNMAT HT up to date it is recommended you update your firmware regularly. This can be done on the FUNMAT HT machine via USB. -
Page 55: Cleaning The Glass Plate
CLEANING THE GLASS PLATE Cleaning the Glass Plate After printing, excess glue that was used to stick the print on the build plate will accumulate on the build plate. This causes uneven print surfaces, which will negatively affect future prints. So, the glass plate has to be cleaned regularly. - Page 56 CLEANING THE GLASS PLATE Step 3: Clean the glass plate with lukewarm water and dry it with a cloth. If necessary, you can also use a sponge and some soap. Figure 6.5 Step 4: Put the glass plate onto the platform. Align the three magnets on the glass plate to the magnet holders on the platform.
-
Page 57: Cleaning Feeder
ADDITIONAL CLEANING Cleaning Feeder After repeated printing, small plastic particles can accumulate in the knurled wheel in the material feeder. These can be cleaned by blowing air on the knurl wheel or by using a simple brush. It is also recommended you clean the feeder if you notice grinding of the filament. -
Page 58: Cleaning Nozzle
ADDITIONAL CLEANING Cleaning Nozzle While using the FUNMAT HT 3D printer, the nozzle can get dirty material sticking to it. This material doesn’t damage the printer but it is recommended you keep the nozzle clean in order to achieve the best print results. -
Page 59: Lubricate Axis
ADDITIONAL CLEANING Lubricate Axis When you notice small ridges on the surfaces of your 3D printed objects or feel that the X Y Z axes are dry, you should lubricate the X Y Z axes. This will help keep the printer running smoothly. In general, we suggest you lubricate the X and Y axes after 200-300 hours of printing, or one week with... -
Page 60: Filament Care
ADDITIONAL CLEANING Filament Care All filaments are highly sensitive to moisture. It is strongly recommended that filaments should be stored in a sealed container or bag with desiccant. A dry box is recommended when printing. Figure 6.12 If filament with moisture would result in foamy extrudate, stringing, underextrusion and rough surface. -
Page 61: Troubleshooting
TROUBLESHOOTING In this chapter, you will find solutions to various frequently occurring problems with 3D Prints. - Page 62 TROUBLESHOOTING Note: We referred to www.3dverstan.se for this content as the common problems while printing are the same across different FDM 3D Printers. Warping Warping mainly happens with ABS. Warping happens when the plastic cools and contracts. As the print cools down and shrinks slightly, it starts to pull in on itself.
- Page 63 TROUBLESHOOTING Shifted Layers If a printer suddenly shifts the layers it is most likely because one or more pulleys are not secured properly to the axis/ axes. Tighten the set screws that hold the pulleys in place very tightly. Another issue might be the head being too stiff. Add some sewing machine oil to solve this issue.
- Page 64 TROUBLESHOOTING Circles Not Round / Lines Not Touching When you are trying to print circles, it is possible they don’t come out perfectly circular. This problem stems from backlash caused by slack belts. To solve this issue the belts should be tightened. To tighten the belts, loosen the stepper motor, pull it downward or upward to tighten the belt and then tighten the stepper motor screws.
- Page 65 TROUBLESHOOTING First layer not sticking / Parts coming loose The most common cause of this problem is improper leveling of the build plate. It is very important that the build plate is perfectly leveled in relation to the movement of the print head and that the distance between the nozzle and the plate is as close to perfect as possible.
- Page 66 TROUBLESHOOTING Feeder Pressure The amount of pressure the feeder puts on the filament is adjustable. This pressure should be adjusted to the optimal level to prevent filament grinding. To adjust feeder pressure, fighten or loosen the screw above the feeder. Under Extrusion Under-extrusion is when the printer can’t supply the amount of plastic.
- Page 67 TROUBLESHOOTING Nozzle Clogged If the material can not come out of the nozzle, one major cause might be the nozzle being clogged. This happens when the nozzle temperature is much higher than the material melting point, or when the nozzle temperature is much lower than the material melting point.
-
Page 68: Software Overview
SOFTWARE OVERVIEW This section contains details about the INTAM-suite slicing engine developed in-house by INTAMSYS, based on the open source slicing software CURA. - Page 69 Step 1: You can download the software from the SD card provided with your printer. It is also available on our website: www.INTAMSYS.com. Follow the instructions to complete the installation. Step 2: Double click the software on the SD card provided.
- Page 70 DOWNLOAD AND INSTALL SOFTWARE Step 4: Choose all the components you wish to install with INTAMSUITE and click “Install.” Figure 8.3 Step 5: Wait a moment for the program to install the software. Figure 8.4 INTAM-suite is ready to use! Step 6: Step 7: Click "Finish."...
- Page 71 DOWNLOAD AND INSTALL SOFTWARE Select the model of your printer and click Step 8: "Add Printer", you are now ready to use INTAM- Suite with your machine type! Figure 8.6...
- Page 72 OVERVIEW OF VARIOUS SCREENS Overview of Various Screens File Screen On this screen you can perform regular operations like OPEN file, Save G-Code, etc. Figure 8.7 Edit Screen Figure 8.8 View Screen Figure 8.9...
- Page 73 OVERVIEW OF VARIOUS SCREENS Settings Screen Figure 8.10 Help Screen Figure 8.11 Figure 8.12...
- Page 74 USING SOFTWARE Using Software Step 1: Load STL. Figure 8.13 Step 2: Edit STL Make sure your object is laid flat on the platform. You can use the Rotate, Scale and Mirror buttons in the bottom-left corner to modify your objects. The viewing button is located in the top-right corner.
- Page 75 USING SOFTWARE If you would like to customize the print settings or you have special requirements for the print, you can go to “full settings” by clicking the “switch to full settings” option in the Expert menu. On this page, you can modify each print setting yourself.
-
Page 76: Glossary
GLOSSARY In this section, you can find definitions for various regularly used 3D Printing related terms. - Page 77 GLOSSARY Terminology Definition Numerical 3Doodler A kind of 3D Pen that can be used to draw three-dimensional objects. 3D Bioplotter Well reputed 3D Bio-Printing machine from Envision-tec. The process of creating cell patterns in a confined space using 3D printing 3D Bio-Printing technologies, where cell function and viability are preserved within the printed construct.
- Page 78 GLOSSARY Terminology Definition Additive Manufacturing File Format is an open standard for describing objects for additive manufacturing processes such as 3D printing. Amorphous Without a clearly defined shape or form. Anisotropic Object with physical properties that are different in different directions. Platform on which material gets extruded.
- Page 79 GLOSSARY Terminology Definition Catia Popular 3D Modeling software. CJP : A type of 3D Printing technology from 3D Systems, primarily for printing multi- Color-Jet-Printing color objects. CLIP Continuous Liquid Interface Production. A process used in the manufacturing sector that involves the use of computers CNC Machining to control machine tools.
- Page 80 GLOSSARY Terminology Definition Used to hold a workpiece during either a machining operation or some other Fixture industrial process. Flowrate The volume of fluid that passes per unit time. The common name for the most widely used numerical control (NC) G-Code programming language.
- Page 81 GLOSSARY Terminology Definition An object having a physical property which has the same value when measured Isotropic in different directions. Used to hold and guide a workpiece during either a machining operation or some other industrial process. A kind of tape used to avoid product warping during the printing process, Kapton Tape especially for ABS material.
- Page 82 GLOSSARY Terminology Definition MJF : Multi-Jet-Fusion Proprietary 3D Printing technology developed by HP. MJP : Multi-Jet Another term for Poly Jet Printing. Printing Monomer A molecule that can be bonded to other identical molecules to form a polymer. National Electrical Manufacturers Association offers standards for various NEMA products like Stepper Motors.
- Page 83 GLOSSARY Terminology Definition PolyJet 3D Printing works similarly to inkjet printing, but instead of jetting drops PJP : Polyjet Printing of ink onto paper, PolyJet 3D Printers jet layers of curable liquid photopolymer. Polylactic Acid is a type of 3D Printing filament made out of corn starch. Plastic Jet Printing Similar to FDM/FFF.
- Page 84 GLOSSARY Terminology Definition Open source rapid prototyping system that is capable of producing its own RepRap parts and can be replicated easily. A solid or liquid synthetic organic polymer used as the basis of plastics, Resin adhesives, varnishes, or other products. Resolution Layer thickness usually defined in micrometers.
- Page 85 GLOSSARY Terminology Definition A brushless DC electric motor that divides a full rotation into a number of equal steps. The motor's position can then be commanded to move and hold at one of Stepper Motor these steps without any feedback sensor (an open-loop controller), as long as the motor is carefully sized to the application.
- Page 86 GLOSSARY Terminology Definition Polyetherimide is an amorphous, amber-to-transparent thermoplastic with Ultem characteristics similar to PEEK. Ultraviolet is an electromagnetic radiation with a wavelength from 10 nm (30 UV Light PHz) to 400 nm (750 THz) generally used for curing in DLP process. A large open vessel for holding or storing liquids.
- Page 87 INTAMSYS TECHNOLOGY CO., LTD. www.intamsys.com 021-5846 5932 info@intamsys.com Floor, Building C9, No. 3188 Xiupu Road, Pudong New District, Shanghai, P.R.China 201315...
Need help?
Do you have a question about the FUNMAT HT and is the answer not in the manual?
Questions and answers