Apera Instruments Premium Series User Manual
5-in-1 tester
Hide thumbs
Also See for Premium Series:
- User manual (12 pages) ,
- User manual (11 pages) ,
- User manual (12 pages)

Related Manuals for Apera Instruments Premium Series


Summary of Contents for Apera Instruments Premium Series
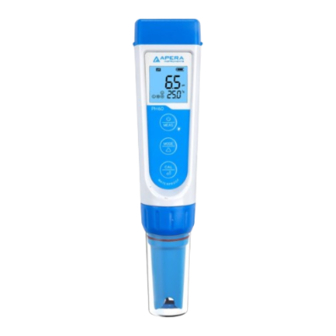
- Page 1 Premium Series PC60 5-in-1 Tester Conductivity Salinity Temperature User Manual IP67 9001 : 2015 APERA INSTRUMENTS, LLC aperainst.com v8.3 - 1 -...
-
Page 2: Table Of Contents
14. Troubleshooting Guide ........................11 15. Limited Warranty ..........................12 scan to watch video tutorial Thank you for choosing Apera Instruments PC60 Premium Multi-parameter Tester. Please read this manual before use in order to properly use and maintain the product. ATTENTION Ը... -
Page 3: What's In The Kit
1. What’s in the Kit Conductivity Calibration Solutions Calibration Solutions Lanyard Storage Solution pH Calibration Vials PC60 Tester Conductivity Calibration Vials 2. Keypad Functions Short press (tap): < 2 seconds Long press (hold): > 2 seconds Battery Cap 1. Short press to power on the tester and long press to power off the tester. -
Page 4: Preparation Before Use
3. Preparation before Use 3.1 Pull out the battery insulation slip, and take off the probe cap. 3.2 Rinse off the probe in pure water (preferably distilled or deionized water. RO water is ok) , then shake off excess water. 3.3 Perform calibration. - Page 5 4.1.5 Wait for the reading to stabilize (when stays on the screen), then short press to finish the first point calibration. After calibration is completed, the tester will return to measurement mode. Icon will appear at the bottom left of the screen, indicating a successful 1-point calibration (the middle point).
-
Page 6: Ph Measurement
5. pH Measurement 5.1 How to Take pH measurements 5.1.1 Short press to turn on the tester. Rinse off the probe in pure water, shake off excess water. Dip the probe in your sample solution at least 1 inch deep, make a quick stir and hold still. Record the stabilized reading as your pH measurement ( comes up and stays on screen). -
Page 7: Conductivity Measurement
Calibration Indication Icon Calibration Standards Measuring Range 84 μS 0 - 200 μS 1413 μS 200 - 2000 μS 12.88 mS 2 - 20 mS (2000 - 20,000 µS) For conductivity calibration solutions, we recommend replacing new solutions after 5 times of use to keep the standard solution’s accuracy. -
Page 8: Probe Cleaning
8. Probe Cleaning 8.1 The tester is only as accurate as the probe is clean. Always thoroughly rinse off the probe before and after each measurement with pure water in a container or with a wash bottle. 8.2 For tough contaminants, detach the sensor shield, soak the probe in Apera probe cleaning solution (AI1166) or detergent water for 30 minutes. -
Page 9: Technical Specifications
10.1 Parameter Settings Tutorial When the tester is turned off, long press to enter parameter settings → Short press to switch P1-P2-P3…P8 → Short press to select parameter (starts flickering) → Short press to change parameter → Short press to confirm the change → Long press to return to measurement mode. -
Page 10: Probe Replacement
12. Probe Replacement To replace a probe: 1) Take off the probe cap 2) Screw off the probe ring 3) Unplug the probe 4) Plug in the new probe (pay attention to the probe’s position); 5) Screw on the probe ring tightly. Soak the new probe in 3M KCL for 5-15 minutes. -
Page 11: Troubleshooting Guide
14. Troubleshooting Guide Trouble Reasons How to Fix Wait for the reading to get stabilized (smiley face to stay on the Pressing too soon ( screen) before pressing button to finish calibration. Incorrect calibration order ( Refer to Section 4.2.1 Poor quality calibration solutions Make sure your calibration standard solutions are fresh and clean, and made by a legitimate manufacturer. -
Page 12: Limited Warranty
We warrant this instrument to be free from defects in material and workmanship and agree to repair or replace free of charge, at option of APERA INSTRUMENTS, LLC, any malfunctioned or damaged product attributable to responsibility of APERA INSTRUMENTS, LLC for a period of TWO YEARS (SIX MONTHS for the probe) from the delivery.
Need help?
Do you have a question about the Premium Series and is the answer not in the manual?
Questions and answers
No matter what I do, remove batteries for 1 hour + I can not get rid of the M sign to re start calibration I hold hold on and mode button for 5 seconds and do not get factory setting and I get a sigh " r 1.5 I need to calibrate with 4PH after 7PH. The meter was bought brand new
To reset the Apera Instruments Series meter and remove the "M" sign so you can recalibrate with pH 4.00 after pH 7.00, follow these steps:
1. Turn off the meter.
2. Reset the meter to factory default settings:
- Long press the power button to enter parameter settings.
- Short press to navigate to P8 (Factory default setting).
- Select "Yes" to reset.
3. Reboot the meter.
4. Start calibration again:
- Calibrate first with pH 7.00.
- Then immediately calibrate with pH 4.00 without turning off the meter.
Turning off the meter between calibrations will require starting over from pH 7.00.
This answer is automatically generated