Advertisement
TRX
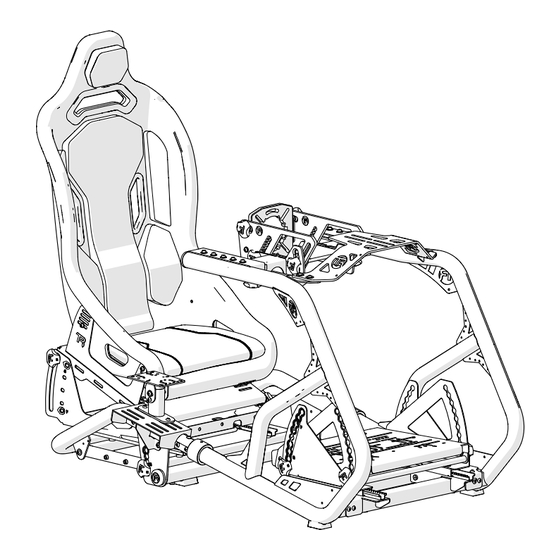
Assembly Guide
IMPORTANT: As there are different versions of each rig depending on your
region, please ensure that you are using the correct instruction set. The
part number below should match the part number labeled on your box
TRX-BLK & TRX-ALP
1
Published 2023‑10‑10
Advertisement

Related Manuals for TRAK RACER TRX-BLK


Summary of Contents for TRAK RACER TRX-BLK
- Page 1 IMPORTANT: As there are different versions of each rig depending on your region, please ensure that you are using the correct instruction set. The part number below should match the part number labeled on your box TRX-BLK & TRX-ALP Published 2023‑10‑10...
-
Page 2: Table Of Contents
TABLE OF CONTENTS Symbol Legend Part list Assembly Notes TRX Assembly Instructions Wheel Mounting Options Wheel Mount OPTION 1: Universal Mount Wheel Mount OPTION 2: Direct Drive Mount Wheel Mount OPTION 3: Fanatec DD1 / DD2 Wheel Mount OPTION 2: Fanatec CSL DD OPTIONAL: TRX-SEAT OPTIONAL: TRX Shifter Mount OPTIONAL: TRX Monitor Stand... - Page 3 IMPORTANT: As there are different versions of each rig depending on your region, please ensure that you are using the correct instruction set. The part number below should match the part number labeled on your box IMPORTANT: Due to the nature of cut aluminium profile, some metal shavings may still be present after our extensive QA cleaning process.
- Page 4 TRX PARTS LIST NOTE: Some screws and washers come pre-installed. These will be part of the parts list and will need to be removed and reattached according to the instructions. BOX #: TRX-BLK-PART1 TRX-WLB SL-M8-16 Wheel Tilt (Left) SB-M8-40 M8x40mm...
- Page 5 TRX PARTS LIST NOTE: Some screws and washers come pre-installed and will need to be removed and reattached according to the instructions. BOX #: TRX-BLK-PART2 BOX #: TRX-BLK-PART3 TRX-BA TRX-TB Frame Rear Pedal Assembly TRX-LH TRX-WLAP Frame Collar Wheel Mount Part 2 (Right)
- Page 6 NOTE tooltip TOP SIDE MONITOR STAND STRUT MONITOR BRACE FRONT SIDE INSIDE OUTSIDE PEDAL MOUNT SEAT PLATFORM SHIFTER SHIFTER MOUNT BACK SIDE INSTALLATAION ORDER FOR SCREWS & WASHERS HOW TO MEASURE SCREWS ① SCREW ② LOCK WASHER ③ WASHER (IF APPLICABLE) FLAT SCREW HEX SCREW BUTTON SCREW...
- Page 7 TRX-BA tooltip NOTE: Some screws and washers come pre-installed and will need to be loosened and reattached according to the instructions. Slightly loosen the two knob screws located at the back of the seat platform tooltip Turn the T-handle at the rear in either direction until the locking pins unseat from their holes and lift the top plate to the top “G”...
- Page 8 TRX-BA tooltip Remove the seat platform assembly by removing the 4 screws and set everything aside tooltip...
- Page 9 M8x16mm SH-M8-16 WL-M8 TRX-SLIDER NOTE: Some screws and washers come pre-installed and will need to be removed and reattached according tooltip to the instructions. Fit tabs into holes of one side of the handlebar, then tooltip squeeze handlebar and repeat for opposite side tooltip...
- Page 10 tooltip M8x16mm WF-M8 SH-M8-16 NOTE: Some screws and washers come pre-installed and will need to be loosened and reattached according to the instructions. Reattach the seat platform to the seat slider tooltip NOTE: If the locking seat platform locking mechanism are loose, tighten the eyelets on both sides by holding HOLD the centre turnbuckle and tighten accordingly.
- Page 11 TRX-LH TRX-RB NOTE: Some screws and washers come pre-installed and will need to be loosened and reattached according to the instructions. Remove pre-installed SB-M8-15 screws tooltip Slightly loosen the two set screws pre-installed in TRX-LH and slide over TRX-RB. Keep screws loose until STEP 18...
- Page 12 M8x15mm SB-M8-15 TRX-RB WC-M8 NOTE: Some screws and washers come pre-installed and will need to be loosened and reattached according to the instructions. tooltip tooltip Reinstall and keep screws slightly loose until STEP 17...
- Page 13 TRX-LH TRX-LB NOTE: Some screws and washers come pre-installed and will need to be loosened and reattached according to the instructions. Remove pre-installed SB-M8-15 screws tooltip Slightly loosen the two set screws pre-installed in TRX-LH and slide over TRX-RB. Keep screws loose until STEP 18...
- Page 14 M8x15mm TRX-LB SB-M8-15 WC-M8 NOTE: Some screws and washers come pre-installed and will need to be loosened and reattached according to the instructions. tooltip tooltip Reinstall and keep screws slightly loose until STEP 17...
- Page 15 M8x16mm TRX-TB SH-M8-16 WF-M8 NOTE: Some screws and washers come pre-installed and will need to be loosened and reattached according to the instructions. tooltip tooltip Remove pre-installed SH-M8-16 screws (x12) & WF-M8 (12) tooltip Re-install SH-M8-16 & WF-M8 Keep screws slightly loose until STEP 19...
- Page 16 NOTE Please skip to the pages corresponding to the wheelbase mounting method you have chosen for your TRX rig tooltip Option 1: Option 2: WM-WM6 (TR80-NWM6) WM-DD (TR80-NWMDD) Wheel Mounting Plate (Over-sized) Wheel Mounting, Direct Drive Page 17 Page 24 Option 3: Option 4: FANATEC PODIUM DD1 / DD2...
- Page 17 OPTION 1: Universal Wheel Mount Part # Image Description Check WM-NWM6 Wheel Mount, Universal Oversize WM6-TILT-L NWM6 Tilt (Left) WM6-TILT-R NWM6 Tilt (Right) TRX-KNOB8 8mm Knob Screw TRX-KNOB12 12mm Knob Screw SB-M8-20 Screw (Button), M8 x 20mm WL-M8 Washer (Lock), M8 SF-M6-16 Screw (Flat), M6 x 16mm RC-M5...
- Page 18 M6x16mm WM6-TILT-L WM6-TILT-R SF-M6-16 NOTE: Some screws and washers come pre-installed. These will be part of the parts list and will need to be removed and reattached according to the instructions. tooltip NOTE: Due to the slider blocks being made of aluminum, be cautious to not cross-thread when tightening screws tooltip...
- Page 19 TRX-SWP TRX-WLAP TRX-KNOB12 RC-M5 tooltip tooltip Press RC-M5 into groove of TRX-KNOB12 after threading in.
- Page 20 TRX-SWP TRX-KNOB12 RC-M5 TRX-WRAP NOTE: TR-SWRL is an assembly rod used to maintain alignment of your wheel mount. It will not add rigidity. This part can be removed if it impedes with your wheel base. tooltip tooltip Press RC-M5 into groove of TRX-KNOB12 after threading in.
- Page 21 M8x20mm WM-WM6 TRX-KNOB8 SB-M8-20 WL-M6 tooltip ORIENTATION 1...
- Page 22 tooltip M8x20mm WM-WM6 TRX-KNOB8 SB-M8-20 WL-M6 tooltip ORIENTATION 2 � � � � NOTE: In order to use WM-WM6 (TR80-NWM6) upside down, loosen the hand screws and slide both side plates down to one of the top 4 holes shown with the green checks above tooltip...
- Page 23 SKIP TO PAGE 34...
- Page 24 OPTION 2: Direct Drive Wheel Mount tooltip Part # Image Description Check BOX #: TR-TR8-SING WM-DD Wheel Mount, Direct Drive SH-M5-10 Screw (Button), M5x10 SH-M8-20 Screw (Button), M8x20 SH-M8-25 Screw (Button), M8x25 WF-M5 Washer (Flat), M5 WF-M8 Washer (Flat), M8 * NOTE: Extra hardware may be included as spare parts TR-80-NWMDD Published 2023‑10‑10...
- Page 25 M6x10mm TRX-WLB TRX-WRB SB-M6-10 NOTE: Some screws and washers come pre-installed. These will be part of the parts list and will need to be removed and reattached according to the instructions. tooltip tooltip...
- Page 26 M6x10mm TRX-WLAP TRX-WRAP TRX-SWRL SF-M6-10 NOTE: TR-SWRL is an assembly rod used to maintain alignment of your wheel mount. It will not add rigidity. This part can be removed if it impedes with your wheel base. NOTE: Use TR-SWRL for wheel bases 240mm or less in length (from mounting surface to back surface.
- Page 27 TRX-SWP TRX-KNOB12 TRX-KNOB14 RC-M5 tooltip Press RC-M5 into groove of TRX-KNOB12 after threading in.
- Page 28 TRX-SWP TRX-KNOB12 TRX-KNOB14 RC-M5 tooltip Press retaining clips into groove of TRX-KNOB12 after threading in.
- Page 29 M8x30mm SB-M8-30 WM-DD WL-M8 TRX-BUSH5 WF-M8 TRX-KNOB14 NOTE: FOR FRONT MOUNTED DIRECT DRIVE WHEEL BASES tooltip NOTE: Use screws and washers included in the TRX assembly. tooltip...
- Page 30 SKIP TO PAGE 34...
- Page 31 M6x10mm TRX-WLB TRX-WRB SB-M6-10 NOTE: Some screws and washers come pre-installed. These will be part of the parts list and will need to be removed and reattached according to the instructions. tooltip tooltip...
- Page 32 M6x10mm TRX-WLAP TRX-WRAP TRX-SWRL SF-M6-10 NOTE: TR-SWRL is an assembly rod used to maintain alignment of your wheel mount. It will not add rigidity. This part can be removed if it impedes with your wheel base. NOTE: Use TR-SWRL for wheel bases 240mm or less in length (from mounting surface to back surface.
- Page 33 TRX-SWP TRX-KNOB12 TRX-KNOB14 RC-M5 tooltip Press RC-M5 into groove of TRX-KNOB12 after threading in.
- Page 34 TRX-SWP TRX-KNOB12 TRX-KNOB14 RC-M5 tooltip Press retaining clips into groove of TRX-KNOB12 after threading in.
- Page 35 M8x35mm SB-M8-35 WL-M8 TRX-BUSH10 WF-M8 TRX-KNOB19 NOTE: FOR FANATEC DD1 / DD2 tooltip tooltip...
- Page 36 SKIP TO PAGE 34...
- Page 37 M6x10mm TRX-WLB TRX-WRB SB-M6-10 NOTE: Some screws and washers come pre-installed. These will be part of the parts list and will need to be removed and reattached according to the instructions. tooltip tooltip...
- Page 38 M6x10mm TRX-WLAP TRX-WRAP TRX-SWRL SF-M6-10 NOTE: TR-SWRL is an assembly rod used to maintain alignment of your wheel mount. It will not add rigidity. This part can be removed if it impedes with your wheel base. NOTE: Use TR-SWRL for wheel bases 240mm or less in length (from mounting surface to back surface.
- Page 39 TRX-SWP TRX-KNOB12 TRX-KNOB14 RC-M5 tooltip Press RC-M5 into groove of TRX-KNOB12 after threading in.
- Page 40 TRX-SWP TRX-KNOB12 TRX-KNOB14 RC-M5 tooltip Press retaining clips into groove of TRX-KNOB12 after threading in.
- Page 41 NS-M8 NOTE: FOR FANATEC CSL DD NOTE: Replace T-nuts (M6) included with CSL DD base with ones included with TRX (M8)
- Page 42 M8x40mm TRX-BUSH15 SH-M8-40 WL-M8 WF-M8 TRX-KNOB24 NOTE: FOR FANATEC CSL DD tooltip OPTION 4 NOTE: Use screws and washers included in the TRX assembly. tooltip...
- Page 43 SL-M8-16 TRX-KNOB14 For use with WM-WM6 tooltip For use with: WM-WMDD FANATEC CSL DD FANATEC DD1/DD2...
- Page 44 M8x15mm SH-M8-15 WF-M8 TRX-TVSP NOTE: Some screws and washers come pre-installed. These will be part of the parts list and will need to be removed and reattached according to the instructions. Keep screws slightly loose until STEP 18...
- Page 45 tooltip Tighten all screws tooltip Slide collar over the seam between frame tubes and tighten set screws...
- Page 46 tooltip tooltip Visually check that the pedal mount, wheel mount, and support strut are center aligned. Adjust if necessary. Once all parts are centered, tighten all screws indicated by the red arrows.
- Page 47 M8x16mm TRX-SPL TRX-SPR SB-M8-16 WF-M8 NF-M8 tooltip NOTE: Some screws and washers come pre-installed. These will be part of the parts list and will need to be removed and reattached according to the instructions. tooltip Adjust using slots according to preference Keep screws loose until STEP 21...
-
Page 48: Optional: Trx-Seat
OPTIONAL: TRX Seat Part # Image Description Check BOX #: TR-TR8-SING TRX-S01 TRX-S02 TRX Seat TRX-S03 SH-M8-25 Screw (Hex), M8x25 WF-M8 Nut (Flange), M8 * NOTE: Extra hardware may be included as spare parts TRX-S01, TRX-S02, TRX-S03 Published 2023‑10‑10... - Page 49 M8x25mm SA-TRX SH-M8-25 WF-M8 NOTE: Some screws and washers come pre-installed. These will be part of the parts list and will need to be removed and reattached according to the instructions. tooltip Adjust height and angle using holes according to preference Install front screws first ④...
- Page 50 Sit in seat and center by aligning your line of sight with the center of the rig tooltip Once centered, tighten all screws to fix seat in place...
-
Page 51: Optional: Trx Shifter Mount
OPTIONAL: TRX Shifter Mount Part # Image Description Check BOX #: TR-TR8-SING TRX-GLA TRX Shifter Mount SH-M8-16 SCREW (HEX), M8x16mm WF-M8 WASHER (FLAT), M8 * NOTE: Extra hardware may be included as spare parts TRX-GLA Published 2023‑10‑10... - Page 52 TRX-GLA NOTE: Some screws and washers com pre-installed. These will be part of the parts list and will need to be removed and reattached according to the instructions. tooltip...
-
Page 53: Optional: Trx Monitor Stand
OPTIONAL: TRX Monitor Stand tooltip Version A Part # Image Description Check BOX #: TR-TR8-SING SH-M8-16 Screw (Hex), M8x16 SH-M8-10 Screw (Hex), M8x10 WF-M8 Washer (Flat), M8 NF-M8 Nut (Flange), M8 BM-IS Integrated Single Monitor Mount VM-SIN-01 VESA Mount * NOTE: Extra hardware may be included as spare parts TR-TRX-SING Published 2023‑10‑10... - Page 54 OPTIONAL STEP: If a monitor position closer to the driver is desired in the Formula position, the monitor strut can be moved forward and mounted to the accessories mounting location on the frame. tooltip tooltip M8x16mm SH-M8-16 WF-M8 NF-M8 BM-IS tooltip Adjust monitor distance using slots...
- Page 55 VM-SIN-01 tooltip NOTE: Due to the large variety of spacers and screws, TR may not include mounting hardware. When adding mounting screws ensure that the screw is an appropriate size or else you may damage your monitor. Mount VM-SIN-02 to monitor using a combination of screws and washers to suit your specific monitor mounting points...
- Page 56 OPTIONAL: TRX Monitor Stand tooltip Version B Part # Image Description Check BOX #: TR-TR8-SING SH-M8-16 Screw (Hex), M8x16 SH-M8-10 Screw (Hex), M8x10 WF-M8 Washer (Flat), M8 NF-M8 Nut (Flange), M8 BM-IS Integrated Single Monitor Mount VM-SIN-02 VESA Mount * NOTE: Extra hardware may be included as spare parts TR-TRX-SING Published 2023‑10‑10...
- Page 57 OPTIONAL STEP: If a monitor position closer to the driver is desired in the Formula position, the monitor strut can be moved forward and mounted to the accessories mounting location on the frame. tooltip tooltip M8x16mm SH-M8-16 WF-M8 NF-M8 BM-IS tooltip Adjust monitor distance using slots...
- Page 58 VM-SIN-02 NOTE: Due to the large variety of spacers and screws, TR may not tooltip include mounting hardware. When adding mounting screws ensure that the screw is an appropriate size or else you may damage your monitor. Mount VM-SIN-02 to monitor using a combination of screws and washers to suit your specific monitor mounting points...
-
Page 59: Optional: Vesa Mount Extension Arms
OPTIONAL: VESA MOUNT EXTENSION ARMS ooltip Part # Description Check BOX #: TR-80B VM-02-A VESA Extension A VM-02-B VESA Extension B SF-M8-16 Screw (Flat), M8x16 NL-M6 Nut (Locking), M6 * NOTE: Extra hardware may be included as spare parts TR-80B Published 2023‑10‑10... - Page 60 M6x16mm SF-M6-16 NL-M6 VM-02-A VM-02-B NOTE: For use with monitors with mounting hole spacing larger than 100mm oltip V M -S IN -0 1 V M -S IN -0 2...
-
Page 61: Optional: Locking Wheels
OPTIONAL: LOCKING WHEELS Part # Description Check BOX #: TR-WKIT-2 CA-WKIT-F Caster Wheels, Free CA-WKIT-L Caster Wheels, Locking * NOTE: Extra hardware may be included as spare parts TR-WKIT-2 Published 2023‑10‑10... - Page 62 NF-M8 CA-WKIT-F CA-WKIT-L tooltip LOCK NO LOCK LOCK...
- Page 63 tooltip Adjust height and level rig Tighten nut...
- Page 64 FINISHED Share your build online and tag us to be featured! @trakracer @trakracer @trak_racer...
Need help?
Do you have a question about the TRX-BLK and is the answer not in the manual?
Questions and answers