Table of Contents
Advertisement
Quick Links
Installer: Leave this manual with the appliance. Consumer: Retain this manual for future reference.
READ INSTRUCTIONS CAREFULLY: YOUR SAFETY IS IMPORTANT TO YOU AND TO OTHERS.
Read and follow all instructions. Place instructions in a safe place for future reference. Do not allow anyone
who has not read these instructions to assemble, light, adjust or operate the heater.
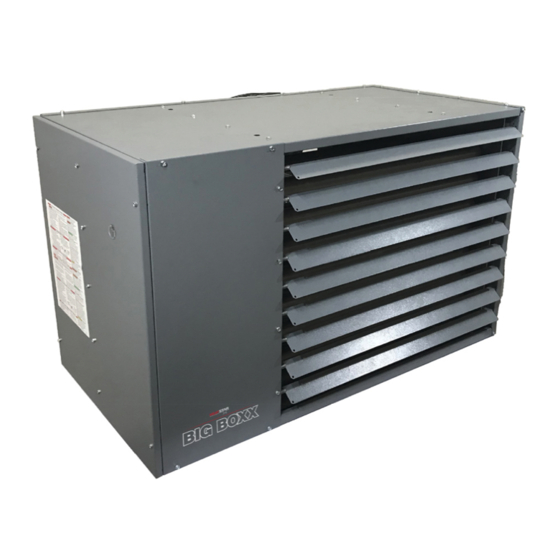
HSU100NGPALP
HSU100NGPAL
HSU125NGPALP
HSU125NGPAL
HSU150NGPALP
HSU150NGPAL
HSU200NGPALP
HSU200NGPAL
HSU250NGPALP
HSU250NGPAL
HSU300NGPALP
HSU300NGPAL
HSU400NGPALP
HSU400NGPAL
This product is approved for sale and
installation in the states of California
and Massachusetts.
WARNING:
FIRE OR EXPLOSION HAZARD
Failure to follow safety warnings exactly
could result in serious injury, death or
property damage.
Be sure to read and understand the
installation, operation and service instructions
in this manual.
Improper installation, adjustment, alteration,
service or maintenance can cause injury or
property damages.
WARNING: If the information in these instructions are not followed exactly, a fire or explosion may result causing
property damage, personal injury or loss of life.
WWW.HEATSTARBYENERCO.COM
OPERATING INSTRUCTIONS
AND OWNER'S MANUAL
MODELS:
HSU100NGPSSP
HSU100NGPSS
HSU125NGPSSP
HSU125NGPSS
HSU150NGPSSP
HSU150NGPSS
HSU200NGPSSP
HSU200NGPSS
HSU250NGPSSP
HSU250NGPSS
HSU300NGPSSP
HSU300NGPSS
HSU400NGPSSP
HSU400NGPSS
UNIT HEATER
FOR INDUSTRIAL/COMMERCIAL USE
Do not store or use gasoline or other flammable vapors
and liquids in the vicinity of this or any other appliance.
-WHAT TO DO IF YOU SMELL GAS:
Ǟ DO NOT try to light any appliance.
Ǟ DO NOT touch any electrical switch, do not
use any phone in your building.
Ǟ Leave the building immediately.
Ǟ Immediately call your gas supplier from a
phone remote from the building. Follow the
gas suppliers instructions.
Ǟ If you cannot reach your gas supplier, call the
Fire Department.
- Installation and service must be performed by
a qualified installer, service agency or the gas
supplier.
1-(866)-447-2194
60364 REV B
Advertisement
Table of Contents

Related Manuals for HeatStar HSU100NGPALP


Summary of Contents for HeatStar HSU100NGPALP
- Page 1 READ INSTRUCTIONS CAREFULLY: YOUR SAFETY IS IMPORTANT TO YOU AND TO OTHERS. Read and follow all instructions. Place instructions in a safe place for future reference. Do not allow anyone who has not read these instructions to assemble, light, adjust or operate the heater. MODELS: HSU100NGPALP HSU100NGPSSP HSU100NGPAL HSU100NGPSS...
-
Page 2: Table Of Contents
WARNING: WARNING: Do not install unit heaters in structures that contain Heaters must not be installed in locations that have space for family living quarters. volatile, explosive, or flammable: • Vapors (including gasoline, paint thinner, oil-based paint) Utility Heaters may be used to heat non-living spaces •... -
Page 3: Heater Specifications
SPECIFICATIONS - TABLE 1 Model Size 100,000 BTU/Hr 125,000 BTU/Hr 150,000 BTU/Hr 200,000 BTU/Hr 250,000 BTU/Hr 300,000 BTU/Hr 400,000 BTU/Hr Input* (29.3 kW) (36.6 kW) (44 kW) (58.6 kW) (73.3 kW) (87.9 kW) (117.2 kW) 82,000 BTU 102,500 BTU 123,000 BTU 164,000 BTU 205,000 BTU 246,000 BTU... - Page 4 HEATER DIMENSIONS IN INCHES (mm) - TABLE 2 Model Size 36.0” 36.0” 33.2” 40.4” 40.4” 40.4” 40.4” (914 mm) (914 mm) (843 mm) (1026 mm) (1026 mm) (1026 mm) (1026 mm) 20.7” 20.7” 23.1” 25.8” 28.5” 31.5” 39.8” (526 mm) (526 mm) (587 mm) (655 mm)
-
Page 5: Receiving Instructions
• All wires are tight and all gaskets intact and all plugs/caps in place? • The air louvers are open and the access panel has been replaced? thermostat has this option, an additional wire should be run to RECEIVING INSTRUCTIONS the “G”... -
Page 6: Venting
28. Use the screws removed in the steps above to attach the low FRONT VIEW OF HEATER clearance mounting brackets to the heater. Do not over tighten the screws or you will strip out the holes. 29. This will provide the 1” (2.54 cm) of clearance required to the ceiling for the 100 &... - Page 7 WARNING: 13. Do not use vent dampers or any other restricting devices in any This heater must be vented to the outdoors. portion of the vent pipe or inlet pipe. This heater must have proper air for combustion. 14. All Heaters have a pressure switch. The pressure switch, along Death or injury could result if these instructions are not with visual inspections, can determine if the vent system and followed.
- Page 8 TABLE 6 The heat from the flue products in the heater can cause damage Distance/Clearance for Vent Terminals to sloped and flat roof materials. Verify the temperature rating of (For reference only. Refer to the latest edition of the roof material and confirm that the hot flue products from the vent pipe will not cause damage to the roof material.
- Page 9 Horizontal venting is Category III. Category III vent pipe has a Vertical Category I Vent System - Vent Pipe Only positive pressure inside the pipe. If Category III vent pipe is not used and installed per the Category III manufacturers instructions, carbon monoxide can leak into the building.
-
Page 10: Gas Installation
The minimum inlet gas pressure is: Horizontal Vent System - Vent Pipe Only Natural gas = 6.0” Water column (1.49 kPa) Propane = 1 1.0” W.C. (2.74 kPa) The maximum gas pressure to the appliance is ½ PSI (14” W.C. or 3.48 kPa). -
Page 11: Electrical Installation
10. Use thread joint compound that is approved for use with the gas This unit has been fully assembled and has had operational tests that will be used for the heater. performed at the factory. The following pre-operational procedures should be performed to verify proper on-site installation operation. 11. - Page 12 Figure 11 - Electrical Connections and Ladder Diagrams Model Size 100 to 300 Model Size 400 Only * There is a 3 Amp fuse on the control board of all heaters Compact Unit Heater Operating Instructions and Owner’s Manual...
- Page 13 10. When the burners light, verify the gas inlet pressure is between 14. Remove the call for heat from the thermostat. 6.0 to 14” W.C. (1.50-3.49 kPa) for natural gas and 1 1.0 to 14” 15. After the burners turn off, the combustion blower should operate (2.74-3.49 kPa) for propane.
-
Page 14: Propane And High Altitude Installation
Seal any unused openings in the venting system. Table 9 – Natural Gas High Altitude Information and Conversion TABLE 9.1 Inspect the venting system for proper size and horizontal pitch, as required in the National Fuel Gas Code, NFPA 54/ High Altitude Information NG Units: ANSI Z223.1 or CSA B149.1 Installation Code –... - Page 15 Table 10 – Propane (LP) Information and Conversions All Elevations Table 10.1 Propane Information: 0’ to 2,000’ (0 to 610m) Model Size Btu/Hr Input 100,000 125,000 150,000 200,000 250,000 300,000 400,000 Orifice Drill Size 1.65mm Orifice Qty in Kit* L.P. Manifold Pressure 10.0/2.49 10.0/2.49...
-
Page 16: Maintenance
MAINTENANCE Gas valve and pipe: Leak check gas fittings with suitable leak detectors. Do not Annually have a qualified service agency perform the following use a match or open flame. Make sure to turn the gas on for maintenance: this portion of the service. WARNING: Service and maintenance must be performed by a Verify the manifold gas pressure and inlet gas pressure. -
Page 17: Troubleshooting
TROUBLESHOOTING Symptom Possible Cause Possible Remedy Unit does not Start Power supply is off. Turn on main power. No 24V power to thermostat. Check control transformer. If failed transformer – check thermostat wire gage, length, and defects. Thermostat malfunction. Verify wire connections to R&W terminals only. - Page 18 REPAIR PARTS When ordering parts include the complete unit model number listed on the unit rating plate. HA - High Altitude Kit, refer to “Propane and High Altitude Installation” section of manual NS - Not Shown (*) - Number of parts needed per model Compact Unit Heater Operating Instructions and Owner’s Manual...
-
Page 19: Parts List
PARTS LIST ( SEE BACK PAGE FOR PARTS ORDERING INFORMATION) UNIT CAPACITY (MBH) NO. OF TUBES PER MODEL ITEM DESCRIPTION PART NO. (QTY*) Flame Sensor 60366 Spark Igniter 60375 Gas Valve 60376 Gas Valve 60377 Transformer 60387 Relay 60388 Pressure Switch 60473 Pressure Switch 60389... - Page 20 UNIT CAPACITY (MBH) NO. OF TUBES PER MODEL ITEM DESCRIPTION PART NO. (QTY*) Rollout Limit Switch 60463 6 Pin Harness 60464 6 Pin Harness 60465 Pressure Switch (HA), -0.75 60466 Pressure Switch (HA), -0.80 60482 Pressure Switch (HA), -1.10 60467 Pressure Switch (HA), -1.20 60390 Pressure Switch (HA), -1.35...
- Page 21 THIS PAGE INTENTIONALLY LEFT BLANK ESTA PÁGINA SE DEJÓ INTENCIONALMENTE EN BLANCO CETTE PAGE A ÉTÉ INTENTIONNELLEMENT LAISSÉE VIERGE Compact Unit Heater Operating Instructions and Owner’s Manual...
Need help?
Do you have a question about the HSU100NGPALP and is the answer not in the manual?
Questions and answers