Table of Contents
Advertisement
Quick Links
Advertisement
Table of Contents

Subscribe to Our Youtube Channel
Related Manuals for Philco PDI 1568 DTBISX


Summary of Contents for Philco PDI 1568 DTBISX
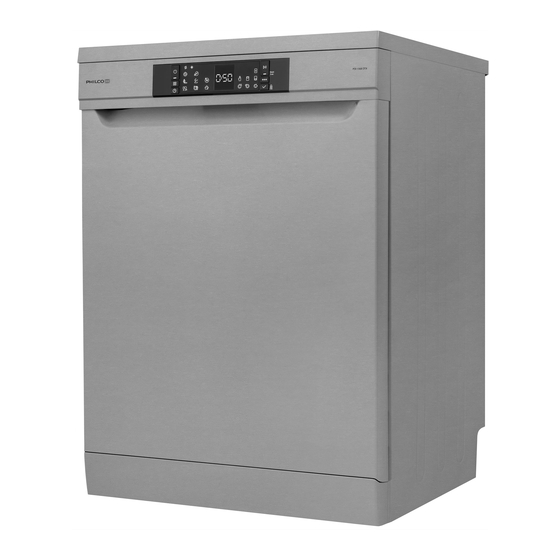
- Page 1 Dishwasher OWNER’S MANUAL PDI 1568 DTBISX...
- Page 2 Dear customer, Thank you for buying a PHILCO brand product. So that your appliance serves you well, please read all the instructions in this user’s manual. Copyright © 2020, Fast ČR, a. s. Revision 08/2023...
-
Page 3: Table Of Contents
CONTENTS PART 1: SAFETY PRECAUTIONS ........................2 PART 2: INSTALLATION ............................5 PART 3: TECHNICAL SPECIFICATIONS ......................7 PART 4: BEFORE USING THE APPLIANCE .......................8 PART 5: LOADING YOUR DISHWASHER .......................12 PART 6: PROGRAMME TABLE ........................16 PART 7: CONTROL PANEL ..........................18 PART 8: CLEANING AND MAINTENANCE .....................22 PART 9: TROUBLESHOOTING ........................24 PART 10: PRODUCT INFORMATION SHEET ....................28 EN - 1... -
Page 4: Part 1: Safety Precautions
PART 1: SAFETY PRECAUTIONS This appliance can be used by children aged from 8 years and above and by persons with reduced physical, sensory or mental capabilities or lack of experience and knowledge if they have been given supervision or instructions concerning use of the appliance in a safe way and if they understand the hazards involved. - Page 5 This appliance is intended to be used in households and similar premises, such as – kitchenettes in shops, offices and other workplaces; – agricultural facilities; – hotels, motels, and other accommodation facilities where appliances are used by guests; – bed and breakfast facilities. Do not use the dishwasher to wash plastic items that have not been labeled as dishwasher safe by the manufacturer.
- Page 6 The appliance, the power cord or the electric outlet must not lie in, tough or be submerged in water or any other liquid to avoid electrical hazards. If the power cord gets damaged, it must be replaced by the manufacturer, its service technician or another person with similar qualification so that safety is not jeopardized.
-
Page 7: Part 2: Installation
PART 2: INSTALLATION Machine positioning Water inlet hose When positioning the machine, place it in an area where dishes can be easily loaded and unloaded. Do not put the machine in an area where the ambient temperature falls below 0 °C. Read all warnings located on the packaging before removing the packaging and positioning the machine. - Page 8 CAUTION! Ensure the water inlet and outlet hoses are not squeezed or trapped and that the machine does not stand on the electrical cable while positioning. Electrical connection WARNING! Your machine is set to operate at 220-240 V. If the mains voltage supply to your machine is 110 V, connect a transformer of 110/220 V and 3000 W between the electrical connection.
-
Page 9: Part 3: Technical Specifications
PART 3: TECHNICAL SPECIFICATIONS Technical specifications Capacity 15 place settings Dimensions (mm) Height 820-870 (mm) Width 598 (mm) Depth 550 (mm) Net weight 37,900 kg Operating voltage / 220-240V / 50 Hz frequency Total current (A) 10 (A) Total power (W) 1900 (W) Water supply pressure Maximum: 1 (Mpa) Minimum: 0.03 (Mpa) -
Page 10: Part 4: Before Using The Appliance
PART 4: BEFORE USING THE APPLIANCE Preparing your dishwasher for first • Make sure the electricity and supply water specifications match the values indicated in the installation instructions for the machine. • Remove all packaging material inside the machine. • Set the water softener level. • Fill the rinse aid compartment. Salt usage For a good washing function, the dishwasher needs soft, i.e. - Page 11 Test Strip Set the hardness Run water through Keep the strip in Wait Shake the strip. level of your the tap (1min.) the water (1sec) (1min.) machine. second minute minute NOTE: The level is set to 3 as default. If the water is well water or has a hardness level above 90 dF, we recommend that you use filter and refinement devices.
- Page 12 Detergent usage We recommend you do not use combined detergents in short programmes. Only use detergents specifically designed for Please use powder detergents in such programmes. domestic dishwashers. Keep your detergents in cool, If you encounter problems when using combined dry places out of reach of children.
- Page 13 Level Brightener Dose Indicator Rinse-aid not r1 is shown on dispensed the display. 1 dose is r2 is shown on dispensed the display. 2 doses are r3 is shown on dispensed the display. 3 doses are r4 is shown on dispensed the display.
-
Page 14: Part 5: Loading Your Dishwasher
PART 5: LOADING YOUR DISHWASHER For best results, follow these loading guidelines. WARNING! Loading the household dishwasher up to the capacity To avoid any possible injuries, place long- indicated by the manufacturer will contribute to handle and sharp- pointed knives with their energy and water savings. - Page 15 Height Adjustable Rack (peg type) Four Folding Racks The height adjustable racks enable glasses and cups The folding racks are designed so that large items, to be placed on or under the racks. The racks can be such as pots and pans, can be easily placed in the adjusted to 2 different heights.
- Page 16 Upper Cutlery Basket The upper cutlery basket is designed for the placement of large and small cutlery and utensils. The basket is easily removed from the dishwasher, therefore allows ease of use when removing your items, along with the basket, after washing. The upper cutlery basket is composed of two pieces that can be separately removed.
- Page 17 Alternative Basket Loads Unsuitable items for dishwashing • Cigarette ashes, candle leftovers, polish, paint, Lower Basket chemical substances, ironalloy materials. • Forks, spoons and knives with wooden, bone, ivory or nacrecoated handles; glued items, items soiled with abrasive, acidic or base chemicals. • Temperature-sensitive plastics, copper...
-
Page 18: Part 6: Programme Table
PART 6: PROGRAMME TABLE EN - 16 Copyright © 2020, Fast ČR, a. s. Revision 08/2023... - Page 19 • The program duration may change according to the amount of dishes, the water temperature, the ambient temperature and selected additional functions. • Values given for programmes other than the eco programme are indicative only. • Eco programme is suitable to clean normally soiled tableware, that for this use, it is the most efficient programme in terms of its combined energy and water consumption, and that it is used to assess compliance with the EU ecodesign legislation.
-
Page 20: Part 7: Control Panel
PART 7: THE CONTROL PANEL 3. Delay Button You can delay the start time of the programme for 1-2...24 hours by pressing the delay button (3) before the programme starts. The delay indicator (3.1) will be on. If you want to change the delay time,first press the Start/Pause button and then the delay button to select a new delay time. - Page 21 9. Rinse Aid Indicator 15. Extra Silent Indicator When the rinse aid level is low, the rinse aid lack Select the Extra Silent function for a more sensitive warning indicator turns on and you should fill the and silent washing operation. The Extra Silent rinse aid chamber. Indicator will illuminate. This option reduces the sound pressure level of the washing.
- Page 22 7.1. Changing a programme If you would like to change the programme when When the End light turns on, the machine is already running. switch your machine off by pressing the On/Off button. Press the Start/ Pause button. 7.3. Switching the Machine Off Switch your machine off with On/Off button after After the programme stops, select the programme has ended and the End light your desired programme via the...
- Page 23 Buzzer Sound Control NOTE: Natural Ion Tech function does not work (Model Depending) with any program. To change the buzzer sound level, follow the below steps: Crystalight (Model Depending) 1. Open the door and press Option (6) and Select This technology which have Ion and Light (7) buttons at the same time for 3 seconds.
-
Page 24: Part 8: Cleaning And Maintenance
PART 8: CLEANING AND MAINTENANCE Cleaning your dishwasher is important to maintain To remove and clean the filter combination, turn it the machine’s service life counter clockwise and remove it by lifting it upwards (1). Pull the coarse filter out of the micro filter (2). Make sure that the water softening setting (If available) is done correctly and correct amount of Then pull and remove the metal filter (3). - Page 25 Drain Pump Large food residues or foreign objects which were not captured by the filters may block the waste water pump. The rinsing water will then be above the filter. Warning Risk of cuts! When cleaning the waste water pump, ensure that you do not injure yourself on pieces of broken glass or pointed implements.
-
Page 26: Part 9: Troubleshooting
PART 9: TROUBLESHOOTING FAULT POSSIBLE CAUSE TROUBLESHOOTING Your Dishwasher is not plugged in. Plug your Dishwasher in. Switch your Dishwasher on by pressing Your Dishwasher is not switched on. the On/Off button. Fuse blown. Check your indoor fuses. The programme does Water inlet tap is closed. - Page 27 FAULT POSSIBLE CAUSE TROUBLESHOOTING Use the correct amount of detergent, as Not enough detergent used. instructed in the programme table. Rinse aid dosage and/or water softener Increase rinse aid and/or water softener setting set too low. level. Whitish stains remains on dishes.
- Page 28 AUTOMATIC FAULT WARNINGS AND WHAT TO DO TROUBLE POSSIBLE FAULT WHAT TO DO CODE Make sure the water inlet tap is open and water is flowing. Water inlet system failure Separate the inlet hose from the tap and clean the filter of the hose.
- Page 29 PRACTICAL INFORMATION 1. When the machine isn’t in operation: • Disconnect the plug and close the tap. • Leave the door slightly open to prevent odour formation. 2. Select the dry option to remove water droplets. 3. Place dishes in the machine properly to achieve the best energy consumption, washing and drying performance. Please see the programme and consumption table for more information. 4.
-
Page 30: Part 10: Product Information Sheet
PART 10: PRODUCT INFORMATION SHEET Product Information Sheet COMMISSION DELEGATED REGULATION (EU) 2019/2016 Supplier's name or trademark: PHILCO Supplier's address: U Sanitasu 1621 Říčany 251 01, Czech Republic Model identifier: PDI 1568 DTBISX General product parameters: Dishwasher Parameter Value Parameter Value Height Rated capacity (kg) - Page 31 When contacting our authorized service, have the model designation, serial number and defect description available. To download documents, visit www.philco.cz. To report a defect and obtain additional service information, visit https://philco.cz/podpora-a-servis. Subject to change without notice. EN - 29 Copyright © 2020, Fast ČR, a. s.
- Page 32 INSTRUCTIONS AND INFORMATION REGARDING THE DISPOSAL OF USED PACKAGING MATERIALS Dispose of packaging material at a public waste disposal site. DISPOSAL OF USED ELECTRICAL AND ELECTRONIC APPLIANCES The meaning of the symbol on the product, its accessory or packaging indicates that this product shall not be treated as household waste.
- Page 33 Výrobce/Manufacturer: Fast ČR, a.s. U Sanitasu 1621 Říčany 251 01, CZECH REPUBLIC Distributor: FAST PLUS, a.s. Na pántoch 18 831 06 Bratislava, SLOVAKIA Distributor: FAST POLAND Sp. z o. o. Kwietniowa 36 05-090 Wypędy, POLAND is a pending or registered trademark of Electrolux Home Products, Inc.
Need help?
Do you have a question about the PDI 1568 DTBISX and is the answer not in the manual?
Questions and answers