Table of Contents
Advertisement
Quick Links
Advertisement
Table of Contents

Subscribe to Our Youtube Channel
Related Manuals for Philco PD 1142 X


Summary of Contents for Philco PD 1142 X
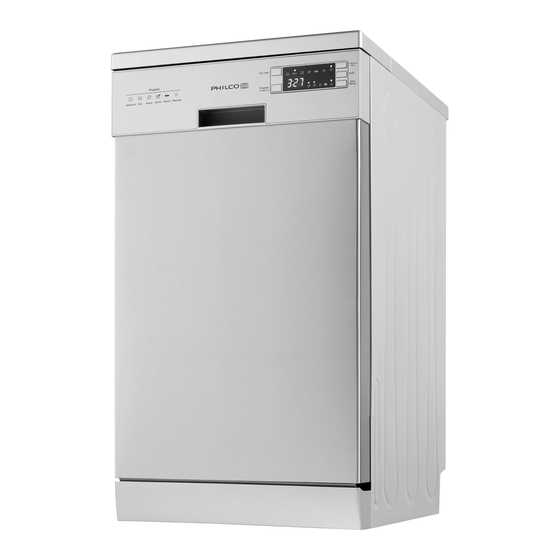
- Page 1 DISHWASHER USER’S MANUAL PD 1142 X PD 1142 W...
- Page 2 Dear customer, thank you for buying a PHILCO brand product. So that your appliance serves you well, please read all the instructions in this user’s manual.
-
Page 3: Table Of Contents
CONTENTS PART 1: SAFETY INFORMATION ........................3 PART 2: OPERATION INSTRUCTION ............................7 Control Panel......................................7 Dishwasher Features ....................................8 PART 3: Prior using for the fi rst time .......................9 Set the Water Softener ..................................9 Loading the Salt into the Softener ..............................10 Fill the Rinse Aid Dispenser................................11 Function of Detergent .................................. - Page 4 Dear Customer, Please read this User Information carefully and keep it to refer to at a later date. Pass it on to any subsequent owner of the appliance. This manual contains sections of Safety Instructions, Operating Instructions, Installation Instructions and Troubleshooting Tips, etc.
-
Page 5: Part 1: Safety Information
PART 1: SAFETY INFORMATION WARNING! When using your dishwasher, follow the basic precautions including the following: WARNING! HYDROGEN GAS IS EXPLOSIVE Under certain conditions, Hydrogen gas may be produced in a hot-water system that has not been used for two weeks or more. - Page 6 Do not place any heavy objects or stand on the door when it is open. The appliance could tip forward. When loading items to be washed: Locate sharp items so that they are not likely to damage the door seal; Load sharp knives with the handles up to reduce the risk of cut-type injuries;...
- Page 7 These instructions shall also be got from the manufacturer or responsible Vendor. To protect against the risk of electrical shock, do not immerse the unit, cord or plug in water or other liquid. This appliance can be used by children aged from 8 years and above and persons with reduced physical, sensory or mental capabilities or lack of experience and knowledge if they have been given supervision or...
- Page 8 The appliance is to be connected to the water mains using new hose sets, and the old hose-sets should not be reused. Make sure that the carpet must not obstruct the openings at the bottom base. Use the dishwasher only for its intended function. The dishwasher is intended for indoor use only.
-
Page 9: Part 2: Operation Instruction
PART 2: OPERATION INSTRUCTION Control Panel 11 3 7 8 9 10 12 5 Power switch: To turn on/off the power supply. Program select button/Child lock button: Press the button to select the program. The “child lock” will be available when you press the button 3 seconds, and “LO” fl ashes 6 times on digital displays. Delay button: The START DELAY will allow you to delay the start time of any cycle automatically up to 24hours. -
Page 10: Dishwasher Features
Dishwasher Features Front View Upper Basket Spray Arms Lower Basket Water Softener Filters Detergent Dispenser Rinse Aid Dispenser Cutlery Tray EN - 8 Copyright © 2017, Fast ČR, a. s. 06/2017... -
Page 11: Part 3: Prior Using For The First Time
PART 3: PRIOR USING FOR THE FIRST TIME Before using your dishwasher for the fi rst time: A. Set the water softener B. Loading the salt into the softener C. Fill the rinse aid dispenser D. Fill in detergent A. Set the Water Softener The water softener is designed to remove minerals and salts from the water, which would have a detrimental or adverse eff ect on the operation of the appliance. -
Page 12: Loading The Salt Into The Softener
B. Loading the Salt into the Softener Always use salt intended for using with dishwasher. NOTE: If your model has no water softener, you may skip this section WATER SOFTENER The hardness of the water varies from place to place. If hard water is used in the dishwasher, deposits will form on the dishes and utensils. -
Page 13: Fill The Rinse Aid Dispenser
C. Fill the Rinse Aid Dispenser Function of Rinse Aid Rinse aid is automatically added during the last rinse, ensuring thorough rinsing, spot and streak free drying. ATTENTION! Only use branded rinse aid for dishwasher. Never fi ll the rinse aid dispenser with any other substances (e.g. -
Page 14: Function Of Detergent
To fi ll the dispenser, open the cap and pour the rinse aid into the dispenser until the level indicator turns completely black. The volume of the rinse aid container is about 140ml. Be careful not to overfi ll the dispenser, because this could cause over sudsing. Wipe away any spills with a damp cloth. - Page 15 Detergent Dispenser The dispenser must be refi lled before the start of each washing cycle following the instructions provided in the Wash Cycle Table. Your dishwashers use less detergent and rinse aid than conventional dishwashers. Generally, only one tablespoon of detergent is needed fora normal wash load. Also, more heavily soiled items need more detergent.
- Page 16 Please observe the manufacturer’s dosing and storage recommendations as stated on the detergent packaging. Close the lid and press until it locks in place. If the dishes are heavily soiled, place an additional detergent dose in the pre-wash detergent chamber. This detergent will take eff ect during the pre-wash phase.
- Page 17 To cancel “3in1” function: To cancel 3in1 washing cycle by pressing the "ALT" button or follow the "change the programme" instructions. If you decide to switch to the use of a standard detergent system we advise that you: Refi ll both the salt and rinse aid compartments. Switch the water hardness setting to the highest possible position and run for three normal cycles without load.
-
Page 18: Part 4: Loading The Dishwasher Baskets
PART 4: LOADING THE DISHWASHER BASKETS For best performance of the dishwasher, follow these loading guidelines. Features and appearance of baskets and Cutlery tray may vary from your model. Attention before or after Loading the Dishwasher Baskets Scrape off any large amounts of leftover food. It is not necessary to rinse the dishes under running water. Place objects in the dishwasher in the following way: Items such as cups, glasses, pots/pans, etc. - Page 19 Adjusting the Upper Basket If required, the height of the upper basket can be adjusted in order to create more space for large utensils either in the upper basket or lower basket. The upper basket can be adjusted for height by putting wheels of diff erent height into the rails.
- Page 20 * Upper and Lower basket Folding racks Folding racks consisting of two parts that are located on the lower basket of your machine are designed in order to let you place big items easier as pots, pans, etc. If requested, each part can be folded separately, or all of them can be folded and larger can be obtained. You can use folding racks by rasing then upwards, or by folding.
- Page 21 Are not suitable Cutlery with wooden, horn china or mother-of-pearl handles Plastic items that are not heat resistant Older cutlery with glued parts that is not temperature resistant Bonded cutlery items or dishes Pewter or cooper items Lead crystal glass Steel items subject to rusting Wooden platters Items made from synthetic fi bre...
- Page 22 Damage to Glassware and other Dishes Possible causes: Type of glass or manufacturing process. Chemical composition of detergent. Water temperature and duration of dishwasher programme. Suggested remedy: Use glassware or porcelain dishes that have been marked dishwasher-proof by the manufacturer. Use a mild detergent that is described as kind of dishes.
-
Page 23: Part 5: Starting A Washing Programme
PART 5: STARTING A WASHING PROGRAMME Wash cycle table Running Cycle Selection Description of Detergent Energy Water Program Time Information Cycle Pre/main (kWh) (min) For the heaviest soiled loads, such as Pre-wash pots, pans, casserole Main wash (60°C) dishes and dishes Rinse1 5/22.5 1.360... -
Page 24: Turning On The Appliance
Turning on the Appliance Starting a wash cycle... Draw out the lower and upper basket, load the dishes and push them back. It is recommended to load the lower basket fi rst, then the upper one (see the section entitled “Loading the Dishwasher”). Pour in the detergent (see the section entitled “Salt, Detergent and Rinse Aid”). - Page 25 WARNING! It is dangerous to open the door when washing, because the hot water may scald you. Switch Off the Dishwasher The digital display appears “---” and the buzzer rings 6 times, only in this case the programme has ended. 1.
-
Page 26: Part 6: Maintenance And Cleaning
PART 6: MAINTENANCE AND CLEANING Filtering System The fi lter is used to avoid the big remnants and other sundries getting inside the pump. The residue can obstruct the fi lter in sometime. The fi lter system consists of a coarse fi lter, a fl at (Main fi lter) and a micro fi lter (fi ne fi lter). 1. - Page 27 NOTE: If operate from step 1 to step 2, the fi lter system will be removed; while operate from step 2 to step 1, the fi lter system will be installed 3. Filter assembly For best performance and results, the fi lter assembly must be cleaned. The fi lter effi ciently removes food particles from the wash water, allowing it to be recirculated during the cycle.
- Page 28 Protect Against Freezing If your dishwasher is left in an unheated place during the winter, ask a service technical to: Cut off electrical power to the dishwasher. Turn off the water supply and disconnect the water inlet pipe from the water valve. Drain water from the inlet pipe and water valve.
-
Page 29: Part 7: Installation
PART 7: INSTALLATION Keep this instruction manual in a safe place for future reference. If the appliance is sold, given away or moved, please ensure the manual is kept with the machine, so that the new owner may benefi t from the advice contained within it. - Page 30 Connecting the water outlet hose Fit the drainage hose of your machine to the drainage pipe without bending. If the length of the hose is not suffi cient, apply to the authorized service for an extension made from the same material as the original.
- Page 31 Leveling the Appliance Once the appliance is positioned, adjust the feet (screwing them in or out) to adjust the height of the dishwasher, making it level. In any case, the appliance should not be inclined more than 2°. NOTE: The maximum adjustment height of the feet is 20 mm. How to Drain Excess Water From Hoses If the sink is 1000mm higher from the fl oor, the excess water in hoses cannot be drained directly into the sink.
-
Page 32: Part 8: Troubleshooting Tips
PART 8: TROUBLESHOOTING TIPS Error codes When some malfunctions happen, the appliance will display error codes to warn you. Codes Meanings Possible Causes Door open The door is opened when the dishwasher is operating Water inlet Water inlet malfunction Water drainage Water drainage malfunction Temperature sensor Temperature sensor malfunction... - Page 33 Problem Possible Causes What To Do Noise Some audible sounds Sound from detergent cup opening. are normal Utensils are not To ensure everything is secured in the dishwasher. secure in the baskets or something small has dropped into the basket Motor hums Dishwasher has not been used regularly.
- Page 34 Problem Possible Causes What To Do Cloudiness Combination of soft Use less detergent if you have soft water and select a shortest on glassware water and too much cycle to wash the glassware and to get them clean. detergent Yellow or Tea or coff ee stains Using a solution of 1/2 cup of bleach and 3 cups of warm water brown fi lm...
-
Page 35: Part 9: Product Fiche
Name Philco Identifi cation model mark PD 1142 X / PD 1142 W Rated capacity (number of dish sets) Energy effi ciency class (scale: the most effi cient A+++ up to the least effi cient D) Annual energy consumption (AE C ) in kWh per year at 280 cycles * (kWh) - Page 36 The device meets the European standards and the directives. NOTE: The above values have been measured in accordance with standards under specifi ed operating conditions. Results may vary greatly according to quantity and pollution of the dishes, water hardness, amount of detergent, etc. The manual is based on the European Union’s standards and rules.
-
Page 37: Part 10: Disposal
PART 10: DISPOSAL Dispose of the dishwasher packaging material correctly. All packaging materials can be recycled. Plastic parts are marked with the standard international abbreviations: - (e.g. PS for polystyrene, padding material) This appliance is identifi ed according to the European guideline 2002/96/EC on waste electrical and electronic equipment -WEEE. - Page 38 By ensuring this product is disposed of correctly, you will help prevent potential negative consequences for the environment and human health, which could otherwise be caused by inappropriate waste handling of this product. For more detailed information about recycling of this product, please contact your local city offi ce and your household waste disposal service IMPORTANT!
- Page 39 INSTRUCTIONS AND INFORMATION REGARDING THE DISPOSAL OF USED PACKAGING MATERIALS Dispose of packaging material at a public waste disposal site. DISPOSAL OF USED ELECTRICAL AND ELECTRONIC APPLIANCES The meaning of the symbol on the product, its accessory or packaging indicates that this product shall not be treated as household waste.
Need help?
Do you have a question about the PD 1142 X and is the answer not in the manual?
Questions and answers