golmar Art 7 LITE/G2+ User Manual
Monitor hands-free 2-wire installation
Hide thumbs
Also See for Art 7 LITE/G2+:
- Quick manual (4 pages) ,
- Quick manual (10 pages) ,
- User manual (24 pages)

Related Manuals for golmar Art 7 LITE/G2+


Summary of Contents for golmar Art 7 LITE/G2+
- Page 1 TECHNOLOGY Art 7 LITE/G2+ monitor Hands-free 2-wire installation TART 7 LITE/G2+ EN REV.0123 V04...
-
Page 2: Table Of Contents
- Do not place in humid, dusty or smoky locations, or near sources of heat. - Before connecting the device to the mains, check the connections between the door panel, power supply unit, distributors and monitors, se the Golmar RAP-GTWIN/HF cable (2x1mm²). -
Page 3: Characteristics
If you have the “S5110 ART 7 LITE” villa kit with Soul door panel download “TS5110 ART 7 LITE (cód. 50122 )” h ps://www.golmar.es/productos/s5110-art-7-lite#product user manual from the next QR o n r i the link Golmar web: TS5110 ART 7 LITE MANUAL... -
Page 4: Description
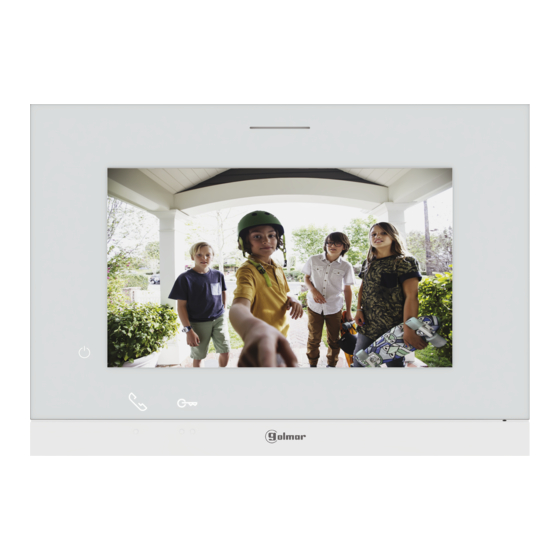
E. 7” TFT colour screen. either of the 2 buttons located above the raised dots for the visually impaired (see page 6 F. Golmar use. In call/ communication: press button to start or end G. Microphone. the communication. H. Wall mounting connector fixing (x4). -
Page 5: Installation
ART 7 LITE/G2+ MONITOR INSTALLATION Avoid dusty or smoky environments or locations near sources of heat. For proper installation, use the template supplied with the product. 1. Position the top of the template at a height of 1.65m. 2. If you are going to use an embedding box to pass the wiring through, make sure that it is in line with the holes corresponding to the box model chosen and fix the connector. -
Page 6: Main Menu
ART 7 LITE/G2+ MONITOR MAIN MENU Main menu LED indicators Hidden button pressing area Raised dots for the visually impaired If the device is in standby (screen switched off), to access the main menu, press either of the 2 buttons (located above raised dots / for the visually impaired) on the monitor. -
Page 7: Settings Menu
ART 7 LITE/G2+ MONITOR SETTINGS MENU If the device is in standby (screen switched off), to access the main menu, press either of the 2 buttons (located above the raised dots for the visually impaired) on the monitor. Then press the hidden button located just below the icon to access to the “access... - Page 8 ART 7 LITE/G2+ MONITOR Continued from previous page. SETTINGS MENU Selecting the melody and call volume: Press the hidden button below icon to access the settings screen. Settings menu screen In order to identify the origin of the calls when you are not in front of the monitor, select different melodies and the desired call volume.
- Page 9 ART 7 LITE/G2+ MONITOR Continued from previous page. SETTINGS MENU Select the "About" screen: Press the hidden button below icon to access the settings screen. Settings menu screen The 'About' screen provides information about the monitor, such as the software version, address and whether it is master or slave (M, S1, S2 or S3).
- Page 10 ART 7 LITE/G2+ MONITOR Continued from previous page. SETTINGS MENU Press the button below icon to return to the main menu. Settings menu screen Main menu Note: New menu available with V.04 of ART 7 LITE/G2+ monitor.
-
Page 11: Door Panel Call Screen
ART 7 LITE/G2+ MONITOR DOOR PANEL CALL SCREEN This screen is displayed when you receive a call or when you press the button below icon of the main menu. During a call, icon displayed on the screen green color (during the call process). n the left , the source of the image is displayed (door panel 1... -
Page 12: Communication Screen
ART 7 LITE/G2+ MONITOR COMMUNICATION SCREEN This screen is displayed during communication process. icon displayed on the screen red color (during the communication process) on the left , the source of the image is displayed (door panel 1 door panel , camera 1 camera ) Press the hidden button below icon to change the source of the image as long as the system has... - Page 13 ART 7 LITE/G2+ MONITOR IMAGE AND COMMUNICATION SETTINGS During a c process, press the hidden button below icon to access the image menu. Door panel call screen The following settings menu will then appear (brightness, contrast, colour). Go to the option to be modified by pressing the button/ hidden button below...
-
Page 14: Image And Communication Settings
ART 7 LITE/G2+ MONITOR Continued from previous page. IMAGE AND COMMUNICATION SETTINGS During a communication process, press the hidden button below icon to access the image and monitor in communication volume settings menu. Door panel communication screen The following settings menu will then appear (brightness, contrast, colour and monitor in communication volume). Go to the option to be modified by pressing the button/ hidden button below... -
Page 15: Intercom Menu
ART 7 LITE/G2+ MONITOR INTERCOM MENU Access the intercom menu as described on p. . From this menu, you can contact another monitor(s) in your apartment (internal intercom) or other apartments (external intercom). For external intercom, the monito of the apartment that makes the call and the monitor(s) of the apartment that receives the call must have the intercom function enabled (see p age 19... - Page 16 ART 7 LITE/G2+ MONITOR Continued from previous page. INTERCOM MENU To make an external intercom call (to other apartments), go to the option with icon by pressing the button/ hidden button below corresponding icons and press the hidden button below icon access the code selection menu of the apartment with which you wish to communicate.
- Page 17 ART 7 LITE/G2+ MONITOR Continued from previous page. INTERCOM MENU The monitor making the call will sound a confirmation melody and will indicate the code of the apartment called and available call time, if you wish to cancel the call press the button below icon returning to the intercom menu.
-
Page 18: P Eriod Of Time For 'Do Not Disturb' Mod E Menu
ART 7 LITE/G2+ MONITOR PERIOD OF TIME FOR 'DO NOT DISTURB' MODE MENÚ “Do not disturb" mode settings, "automatic door opening" function and activate/deactivate "intercom between apartments": Access the do not disturb menu as described on page 6. “Do not disturb” menu To set a period of time during which the monitor will not sound when receiving calls see not “HZ”... - Page 19 ART 7 LITE/G2+ MONITOR Continued from previous page. PERIOD OF TIME FOR 'DO NOT DISTURB' MODE MENÚ To activate and set a period of time for the automatic door opening (after 3 seconds of receiving a call from the door panel), go to the option with icon by pressing the button/ hidden button below corresponding...
-
Page 20: Cleaning The Monitor
ART 7 LITE/G2+ MONITOR Continued from previous page. PERIOD OF TIME FOR 'DO NOT DISTURB' MODE MENÚ If the "automatic door opening" mode has been activated (see page 19), icon will be displayed at the top left of the main menu screen and the notification icon will blink. -
Page 21: Settings And Operation Of The Guard Monitor
ART 7 LITE/G2+ MONITOR SETTINGS AND OPERATION OF THE GUARD MONITOR Settings "guard monitor" mode: The monitor/s to be configured as a guard monitor/s (up to 4 monitors) in the building, must be configured with address 1 and as master slave 1 slave 2 slave 3 . -
Page 22: Special Codes
ART 7 LITE/G2+ MONITOR SPECIAL CODES The enabling of some functions, as well as the modification of some factory parameters, can be carried out by entering special codes. To do so, the installer menu must be accessed from the monitor. Go to the 'About' screen in the Settings menu (p. - Page 23 ART 7 LITE/G2+ MONITOR Continued from previous page. SPECIAL CODES Video sources available on a monitor (configure only on the master monitor). Visible Not isible Factory setting Door panel 1 0111 0110 0111 Door panel 2 0121 0120 0120 Door panel 3 0131 0130 0130...
- Page 24 ART 7 LITE/G2+ MONITOR Continued from previous page. SPECIAL CODES Activation times of the outputs (Door panel ). (Configure only on the master monitor). Factory setting Relay 1 From 1200 (0,5s) 1219 (10s) 1205 (3s) ay 2 From 1300 (0,5s) 1319 (10s) 1305 (3s) Configuration of the remote activation button...
- Page 25 ART 7 LITE/G2+ MONITOR Continued from previous page. SPECIAL CODES (GENERAL DOOR PANELS) General door panels video sources available on a monitor (configure only on the master monitor). Visible Not isible Factory setting General door panel 1 1111 1110 1110 General door panel 2 1121 1120...
-
Page 26: Compliance
C/ Silici, 13 08940- Cornellá de Llobregat SPAIN Golmar se reserva el derecho a cualquier modificación sin previo aviso. Golmar se réserve le droit de toute modification sans préavis. Golmar reserves the right to make any modifications without prior notice.
Need help?
Do you have a question about the Art 7 LITE/G2+ and is the answer not in the manual?
Questions and answers