Table of Contents
Advertisement
Quick Links
EASYCONNECT
INSTALLATION AND SETUP GUIDE
INSTALLATION CONSIDERATIONS
• The MPX 100 is designed to be installed behind a display or close to the in-room display.
• The device may be installed in various locations using the provided mounting plate that allows
the device to be securely fastened on or under desktops, on walls, and more.
• The mounting plate has a built-in cable management retainer and there are two cable slider
clips for additional cable management.
• Do not exceed the maximum ambient operating temperature of 32-104° F (0-40° C). Be aware
of conditions in an enclosed rack that may cause the temperature to exceed ambient room
conditions.
Warning: the MPX 100 power supply MUST NOT be connected to a VBC 2500 or ABC 2500
conference bar. the unit will be damaged.
Biampinfo@biamp.com
™
MPX 100
™
BYOM AV SWITCHING
DEVICE AND PORT
EXPANDER
www.biamp.com
™
Advertisement
Table of Contents

Subscribe to Our Youtube Channel
Related Manuals for Biamp EASYCONNECT MPX 100


Summary of Contents for Biamp EASYCONNECT MPX 100
- Page 1 Warning: the MPX 100 power supply MUST NOT be connected to a VBC 2500 or ABC 2500 conference bar. the unit will be damaged. Biampinfo@biamp.com www.biamp.com...
-
Page 2: Included In The Box
INCLUDED IN THE BOX COMPONENTS CABLES 2 x HDMI 2.0 3’ (1m) 4k60 2 x USB 3.0 3’ (1m) Type A to B 1 x HDMI 2.0 15’ (5m) 4k60 1 x USB 3.0 15’ (5m) Type B to C Active Installation &... -
Page 3: Device Layout
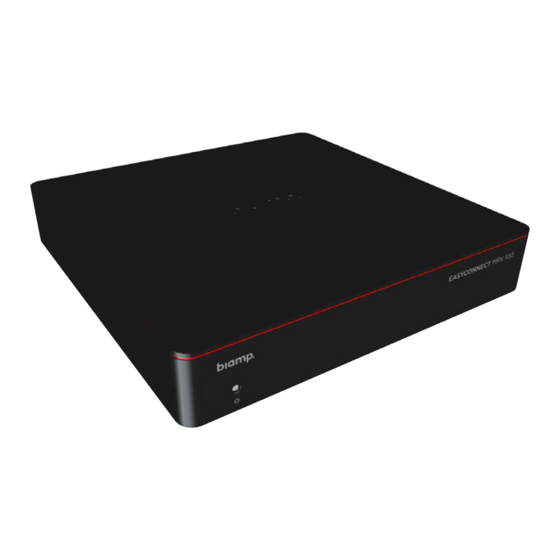
DEVICE LAYOUT FRONT PANEL FRONT PANEL INDICATOR Off: Green: Red: The device is The device is The device is not powered powered booting. REAR PANEL REAR PANEL PORTS & TERMINALS ROOM AV 1. HDMI Input 2.0 5. HDMI Output 2.0 6. -
Page 4: Installation
INSTALLATION REMOVABLE MOUNTING PLATE The MPX 100 may be installed in almost any location that works for the room design, require- ments, etc. This includes installation on a wall behind a typical conference room display or under a table. Be sure to allow for adequate airflow on the ventilation grilles. For installation on a wall, behind a conference room display, or under a table use the provided mounting plate. -
Page 5: Mounting The Device
INSTALLATION MOUNTING THE DEVICE 1. The MPX 100 comes attached to the mounting plate via four mounting screws. If the bracket has been removed, attach it before attempting to mount the device. 2. Locate a flat place to mount the device using the attached mounting plate. 3. -
Page 6: Cable Management
INSTALLATION CABLE MANAGEMENT 5. Once the device is in place, use the built in cable management retainer to keep cables organized and protected from accidental damage. 6. Once the device is in a desired location and the cables have been connected and secured within the cable management retainer, attach the protective cover. - Page 7 INSTALLATION 7. The cover will snap into place. Secure the cover using the provided cover mount screw. Installation & Setup Guide Model...
- Page 8 INSTALLATION ADDITIONAL CABLE MANAGEMENT 1. Use the included cable slider clips to further mananage cables outside of the cable management retainer. The larger clip is for the 5m long cables and the smaller is for either 10m or 15m long cables. 2.
- Page 9 CONNECTIONS COMPLETE SYSTEM DEPLOYMENT The MPX 100 supports automatic switching between UC Room Systems and BYOM Cli- ents. By default, without a BYOM connected, the device will be set to UC Room. When a BYOM device is connected the EasyConnect will automatically switch to the BYOM connection.
- Page 10 CONNECTIONS UC COMMUTE Connect the UC Compute device to the MPX 100 via UC ports using one of the provided HDMI cables and one of the provided USB 3.0 Type-A to Type-B cables. HDMI USB Type-A to Type-B UC Compute BYOM LAPTOP Connect the BYOM laptop device to the MPX 100 via BYOM ports using one of the provided HDMI cables and the provided USB 3.0 Type-B to Type-C active cable.
- Page 11 CONNECTIONS AV ROOM Connect the MPX 100 to AV Room peripheral devices using the provided cables and separate accessory cables. Provided Cables Accessory Cables Network HDMI USB Type-A to Type-B Parlé VBC 2500 Touchscreen Display TesiraFORTÉ X Loudspeakers / Mics •...
- Page 12 ™ CONTACT US Email: support@biamp.com Web: support.biamp.com Warranty: biamp.com/legal/warranty-information Safety & Compliance: biamp.com/compliance biamp.com/legal/warranty-information October 18, 2023...
Need help?
Do you have a question about the EASYCONNECT MPX 100 and is the answer not in the manual?
Questions and answers