Table of Contents
Advertisement
Available languages
Available languages
Quick Links
BIWLF128-B3
INSTRUCTION MANUAL
Texte français page 12
WE'RE HERE TO HELP
Want to watch a video that
shows how easy this is?
Watch it now at:
SANUS.com/3153
Get it right the first time.
HeightFinder™ shows you
where to drill.
Use it now:
SANUS.com/2566
Our live install experts are
standing by to help.
Call us at:
+1 (800) 359-5520
Advertisement
Table of Contents

Related Manuals for LEGRAND SANUS BIWLF128-B3


Summary of Contents for LEGRAND SANUS BIWLF128-B3
- Page 1 BIWLF128-B3 INSTRUCTION MANUAL Texte français page 12 WE’RE HERE TO HELP Want to watch a video that Get it right the first time. Our live install experts are shows how easy this is? HeightFinder™ shows you standing by to help. where to drill.
-
Page 2: Wall Construction
IMPORTANT SAFETY INSTRUCTIONS – PLEASE READ MANUAL PRIOR TO USE – SAVE THESE INSTRUCTIONS WARNING: Avoid potential personal injuries and property damage! ● DO NOT INSTALL THIS MOUNT IN A FIREWALL (The wall between a garage and a living space, or the wall between two condominiums or occupancies sharing a wall). Contact your local building inspector before cutting a hole in the drywall if unsure. -
Page 3: Before You Begin
Dimensions TV INTERFACE 100.0 23.6 600.0 15.7 100.0 400.0 WALL PLATE TOP VIEW - EXTENDED SIDE VIEW - EXTENDED 28.0 710.6 16.0 406.4 196.9 63.5 15.5 20.8 393.7 529.0 67° 67° 4° 15° SIMULATED 65" 18.1 DOWN 460.8 FLAT SCREEN TV FULLY ASSEMBLED MOUNT TOP VIEW - RETRACTED SIDE VIEW RETRACTED... -
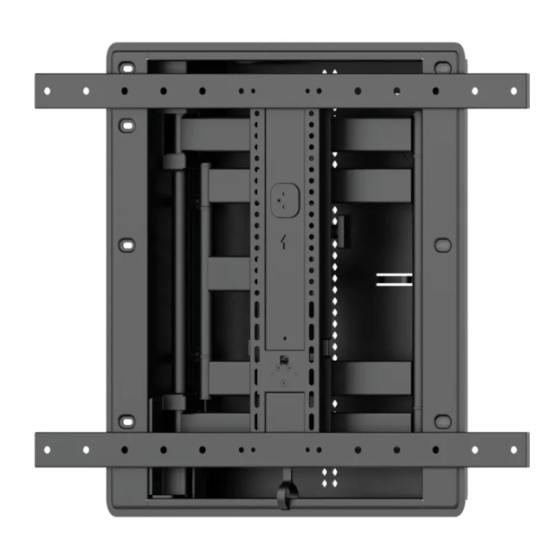
Page 4: Supplied Parts And Hardware
Supplied Parts and Hardware WARNING: This product contains small items that could be a choking hazard if swallowed. Before starting assembly, verify all parts are included and undamaged. If any parts are missing or damaged, do not return the damaged item to your dealer; contact Customer Service. Never use damaged parts! NOTE: Not all hardware included will be used. - Page 5 STEP 1 Attach TV Brackets to TV 1-1 Select TV Screw Diameter 1-2 Select TV Screw Length and Spacers Only one screw size fits your TV. NO SPACER SPACER NEEDED • Flat Back TV • Flat Back TV • Rounded or Irregular Back TV with extra space needed [for deep inset holes or cable interference] [TV brackets NOT resting flat on your TV]...
-
Page 6: Wood Stud Installation
Wood Stud Installation STEP 2 Attach The In-wall Box CAUTION: Avoid potential personal injury or property damage! ● Drywall covering the wall must not exceed 5/8 in. (16 mm) ● Minimum wood stud size: nominal 2 x 4 in. (51 x 102 mm) actual 1½ x 3½ in. (38 x 89 mm) ●... - Page 7 2 ½ in. (63 mm) 1/8 in. (3 mm)
- Page 8 STEP 3 Hang your TV onto The In-wall Box 3-1 Attach Arm Assembly to the In-wall Box NOTE: The top two screws will not seat fully - tighten until snug. 3-2 Attach TV to Arm Assembly HEAVY! You may need assistance with this step. CAUTION: Avoid potential injuries or property damage! Locking screw...
-
Page 9: Manage Cables
Manage Cables IMPORTANT: Fully extend arm assembly to ensure enough slack in cables. Route your cables through the arm assembly and secure with clips IMPORTANT: Be sure cables are not in a position to be pinched when mount is in motion. Install Components Junction Box (Not Included) WARNING:... -
Page 10: Tilt Adjustment
TV Adjustments TILT ADJUSTMENT Your TV should adjust easily when moved, then stay in place. If your TV is too loose or too tight, adjust the side tension knob NOTE: Once your TV is in place, tighten the tension knob to prevent unwanted movement. -
Page 11: Removing The Tv
REMOVING THE TV HEAVY! You may need assistance with this step. REMOVING THE ARM REMOVING THE BOX... - Page 12 INFORMATIONS IMPORTANTES CONCERNANT LA SÉCURITÉ FRANÇAIS – VEUILLEZ LIRE ATTENTIVEMENT LE MANUEL AVANT D'UTILISER CE PRODUIT – CONSERVEZ CES INSTRUCTIONS NOUS SOMMES LÀ POUR VOUS AIDER Souhaitez-vous voir une vidéo démontrant à quel point cette procédure est facile à e ectuer ? Rendez-vous maintenant sur : SANUS.com/3153 Réussissez du premier coup ! HeightFinder™...
- Page 13 Dimensions PAGE 3 Avant de commencer Retirez le socle de votre téléviseur ... s'il est installé bien sûr. Installez tout accessoire que vous prévoyez d'ajouter à votre téléviseur. Vérifiez les manuels d'installation de tous les accessoires pour savoir si vous devez les INSTALLER AVANT de monter votre téléviseur. Protégez la face de votre téléviseur lorsque vous la poserez vers le bas pour l'installation.
-
Page 14: Gestion Des Câbles
ÉTAPE 2 Fixation de la box encastrable au mur Installation sur des montants en bois PAGE 6 ATTENTION : Évitez les risques de blessures corporelles ou de dommages matériels ! ● L'épaisseur du revêtement de cloison sèche ne doit pas excéder 1,5 cm (5/8 po). ●... - Page 15 Réglages PAGE 10 INCLINAISON Votre téléviseur doit se régler facilement lorsqu'il est déplacé, puis il doit rester bien en place. Réglez le bouton de tension de l'inclinaison votre téléviseur s'incline naturellement vers le haut ou le bas. REMARQUE : Si vous ne prévoyez pas de régler l'inclinaison pour différents angles de vue, vous pouvez serrer manuellement le bouton de tension de l'inclinaison afin d'éviter tout mouvement non souhaité.
- Page 16 SANUS.com Legrand AV Inc. and its a iliated corporations and subsidiaries (collectively, “Legrand”), intend to make this manual accurate and complete. However, Legrand makes no claim that the information contained herein covers all details, conditions, or variations. Nor does it provide for every possible contingency in connection with the installation or use of this product. The information contained in this document is subject to change without notice or obligation of any kind.
Need help?
Do you have a question about the SANUS BIWLF128-B3 and is the answer not in the manual?
Questions and answers