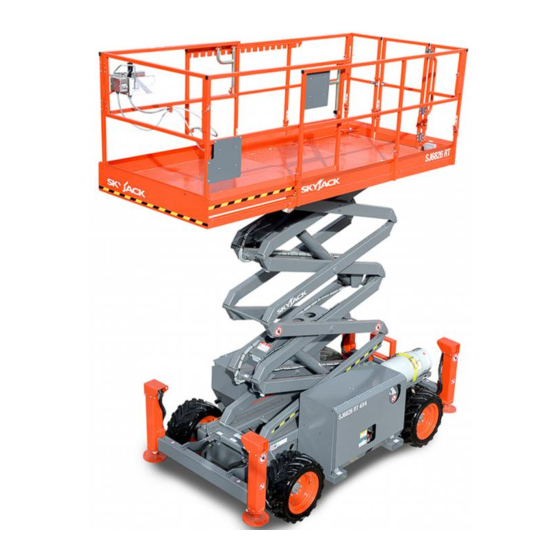
Skyjack SJ6826 RT, SJ6832 RT Service Manual
Hide thumbs
Also See for SJ6826 RT, SJ6832 RT:
- Operation manual (110 pages) ,
- Operating manual (92 pages) ,
- Operation and installation manual (36 pages)

Subscribe to Our Youtube Channel
Related Manuals for Skyjack SJ6826 RT, SJ6832 RT


Summary of Contents for Skyjack SJ6826 RT, SJ6832 RT
- Page 1 SERVICE MANUAL SJ6826 RT, SJ6832 RT ROUGH TERRAIN SCISSORS 167955AGA September 12, 2023 ANSI/CSA...
- Page 2 This manual is for MEWPs with serial numbers: SJ6826 RT: 37 004 671 - 37 299 999 SJ6832 RT: 37 004 671 - 37 299 999 Please refer to the website (www.skyjack.com) for contact information, other serial numbers, the most recent technical manuals, animations, and USB software.
- Page 3 It may also be used to alert against unsafe practices. IMPORTANT IMPORTANT indicates a procedure essential for safe operation and which, if not followed, may result in a malfunction or damage to the MEWP . SJ6826 RT, SJ6832 RT 167955AFA...
- Page 4 Notes 167955AFA SJ6826 RT, SJ6832 RT...
-
Page 5: Table Of Contents
Fluid Specifications ..............34 SJ6826 RT, SJ6832 RT... - Page 6 Electrical Schematic (All Option with Kubota Diesel Engine) S/N 37000235 and above ..77 3.34 Electrical Schematic (All Option with Kubota Diesel Engine) S/N 37000234 and below ..78 167955AFA SJ6826 RT, SJ6832 RT...
- Page 7 4.2-38 Right Front Outrigger Inoperative Manually ......... 101 SJ6826 RT, SJ6832 RT...
- Page 8 Replace and adjust the fan belt ..........118 167955AFA SJ6826 RT, SJ6832 RT...
- Page 9 5.13-3 LED error codes ............. . 152 SJ6826 RT, SJ6832 RT...
- Page 10 Notes 167955AFA SJ6826 RT, SJ6832 RT...
-
Page 11: Section 1 - Scheduled Maintenance
3000 hours, whichever occurs first. Any defective specifications and dimensions are subject to change part will be replaced or repaired by your local Skyjack without notice. dealer at no charge for parts or labor. In addition, all products have a 5 year structural warranty. -
Page 12: Maintenance And Inspection Schedule
MEWP . relative law provisions obtaining in the country. Consult SKYJACK’s Service Department for optional Before attempting any repair work, disconnect the tires specifications and installation. main power conenctors. -
Page 13: Hydraulic System & Component Maintenance And Repair
6. When removing any hydraulic component, be sure to cap and tag all hydraulic lines involved. Also, plug the ports of the removed components. SJ6826 RT, SJ6832 RT 167955AFA... -
Page 14: About This Section
MEWP parked on a flat and level surface ▪ Legend Disconnect the batteries by disconnecting the ▪ Pass main power connectors. Fail Repair any damaged or malfunction ▪ components before operating MEWP . Repaired Keep records on all inspections. ▪ Not applicable 167955AFA SJ6826 RT, SJ6832 RT... -
Page 15: Owner's Annual Inspection Record
Do not use the aerial platform if an inspection has not been recorded in the last 13 months. Description Label Pictorial Description Label Pictorial 1 Inspection 2 Inspector Date Signature SJ6826 RT, SJ6832 RT 167955AFA... - Page 16 The undersigned has made sure that all areas in the list have received an inspection. The undersigned has told the machine owner of all inconsistencies in the inspection and corrected them before machine operation. Owner: User: 167955AFA SJ6826 RT, SJ6832 RT...
-
Page 17: Scheduled Maintenance Inspections
MEWP Inspect the following areas for chafed, corroded and loose wires: Base to platform cables and wiring harness. ▪ Engine compartment electrical panel. ▪ Engine wiring harness. ▪ Hydraulic / electrical wiring harnesses. ▪ SJ6826 RT, SJ6832 RT 167955AFA... -
Page 18: Manuals (B)
Visually inspect all limit switch located inside the conditions. scissor arms and the outrigger assemblies for the following: Broken or missing actuator arm. ▪ Missing fasteners. ▪ Loose wiring. ▪ 167955AFA SJ6826 RT, SJ6832 RT... - Page 19 Risk of burns to exposed skin. Beware of hot liquids and radiator components. Allow the engine Replace battery if damaged or incapable of ▪ to cool before performing any maintenance. holding a lasting charge. Ensure radiator is secure. ▪ SJ6826 RT, SJ6832 RT 167955AFA...
- Page 20 Fuel Shut-off Valve IMPORTANT Ensure there are no loose or missing parts and ▪ there is no visible damage. Close engine compartment before operating. Push it in until the two latches lock to base. 167955AFA SJ6826 RT, SJ6832 RT...
-
Page 21: Hydraulic / Fuel Compartment
Ensure there are no loose or missing parts and ▪ IMPORTANT there is no visible damage. Before using the MEWP , always make sure there is enough fuel for expected use. Ensure fuel filler cap is secure. ▪ SJ6826 RT, SJ6832 RT 167955AFA... -
Page 22: Platform Assembly
▪ Refer to 5.2-2 Platform mounting hardware for the ▪ returned to neutral and are properly secured. maintenance/installation procedure. Make sure there are no loose or missing parts ▪ and there is no visible damage. 167955AFA SJ6826 RT, SJ6832 RT... -
Page 23: Lifting Mechanism
Ensure all pins are properly secured. ▪ Ensure cables and wires are properly routed and ▪ shows no signs of wear and/or physical damage. Scissor Bumpers Ensure bumpers are secure and shows no sign of ▪ visible damage. SJ6826 RT, SJ6832 RT 167955AFA... - Page 24 Pin retainer and retainer bolts are in place. ▪ Center pin pivot – Outer Pin retainer in place Center pin pivot – Middle No rust. Pin has not rotated. Area is clean of dust/metal shavings Center pin pivot – Inner 167955AFA SJ6826 RT, SJ6832 RT...
- Page 25 Any units with structural damage to any pin connection or scissor arm must be immediately removed from indicates pin has rotated service and repaired by a qualified technician. Contact Skyjack Service for repair instructions. Rust Lift Cylinders around Ensure each lift cylinder is properly secured, pin boss ▪...
- Page 26 Cracks in welds or the surrounding metal, or rust ▪ forming in the area. Bearing block degradation Broken, missing, or Cracks in weld or loose retainers or bolts surrounding metal, rust in the area Note: weld intentionally not located at bolt area 167955AFA SJ6826 RT, SJ6832 RT...
-
Page 27: 10 Base
Check each wheel for damage and cracked ▪ welds. Check each lug nut for proper torque. Refer to ▪ 2.6 Torque Specifications. To maximize stability, it is essential to maintain ▪ proper pressure equally in all air-filled tires. SJ6826 RT, SJ6832 RT 167955AFA... - Page 28 Outriggers (If Equipped) Ensure there are no loose or missing parts and ▪ there is no visible damage. Emergency Lowering Access Rod Ensure rod is properly secured and there is no ▪ visible damage. 167955AFA SJ6826 RT, SJ6832 RT...
-
Page 29: Function Tests
After repairs are completed, the operator must perform a pre-operation inspection and a series of function tests again before putting aerial platform into service. SJ6826 RT, SJ6832 RT 167955AFA... - Page 30 Notes 167955AFA SJ6826 RT, SJ6832 RT...
-
Page 31: Section 2 - Specifications
3500 (High Throttle) / 2050 (Low Throttle) Tires Foam-filled OTR Outrigger - 26 x 12 Sound Pressure (2000/14/EC Annex III) 96 dB(A) Gradeability (Torque Equivalent To) *Weights are approximate; refer to serial nameplate for specific weight. 1500AA SJ6826 RT, SJ6832 RT 167955AFA... -
Page 32: Floor Load Calculation
Do not use tires other than those specified for this machine. Do not mix different types of tires. Tires other than those specified can adversely affect stability. Failure to operate with matched, approved tires in good condition can result in death or serious injury. Replace tires with the exact, Skyjack-approved types only. 167955AFA... -
Page 33: Floor Loading Pressure
136 kg 400N 2.5 x 4.5 1.5 x 1.5 No Wind Platform NOTE: Occupants and materials are not to exceed rated load. Refer to capacity label for additional information and for models equipped with options. SJ6826 RT, SJ6832 RT 167955AFA... -
Page 34: Fluid Specifications
Engine Type Capacity (Liters) Coolant Type Gallons) Kubota 0.82 Anti-freeze 50/50 Premix Engine Fuel Capacity (US Engine Type Capacity (Liters) Fuel Type Gallons) Kubota D902 Diesel Kubota D972 86.88 22.95 Unleaded Gasoline Kubota WG 752 1512AA 167955AFA SJ6826 RT, SJ6832 RT... -
Page 35: Torque Specifications
Hydraulic drive motor mounting bolts (Front) Hydraulic drive motor mounting bolts (Rear) Positive battery post cable/fuse nut 7.5 (90 in-lb) 10.2 Steer cylinder nut 94.9 Newton-meter = Nm Foot-Pound Force = ft-lb Inch-Pound Force = in-lb 1504AC SJ6826 RT, SJ6832 RT 167955AFA... -
Page 36: Torque Specifications For Fasteners (Imperial)
2660 1 1/2-12 1329 2983 2224 4827 3606 NOTE: Lubed includes lubricants such as lubrizing, oil, grease, and some uncured thread lockers. Refer to the specific 1374AB thread locker manufacturer’s instructions for specific torque adjustments. 167955AFA SJ6826 RT, SJ6832 RT... -
Page 37: Torque Specifications For Fasteners (Metric)
2024 M36 x 4.00 2557 1918 3659 2744 NOTE: Lubed includes lubricants such as lubrizing, oil, grease, and some uncured thread lockers. 1375AC Refer to the specific thread locker manufacturer’s instructions for specific torque adjustments. SJ6826 RT, SJ6832 RT 167955AFA... -
Page 38: Torque Specifications For Hydraulic Couplings & Hoses
Min. Max. Min. Max. Min. Max. 1/4" 6.75 1/4" 3/8" 3/8" 1/2" 27.66 1/2" 5/8" 46.33 5/8" 3/4" 72.33 3/4" 1" 100.5 1" 1 1/4" 101.5 1 1/4" 1 1/2 1 1/2 2" 2" 1276AA 167955AFA SJ6826 RT, SJ6832 RT... -
Page 39: Section 3 - System Component Identification And Schematics
Section 3 – System Component Identification and Schematics SJ6826 RT, SJ6832 RT 167955AFA... -
Page 40: Hydraulic Symbol Chart
Section Section 3 – System Component Identification and Schematics Hydraulic Symbol Chart Table 3.1 Hydraulic Symbol Chart VARIABLE DISPLACEMENT SHUTTLE VALV VELOCITY FUSE LINE CROSSING PUMP ACCUMULATOR, SINGLE ACTING LINE JOINED HAND PUMP GAS CHARGED CYLINDER HYDRAULIC CUSHION DOUBLE ACTING RELIEF VALVE TANK CYLINDER... -
Page 41: Electrical Symbol Chart
Electrical Symbol Chart Section Section 3 – System Component Identification and Schematics Table 3.2 Electrical Symbol Chart ANGLE KEY SWITCH WIRE CROSSING HOURMETER TRANSDUCER PRESSURE WIRES JOINED LIGHT FOOT SWITCH TRANSDUCER HYDRAULIC LIMIT SWITCH BATTERY TOGGLE SWITCH VALVE COIL N.O. PROPORTIONAL LIMIT SWITCH PUSH BUTTON... -
Page 42: Ac Cord Color Code
Standard Definition NEC Colors IEC Colors Protective Ground/ Protective Earth Green Green-Yellow Neutral White Blue Line, Single Phase Black Black or Brown or Grey Note: Standard colors referenced from IEC 60445:2010, Annex A: Table A.1 167955AFA SJ6826 RT, SJ6832 RT... -
Page 43: Hydraulic Schematic Parts List
103623 VALVE, Control (Brake) 4H-15A 139256 VALVE, Control (Reverse drive) 4H-15B 128318 VALVE, Control (Parallel reverse drive) 4H-16A 139256 VALVE, Control (Forward drive) 4H-16B 128318 VALVE, Control (Parallel forward drive) 4H-20A 139351 VALVE, Control (Series/Parallel) SJ6826 RT, SJ6832 RT 167955AFA... - Page 44 PUMP , Dual hydraulic (0.671/ 0.366) 104534 VALVE, Relief (System) 104534 VALVE, Relief (Lift) 106557 VALVE, Relief (Lift cylinder) 106557 VALVE, Relief (Lift cylinder) 104534 VALVE, Relief (Drive) 107271 VALVE, Emergency lowering 137182 VALVE, Freewheel 113752 VALVE, Brake auto reset 167955AFA SJ6826 RT, SJ6832 RT...
-
Page 45: Electrical Parts List
RELAY, 12 Volt (40 Amp) (Large pump dump enable) 31CR 127035 RELAY, 12 Volt (40 Amp) (Glow plug) 32ACR 127035 CONTACTOR, Engine start 32CR1 127035 RELAY, 12 Volt (40 Amp) 32CR2 127035 RELAY, 12 Volt (40 Amp) (Engine start) SJ6826 RT, SJ6832 RT 167955AFA... - Page 46 Solenoid, High throttle ICM1 136121 MODULE, Igniter control 137857 ALTERNATOR (Kubota DF902) 136101 ALTERNATOR (Kubota DF972) IGC1 136106 COIL, Ignition IGC2 136106 COIL, Ignition LED-1 137785 LIGHT, Power on LED-2 137785 LIGHT, Power on (Base controls) 167955AFA SJ6826 RT, SJ6832 RT...
- Page 47 • SWITCH HEAD, Push button (Black) 137786 • SWITCH ASSEMBLY (Base) 137782 • • BLOCK, N.O. Spring contact 137781 • • LATCH 102853 SWITCH, Outrigger Enable 127132 SWITCH, Outrigger enable 133762 BLOCK, N.O. Contact (Platform/Idle/Base) (Base controls) SJ6826 RT, SJ6832 RT 167955AFA...
- Page 48 COIL, 12 Volt (Parallel reverse drive valve) 4H-16A 128321 COIL, 12 Volt (Forward drive valve) 4H-16B 128321 COIL, 12 Volt (Parallel forward drive valve) 4H-20A 137513 COIL, 12 Volt (Series/Parallel drive) 4H-23 128321 COIL, 12 Volt (Right steer valve) 167955AFA SJ6826 RT, SJ6832 RT...
- Page 49 128321 COIL, 12 Volt (Front left outrigger extend) 4H-76 128321 COIL, 12 Volt (Front right outrigger extend) 4H-77 128321 COIL, 12 Volt (Rear right outrigger extend) 4H-78 128321 COIL, 12 Volt (Rear left outrigger extend) SJ6826 RT, SJ6832 RT 167955AFA...
-
Page 50: Hydraulic Schematic S/N 37006450 And Above
Ø0.089 68 32 RT MB8 OUTRIGGER MANIFOLD BLOCK VALVE 2H-18B (ANSI/CSA) 2H-18C (CE) SMALL PUMP DUMP AUXILIARY VALVE TANK PORT TANK DRAIN MB1 68XXRT MAIN MANIFOLD PUMP PUMP LARGE SMALL FILTER PUMP PUMP ENGINE PUMP RESERVOIR M194135AA SJ6826 RT, SJ6832 RT 167955AFA... -
Page 51: Hydraulic Schematic S/N 37006449 And Below
Ø0.089 68 32RT COUNTERBALANCE MB8 OUTRIGGER MANIFOLD BLOCK VALVE 2H-18B (ANSI/CSA) 2H-18C (CE) SMALL AUXILIARY PUMP DUMP TANK PORT VALVE TANK DRAIN MB1 68XXRT MAIN MANIFOLD PUMP PUMP LARGE SMALL FILTER PUMP PUMP ENGINE PUMP RESERVOIR M137360AK SJ6826 RT, SJ6832 RT 167955AFA... -
Page 52: Hydraulic Manifold Valve Port Identification
2H-18B (ANSI/CSA) RESET VALVE 2H-18C (CE) SMALL PUMP DUMP VALVE TANK DRAIN CHECK SYSTEM 3H-14A EMERGENCY 4H-23 VALVE LOWERING RELIEF LIFT LOWERING RIGHT STEER ORIFICE VALVE VALVE PULL VALVE MAIN MANIFOLD VALVE ASSEMBLY VALVE M137189AQ SJ6826 RT, SJ6832 RT 167955AFA... -
Page 53: Hydraulic Manifold Valve Assemblies And Port Identification
LEFT FRONT EXTEND 2H-17C OUTRIGGER HOLDING 4H-76A VALVE 4H-77A OUTRIGGER CHECK OUTRIGGER RIGHT FRONT VALVE RIGHT REAR EXTEND EXTEND CHECK VALVE CHECK VALVE SPLITTER MANIFOLD VALVE ASSEMBLY OUTRIGGER OUTRIGGER MANIFOLD VALVE ASSEMBLY CYLINDER M138075AB_1 M138045AB_1 SJ6826 RT, SJ6832 RT 167955AFA... -
Page 54: Control Box Wiring Diagram
JOYSTICK HARNESS REFERENCE (02) WHITE WHITE BLACK (16) MALE QDC - 2nd/3rd SPD V+ 8B PURPLE CRD1 GROUND - GREEN BLACK WHITE FEMALE QDC - ENABLE VS+ 8A WHITE/BLUE MALE QDC - GROUND 02 WHITE M166134AB SJ6826 RT, SJ6832 RT 167955AFA... -
Page 55: Outrigger / Hydraulic Generator Control Console Wiring Diagram
PIN 5 - 71 ORANGE PIN 13 - 79 GREEN PIN 6 - 72 RED PIN 14 - 35C BLUE/WHITE PIN 7 - 73 BLUE PIN 15 - 35C GREEN/WHITE PIN 8 - 74 BLACK M129301AD SJ6826 RT, SJ6832 RT 167955AFA... -
Page 56: Scissor Arm Control Cable Wiring Diagram
BLUE/BLACK (24) (08) BLACK/RED RED/WHITE (31) (09) ORANGE/RED GREEN/BLACK (32) (10) BLUE/WHITE GREEN/WHITE (34) (10) BLUE/RED GREEN (49) (13) ORANGE ORANGE/GREEN (60) (14) BLACK RED/BLACK/WHITE (NOT USED) (15) BLUE (GROUND) GRN/BLK/WHT TO (00) FEMALE M137356AB SJ6826 RT, SJ6832 RT 167955AFA... -
Page 57: Main Manifold Valve Harness Wiring Diagram
PIN 2 - 02 WHITE HOLDING VALVE (LOWER) PIN 1 - 13 BLACK 13 - BLACK PIN 1 - 13 BLACK PIN 2 - 02 WHITE PIN 2 - 02 WHITE 02 - WHITE M139827AB SJ6826 RT, SJ6832 RT 167955AFA... -
Page 58: Kubota Engine Wiring Diagram - Dual Fuel System - S/N 37009728 And Below
PIN 87 - 31A RED/WHITE PIN 86 - 02 WHITE CHOKE SOLENOID (CS-31A) PIN 30 - 3A BLUE 31A - RED/WHITE PIN 85 - 31 RED/WHITE 02 - WHITE PIN 87a - NOT USED M137528AC SJ6826 RT, SJ6832 RT 167955AFA... -
Page 59: Kubota Engine Wiring Diagram - Dual Fuel System - S/N 37009729 And Above
3.15 Kubota Engine Wiring Diagram – Dual Fuel System – S/N 37009729 and Above M198923AA SJ6826 RT, SJ6832 RT 167955AFA... -
Page 60: Kubota Engine Wiring Diagram (Diesel Fuel System)
PIN 8 - 31 RED/WHITE (3ACR) PIN 30 - 57 BLACK/WHITE PIN 87a - 57A BLACK/WHITE PIN 85 - 3A BLUE BACK VIEW PIN 86 - 2B BLACK/RED PIN 87 - N/U D E F M137884AH SJ6826 RT, SJ6832 RT 167955AFA... -
Page 61: Outrigger Harness Wiring Diagram
CONTROL BOX PIN 14 - 35C WHITE PIN 1 - BLACK (10A) PIN 2 - WHITE (68A) PIN 15 - 35C GREEN PIN 3 - GREEN (10A) PIN 4 - RED (64) REF: 138052AE M146126AE SJ6826 RT, SJ6832 RT 167955AFA... -
Page 62: Hydraulic Generator Electrical Panel Assembly
86D - ORG/BLK/WHT, FROM MAIN MANIFOLD HARNESS PIN 8 - 17AB BLUE/BLACK PIN 9 - 43 RED/BLACK PIN 10 - 43A RED/WHITE PIN 11 - 86A ORANGE/BLACK/WHITE PIN 12 - 86D ORANGE/BLACK/WHITE OUTRIGGER/HYDRAULIC GENERATOR HARNESS FROM HYDRAULIC GENERATOR CONTROL BOX M146108AC_1 SJ6826 RT, SJ6832 RT 167955AFA... -
Page 63: All Motion Alarm Electrical Panel Diagram
3.19 All Motion Alarm Electrical Panel Diagram 0.100 (MIN STRAIGHT) 0.075 (MIN BEND RADIUS) (1.063 LEG LENGTH) 0.625 DETAIL A DETAIL B DETAIL A DETAIL B M139317AA SJ6826 RT, SJ6832 RT 167955AFA... -
Page 64: Telematics Harness Wiring Diagram
3.20 Telematics Harness Wiring Diagram TO TELEMATICS DEVICE TELEMATICS CONNECTIONS( PART OF STANDARD ELECTRICAL PANEL) MAIN BATTERY TO ENGINE MAIN DISCONNECT SWITCH S1 M171108AA SJ6826 RT, SJ6832 RT 167955AFA... -
Page 65: Flashing Light Relay Harness
3.00 SPLICE 1.50 22CR TERMINATION, MINIMUM. ALL WIRES ARE CSA CERTIFIED TYPE TEW FLAME TESTED THERMOPLASTIC EQUIPMENT WIRE, RATED FOR 600V, 105°C. REFERENCE STANDARD CSA C22.2 No. 127. 0.00 L=12" 22CR 60-BK/WH-16 ELEC. SCHEMATIC M239681AA-1 SJ6826 RT, SJ6832 RT 167955AFA... -
Page 66: Electrical Panel Wiring Diagram S/N 37000235 And Above
3.22 Electrical Panel Wiring Diagram S/N 37000235 and above Serial Number Breakdown Reference Table Model Serial Number 37000235 and SJ68RT above LEGEND: MAIN MANIFOLD HARNESS ENGINE HARNESS PLATFORM CONTROL BOX OUTR/GEN HARNESS TILT SWITCH HIGH SPEED LIMIT SWITCH M204232AA SJ6826 RT, SJ6832 RT 167955AFA... -
Page 67: Electrical Panel Wiring Diagram S/N 37000234 And Below
PIN 1 & 7 - GRN/RED (28-28A) BLACK (14-14A) PIN 9 & 10 - RED (43-43A) PIN 4 - 44 RED ORANGE/GREEN (60) (14) BLACK RED/BLACK/WHITE (NOT USED) (15) BLUE (GROUND) GREEN/BLACK/WHITE TO (00) M146124AF SJ6826 RT, SJ6832 RT 167955AFA... -
Page 68: Electrical Panel Diagram With Positive Air Shut Off Option S/N 37000235 And Above
Serial Number Breakdown Reference Table Model Serial Number 37000235 and SJ68RT above LEGEND: MAIN MANIFOLD HARNESS ENGINE HARNESS PLATFORM CONTROL BOX OUTR/GEN HARNESS TILT SWITCH HIGH SPEED LIMIT SWITCH POSITIVE AIR SHUT OFF RESISTOR M204247AA SJ6826 RT, SJ6832 RT 167955AFA... -
Page 69: Electrical Panel Diagram With Positive Air Shut Off Option S/N 37000234 And Below
PIN 1 & 7 - GRN/RED (28-28A) BLACK (14-14A) PIN 9 & 10 - RED (43-43A) PIN 4 - 44 RED ORANGE/GREEN (60) (14) BLACK RED/BLACK/WHITE (NOT USED) (15) BLUE (GROUND) GREEN/BLACK/WHITE TO (00) M171645AB SJ6826 RT, SJ6832 RT 167955AFA... -
Page 70: Positive Air Shut Off Harness Wiring Diagram - Diesel Engine
403 BLUE (AUX PIN) AIR CLEANER ENGINE HARNESS POSI AIR SHUT OFF TO ELECTRICAL PANEL TO 1.75" AUTO SHUT OFF VALVE CONNECTOR TO ALTERNATOR TRIGGER ALTERNATOR TRIGGER PIN 3 “P”-YELLOW (410) REAR VIEW 3 2 1 M171825AB_2 SJ6826 RT, SJ6832 RT 167955AFA... -
Page 71: Electrical Schematic (No Option With Kubota Dual Fuel Engine) S/N 37009565 And Above
D18B SMALL PUMP DUMP D44-1 TILT ENABLE RELAY SWITCH 28ACR1 LARGE PUMP DUMP ENABLE RELAY NO OUTRIGGER 28ACR2 JUMPER 2 3.27 Electrical Schematic (No Option with Kubota Dual Fuel Engine) S/N M213390AA 37009565 and above SJ6826 RT, SJ6832 RT 167955AFA... -
Page 72: Electrical Schematic (No Option With Kubota Dual Fuel Engine) S/N 37000235 To 37009564
3.28 Electrical Schematic (No Option with Kubota Dual Fuel Engine) S/N 37000235 to 37009564 Serial Number Breakdown Reference Table Model Serial Number 37000235 to SJ68RT 37009564 M166131AC SJ6826 RT, SJ6832 RT 167955AFA... -
Page 73: Electrical Schematic (No Option With Kubota Dual Fuel Engine) S/N 37000234 And Below
3.29 Electrical Schematic (No Option with Kubota Dual Fuel Engine) S/N 37000234 and below Serial Number Breakdown Reference Table Model Serial Number 37000234 and SJ68RT below M166131AA SJ6826 RT, SJ6832 RT 167955AFA... -
Page 74: Electrical Schematic (All Option With Kubota Dual Fuel Engine) S/N 37009565 And Above
3.30 Electrical Schematic (All Option with Kubota Dual Fuel Engine) S/N 37009565 and above 3.30 Electrical Schematic (All Option with Kubota Dual Fuel Engine) S/N 37009565 and above M220163AB SJ6826 RT, SJ6832 RT 167955AFA... -
Page 75: Electrical Schematic (All Option With Kubota Dual Fuel Engine) S/N 37000235 To 37009564
3.31 Electrical Schematic (All Option with Kubota Dual Fuel Engine) S/N 37000235 to 37009564 Serial Number Breakdown Reference Table Model Serial Number 37000235 to SJ68RT 37009564 M166380AD SJ6826 RT, SJ6832 RT 167955AFA... -
Page 76: Electrical Schematic (All Option With Kubota Dual Fuel Engine) S/N 37000234 And Below
3.32 Electrical Schematic (All Option with Kubota Dual Fuel Engine) S/N 37000234 and below Serial Number Breakdown Reference Table Model Serial Number 37000234 and SJ68RT below M166380AB SJ6826 RT, SJ6832 RT 167955AFA... -
Page 77: Electrical Schematic (All Option With Kubota Diesel Engine) S/N 37000235 And Above
3.33 Electrical Schematic (All Option with Kubota Diesel Engine) S/N 37000235 and above Serial Number Breakdown Reference Table Model Serial Number SJ68RT 37000235 and above M166381AD SJ6826 RT, SJ6832 RT 167955AFA... -
Page 78: Electrical Schematic (All Option With Kubota Diesel Engine) S/N 37000234 And Below
3.34 Electrical Schematic (All Option with Kubota Diesel Engine) S/N 37000234 and below Serial Number Breakdown Reference Table Model Serial Number 37000234 and SJ68RT below M166381AC SJ6826 RT, SJ6832 RT 167955AFA... -
Page 79: Section 4 - Troubleshooting Guide
This manual cannot cover all possible problems that may occur. If a problem occurs that is not listed, isolate the component and determine whether the problem is electrical or hydraulic. Have the problem corrected before operating the machine. SJ6826 RT, SJ6832 RT 167955AFA... -
Page 80: Electrical System
3. Loose or broken wire #07 from base terminal block Check continuity. Replace if defective. TB-1 to platform emergency stop switch S4. Check switch. Replace if defective. 4. Open or defective platform emergency stop switch S4. 167955AFA SJ6826 RT, SJ6832 RT... -
Page 81: All Functions Inoperative From The Platform
17. Loose or broken wire #32 from relay 32CR2 to relay Check continuity. Replace if defective. 32CR1. 18. Loose or broken wire #41 from relay 32CR2 to relay Check continuity. Replace if defective. 32CR1. 19. Defective relay 32CR1. Check relay. Replace if defective. SJ6826 RT, SJ6832 RT 167955AFA... -
Page 82: Engine Cranks But Does Not Start - Kubota Diesel
3. Loose or broken wire #00 from coil pack 2 wire Check continuity. Replace if defective. connector to engine ground. 4. Loose or broken wire #00 from engine ground to Check continuity. Replace if defective. crank position sensor. 167955AFA SJ6826 RT, SJ6832 RT... -
Page 83: Glow Plugs Inoperative From Engine Controls Or Platform (Diesel Models)
7. Loose or broken wire #02 from glow plug relay Check continuity. Replace if defective. 31CR to base terminal block TB1. 8. Loose or broken wire #103 from engine starter to Check continuity. Replace if defective. relay 31CR. SJ6826 RT, SJ6832 RT 167955AFA... -
Page 84: Choke Inoperative From Engine Controls Or Platform (Kubota Dual Fuel)
If machine is in drive mode and is elevated above high speed limit switch, high throttle is inoperative. 1. Loose or broken wire #08 from lift / drive select Check continuity. Replace if defective. switch S3 to low/high throttle switch S14. 167955AFA SJ6826 RT, SJ6832 RT... -
Page 85: 10 High Throttle On Demand Inoperative (Kubota Dual Fuel)
Select high throttle position on switch. 2. Open or defective diode D17A or D18B. Check diodes. Replace if defective. 3. Loose or broken wire #33 from terminal block Check continuity. Replace if defective. TB1 to power on demand relay 33CR. SJ6826 RT, SJ6832 RT 167955AFA... -
Page 86: 11 Drive And Steer Inoperative (Machines Without Outriggers Option)
CN14 between pin #1 Check continuity. Replace if defective. and pin #7. 14. Loose or broken wire #28A from outrigger connector CN14 at pin #1 to base terminal block Check continuity. Replace if defective. TB1. 167955AFA SJ6826 RT, SJ6832 RT... -
Page 87: 12 Drive And Steer Inoperative (Machines With Outriggers Option)
16. Defective drive enable relay 61CR. Check relay. Replace if defective. 17. Loose or broken wire #28A from pin #1 on connector CN14 at the outrigger board to Check continuity. Replace if defective. terminal block TB1. SJ6826 RT, SJ6832 RT 167955AFA... -
Page 88: 13 Brakes Does Not Release
2. Defective controller S7. Check controller. Replace if defective. 3. Loose or broken wire #A from reverse switch S7-4 to contacts on Lift/Drive select switch Check continuity. Replace if defective. between wire #A and wire #15. 167955AFA SJ6826 RT, SJ6832 RT... -
Page 89: 17 Forward Drive Inoperative
Check continuity. Replace if defective. switch to relay 16CR. 5. Defective relay 16CR. Check relay. Replace if defective. 6. Loose or broken wire #02 from relay 16CR to Check continuity. Replace if defective. base terminal block. SJ6826 RT, SJ6832 RT 167955AFA... -
Page 90: 18 First Drive Speed And Steering Inoperative
8. Defective small pump dump valve coil 2H-18B. Check coil. Replace if defective. 9. Loose or broken wire #02 from small pump Check continuity. Replace if defective. dump coil 2H-18B to base terminal block TB1. 167955AFA SJ6826 RT, SJ6832 RT... -
Page 91: 19 Second Drive Speed Inoperative
19. Defective relay 28ACR2. Check relay. Replace if defective. 20. Loose or broken wire #17A from relay 28ACR2 to Check continuity. Replace if defective. relay 28ECR2. (CE) 21. Defective relay 28ECR2. (CE) Check relay. Replace if defective. SJ6826 RT, SJ6832 RT 167955AFA... -
Page 92: 20 Third Drive Speed Inoperative
7. Loose or broken wire #20A from relay 20CR to Check continuity. Replace if defective. relay 20ACR1. 8. Loose or broken wire #20A from relay 20ACR1 to Check continuity. Replace if defective. series/parallel valve coil 4H-20A. 167955AFA SJ6826 RT, SJ6832 RT... -
Page 93: 22 Up Circuit Inoperative From Platform
4.2-24 Up Circuit Inoperative from Platform or Base Control Console (without Outriggers) 1. Loose or broken wire #14 from base terminal block TB1 to up relay jumper between wire #14 Check continuity. Replace if defective. and #14A. SJ6826 RT, SJ6832 RT 167955AFA... -
Page 94: 25 Platform Does Not Lift From Platform Or Base Control Console With Outriggers Retracted (Lift Operates Correctly With Outriggers Extended)
LS62 to outrigger board. 12. Loose or broken wire #62 from outrigger board Check continuity. Replace if defective. to outrigger limit switch LS61. 13. Defective outrigger limit switch LS61. Check switch. Replace if defective. 167955AFA SJ6826 RT, SJ6832 RT... -
Page 95: 26 Platform Does Not Lift From Platform Or Base Control Console With Outriggers Extended
16. Loose or broken wire #65 from outrigger control Check continuity. Replace if defective. module at pin P2-8 to outrigger board. 17. Open diode D14A-2 at base terminal block TB1. Check diode. Replace if defective. SJ6826 RT, SJ6832 RT 167955AFA... -
Page 96: Retracted
7. Loose or broken wire #02 from base terminal block TB1 to lowering valve 2H-13 or holding Check continuity. Replace if defective. valve 2H-13-1 and 2H-13-2. 8. Defective lowering valve coil 2H-13 or holding Check Coil. Replace if defective. valve 2H-13-1 and 2H-13-2. 167955AFA SJ6826 RT, SJ6832 RT... -
Page 97: 29 Down Circuit Inoperative From Base
Check continuity. Replace if defective. relay 86ACR. 13. Loose or broken wire #02 from base terminal Check continuity. Replace if defective. block TB1 to relay 86CCR. 14. Defective relay 86CCR. Check relay. Replace if defective. SJ6826 RT, SJ6832 RT 167955AFA... -
Page 98: 31 Hydraulic Generator Does Not Shut Off From Generator Switch
2. No power at wire #9 at pin #5 on connector #9 back to the main terminal block TB1. Replace if CN14 on outrigger board. defective. 3. Defective relay 9CR2 or 9CR3 on outrigger board. Check relays. Replace if defective. 167955AFA SJ6826 RT, SJ6832 RT... -
Page 99: 33 All Outriggers Inoperative (Auto-Level And Manual From Platform Controls)
OCM1. 4. Loose or broken wire #02 at pin #3 of the tilt Check for continuity. Replace if defective. switch connector to base terminal block TB1. 5. Defective outrigger control module OCM1. Replace. SJ6826 RT, SJ6832 RT 167955AFA... -
Page 100: 36 All Outriggers Inoperative (Auto Level Only)
Internal failure of OCM1. Turn off power to reset the outrigger control module. Turn power back on and see if the code has cleared. If problem persists, replace outrigger control module. 60416AB 167955AFA SJ6826 RT, SJ6832 RT... -
Page 101: 37 Left Front Outrigger Inoperative Manually
Check continuity. Replace if defective. CN21 at the outrigger board. 4.2-39 Right Rear Outriggers Inoperative Manually 1. Defective right rear outrigger switch S22 at platform control console or S22A at base control Check switch. Replace if defective. console. SJ6826 RT, SJ6832 RT 167955AFA... -
Page 102: 40 Left Rear Outriggers Inoperative Manually
Turn off power to reset the outrigger control 2. No output from outrigger control module OCM1 module. Turn power back on and retest. If problem at plug P4 pins 1-8. persists, replace outrigger control module. 167955AFA SJ6826 RT, SJ6832 RT... -
Page 103: 42 Auto-Level Inoperative
6. Loose or broken wire #79 from auto mode outrigger switch S24 to pin #P2-6 on outrigger Check continuity. Replace if defective. control module OCM1. 7. For additional information, refer to section 5 Outrigger Control Module. SJ6826 RT, SJ6832 RT 167955AFA... -
Page 104: Hydarulic System
Close valve. Repair or replace if defective. 6. Stuck or defective high speed valve 2H-20B. Check valve. Repair or replace if defective. 7. Cushion cylinder C8 bypassing internally. Check cylinder. Repair or replace if defective. 4.3-6 Drive Sluggish 167955AFA SJ6826 RT, SJ6832 RT... -
Page 105: Reverse Drive Inoperative
1. Stuck or defective lowering valve 2H-13. Check valve. Repair or replace if defective. 2. Stuck holding valve 2H13-1 or 2H13-2. Check valves. Repair or replace if defective. 3. Plugged lowering orifice O1. Clean or replace orifice. SJ6826 RT, SJ6832 RT 167955AFA... -
Page 106: 14 Hydraulic Generator Inoperative
3. Bypassing outrigger cylinder C12. Repack cylinder. Replace if defective 4.3-20 Outriggers Drift In 1. Defective check valve left front CV7, right front CV8, Clean valve. Replace if defective. right rear CV9 or left rear CV10. 167955AFA SJ6826 RT, SJ6832 RT... - Page 107 Hydarulic System Section 4 – Troubleshooting Guide 2. Outriggers cylinder bypassing left front C9, right Repack cylinder. Replace if defective. front C10, right rear C11 or left rear C12. SJ6826 RT, SJ6832 RT 167955AFA...
- Page 108 Notes 167955AFA SJ6826 RT, SJ6832 RT...
-
Page 109: Section 5 - Service Procedures
4. Turn the main power disconnect switch to the off position. After you complete a procedure which involves the modification, adjustment, or replacement of a hydraulic or electrical component, do all of the function tests given in your unit’s Operation Manual. SJ6826 RT, SJ6832 RT 167955AFA... -
Page 110: Platform
3. To increase the tension, insert a 5/32 hex wrench in (bolts, flat washers, and spring washers) with the screw socket, and turn the wrench clockwise. new Skyjack-approved parts. Refer to the parts To release the tension, depress the hex wrench manual for the part numbers for your specific in the socket, let it rotate counterclockwise, then MEWP . -
Page 111: Scissors
7 ft (2.13 m). cable by cutting the tie wraps. 6. Follow the cable into the electrical panel, and disconnect the limit switch wires from the electrical panel. Discard the limit switch.Limit Switch Replacement SJ6826 RT, SJ6832 RT 167955AFA... -
Page 112: Test The High Speed Cutout Limit Switch
2. Then raise the platform over 84 in (213 cm). Drive forward with joystick fully forward. Machine should drive in low speed. NOTE High Speed Cutout should occur within the tolerance zone of 81–87 in (206–221 cm). Figure 04 167955AFA SJ6826 RT, SJ6832 RT... -
Page 113: Engine
3. If the resistance is not within the factory specifications, replace it. IMPORTANT To replace the ignitor with a service part, make sure the ignitor has the same part cord No / ID mark as the old one. See the information label 1. SJ6826 RT, SJ6832 RT 167955AFA... -
Page 114: Kubota Dual Fuel (Df972/Wg752) Engine Throttle Setting
3. Set the low/high throttle switch to low on the platform control box. Start the engine and let it run until it reaches normal operating temperature. 1. Turn threaded link 2. Tighten nut Figure 07 167955AFA SJ6826 RT, SJ6832 RT... -
Page 115: Kubota Diesel D902 Engine Throttle Setting
3. Set the low/high throttle switch to low on the platform control box. Start the engine and let it run until it reaches normal operating temperature, then switch it to high throttle for the next step. SJ6826 RT, SJ6832 RT 167955AFA... - Page 116 Jam nuts Low idle Figure 10 jam nut 7. Once the correct rpm is reached, apply a drop of Loctite 242 to the threads, and tighten the jam nuts on each end. Figure 11 167955AFA SJ6826 RT, SJ6832 RT...
-
Page 117: Replace The Fuel Filter Element - Kubota D902
Some air bubbles should come out. Filter Element Filter Cup Figure 13 Retaining Ring 5. When no more air bubbles are seen, close the air vent plug. 8. Close the engine door. SJ6826 RT, SJ6832 RT 167955AFA... -
Page 118: Replace And Adjust The Fan Belt
4. Measure and adjust the fan belt deflection as described in the next section. Adjustment bolt Pulley cover Figure 17 3. Retest the deflection, and continue to adjust as needed until it falls within the range specified Figure 15 above. 167955AFA SJ6826 RT, SJ6832 RT... -
Page 119: Replace The Air Cleaner Element
5. Check for oil leaks around the gasket, and if no leaks are found, check the oil level using the dipstick. 6. Replenish the oil if needed. Figure 19 6. Close the engine door. SJ6826 RT, SJ6832 RT 167955AFA... -
Page 120: Change The Oil
B – Evaporation Oil filler cap 5. Replenish the recovery tank up to the FULL line with clean, soft water. Radiator cap Dipstick Drain plug Figure 21 Drain plugs Figure 22 167955AFA SJ6826 RT, SJ6832 RT... -
Page 121: 11 Drain And Refill The Radiator
8. Start the engine and run it for a few minutes, then shut it off. 9. Check the coolant level on the recovery tank once again, and add more coolant to the tank if needed. FULL SJ6826 RT, SJ6832 RT 167955AFA... -
Page 122: Base
If possible, drive the machine before you check the torques. 8. Check the torque values after 8 hours of operation and then at weekly intervals. 167955AFA SJ6826 RT, SJ6832 RT... -
Page 123: Grease Points
On each outrigger foot (1 fitting per outrigger, if ▪ equipped, 4 per unit). 5. Wipe off any excess grease from around the joint or bearing, and from the grease fitting. 6. Replace the grease fitting cap. Figure 24 Figure 23 SJ6826 RT, SJ6832 RT 167955AFA... -
Page 124: Reconnect The Platform Control Box For Use From The Ground
4. Bring the control box down from the platform to the ground. 5. Locate the control cable connectors inside the engine cabinet. Figure 28 8. The control box functions may now be accessed Figure 26 from the base. 167955AFA SJ6826 RT, SJ6832 RT... -
Page 125: Electronic Tilt Switch Set Up Procedure
Red LED 4. Push in emergency stop buttons. Turn the main indicates the switch Green LED has learned the new power disconnect switch off. zero position. 5. Disconnect the tilt switch from 4 pin connector. SJ6826 RT, SJ6832 RT 167955AFA... - Page 126 Step 10, the switch exits the program mode and returns to normal operation using the previous zero point. 15. Turn main power disconnect switch off. 16. Push in all emergency stop buttons. 17. Remove wheel chocks. 167955AFA SJ6826 RT, SJ6832 RT...
- Page 127 The switch does not function. After a period of 5 seconds Green and Red or on power up, the switch LEDs on attempts to return to normal operation. If the fault is still detected, both LEDs remain SJ6826 RT, SJ6832 RT 167955AFA...
-
Page 128: Hydraulics
O-ring when installed. 6. Install any 45° and 90° hydraulic hose ends first, then align direction and tighten. Adjust the swivel nut on the straight hose end before Figure 33 tightening to create the desired flow. 167955AFA SJ6826 RT, SJ6832 RT... -
Page 129: Do A Check Of The Holding Valve
Using two Box Wrenches, tighten the nut the appropriate number of flats past the mark (refer to the FFWR chart above). Figure 34 6. Apply a drop of torque seal to the connection. SJ6826 RT, SJ6832 RT 167955AFA... -
Page 130: Set The System Pressure
5. No further action is needed if the pressure shown on the gauge matches that on the serial plate. However, if it does not match that on the serial plate, proceed to the next step. 167955AFA SJ6826 RT, SJ6832 RT... -
Page 131: Set The Lift Pressure
Refer to 5.6-1 Tightening and torque recommendations for hydraulic couplings and hoses. Pressure gauge 12. Remove the pressure gauge and reconnect the attached to quick control box to the platform. disconnect fitting Figure 39 SJ6826 RT, SJ6832 RT 167955AFA... -
Page 132: Drive Circuit Flush Procedure
Verify the motors turn freely and smoothly. If any of the existing motors do not turn freely, or are locked, they should be replaced at this time. 8. Re-assemble and re-install all drive valves. 167955AFA SJ6826 RT, SJ6832 RT... -
Page 133: Drive Pressure And Wheel Motor Tests
3. Move the torque switch to the “RAMP” (parallel), start the engine and engage drive joystick to full forward drive. Result: Drive pressure should be between ▪ 2500 and 3000 psi. If pressure is below 2500 psi, continue motor testing procedure. SJ6826 RT, SJ6832 RT 167955AFA... -
Page 134: Outriggers
O.R. DOWN SWITCH (NC) - BLACK & BLACK / WHITE O.R. DOWN SWITCH (NC) - BLACK & BLACK / WHITE LEFT REAR OUTRIGGER SECTION VIEW RIGHT REAR OUTRIGGER SECTION VIEW (SHOWN IN THE RETRACTED STATE) (SHOWN IN THE RETRACTED STATE) Figure 41 167955AFA SJ6826 RT, SJ6832 RT... -
Page 135: Replace And Adjust The Outrigger Upper Limit Switches (Ls61, Ls62, Ls63, Ls64)
1. Turn the main power disconnect switch to the ON position. Start the engine. 2. With the outriggers fully retracted, the MEWP should be drivable. With the outriggers extended more than halfway, the MEWP should not be drivable. SJ6826 RT, SJ6832 RT 167955AFA... -
Page 136: Replace And Adjust The Outrigger Lower Limit Switches (Ls65, Ls66, Ls67, Ls68)
2. With the outriggers fully retracted, the unit Retain the rubber grommet. Discard the old limit drives. With the outriggers extended more than switch and cable. halfway, the MEWP does not drive. 167955AFA SJ6826 RT, SJ6832 RT... -
Page 137: Ezcal Diagnostic Tool
ESC/ENTER ENTER ESC ENTER Use these to move back and forth between menus and submenus and to make a selection. Up/Down Adjust the settings values. Left/Right Select the menus and settings to be adjusted. SJ6826 RT, SJ6832 RT 167955AFA... -
Page 138: Flash The Controller
EZcal Pro, press the enter key until it displays the required file. EZcal Pro MENU: XXXXXXX :YES ENTER PGFLASH WORKING Wait for the flash to finish. This could take several minutes. PGFLASH OK/VX.X FINSHED 167955AFA SJ6826 RT, SJ6832 RT... -
Page 139: Outrigger Codes
EZcal Diagnostic Tool Section 4 – Service Procedures 5.10-3 Outrigger codes Model Standard Outrigger Code SJ6826 RT ANSI/CSA SJ6832 RT ANSI/CSA SJ6826 RT, SJ6832 RT 167955AFA... -
Page 140: Ocm1 Control Module
Section 4 – Service Procedures OCM1 Control Module 5.11 OCM1 Control Module 5.11-1 Auto-leveling outrigger PC board layout CN14 CN21 CN20 9CR3 9CR2 61CR 17DCR 65CR ENABLE CN22 Figure 46 167955AFA SJ6826 RT, SJ6832 RT... -
Page 141: Outrigger Control Module (Ocm1) Instructions
Displays various status during the auto-level function Tilt Displays vehicle tilt in X and Y orientations measured by integral sensor Tilted Displays whether vehicle is tilted (YES or NO) Battery Displays battery supply voltage (on P2-12) SJ6826 RT, SJ6832 RT 167955AFA... - Page 142 OCM1 version Displays part number and software version of GP106 EZcal version Displays software version of EZcal Access Level Menu Options ACCESS LEVEL 3 (allows viewing only) CODE xxxx ACCESS LEVEL 2 (allows setup on OCM1) 167955AFA SJ6826 RT, SJ6832 RT...
- Page 143 If machine is tilted to 1.0° in the X and Y orientations, the auto-level function will attempt to level the X orientation (0.3+0.5<1.0) but does not attempt to level the Y orientation (0.7+0.5>1.0) RANGE: 0.0° to 1.0°, default 0.3° SJ6826 RT, SJ6832 RT 167955AFA...
-
Page 144: Auto-Leveling Outrigger Settings And Error Codes
Since the outrigger control module only reports one 60402AC error, only one code can be read from the LED per instance. If the error is cleared and another is present, it will then be presented. 167955AFA SJ6826 RT, SJ6832 RT... -
Page 145: Auto-Leveling Outrigger Error Code Breakdown
P4 pins 1-8 is high, when the outrigger control module is not active These are internal faults. If the fault persists after the power has been reset, the outrigger control module may need to be replaced. SJ6826 RT, SJ6832 RT 167955AFA... -
Page 146: Control Module
12. The display shows Defaults, 0 = Custom. Use the up and down buttons to select the Defaults: Code Setting for your model from the menu. For the default code, refer to 5.10-3. 13. Press ENTER then ESCAPE. 167955AFA SJ6826 RT, SJ6832 RT... -
Page 147: Gp-106 Outrigger Controller Pin Reference Table
Output used to retract the RIGHT REAR outrigger 72 Red Output used to retract the RIGHT FRONT outrigger 71 Orange Output used to retract the LEFT FRONT outrigger 35C White/Black Power input for outriggers 60401AC SJ6826 RT, SJ6832 RT 167955AFA... -
Page 148: Control Module
Hold the keyswitch in the base position during the entire setup process. If you let go of the keyswitch in the middle of the process, the controller resets and you have to start again from the beginning. 167955AFA SJ6826 RT, SJ6832 RT... - Page 149 TILT SETUPS CALIBRATE LEVEL To the CALIBRATE LEVEL: YES:ENTER, NO:ESC ENTER ENTER home screen YES:ENTER, NO:ESC TILT 0.0’ , 0.0’ Push and pull the emergency stop button to cycle the power and save the settings. SJ6826 RT, SJ6832 RT 167955AFA...
-
Page 150: Gp-108 Outrigger Controller Pin Reference Table
12V Input From LS1 High Speed Limit Switch To Verify ON/OFF Limits 02 White 0V GND (-) Negative Reference From Base Terminal Strip 10A Blue/Black 12V Main Power Input thru Main Power Relay 10BCR From Base Terminal Strip 167955AFA SJ6826 RT, SJ6832 RT... - Page 151 12V Output for Outrigger Right Front Up signal to 4H-72 Solenoid 71 Orange 12V Output for Outrigger Left Front Up signal to 4H-71 Solenoid 35C White/Black 12V Output for Outrigger Enable signal from Enable switch S9A or Relay 9CR3 SJ6826 RT, SJ6832 RT 167955AFA...
-
Page 152: Led Error Codes
DRIVE/LIFT INPUTS FAULTY! FAULT: CHECK HEIGHT1 SENSOR FAULT: CHECK HEIGHT2 SENSOR FAULT: CHECK HEIGHT SENSORS FAULT: CHECK PRESSURE SENSOR FAULT: CHECK ELEVATION SWITCH TESTING HWFS IDLE TIMEOUT ACTIVE! CHECK GP106 CONNECTIONS! CHECK GP102 CONNECTIONS! FACTORY OVERRIDE 60665AA 167955AFA SJ6826 RT, SJ6832 RT... - Page 154 www.skyjack.com...
Need help?
Do you have a question about the SJ6826 RT, SJ6832 RT and is the answer not in the manual?
Questions and answers