Advertisement
Quick Links
Day One+
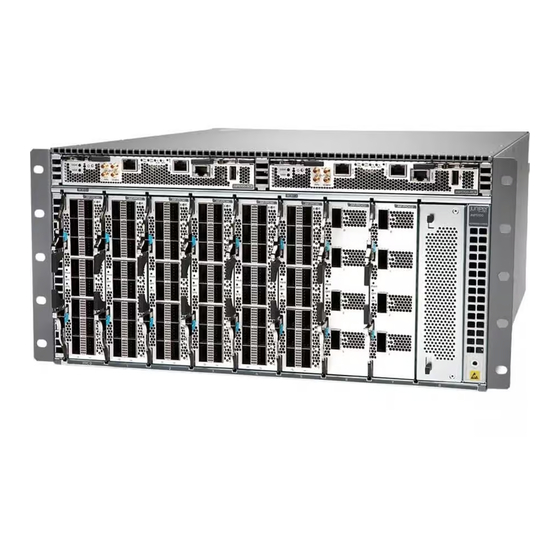
QFX5700
IN THIS GUIDE
Step 1: Begin | 1
Step 2: Up and Running | 10
Step 3: Keep Going | 13
Step 1: Begin
IN THIS SECTION
Meet the QFX5700 Switch | 2
Install the QFX5700 | 2
Power On | 9
In this guide, we provide a simple, three-step path, to quickly get you up and running with your new QFX5700. We've
simplified and shortened the installation and configuration steps, and included how-to videos. You'll learn how to install
an AC-powered QFX5700 in a rack, power it up, and configure basic settings. For details on how to install a DC-powered
QFX5700, see the
QFX5700 Switch Hardware
Junos OS Evolved
The QFX5700 runs Junos
that provides reliability, agility, and open programmability for successful cloud-scale deployments. With Junos OS Evolved,
you can enable higher availability, accelerate your deployments, innovate more rapidly, and operate your network more
efficiently. We've aligned Junos OS Evolved with Junos OS so that you can seamlessly continue to manage and automate
your network.
Guide.
®
OS Evolved software. Junos OS Evolved is a unified, end-to-end network operating system
Advertisement

Related Manuals for Juniper Day One+ QFX5700


Summary of Contents for Juniper Day One+ QFX5700
- Page 1 Day One+ QFX5700 IN THIS GUIDE Step 1: Begin | 1 Step 2: Up and Running | 10 Step 3: Keep Going | 13 Step 1: Begin IN THIS SECTION Meet the QFX5700 Switch | 2 Install the QFX5700 | 2 Power On | 9 In this guide, we provide a simple, three-step path, to quickly get you up and running with your new QFX5700.
- Page 2 Are you interested in getting hands-on experience with the topics and operations covered in this guide? Visit Juniper Networks Virtual Labs and reserve your free sandbox today! You’ll find the Junos Day One Experience sandbox in the stand alone category.
- Page 3 What’s in the Box? QFX5700 switch Two power cords appropriate for your geographic location RJ-45 Ethernet cable RJ-45 to DB-9 serial port adapter What Else Do I Need? Someone to help you secure the switch to the rack A mechanical lift rated for 250 lb (113.4 kg) Eighteen mounting screws appropriate for your rack A Phillips (+) screwdriver, number 1, 2, or 3, depending on the size of your rack-mounting screws NOTE:...
- Page 4 RCB 0 RCB 1 5. Load the switch onto the lift, making sure it rests securely on the lift platform. 6. Using the lift, align the switch in front of the rack. 7. Carefully position the chassis in the rack until the holes of the front-mounting brackets align with the holes in the rack rails.
- Page 5 8. Starting from the bottom, insert 5 rack mounting screws into the front mounting bracket holes on each side of the rack and tighten them with a screwdriver. 9. On the rear of the chassis, slide the rear mounting blades into the channels on each side of the chassis until they contact the rack rails.
- Page 6 10. Starting from the bottom, insert 4 rack mounting screws into the rear mounting bracket holes on each side of the rack and tighten them with a screw driver. 11. Check to see if the mounting screws are aligned on each slide of the rack and that the switch is level. NOTE: If you have unused ports on RCB (Timing Ports 10MHz/1PPS IN/OUT) and FPC (Optical Ports), plug them using dust covers to prevent dust from entering the connectors.
- Page 7 3. Using a Phillips screwdriver, remove the screw on each side of the chassis that holds the rear mounting blades to the chassis. 4. Slide the mounting blades out of the channels. RCB 0 RCB 1 5. With one person on each side, carefully lift the bottom of the chassis and position it in the rack so that the front brackets are aligned with the rack holes.
- Page 8 6. With two people continuing to support the chassis, have the third person install and tighten five mounting screws in the front mounting bracket holes on each side of the rack, starting from the bottom. 7. On the rear of the chassis, slide the rear mounting blades into the channels on each side of the chassis until the rear mounting brackets contact the rack rails 8.
- Page 9 10. If you have removed any pre-installed components, reinstall them: Install a QFX5700 Routing and Control Board Install a QFX5700 Forwarding Engine Board Install a QFX5700 FPC Install a QFX5700 Fan Tray Install a AC/HVDC Power Supply/DC Power Supply Power On Now that you’ve installed your QFX5700 in the rack, you’re ready to connect it to power.
-
Page 10: Step 2: Up And Running
4. Insert the coupler end of the power cord into the each AC power cord inlet on the AC power supply. TRA Y 5. If the AC power source outlet has a power switch, turn it off. NOTE: The QFX5700 powers on as soon as you plug it in to power. There is no power switch. 6. -
Page 11: Plug And Play
Plug and Play The QFX5700 switch ships with factory-default settings that enable plug-and-play operation. These settings load as soon as you power on the QFX5700 switch. Customize the Basic Configuration You can easily customize the factory-default configuration using CLI commands. Initially, you’ll need to make changes through the console port. - Page 12 root@% cli 5. Enter configuration mode. root> configure 6. Add a password for the root administration user account. [edit] root@# set system root-authentication plain-text-password New password: password Retype new password: password 7. (Optional) Configure the name of the switch. If the name includes spaces, enclose the name in quotation marks (“ ”). [edit] root@# set system host-name host-name 8.
- Page 13 NOTE: When Telnet is enabled, you can’t log in to the QFX5700 through Telnet using root credentials. Root login is allowed only for SSH access. 13. Enable SSH service. [edit] root@# set system services ssh 14. To allow users to log in to the switch as root through SSH, include the root-login statement. [edit system services ssh] root@# root-login (allow | deny | deny-password) NOTE:...
-
Page 14: What's Next
QFX series switch See all documentation See the QFX5700 Documentation in the Juniper Networks TechLibrary. available for the QFX5700 Manage software upgrades for Installing Software on QFX Series Devices. your QFX5700... - Page 15 Juniper Portal Juniper Networks, the Juniper Networks logo, Juniper, and Junos are registered trademarks of Juniper Networks, Inc. in the United States and other countries. All other trademarks, service marks, registered marks, or registered service marks are the property of their respective owners. Juniper Networks assumes no responsibility for any inaccuracies in this document. Juniper Networks reserves the right to change, modify, transfer, or otherwise revise this publication without notice.
Need help?
Do you have a question about the Day One+ QFX5700 and is the answer not in the manual?
Questions and answers