
Related Manuals for Displays2go DF080NVB2


Summary of Contents for Displays2go DF080NVB2
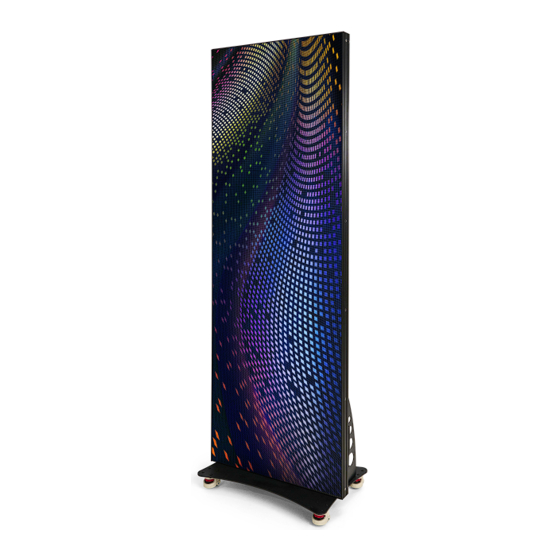
- Page 1 80” Floor Standing LED Poster 2.5mm Pixel Pitch SKU: DF080NVB2 Scan QR code to visit the product page: USER MANUAL 2023.06...
-
Page 2: Table Of Contents
Contents 1. Preface 6. System Connection Instructions 1.1 Introduction 6.1 System Connection Diagram of Single LED Poster 6.2 1.2 Safety Notice Startup instructions 1.3 Certification 1.4 GOB LED Modules 7. Content Management & Publish 2. Product Introduction 7.1 Publish via PC 2.1 Overview 7.2 Publish via Phone APP 2.2 Features... -
Page 3: Preface
1. Preface 1.1 Introduction 1) This manual is for 2.5-80” LED poster. For better application, this manual systematically introduces the product make up, interface, specification, also the installation, wiring and content publish function. 2) Software instructions are based on built-in Nova T6 player and not applicable to other players. 1.2 Safety Notice Warning! Please read below safety instructions before installation, power-on, operation and testing... - Page 4 Please read below safety instructions before installation, power-on, operation and testing; Make sure to follow the safety instructions. For any questions, please contact us for assistance. • Due to flame, electric shock, fall down, this product may cause injury to person, even death; •...
- Page 5 • Please make sure this product grounded correctly to ensure safety and prevent electrical shock; • Please cut off in thunderstorm weather or make sure taking lightning strike protection measures. Please cut off if no long no use; • Please cut off display power under situations of unused, disassemble, installation, maintenance; •...
- Page 6 • Please make sure screen, processor and power with good heat ventilation, at least 4 inches distance from other stuff; • Please do not stick any objects on screen; • Please do not refit the product and add new parts; •...
-
Page 7: Certification
1.3 Certification The product has passed FCC, UL, CE and RoHS certification to meet international standards. 1.4 GOB LED Modules Gob Led Display is an LED Display with a glue on board (GOB) technology. This innovative technology seals the module surface with transparent epoxy glue. This protects the LED from any harmful accidents by making it anti-collision, waterproof, anti-UV and dust proof. -
Page 8: Product Introduction
2. Product Introduction 2.1 Overview • Easy operation, multiple communication modes, high brightness, low power consumption and ultra-thin body to ensure stable and high-quality display effect even in bright-light venues. • It is a new product that overturns traditional LCD player (high cost, low-quality picture, uneven brightness, heavy body and high energy consumption), which can be installed in hotels, restaurants, shopping malls, banks, government agencies, hospitals and so on. -
Page 9: Specifications
2.3 Specifications 2.25 in 25.5 in 1)Display Overall Dimensions (W×H×D): 25.5×76×16.5 in (LED poster) 25.5×79×16.5 in (with base) 79 in 16.5 in 24.5 in... - Page 10 2.3 Specifications 2.5-80“ LED Poster Pixel Pitch (mm) 2)Main parameters LED Type Viewing Angle (H/V) Optical 140 ° / 140 ° Parameters Brightness(cd/m ≥900 nits ( ± 10%) Refresh Rate(Hz) 3840 Hz Optimized Viewing Distance (feet) ≥20’ + Average Power Consumption (W/unit) Max.
-
Page 11: Packing List
3. Packing list USB Drive×1 Power cable×1 Bracket X1 Floor Standing Base X1 80” LED Display×1 HDMI Cable×1... -
Page 12: Assembly Instructions
4. I/O Interface 5. Assembly Instructions CAUTION: TWO PEOPLE ARE REQUIRED. NOTE: 1. Assemble the product on a level and clean ground. Cover the area with soft cloth to prevent any damage. 2. A Phillips screwdriver is needed. Ethernet 1. Fix 1 upright bracket to the base with 2 flat COM 2 head screws and a Phillips screwdriver. -
Page 13: System Connection Instructions
6. System Connection Instructions 6.1 System Connection Diagram of Single LED Poster 6.2 Startup Instructions ① Connect power cable to power on the LED Poster. See fig 6.2. ② DGLED25AND will be light up after 40s. ③ Load in the playlist. Notes: please refer to the Section 7 for how to load in a playlist. -
Page 14: Content Management & Publish
7. Content Management & Publish 7.1 Publish via PC 1) Software installation a. Plug in the USB provided by seller to PC and open it, find the software [ViPlex Express V1.1.0 CTM1.0.2 Setup] under the folder [Project # (for example C18I-067-XI-CD)] → [Part 1 Software] → [T6] → [PC Terminal], see below fig 7.1, and install it. b. - Page 15 7.1 Publish via PC 2) Internet connection Connect PC as below: • WIFI of built-in player; • Router in LAN; fig 7.3 • CAT 5E; Note: in this instruction, the connection is via WIFI of built-in player. Open WLAN in your PC, connect to the WIFI, refer to fig 7.3. •...
- Page 16 7.1 Publish via PC 3) Settings on the play software [ViPlex Express] Open ViPlex Express, click [Connect] and enter username and password, then click [Ok], refer to fig 7.5. Note: default username: admin default password: 123456 fig 7.5...
- Page 17 7.1 Publish via PC 4) Create a new playlist a. Click [Program Management] → [New] b. Name the new playlist in [Solution Name] c. Type in the resolution in [Display Width & Display Height] d. Click [ok] to edit the playlist, please refer to fig 7.6. fig 7.6...
- Page 18 7.1 Publish via PC 4) Create a new playlist e. Click [+] to add page according to the quantity of content. f. Select text, image, video, gif, clock, weather, and container for each page. Please refer to fig 7.7. Note: the resolution of image must fit the poster. g.
- Page 19 7.1 Publish via PC 4) Create of a new playlist h. Enter the interface shown in fig 7.9, click the new playlist created in last step and click to publish. i. Select the LED poster, click [Publish] shown in fig 7.10 to upload the playlist. j.
-
Page 20: Publish Via Phone App
7.2 Publish via Phone APP 1) Install Viplex APP b) IOS system: a) Android system: Scan below QR code, download Viplex Handy and install. Search Viplex Handy in App Store , download and install... - Page 21 7.2 Publish via Phone APP 2) Internet connection Open WLAN in the phone, connect to WIFI, please refer to fig 7.12. ID: P2.5-posterleddisplay-x-xxxxxxxx Password:12345678 Note: WiFi ID can be found on the back of poster, refer to fig 7.13. Open ViPlex Handy, find your LED poster, click [Connect] and type in the username and password, then click [Login], refer to fig 7.14.
- Page 22 7.2 Publish via Phone APP 3) Create a new playlist a. Click [Solutions] to add solution to create a new playlist, please refer to fig 7.15. b. Name the new playlist in [Solution Name] c. Type in the resolution in [Solution resolution] d.
- Page 23 7.2 Publish via Phone APP 3) Create a new playlist f. Left-click the display window and select the format of content in [Add Solution]. g. Open [Media Library], choose the content and click [ok], refer to fig 7.17 and fig 7.18. h.
-
Page 24: Publish Via Usb
7.3 Publish via USB 1) Refer to Part 7.1 to create a new playlist in PC. 2) Export the playlist to USB a. Plug the USB to PC, click [Product Management], select the right playlist, click to export content to USB, please refer to fig 7.20. - Page 25 7.3 Publish via USB 2) Export the playlist to USB c. Click [Next] when finish transfer. d. Select [Plug and play] or [Copy and play] in [Play Mode], if select [Copy and play], please choose [overwrite them], then [Ok] to finish, please refer to fig 7.22.
- Page 26 7.3 Publish via USB 2) Export the playlist to USB e. Enter identification page, please type in the log in password again and click [Ok], then export the playlist to USB successfully. Please refer to fig 7.23. Note: This step is required for exporting playlist. f.
-
Page 27: Connecting Multiple Posters
8. Connecting Multiple Posters 8.1 Connect up to 4 Units (Daisy Chain) 1) You can connect up to 4 LED posters together by daisy chaining from one poster to the other utilizing an HDMI cord. 2) From the first poster you connect one end of the HDMI cord to the HDMI out port and with the other end of the HDMI cord connect it to the HDMI in port. -
Page 28: Displaying Content Across Multiple Screens
8.2 Displaying Content Across Multiple Screens Step 4: Step 6: Step 7: Step 1: Step 2: Step 3: Step 5: Toggle On the Check Quantity Enter # of screens On your phone Connect to the Click On Multi- Select settings Multi-Screen and click on OK and click on Done... -
Page 29: Common Faults And Trouble Shooting
9. Common Faults and Trouble Shooting Whole display turn to blank screen Fault Fault Analysis Trouble Shooting 1. Check power supply to make sure the 1. Abnormal electrical power supply of display is powered. display. 2. Check if display power has turned on. 2. - Page 30 9. Common Faults and Trouble Shooting Single module turns to blank screen Fault Fault Analysis Trouble Shooting 1. Open display using magnet tool from the front. 2. Check connection of signal cable and power supply cable on module. 3. If above cables have been in good connection, connect signal cable and power cable on the 1.
- Page 31 9. Common Faults and Trouble Shooting Color missing on certain module Fault Fault Analysis Trouble Shooting 1. Change faulted module. Module fault.
- Page 32 9. Common Faults and Trouble Shooting Color missing or blank screen on certain module Fault Fault Analysis Trouble Shooting 1. Open display using magnet tool from the front. 2. Check the signal cable between modules. Signal cable fault. 3. Change module signal cable to make sure all Module fault.
- Page 33 9. Common Faults and Trouble Shooting Two thirds of display turns to blank screen Fault Fault Analysis Trouble Shooting 1. Open display using magnet tool from the front. 2. Check power cable of board. 1. Poor connection in board power 3.
- Page 34 9. Common Faults and Trouble Shooting Disorder image on display Fault Fault Analysis Trouble Shooting 1. Reload display configuration files. 1. Setting error.
- Page 35 9. Common Faults and Trouble Shooting Repeated image on display Fault Fault Analysis Trouble Shooting LED display setting error. Reload display configuration files.
- Page 36 9. Common Faults and Trouble Shooting Half of display turns to blank screen Fault Fault Analysis Trouble Shooting 1. Power cable fault between 1. Check power cable between switching supply switching power supply and power and related module. module. 2. If above checking is normal, change the 2.
- Page 37 Address: 81 Commerce Drive Fall River, MA 02720 USA If you have any questions regarding our products or warranty information, please visit us at www.displays2go.com or contact D2G customer service 844-221-3393.
Need help?
Do you have a question about the DF080NVB2 and is the answer not in the manual?
Questions and answers