Table of Contents
Advertisement
Quick Links
Advertisement
Table of Contents

Related Manuals for Proxomed kardiomed 530 cycle


Summary of Contents for Proxomed kardiomed 530 cycle
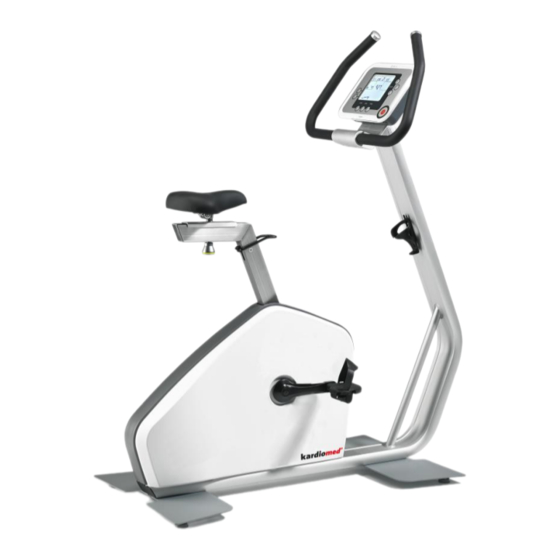
- Page 1 User manual User manual kardiomed cycle 521 med Version 1.0 Page 1 of 21...
-
Page 2: Table Of Contents
Contents General ............................. 3 Classification of the unit......................3 Safety warnings ........................3 Safe assembly of the unit ....................3 Safe training ........................4 Indications and contraindications ..................5 Operating the display ......................5 Pulse systems ........................5 Overview Display / Button Functions ................6 Display .......................... -
Page 3: General
General Read the instruction manual with its security advices and warnings prior to the initial use of the units, to secure a safe and conventional use. Keep this document for future reference and pass it with the unit in case of resale. Classification of the unit ... -
Page 4: Safe Training
Place the unit on a solid, flat and non-sliding ground and level the unit with the adjusting feet, so that it does not move. For the set-up a safety clearance of 100 cm to all sides is necessary to ensure a safe access also in emergencies. -
Page 5: Indications And Contraindications
Indications and contraindications Indications Mobility of the locomotors apparatus Strengthening of the muscles Strengthening of the cardiovascular system Contraindications Cardiovascular affections Pains of the locomotors apparatus During workout Pains in the thoracic region ... -
Page 6: Overview Display / Button Functions
Overview Display / Button Functions Reset button Smart Key buttons Fig. 2: Monitor view for explanation of buttion functions Clockwise explanation of the buttons, starting with the Stop button: The STOP button stops the workout and activates the electronic brake, which will generate a maximum workload for 8 seconds to bring the movement to a halt. -
Page 7: Display
Display Fig.3: In this image all segments of the LCD display can be seen. In usage only the relevant information is shown. Depending on the program, the following parameters are shown: Program: Number of the program. Time: Actual accumulated time of workout or remaining, effective workout time. An arrow indicates the counting direction. -
Page 8: Dot Matrix
DOT Matrix In the lower half of the LCD display a text guides through the programming menu in the chosen language in order to ease the programming. Additionally, the wattage and pulse paths are visualized during workouts.The curve for the wattage is displayed constantly whereas the pulse-curve flashes. The display depends on the program but pressing the scan button can alternate the display. -
Page 9: Online-Training With Rfid
Reinsert the member card. The training can start now. If the maximum number of workouts is fulfilled a new program has to get stored on the card. The member card should be used by one training person only. After the desired program has been saved, the card simply has to be entered to start the workout. -
Page 10: Results
4.11 Results After the end of each workout or after pressing the COOL button, all workout results will be shown on the display. According to the program selected, the relevant results are shown. When there is no reaction the workout will be stopped after showing the results. By pushing the COOL button, the workout can be stopped at any time. - Page 11 exceeded. Additionally, the program can evaluate the development of the heart rate and use the determined fitness level to adjust the resistance, which allows for an optimal warm-up. If the initial resistance is set above a certain limit, no warm-up will be done and the resistance is immediately being adjusted to the desired heart frequency (see motion pulse manager brochure).
- Page 12 Interval The interval training works rpm independently. Programming with a PC-software is not possible at this point. The training can be divided into 22 parts, which can get set individually regarding intensity, time and other parameters. To use this individually set training program easily, it can get saved on a storage media. In general intensity steps are put in a row.
- Page 13 Formula: 220-age=max. heart rate 15 - 90 Choose with +/-, → ENTER Max. pulse 90 - 220 Choose with +/-, → ENTER The programming of the intervals is completed. The display says GO. With +/- the intensity of every step can get adapted With the SCAN button different display views can get chosen.
- Page 14 Distance The distance training works in a rpm-dependent mode, which means that the intensity adjusts when the rpm changes. For this program, the parameters distance and intensity level/gear (1-21) must be pre-selected. At any time during the workout, the level can be adjusted with +/-. The chosen distance will countdown and the intensity is determined from among the 21 intensity levels.
- Page 15 IPN Test Generally, fitness tests judge users’ stamina by comparing certain figures with standard values. Only a few tests are suited to give guidelines for workout intensity on several types of ergometers. The optional IPN test is one of the few tests able to offer such guidelines. The test operates fully automatically upon the input of only 5 parameters.
-
Page 16: Pulse Controlled Programs
are calculated based on the steady state phase in which the heart frequency and the resistance have been adjusted accordingly. The results can be reproduced and then compared in the longitudinal section. This test was founded by Astrand upon the evaluation of the VO relative to body weight (maximum capacity 2 max of oxygen absorption). - Page 17 the machine is being build), in order to limit the risk resulting from any malfunction of the connected device. Please contact your dealer, when you have more questions about this issue. If the monitor shall be active for a longer period – especially prior to the start of a training/test – a stabilized, medically approved, 9 Volt power supply unit has to be connected.
-
Page 18: Maintenance
Maintenance All cardio machines from emotion fitness are characterized by excellent quality. The units are durable and only need little maintenance, to function over a long period of time. The required maintenance hast to get conducted conscientious. Warning: Only authorised service is allowed to open the unit. Abb.6: Warning indication at brake: Danger resulting from high voltage You can only keep the safety level by checking the unit regularly for damage and attrition. -
Page 19: Maintenance For Authorised Specialists
Clean the parts of the seat post and seat sleigh with silicone spray and wipe it dry afterwards. Check the pedal straps for damages. Only use original spare parts, therefore please contact us. Warning: Retorque cranks and pedals After the first 10 hours of use the cranks and pedals need to get re-tightened. -
Page 20: Warranty Conditions
2. The required spare part(s) are shipped. 3. An exchange unit is arranged and sent to the user. The defective parts must be sent to proxomed within 48 hours. Otherwise the cost for spare parts that have been delivered will be charged. - Page 21 German headquaters: ® proxomed Medizintechnik GmbH Daimlerstraße 6 D-63755 Alzenau Tel.: +49 6023 9168-0 Fax: +49 6023 9168-68 www.proxomed.de info@proxomed.de Office Switzerland: proxomed Medizintechnik Seestrasse 161 CH-8266 Steckborn Tel.: +41 52762 1300 Fax: +41 52762 1470 www.proxomed.ch info@proxomed.ch Changes: emotion fitness GmbH &...
Need help?
Do you have a question about the kardiomed 530 cycle and is the answer not in the manual?
Questions and answers