
Related Manuals for AMX NetLinx NXM-MHS


Summary of Contents for AMX NetLinx NXM-MHS
- Page 1 instruction manual NetLinx Master Cards and Modules NXM-MHS, NXC-M/ME/MPE N e t L i n x C e n t ra l C o n t r o l l e r s a n d C a r d s Get other manuals https://www.bkmanuals.com...
- Page 2 This warranty extends only to products purchased directly from AMX Corporation or an Authorized AMX Dealer. AMX Corporation is not liable for any damages caused by its products or for the failure of its products to perform. This includes any lost profits, lost savings, incidental damages, or consequential damages. AMX Corporation is not liable for any claim made by a third party or by an AMX Dealer for a third party.
-
Page 3: Table Of Contents
Table of Contents Table of Contents Product Information - NetLinx Modules ..............1 NXM-MHS (NXM Modules) ....................1 NXM-MHS specifications ......................1 Program Port DIP switch - baud rate settings ................2 Program Port DIP switch - Program Run Disable (PRD) mode ..........3 Setting the Program Port DIP Switch .................. - Page 4 Table of Contents Programming ......................21 Program Port Commands ....................21 ESC Pass Codes ......................24 Notes on specific Telnet/Terminal clients................ 24 Windows client programs ....................... 24 Linux Telnet client ........................24 NetLinx Security ..................... 25 NetLinx Security Features....................25 Security Terms Used in This Document................
- Page 5 Table of Contents Main Security Menu......................36 Default Security Configuration..................37 Security Help menu........................ 38 Logging Into a Session....................39 Logout ..........................40 Help Security.......................... 40 Setup Security........................40 NetLinx Master Cards and Modules Get other manuals https://www.bkmanuals.com...
- Page 6 Table of Contents NetLinx Master Cards and Modules Get other manuals https://www.bkmanuals.com...
-
Page 7: Product Information - Netlinx Modules
Product Information - NetLinx Modules Product Information - NetLinx Modules NetLinx Master Cards and Modules are the controllers for NetLinx Control Systems. The Master Cards can be installed in the NetLinx CardFrame (NXF), the NetLinx Integrated Controller (NXI), or a NetLinx Module (NXS-MHS) for stand-alone operation. The NetLinx Master Cards/Modules covered in this document are: •... -
Page 8: Program Port Dip Switch - Baud Rate Settings
Product Information - NetLinx Modules NXM-MHS Specifications (Cont.) Front Panel Components Cont.): Input LED Yellow LED blinks when the Master Card receives data from button pushes, strings, commands, channel levels, etc. Front Panel LEDs - These LEDs also display special blink patterns when a mode is activated. blink patterns See the Modes and front panel LED blink patterns section on page 5 for details. -
Page 9: Program Port Dip Switch - Program Run Disable (Prd) Mode
Product Information - NetLinx Modules Baud Rate Settings Baud Rate Position 5 Position 6 Position 7 Position 8 9600 bps 38,400 bps (default) 57,600 bps 115,200 bps DIP switch positions 3 and 4 are reserved for future features and should always be set to the Off (down) position. -
Page 10: Program Port Connections/Wiring
Product Information - NetLinx Modules Program Port Connections/Wiring Master Cards are equipped with two Program ports. One is located on the front panel and the other is on the rear for easy access. The port on the front panel is a DB-9 (male) connector, and the rear port is a 5-pin (male) connector. -
Page 11: Modes And Front Panel Led Blink Patterns
Product Information - NetLinx Modules Modes and front panel LED blink patterns The following table lists the modes for the Master Cards/Modules and blink patterns for the front panel LEDs for each mode. Modes and LED Blink Patterns LEDs and Blink Patterns STATUS OUTPUT INPUT... -
Page 12: Rear Panel Leds: Ethernet (Me And Mpe Only)
Product Information - NetLinx Modules Rear panel LEDs: Ethernet (ME and MPE only) L - Link LED (green) lights when A - Activity LED (yellow) the Ethernet cables are connected blinks when receiving ETHERNET and terminated correctly. Ethernet data packets. 10/100 SPEED FD - Full Duplex LED (green) -
Page 13: Nxc-M Master Card
NXC-M Master Card NXC-M Master Card Specifications NXC-M Master Card Specifications Power Requirements 260 mA @ 12 VDC Memory • Disk on chip (Non-volatile): 8 MB (upgradeable to 32 MB) • SDRAM (Volatile): 16 MB • NVS (Non-volatile): 1 MB Front Panel Components: Connector Program port - DB-9 (male) connector for system programming and diagnos-... -
Page 14: Rear Panel Components
NXC-M Master Card Rear panel components FIG. 4 shows the rear panel components of the NXM-M Master Card. ICSHub IN/OUT connectors/LEDs ICSNet connectors/LEDs NXC-M Master 12VDC AXlink PROGRAM ICSNet ICSHub PROGRAM port connector AXLink connector AXLink status LED (green) 12 VDC power supply connector FIG. - Page 15 NXC-M Master Card FIG. 6 Installing the new rear plate 3. Mount the NCP-E to the NXC-M, as shown in FIG. 7. a. Lower the rear edge (with the Ethernet connector and LEDs) of the NCP-E first. b. Align the connector with the opening in the rear plate. c.
- Page 16 NXC-M Master Card NetLinx Master Cards and Modules Get other manuals https://www.bkmanuals.com...
-
Page 17: Nxc-Me Master-Ethernet Card
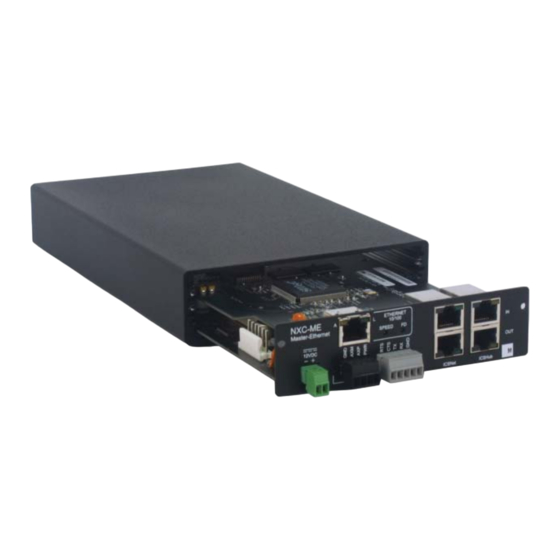
NXC-ME Master-Ethernet Card NXC-ME Master-Ethernet Card The NXM-ME Master-Ethernet Card is a NetLinx Master Card with a 10/100 Base-T TCP/IP Ethernet connection. Specifications NXC-ME Specifications Power Requirements 400 mA @ 12 VDC Memory • Disk on chip (Non-volatile): 8 MB (upgradeable to 32 MB) •... -
Page 18: Ethernet Ports Used By The Me
NXC-ME Master-Ethernet Card Ethernet Ports used by the ME Ethernet Ports used by the ME Port Type Description Standard Port # • ICSP Peer-to-peer protocol used for both master-to-master and 1319 (UDP/TCP) master-to-device communications. For maximum flexibility, the NetLinx master can be configured to utilize a different port than 1319 or disable ICSP over Ethernet completely from either Telnet or the Program Port located on the NetLinx master itself. -
Page 19: Nxc-Mpe Master Port Expander Card
NXC-MPE Master Port Expander Card NXC-MPE Master Port Expander Card The NXC-MPE Master Port Expander Card shares the features and functionality of the NXC-ME, but with an RJ-11 SPE (Server Port Expander) connector instead of a 4-pin AXlink connector. The SPE port allows you to use the NXC-MPE in conjunction with an AXB-SPE (Server Port Expander) to control up to 12 additional AXlink bus lines of up to 3,000 feet (914.4 meters) in distance each. -
Page 20: Rear Panel Components
NXC-MPE Master Port Expander Card Rear panel components FIG. 9 shows the rear panel components NXC-MPE Master Port Expander Card. Ethernet 10/100 LEDs Ethernet 10/100 connector ICSNet connectors/LEDs ICSHub In/Out connectors/LEDs NXC-MPE ETHERNET 10/100 Master-Ethernet SPEED 12VDC AXlink EXPANSION OUT PROGRAM ICSNet ICSHub... -
Page 21: Spe Cable Pinout Information
FIG. 11 Daisy chaining two or more AXB-SPE's off of an NXC-MPE SPE Cable pinout information The following table gives pinout information for the RJ-11 SPE connector. AMX supplies the RJ- 11 cable with the AXB-SPE. The EXPANSION connectors (on the AXB-SPE) use pins 2, 3, 4 and 5. Pin 2 is Ground; the others are all pin-to-pin connections. - Page 22 NXC-MPE Master Port Expander Card NetLinx Master Cards and Modules Get other manuals https://www.bkmanuals.com...
-
Page 23: Installation And Wiring
Installation and Wiring Installation and Wiring This section contains information about installing the NetLinx Modules and Master Cards, wiring diagrams, and pinouts for assembling cables. Mounting the Modules Into an Equipment Rack To install the NXS-MHS Modules in an equipment rack, you'll need an optional AC-RK Kit: 1. -
Page 24: Preparing/Connecting Captive Wires
Installation and Wiring 6. Inside the Master Card slot on the NXF or NXI, find the 6-pin control cable connector. 7. Plug the connector from the NXF or NXI into the 6-pin terminal on the Master Card. This connector is keyed to ensure correct orientation. 8. -
Page 25: Icshub Rj-45 Connections/Wiring
Installation and Wiring ICSHub RJ-45 Connections/Wiring The two ICSHub RJ-45 connectors on the rear of the Master Card provide data to other Hubs connected to a downstream system. Hubs allow you to connect multiple NetLinx Hubs together in a daisy-chain configuration. Connect the OUT port to the IN port on the second or downstream NetLinx hub. -
Page 26: Replacing The Lithium Batteries
Installation and Wiring Replacing the Lithium Batteries The Master Cards are equipped with two lithium batteries that have a life of approximately 5 years to protect their memory. When DC power is on, the batteries are not used. When replacing the batteries, remove one at a time to avoid losing the program in memory. -
Page 27: Programming
Programming Programming The NetLinx programming language allows numbers in the range 0-32,767. Device 0 refers to the Master Card, and numbers greater than 32,767 are reserved for internal use only. The NetLinx programming language requires a Device:Port:System (D:P:S) syntax where Axcess expects only a device number. - Page 28 Programming Program Port Commands (Cont.) Command Description MSG On sets the terminal program to display all messages generated by MSG ON MSG OFF the Master Card. MSG OFF disables the display. Turns off a channel on a device. The device can be on any system the master you are connected to can reach.
- Page 29 Programming Program Port Commands (Cont.) Prompts you to enter the new time for the Master Card. SET TIME When the time is set on the Master Card, the new time will be reflected on all devices in the system that have clocks (i.e. touch panels). By the same token, if you set the time on any system device, the new time will be reflected on the system’s Master, and on all connected devices.
-
Page 30: Esc Pass Codes
Programming ESC Pass Codes There are 'escape' codes in the pass mode. These codes can switch the display mode or exit the pass mode. The following 'escape' codes are defined. ESC Pass Codes Command Description Typing a plus (shift =) followed by another plus followed by an ESC (the escape + + ESC ESC key) followed by another escape exits the pass mode. -
Page 31: Netlinx Security
NetLinx Security NetLinx Security NetLinx Masters (version 2.10.80 or later) have built-in security capabilities. It will require a valid user name and password to access the NetLinx System’s Telnet, HTTP and FTP servers. The security capabilities are configured and applied via a Telnet connection or the NetLinx Master’s RS-232 terminal interface (the DB-9 port on the front panel of the Master). -
Page 32: User Name
NetLinx Security User Name A user name is a valid character string (4 - 20 alpha-numeric characters) defining the user . This string is case sensitive. Each user name must be unique. Group Name A group name is a valid character string (4 - 20 alpha-numeric characters) defining the group. This string is case sensitive. -
Page 33: Initial Setup (Via Telnet Or Terminal Connection)
NetLinx Security When you are prompted to enter the path for a Directory Association, the NetLinx master will attempt to validate the path. If the directory or file is not valid (i.e. it does not exist at the time you entered the path), the NetLinx master will ask you whether you were intending to grant access to a file or directory. -
Page 34: Set System Security Options For Netlinx Master (Security Options Menu)
NetLinx Security 11) Set Telnet Timeout in seconds 12) Display Telnet Timeout in seconds 13) Make changes permanent by saving to flash Or <ENTER> to return to previous menu Security Setup -> 3. The Main Security Menu shows a list of choices and a prompt. To select one of the listed choices, simply enter the number of the choice (1-13) at the prompt and press <ENTER>... -
Page 35: Display System Security Options For Netlinx Master
NetLinx Security The selection listed will display what the current settings. To change an option, select the number listed next to the option. For example, if selection is selected, HTTP Security will be disabled. The menu will then be displayed again as follows: Select to change current security option 1) Terminal (RS232) Security.... -
Page 36: Edit User
NetLinx Security 2. At the prompt, enter a new user name (for example " "). A user Enter user name Bilbo name is a valid character string (4 - 20 alpha-numeric characters) defining the user. This string is case sensitive. Each user name must be unique. 3. -
Page 37: Access Rights Menu
NetLinx Security Edit User Menu Command Description This selection prompts you to enter the new password (twice) for the 1) Change User Password user. Once the new password is entered, the user must use the new password from that point forward. This selection will display the current group the user is assigned to 2) Change Inherits From Group (if any). -
Page 38: Delete User
NetLinx Security Access Rights Menu (Cont.) Command Description This selection enables/disables HTTP (Web Server) Access. The 4) HTTP Access account has sufficient access rights to browse to the NetLinx (Enable/Disable) master with a Web Browser if this option is enabled. This selection enables/disables Telnet Access. -
Page 39: Edit Group Menu: Add Directory Association
NetLinx Security Edit Group Menu: Add directory association 1. At the Edit Group prompt, type 1 to add a new directory association. A sample session response is: There are currently no directories associated with this account New directory: A Directory Association is a path that defines the directories and/or files that a particular user or group can access via the HTTP (Web) Server on the NetLinx master. -
Page 40: Edit Group Menu: List Directory Associations
NetLinx Security Edit Group menu: List directory associations 1. At the Edit Group prompt, type 3 to list all existing directory associations. A sample session response is: The following directory associations are enrolled: /directory1/* /directory2/* Press <ENTER> key to continue 2. -
Page 41: Delete Group
NetLinx Security 1) Add directory association 2) Delete directory association 3) List directory associations 4) Change Access rights 5) Display Access Rights This menu is described on the previous pages (see Edit Group Menu on page 32). 9) Delete Group 1. -
Page 42: Main Security Menu
NetLinx Security Main Security Menu The Main Security menu is described below: Main Security Menu Command Description This selection will bring up the Security Options Menu 1) Set system security options for that allows you to change the security options for the NetLinx master NetLinx master (refer to the Security Options Menu section on page 29 for details). -
Page 43: Default Security Configuration
NetLinx Security Main Security Menu (Cont.) Command Description If a user has been given "administrator rights", this addi- 14) Reset Database tional menu option is displayed. This selection will reset the security database to its Default Security Configuration settings, erasing all users and groups that were added. This is a permanent change and you will be asked to ver- ify this before the database is reset. -
Page 44: Security Help Menu
NetLinx Security Security Help menu Type help at the prompt in the Telnet session to display the following help topics: Security Help Menu Options Command Description (Extended diag messages are OFF) ----- Help ----- <D:P:S> <D:P:S>: Device:Port:System. If omitted, assumes master. Displays this list. -
Page 45: Logging Into A Session
URL LIST <D:P:S> Logging Into a Session Until Telnet security is enabled, a session will begin with a welcome banner. Welcome to NetLinx v2.10.80 Copyright AMX Corp. 1999-2002 > The welcome banner is not displayed for Terminal sessions. When Telnet security is enabled (or Terminal security for a terminal session), the user will be prompted for a user name and password before they will be allowed to access any commands available from Telnet. -
Page 46: Logout
After the password is entered, if the password is correct you will see a welcome banner as shown below: Login: User1 Password: ***** Welcome to NetLinx v2.10.80 Copyright AMX Corp. 1999-2002 > If the password is incorrect, the following will be displayed: Login: User1 Password: ***** Login not authorized. - Page 47 Programming NetLinx Master Cards and Modules Get other manuals https://www.bkmanuals.com...
- Page 48 AMX reserves the right to alter specifications without notice at any time. brussels • dallas • los angeles • mexico city • philadelphia • shanghai • singapore • tampa • toronto* • york 3000 research drive, richardson, TX 75082 USA • 469.624.8000 • 800.222.0193 • fax 469.624.7153 • technical support 800.932.6993...
Need help?
Do you have a question about the NetLinx NXM-MHS and is the answer not in the manual?
Questions and answers