Haworth UPSIDE Installation Instructions Manual
Hide thumbs
Also See for UPSIDE:
- Assembly instructions manual (20 pages) ,
- Assembly instructions manual (20 pages)
Advertisement
Quick Links
This product conforms to UL962 and is certi ed to CAN/CSA C22.2 No. 68.
When using an electrical furnishing, basic precautions should always be followed, including the following:
Read all instructions before using this table.
DANGER
- To reduce the risk of electric shock:
1. Always unplug this furnishing from the electrical outlet before cleaning or servicing.
WARNING
: TO REDUCE THE RISK OF BURNS, FIRE, ELECTRIC SHOCK, OR INJURY TO PERSONS:
1.
Unplug from outlet before putting on or taking o parts.
2.
Close supervision is necessary when this furnishing is used by, or near children, invalids, or disabled persons.
3.
Use this furnishing only for its intended use as described in these instructions. Do not use attachments not recom-
mended by the manufacturer.
4.
Never operate this furnishing if it has a damaged cord or plug, if it is not working properly, if it has been dropped or
damaged, or dropped into water. Return the furnishing to a service center for examination and repair.
5.
Keep the cord away from heated surfaces.
6.
Do not use outdoors.
7.
Do not operate where aerosol (spray) products are being used or where oxygen is being administered.
8.
To disconnect, turn all controls to the o position, then remove plug from outlet.
WARNING
9.
OUTLET ONLY. SEE GROUNDING INSTRUCTIONS.
WARNING
10.
CONFIRM THAT THE APPROPRIATE CRITICAL COMPONENTS AND ACCESSORIES ARE BEING USED WITH THE
FURNISHING.
This product must be grounded. If it should malfunction or breakdown, grounding provides a path of least resistance for
electric current to reduce the risk of electric shock. This product is equipped with a cord having an equipment-grounding
conductor and a grounding plug. The plug must be plugged into an appropriate outlet that is properly installed and
grounded in accordance with all local codes and ordinances.
DANGER
- Improper connection of the equipment-grounding conductor can result in a risk of electric shock.
Check with a quali ed electrician or serviceman if you are in doubt as to whether the product is properly grounded.
Do not modify the plug provided with the product - if it will not t the outlet, have a proper outlet installed by a
quali ed electrician.
This product is for use on a nominal 120-volt circuit and has a grounding plug that looks like the plug illustrated in sketch A
(see Figure 1). Make sure that the product is connected to an outlet having the same con guration as the plug. No adapter
should be used with this product.
Maximum Load rating including surface: 250 lbs
Electrical Rating:
120V, 60Hz, 6.25A for Upside+ 2 leg tables
120V, 60Hz, 6A for Upside 2 leg tables
CUSTOMER SERVICE PHONE: 1-800-426-8562
IMPORTANT SAFETY INSTRUCTIONS
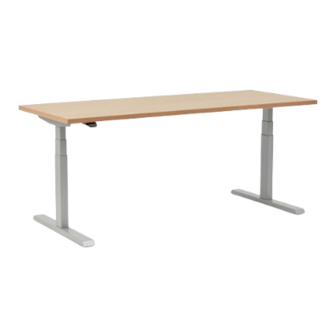
For use with UPSIDE Electric Height Adjustable Tables, 2 Leg
For Commercial or Household Use Only
: RISK OF ELECTRIC SHOCK - CONNECT THIS FURNISHING TO A PROPERLY GROUNDED
: RISK OF ELECTRIC SHOCK, FIRE, AND INJURY. REVIEW THE ASSEMBLY INSTRUCTIONS TO
SAVE THESE INSTRUCTIONS
E.C.O. No:
245-789
GROUNDED
OUTLET
GROUNDED
PIN
Page:
1 of 30
Part No:
GROUNDED
OUTLET BOX
FIGURE 1
Rev:
6100-0110
5
Advertisement

Related Manuals for Haworth UPSIDE


Summary of Contents for Haworth UPSIDE
- Page 1 IMPORTANT SAFETY INSTRUCTIONS For use with UPSIDE Electric Height Adjustable Tables, 2 Leg For Commercial or Household Use Only This product conforms to UL962 and is certi ed to CAN/CSA C22.2 No. 68. When using an electrical furnishing, basic precautions should always be followed, including the following: Read all instructions before using this table.
- Page 2 13mm 1/8” Drill Electrical Tape IMPORTANT! PRIOR TO FIRST USE, PERFORM A DEFAULT RESET TO SYNCHRONIZE THE MOTORS IN THE COLUMNS (D). SEE DEFAULT RESET INSTRUCTIONS IN THE “OPERATING YOUR UPSIDE HEIGHT-ADJUSTABLE TABLE” SECTION. S200 S200 S201 S201 VALUE STANDARD...
- Page 3 IMPORTANT! INSTALL SCREWS (S200) LOOSELY! NOTE: Slide rail (H1) to view holes. LOOSE TIGHT S200 (S200) M6 X 10mm Button Head IMPORTANT! INSTALL CHANNEL (H1) AS SHOWN! - SLOT FACING IN AND NOTE POSITION OF LONG TAB! LONG TAB IMPORTANT! INSTALL CHANNEL (H1) AS SHOWN! - SLOT FACING IN!
- Page 4 (S200) M6 X 10mm Button Head TIGHT IMPORTANT! S200 TIGHTEN ALL 12 SCREWS (S200)! S200 S200 CUSTOMER SERVICE PHONE: 1-800-426-8562 E.C.O. No: Rev: 245-789 Page: 4 of 30 6100-0110 Part No:...
- Page 5 NOTE: Use bracket (B) as template and predrill holes. 1/8” Drill 1/4” WORKSURFACE (inches) C-Style C-Style T-Style T-Style 22-11/16 28-11/16 22-11/16 28-11/16 1-5/8 3-7/16 2-3/4 - 2-3/4 - 2-3/4 - 2-3/4 - 12 MAX. 12 MAX. 12 MAX. 12 MAX. WORKSURFACE (mm) C-Style C-Style...
- Page 6 IMPORTANT! (S201) S-90 MAKE SURE SETSCREWS (S-90) ENGAGE RAILS (H1) M5 X 20mm Pan Head Screw (S-90) S201 M6 X 8mm Set Screw NON-LOCKING CASTER (S209) LOCKING CASTER M6 X 14mm Button Head NOTE: Casters are Optional and ordered separately. S209 CUSTOMER SERVICE PHONE: 1-800-426-8562 E.C.O.
- Page 7 IMPORTANT! (S201) MAKE SURE CONTROL BOX (F) IS FIRMLY ATTACHED TO THE M5 X 20mm Pan Head Screw WORKSURFACE! (S202) M5 X 16mm Pan Head Screw S201 S202 IMPORTANT! PLUG IN CABLE (D) INSTALL SCREWS (S202) INSTALL CABLE (J) (S201) NOTE: For frame (H) less than 46 inches wide mount control module (F) outside of frame M5 X 20mm Pan Head Screw...
- Page 8 S206 (S206) M4 - 30mm Pan Head Screw NOTE: Use template on the following pages to help locate paddle (C). PROGRAMMABLE STANDARD PADDLE PADDLE S206 S206 S206 GOOD NOTE: Paddle screw (S206) must be installed straight and fully seated. Crooked or partial installation of screws (S206) may interfere with the paddle (C) performance (both standard and programmable).
- Page 9 IMPORTANT! PRIOR TO FIRST USE, PERFORM A DEFAULT RESET TO SYNCHRONIZE THE MOTORS IN THE COLUMNS (D). SEE DEFAULT RESET INSTRUCTIONS IN THE “OPERATING YOUR UPSIDE HEIGHT-ADJUSTABLE TABLE” SECTION. CUSTOMER SERVICE PHONE: 1-800-426-8562 TEMPLATE - PADDLE 3.11 1/8” [79mm] Drill 1/4”...
- Page 10 TEMPLATE - STANDARD PADDLE Scale 1 : 1 IMPORTANT! CHECK SCALE 1.119 [28mm] BEFORE USING .866 [22mm] TEMPLATE! 1/8” Drill MAKE SURE IT IS TO SCALE! WHEN 1/4” PRINTING: SET YOUR PRINTER .709 TO PRINT “ACTUAL SIZE”! [18mm] 2.21 [56mm] 1.50 NOTE: After drilling pilot holes, [38mm]...
-
Page 11: Troubleshooting Guide
Upside Table Troubleshooting Guide Note: Parts of this quide require a programmable paddle handset, service part # 8754-8401. Table height adjustment issue START Does performing Does the table Remove paddle. a reset resolve continue moving Drill new pilot the issue? -
Page 12: Collision Detection
Upside Table Collision Detection Is the path of motion of From the table and attached troubleshooting accessories completely Remove obstacles start page clear of obstructions on all sides, including wires? Is the control box snugly Ensure control box is secured... - Page 13 Upside Table Errors Does error Perform a Complete From front “H01” Duty cycle re-occur after second reset page protection error? running the table up & down? Leave table plugged into wall and idle for 20 minutes. (Table is intended to run...
- Page 14 Upside Table Power Is the power cord rmly From plugged into the wall troubleshooting outlet and control box? Plug in power cord start page Is the wall outlet powered? (Do other devices power up when Resolve power issue plugged in?)
-
Page 15: Installation Check
Upside Table Installation Check From Level table by Is table level? troubleshooting adjusting glides start page 1) Unplug table and remove everything from top 2) Flip table onto soft, clean surface 3) Loosen all frame screws 4) Tighten all frame screws...
Need help?
Do you have a question about the UPSIDE and is the answer not in the manual?
Questions and answers