
Related Manuals for Meritor MM-2075


Summary of Contents for Meritor MM-2075
- Page 1 MAINTENANCE MANUAL MM-2075 Air Disc Brakes FOUR-PISTON QUADRAULIC DISC BRAKE CALIPER MAINTENANCE MANUAL Revised 09-23...
-
Page 2: How To Obtain Additional Maintenance, Service And Product Information
Service Notes About this Manual T his manual provides instruction for all Meritor four-piston Quadraulic disc brake calipers: • 70 mm diameter piston • 64 mm diameter piston • 64 mm diameter piston Quadraulic-Lite. How to Obtain Additional Maintenance, Service and Product Information Visit Literature on Demand on meritor.com... -
Page 3: Table Of Contents
Torque Specifications ............26 Disassembly ..............10 Section 5: Prepare Parts for Caliper Assembly .....12 Clean, Dry and Inspect Parts ..........12 Clean Parts ................12 Dry and Inspect Parts ............12 (16579) MM-2075 / Revised 09-23 Printed in USA Copyright Meritor, Inc., 2023 Page iii... - Page 4 MM-2075 / Revised 09-23 (16579) Page iv Copyright Meritor, Inc., 2023 Printed in USA...
-
Page 5: Section 1: Safety Information
• Use only wheels and valve stems approved by the vehicle damage to components. manufacturer for use with Meritor air disc brakes. Use of unapproved wheels and valve stems can result in valve stem • Procedures may only be performed by qualified professionals damage. - Page 6 fiber dust, a cancer and lung disease should be applied with low pressure to prevent dust from hazard. Material Safety Data Sheets are available from Meritor. becoming airborne. Allow the solution to flow between the brake drum and the brake support or the brake rotor and caliper.
- Page 7 fiber dust, a cancer and lung to wash the brake drum or rotor and other brake parts. The disease hazard. Material Safety Data Sheets are available from Meritor. solution should be applied with low pressure to prevent dust Hazard Summary from becoming airborne.
-
Page 8: Section 2: Exploded Views
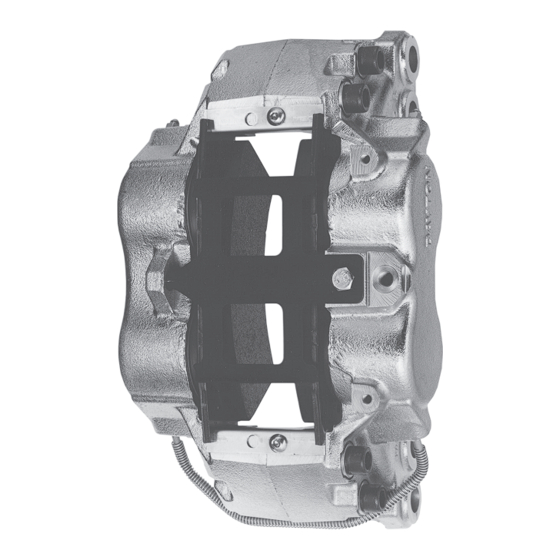
6 M16 BOLT MOUNTING PATTERN AVAILABLE WITH 64 MM AND 70 MM DIAMETER PISTONS QUADRAULIC LITE-IRON CALIPER AVAILABLE WITH 64 MM DIAMETER PISTONS 4003784d Figure 2.1 MM-2075 / Revised 09-23 (16579) Page 4 Copyright Meritor, Inc., 2023 Printed in USA... -
Page 9: Torque
Assemble the torque plate to the axle flange. Assemble the hub and rotor assembly. Assemble the caliper over the rotor and bolt it to the torque plate. (16579) MM-2075 / Revised 09-23 Printed in USA Copyright Meritor, Inc., 2023 Page 5... -
Page 10: Section 3: Introduction
Hub and Rotor assembly and attaching hardware. Meritor hub and rotor assemblies (Figure 2.2) incorporate the There are three caliper types and they are referenced by the piston following design features. -
Page 11: Bleeder Screw
As the linings wear, the pistons extend out further. The void is backfilled with brake fluid available in the brake reservoir. BLEEDER BLEEDER SCREW SCREW INLET PORT CROSSOVER TUBE 4006991b Figure 3.1 (16579) MM-2075 / Revised 09-23 Printed in USA Copyright Meritor, Inc., 2023 Page 7... -
Page 12: Section 4: Removal And Disassembly
Evaluate if the remaining lining is sufficient to reach the next pads. The brake pistons must be seated to allow the brake pads to scheduled service. be removed. MM-2075 / Revised 09-23 (16579) Page 8 Copyright Meritor, Inc., 2023... - Page 13 Install wear plates and tighten to 16. Recheck the brake reservoir fluid level and add OEM-approved specification. Figure 4.4. fluid as needed. (16579) MM-2075 / Revised 09-23 Printed in USA Copyright Meritor, Inc., 2023 Page 9...
-
Page 14: Disassembly
BOLTS — FOUR-BOLT DO NOT Drain all fluid from the caliper. CONFIGURATION REMOVE SHOWN 4003791d Push all four pistons to the bottom of their bores. Figure 4.7 MM-2075 / Revised 09-23 (16579) Page 10 Copyright Meritor, Inc., 2023 Printed in USA... - Page 15 Do not exceed 25 psi (172 kPa). If minor stains and corrosion cannot be removed, replace the Damage to components will result. caliper bore to avoid damage to components. (16579) MM-2075 / Revised 09-23 Printed in USA Copyright Meritor, Inc., 2023 Page 11...
-
Page 16: Section 5: Prepare Parts For Caliper Assembly
To prevent eye injury, always wear eye protection when performing Carefully inspect all parts for wear or damage before you vehicle maintenance or service. assemble them. Repair or replace worn or damaged parts. MM-2075 / Revised 09-23 (16579) Page 12 Copyright Meritor, Inc., 2023 Printed in USA... -
Page 17: Section 6: Assembly And Installation
All brake parts must be clean and Figure 6.2 completely dried of cleaning fluid. Use only Meritor replacement parts to ensure correct caliper performance. Press the pistons into the bores one at a time. Use a block... -
Page 18: Installation
NOTE: The banjo bolt connection should always use new crush Install the hub and rotor assembly according to the vehicle washers. manufacturer’s recommended service procedure. Install the dust shield, if equipped. MM-2075 / Revised 09-23 (16579) Page 14 Copyright Meritor, Inc., 2023 Printed in USA... - Page 19 Install the tire and wheel assembly according to the FRICTION FRICTION manufacturer’s instructions. MATERIAL MATERIAL Lower the vehicle. Road test for correct operation. BACKING PLATE BACKING PLATE 4022009a Figure 6.10 (16579) MM-2075 / Revised 09-23 Printed in USA Copyright Meritor, Inc., 2023 Page 15...
-
Page 20: Section 7: Rotor
Cracks on the surface of the rotor that result from light heat rotor. Figure 7.1. checking are small and fine and do not require rotor replacement. Figure 7.2 and Figure 7.3. MM-2075 / Revised 09-23 (16579) Page 16 Copyright Meritor, Inc., 2023... - Page 21 If the rotor thickness measured across any groove is less than the minimum discard thickness found on the rotor casting, discard and replace the rotor. Figure 7.5. (16579) MM-2075 / Revised 09-23 Printed in USA Copyright Meritor, Inc., 2023 Page 17...
- Page 22 MM-2075 / Revised 09-23 (16579) Page 18 Copyright Meritor, Inc., 2023...
-
Page 23: Section 8: Inspection
Use the schedule below that gives the most frequent inspections. For additional roadside inspection Bleed the brakes in the following order: right rear, left rear, information, contact the Meritor OnTrac™ Customer Call Center at right front and left front. 866-OnTrac1 (688-7221). -
Page 24: Section 9: Troubleshooting
Piston move freely. Investigate other and then check piston movement system issue. when brake applied. Verify brake pads move freely in Replace brake pads and wear plates. caliper MM-2075 / Revised 09-23 (16579) Page 20 Copyright Meritor, Inc., 2023 Printed in USA... - Page 25 Brake booster is not operating properly Check for system for leaks or on stuck Replace brake booster. check valve Vacuum hose leak Inspect vacuum hose for damage or Replace vacuum hose. cracks (16579) MM-2075 / Revised 09-23 Printed in USA Copyright Meritor, Inc., 2023 Page 21...
- Page 26 Wheel bearings worn on not adjusted Check wheel end play Replace as needed. correctly Worn suspension components Check suspension components Replace as needed. Incorrect alignment Check alignment Correct alignment. MM-2075 / Revised 09-23 (16579) Page 22 Copyright Meritor, Inc., 2023 Printed in USA...
- Page 27 Verify using OEM brake pads Replace with OEM brake pads. and growth Loose or worn wheel bearing Check wheel end play Adjust or replace wheel bearing. (16579) MM-2075 / Revised 09-23 Printed in USA Copyright Meritor, Inc., 2023 Page 23...
- Page 28 Replace brake pads as an axle set. Operating environment Inspect parts for difference in Review vehicle cleaning schedule environmental exposure frequency and metrics to address wheel end debris conditions. MM-2075 / Revised 09-23 (16579) Page 24 Copyright Meritor, Inc., 2023 Printed in USA...
- Page 29 - this is referred to as brake snubs. System control issue Check for any dash warning signals Correct system issue as required. (16579) MM-2075 / Revised 09-23 Printed in USA Copyright Meritor, Inc., 2023 Page 25...
-
Page 30: Section 10: Specifications
23-30 Inlet Port, Inverted Flare Nut 17-22 23-30 Inlet Port, Banjo Block Bolt 30-40 41-54 Crossover Tube Nut 10-17 14-23 Lining Wear Plate Bolt 9-12 13-16 MM-2075 / Revised 09-23 (16579) Page 26 Copyright Meritor, Inc., 2023 Printed in USA... - Page 31 If the bridge bolts were removed, install new bridge bolts and tighten them in the correct sequence according to the following procedure. To obtain bolt hardware kits, call Meritor’s Commercial Vehicle Aftermarket at 888-725-9355. Do not rebuild the calipers with used caliper parts.
- Page 32 Dust Shield Clip Bolt 12-18 17-24 Torque Plate-to-Flange Bolt* Caliper-to-Torque Plate Bolt M14* 199-258 270-360 320-360 433-488 Dust Shield Bolt 9-12 13-16 *Refer to the vehicle manufacturer’s torque specifications. MM-2075 / Revised 09-23 (16579) Page 28 Copyright Meritor, Inc., 2023 Printed in USA...
- Page 33 Specifications (16579) MM-2075 / Revised 09-23 Printed in USA Copyright Meritor, Inc., 2023 Page 29...
-
Page 34: Mm-2075 / Revised
Information contained in this publication was in effect at the time the publication was approved for printing and is subject to change without notice or liability. 2135 West Maple Road Meritor Heavy Vehicle Systems, LLC, reserves the right to revise the information presented or to discontinue the production of parts described at any time. Troy, MI 48084 USA...
Need help?
Do you have a question about the MM-2075 and is the answer not in the manual?
Questions and answers