
Related Manuals for Meritor MTC Series


Summary of Contents for Meritor MTC Series
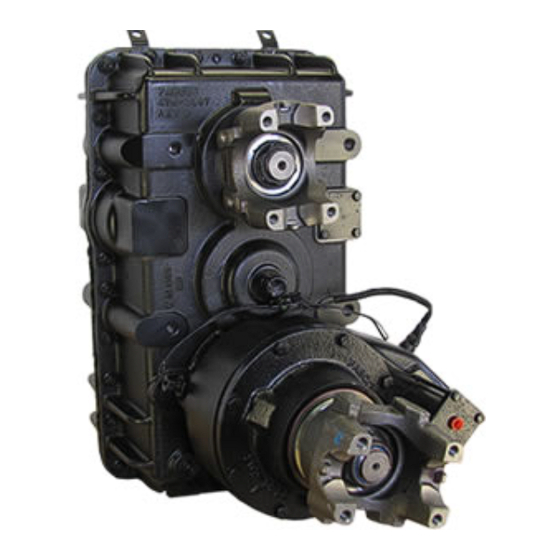
- Page 1 MAINTENANCE MANUAL MM-2034 MTC Series MTC-3206-FV (TC-237) ONE-PIECE TRANSFER CASE MM-2034 / Issued 02-21 Printed in USA Copyright Meritor, Inc., 2021 Page 1...
-
Page 2: About This Manual
If Parts, Tools, and Supplies are Specifi ed in this Manual Contact Meritor’s Commercial Vehicle Aftermarket at 888-725-9355. For assistance with parts, you may also contact the Meritor Parts Center in Florence, KY at CustCareCntr.Florence@Meritor.com or 859-525-3500. Information contained in this publication was in effect at the time the publication was approved for printing and is subject to change without notice or liability. -
Page 3: Table Of Contents
Inspect Parts ..............22 Rear Housing Bearing Cup Driver ........55 Front Bearing Cup Driver ..........56 Front Output Bearing Cup Driver ........57 End Play Setup Tool ............58 MM-2034 / Issued 02-21 Printed in USA Copyright Meritor, Inc., 2021 Page i... -
Page 4: Section 1: Safety Information
CAUTION Indicates a hazardous situation or unsafe practice which, if not avoided, could result in injury or damage to components. MM-2034 / Issued 02-21 Page 1 Copyright Meritor, Inc., 2021 Printed in USA... -
Page 5: Section 2: Illustrations
Illustrations Illustrations Front View Input Front Drive Engagement Breather Indicator Switch Output to Clutch Cylinder Front 4018188a Rear View Shift Cylinder Rear Output 4018189a MM-2034 / Issued 02-21 Printed in USA Copyright Meritor, Inc., 2021 Page 2... -
Page 6: Cross-Section View
Illustrations Cross-Section View 4018190a MM-2034 / Issued 02-21 Page 3 Copyright Meritor, Inc., 2021 Printed in USA... -
Page 7: Section 3: Introduction
Technical Specifi cations This maintenance manual provides information for the following model: Description MTC-3206-FV (TC-237) The Meritor MTC-3206-FV (TC-237) two-speed transfer case is designed for use in all-wheel drive vehicles. The transfer case provides Speed (rpm) 3500 drive to the front axle(s) and can be used in any confi guration of rear driven axles. -
Page 8: Identifi Cation Tag
Identifi cation Tag 4018191a Figure 3.1 Model Nomenclature Power Takeoff Fabco Variant M - TC - xxxx - FV M = Meritor Specification Number 4018192a Figure 3.2 MM-2034 / Issued 02-21 Page 5 Copyright Meritor, Inc., 2021 Printed in USA... -
Page 9: Operation
If the clutch does not fully engage: Turn the steering wheel in one Breather direction and rock the vehicle back and forth until engagement occurs. 4018193a Figure 3.3 MM-2034 / Issued 02-21 Printed in USA Copyright Meritor, Inc., 2021 Page 6... -
Page 10: Section 4: Removal
To prevent eye injury, always wear eye protection when perform- transfer case. ing vehicle maintenance or service. MM-2034 / Issued 02-21 Page 7 Copyright Meritor, Inc., 2021 Printed in USA... -
Page 11: Section 5: Disassembly
To prevent eye injury, always wear eye protection when perform- ing vehicle maintenance or service. Disassembly and assembly of the Meritor MTC-3206–FV (TC-237) transfer case is a relatively simple procedure that can be made easier by the use of some very simple tooling. Details of all tooling are given... - Page 12 Remove and discard the lock wire from the high/low shift shaft Figure 5.6. bolts. Figure 5.4. Shift Lock Cylinder Bolts Wire 4018197a 4018199a Figure 5.6 Figure 5.4 MM-2034 / Issued 02-21 Page 9 Copyright Meritor, Inc., 2021 Printed in USA...
- Page 13 Figure 5.8. Felt Wiper Felt Wiper O-rings O-rings O-rings O-rings Felt Wiper Felt Wiper O-rings O-rings Shift 4018302a Cylinder Adapter Figure 5.9 4018201a Figure 5.8 MM-2034 / Issued 02-21 Printed in USA Copyright Meritor, Inc., 2021 Page 10...
- Page 14 Replace if necessary. Figure 5.13. Bolts (4) Cylinder Sleeve O-rings O-ring O-rings Cylinder Felt Wiper Felt Wiper O-rings O-rings 4018204a 4018302a Figure 5.11 Figure 5.13 MM-2034 / Issued 02-21 Page 11 Copyright Meritor, Inc., 2021 Printed in USA...
- Page 15 15. Remove and discard the lock wire from the front declutch shift shaft bolts. Then remove the declutch shift fork bolts using a hex socket. Figure 5.15. Lock Wire Front Output Carrier 4018209a 4018207a Figure 5.17 Figure 5.15 MM-2034 / Issued 02-21 Printed in USA Copyright Meritor, Inc., 2021 Page 12...
- Page 16 Be careful not to drop the safety wire into the housing output shaft. Figure 5.21. Copper Indicator Washer Switch 4018213a 4018211a Figure 5.21 Figure 5.19 MM-2034 / Issued 02-21 Page 13 Copyright Meritor, Inc., 2021 Printed in USA...
- Page 17 NOTE: It may be necessary to warm the nut slightly to soften the locking compound applied to the threads. 4018215a Figure 5.23 4018217a Figure 5.25 MM-2034 / Issued 02-21 Printed in USA Copyright Meritor, Inc., 2021 Page 14...
- Page 18 Figure 5.27. Drive Out Front Bearing Cup on the Other Side of the Case 4018221a Figure 5.29 Input Seal 4018219a Carrier Figure 5.27 MM-2034 / Issued 02-21 Page 15 Copyright Meritor, Inc., 2021 Printed in USA...
- Page 19 Be careful not to let the input shaft fall to the fl oor. Figure gear. Figure 5.33. 5.31. 4018225a Drive Out Rear Bearing & Direct Drive Gear 4018223a Figure 5.33 Figure 5.31 MM-2034 / Issued 02-21 Printed in USA Copyright Meritor, Inc., 2021 Page 16...
- Page 20 Figure 5.34. the rear carrier opening. Figure 5.36. 4018228a 4018226a Figure 5.36 Figure 5.34 35. Remove intermediate shaft from the housing. Figure 5.35. 4018227a Figure 5.35 MM-2034 / Issued 02-21 Page 17 Copyright Meritor, Inc., 2021 Printed in USA...
-
Page 21: Disassembly Of Sub-Assemblies
Figure 5.40. Figure 5.37 PRESS Invert the shaft and remove the under drive gear and front support bearing. Figure 5.38. PRESS 4018231a Figure 5.40 4018230a Figure 5.38 MM-2034 / Issued 02-21 Printed in USA Copyright Meritor, Inc., 2021 Page 18... - Page 22 Invert the shaft to remove direct drive gear and rear support Figure 5.41 bearing. Figure 5.44. PRESS Remove front declutch gear along with the speedometer tone ring. Figure 5.42. 4018233a Figure 5.44 4018304a Figure 5.42 MM-2034 / Issued 02-21 Page 19 Copyright Meritor, Inc., 2021 Printed in USA...
-
Page 23: Handling Removed Components
• Examine all parts for wear or damage from misuse or poor handling. • Discard and replace any damaged parts. • All bearings with disassembly loads through the rollers and races must be discarded and replaced. MM-2034 / Issued 02-21 Printed in USA Copyright Meritor, Inc., 2021 Page 20... -
Page 24: Section 6: Prepare Parts For Assembly
If required, use a sharp knife to remove gasket material from parts. Be careful not to damage the ground or polished surfaces. MM-2034 / Issued 02-21 Page 21 Copyright Meritor, Inc., 2021 Printed in USA... -
Page 25: Inspect Parts
The groove can be seen at the small or large diameter end of both parts. • Deep cracks or breaks appear in the surfaces of the cup, cone, inner race, or rollers. WEAR CRACK GROOVES Figure 6.2 MM-2034 / Issued 02-21 Printed in USA Copyright Meritor, Inc., 2021 Page 22... - Page 26 Inspect all shafts, fl anges and yokes for wear, stress, and cracks at the splines, shaft, and yoke ears. Replace worn or cracked shafts, fl anges, and yokes. Figure 6.7 MM-2034 / Issued 02-21 Page 23 Copyright Meritor, Inc., 2021 Printed in USA...
- Page 27 • Torn or feathered areas on the o-ring. • Deep gouges in the shifting bores of the case halves. • Chipped or worn shifting splines on the input shaft. MM-2034 / Issued 02-21 Printed in USA Copyright Meritor, Inc., 2021 Page 24...
- Page 28 “Assembly”. and o-rings at every tear down. Install new oil seals into the case halves. Use the correct Meritor Check the pump for easy rotation. If the internal gear does not seal driver and seal. Refer to “Lubrication” for more information.
-
Page 29: Section 7: Assembly
Heated components should be allowed to cool to room temperature Although Meritor does not recommend its use in transfer cases, if before end play measurements are made. a formed-in-place gasket is used for repairs, extreme caution must be exercised to prevent compound from entering bearings, 10. -
Page 30: Input Shaft Assembly
Install the heated front bearing onto the input shaft. Figure 7.4. each side. Figure 7.2. PRESS PRESS Bearing Cup Bearing Cup PRESS 4018236a Figure 7.2 4018238a Figure 7.4 MM-2034 / Issued 02-21 Page 27 Copyright Meritor, Inc., 2021 Printed in USA... - Page 31 Figure 7.8. Bearing Spacer Bearing Cone LIFT LIFT 4018242a Figure 7.8 4018240a Figure 7.6 Remove the bearing lock nut, spacer, and the End Play Setup Tool. MM-2034 / Issued 02-21 Printed in USA Copyright Meritor, Inc., 2021 Page 28...
-
Page 32: Intermediate Shaft Assembly
Place the clutch gear onto the shaft with the groove facing the Lock Nut Endplay retaining ring and the small end of the shaft. Figure 7.11. Setup Tool LIFT LIFT 4018247a Figure 7.13 4018245a Figure 7.11 MM-2034 / Issued 02-21 Page 29 Copyright Meritor, Inc., 2021 Printed in USA... -
Page 33: Rear Output Shaft Assembly
Center Hole 4018249a Figure 7.15 4018248a Figure 7.14 Install a heated bearing onto the shaft so that it is seated against the shoulder. Figure 7.16. 4018250a Figure 7.16 MM-2034 / Issued 02-21 Printed in USA Copyright Meritor, Inc., 2021 Page 30... -
Page 34: Front Output Shaft Assembly
Install the snap ring and front output shaft gear onto the front 53 and Loctite 290 threadlocker on the threads. Torque to output shaft. Figure 7.20. specifi cation. Figure 7.18. 4018254a Figure 7.20 4018252a Figure 7.18 MM-2034 / Issued 02-21 Page 31 Copyright Meritor, Inc., 2021 Printed in USA... - Page 35 Using a fi xture to hold the front output Seal assembly, torque the lock nut to specifi cation. Figure 7.22. Bearing Lock Nut Endplay Setup Tool 4018256a Figure 7.22 4018258a Figure 7.24 MM-2034 / Issued 02-21 Printed in USA Copyright Meritor, Inc., 2021 Page 32...
-
Page 36: General Assembly
Install the bearing cups into the rear housing using the Rear Housing Bearing Cup Driver shown on page 55. Figure 7.26. 4018262a Figure 7.28 4018260a Figure 7.26 MM-2034 / Issued 02-21 Page 33 Copyright Meritor, Inc., 2021 Printed in USA... - Page 37 Place the direct drive gear into the housing. Install the input shaft into the housing while passing it through the direct drive gear. Figure 7.30. 4018265a Figure 7.32 4018263a Figure 7.30 MM-2034 / Issued 02-21 Printed in USA Copyright Meritor, Inc., 2021 Page 34...
- Page 38 Figure 7.34. Figure 7.35 12. Install the rear outer bearing cup into housing followed by the bearing cup spacer. Figure 7.36. 4018266a Figure 7.34 4018268a Figure 7.36 MM-2034 / Issued 02-21 Page 35 Copyright Meritor, Inc., 2021 Printed in USA...
- Page 39 14. Install the input shaft washer in front of the forward most bearing on the shaft. Install the input shaft yoke and torque the lock nut to specifi cation. Figure 7.38. 4018272a Figure 7.40 4018270a Figure 7.38 MM-2034 / Issued 02-21 Printed in USA Copyright Meritor, Inc., 2021 Page 36...
- Page 40 Install the declutch housing onto the main 7.44. housing using Loctite 272 threadlocker. Torque the bolts to specifi cation in a crisscross pattern. Figure 7.42. Intermediate 4018276a Shaft Figure 7.44 4018274a Figure 7.42 MM-2034 / Issued 02-21 Page 37 Copyright Meritor, Inc., 2021 Printed in USA...
- Page 41 24. Slide the spacer onto rear output shaft. Figure 7.48. 22. Install the heated bearings onto the intermediate and rear output shafts. Figure 7.46. 4018280a Figure 7.48 Bearings 4018278a Figure 7.46 MM-2034 / Issued 02-21 Printed in USA Copyright Meritor, Inc., 2021 Page 38...
- Page 42 26. If not already completed, drive a new seal into the rear housing using Rear Output Seal Driver shown on page 54. Figure 7.50. 4018284a 4018282a Figure 7.50 Figure 7.52 MM-2034 / Issued 02-21 Page 39 Copyright Meritor, Inc., 2021 Printed in USA...
- Page 43 Figure 7.54. Figure 7.55 32. Place the front declutch shift fork and collar into housing. Figure 7.56. 4018283a Figure 7.54 4018287a Figure 7.56 MM-2034 / Issued 02-21 Printed in USA Copyright Meritor, Inc., 2021 Page 40...
- Page 44 Coat the o-ring with Cylinder Lubriplate or similar. Figure 7.58. Shift Cylinder Adapter O-ring 4018290a 4018288a Figure 7.60 Figure 7.58 MM-2034 / Issued 02-21 Page 41 Copyright Meritor, Inc., 2021 Printed in USA...
- Page 45 NOTE: It may be necessary to use two washers for correct switch operation. Drain Copper Indicator Washer Switch Front Output Carrier 4018292a Figure 7.64 4018211a Figure 7.62 MM-2034 / Issued 02-21 Printed in USA Copyright Meritor, Inc., 2021 Page 42...
- Page 46 Then insert the shift shaft in through the housing and through the shift forks. Figure 7.66. Flat Spring Side 4018205a Figure 7.68 Flat Side 4018293a Figure 7.66 MM-2034 / Issued 02-21 Page 43 Copyright Meritor, Inc., 2021 Printed in USA...
- Page 47 46. Install an oil soaked felt wiper in the large groove on the range Shift Shaft shift piston and slide the cylinder onto the piston. Figure 7.70. Cover Plate Oil-Soaked Felt Wiper Shift Cylinder 4018297a Figure 7.72 4018295a Figure 7.70 MM-2034 / Issued 02-21 Printed in USA Copyright Meritor, Inc., 2021 Page 44...
- Page 48 Thread in the speed sensor until it touches that tooth. Back out the speed sensor 1/2 - 3/4 turns and tighten the nut. Figure 7.74. O-ring Speed Sensor 4018298a Figure 7.74 MM-2034 / Issued 02-21 Page 45 Copyright Meritor, Inc., 2021 Printed in USA...
-
Page 49: Section 8: Installation
Fill the housing to the correct level using the appropriate lubricant and install the level plug. 10. Check the transfer case for leaks around the gaskets and seals. MM-2034 / Issued 02-21 Printed in USA Copyright Meritor, Inc., 2021 Page 46... -
Page 50: Section 9: Lubrication
Lubrication & Maintenance Lubrication Checking the Air Pressure Circuit When the oil is changed, Meritor recommends checking the air pres- Hazard Alert Messages sure circuit for transfer case shifting cylinders. This includes: Read and observe all hazard alert messages in this publication. They •... -
Page 51: Checking Oil
Filling should be done slowly to provide enough time to ensure the oil fl ows through the complete assembly. requirements. Clean the oil fi ll plug and tighten to 60±7 lbs-ft (80±10 Nm). MM-2034 / Issued 02-21 Printed in USA Copyright Meritor, Inc., 2021 Page 48... -
Page 52: Filling Oil
fi ll plug opening. “Checking Oil” on page 48. Clean the oil fi ll plug and tighten to 60±7 lbs-ft (80±10 Nm). Inspect for leaks. MM-2034 / Issued 02-21 Page 49 Copyright Meritor, Inc., 2021 Printed in USA... -
Page 53: Section 10: Torque Specifi Cations
50 FT-LBS 12 BOLTS 300 FT-LBS 300 FT-LBS 8 FT-LBS 50 FT-LBS 300 FT-LBS 8 BOLTS 300 FT-LBS 300 FT-LBS 70 FT-LBS 4018301a 6 BOLTS Figure 10.1 MM-2034 / Issued 02-21 Printed in USA Copyright Meritor, Inc., 2021 Page 50... -
Page 54: Section 11: Vehicle Towing Instructions
Follow towing procedures recommended by Meritor to prevent internal damage to the transfer case. Meritor recommends using one of the two methods below when towing to prevent damage to the transfer case. NOTE: For complete towing information and instructions on axle shaft removal, refer to Technical Bulletin TP-9579 - Driver Instruction Kit. -
Page 55: Section 12: Tools
The following section provides tooling details to facilitate servicing of the transfer case. Service tools may be manufactured to these drawings or Meritor may be contacted for price and availability. The manufacture of these tools should be carried out by professional ma- chinists and certifi... -
Page 56: Bearing Lock Nut Socket
Tools Bearing Lock Nut Socket Figure 12.1 MM-2034 / Issued 02-21 Page 53 Copyright Meritor, Inc., 2021 Printed in USA... -
Page 57: Rear Output Seal Driver
Tools Rear Output Seal Driver Figure 12.2 MM-2034 / Issued 02-21 Printed in USA Copyright Meritor, Inc., 2021 Page 54... -
Page 58: Rear Housing Bearing Cup Driver
Tools Rear Housing Bearing Cup Driver Figure 12.3 MM-2034 / Issued 02-21 Page 55 Copyright Meritor, Inc., 2021 Printed in USA... -
Page 59: Front Bearing Cup Driver
Tools Front Bearing Cup Driver Figure 12.4 MM-2034 / Issued 02-21 Printed in USA Copyright Meritor, Inc., 2021 Page 56... -
Page 60: Front Output Bearing Cup Driver
Tools Front Output Bearing Cup Driver Figure 12.5 MM-2034 / Issued 02-21 Page 57 Copyright Meritor, Inc., 2021 Printed in USA... -
Page 61: End Play Setup Tool
Tools End Play Setup Tool Figure 12.6 MM-2034 / Issued 02-21 Printed in USA Copyright Meritor, Inc., 2021 Page 58... - Page 62 Information contained in this publication was in effect at the time the publication was approved for printing and is subject to change without notice or liability. 2135 West Maple Road Meritor Heavy Vehicle Systems, LLC, reserves the right to revise the information presented or to discontinue the production of parts described at any time. Troy, MI 48084 USA...
Need help?
Do you have a question about the MTC Series and is the answer not in the manual?
Questions and answers