Table of Contents
Advertisement
Available languages
Available languages
Quick Links
Advertisement
Chapters
Table of Contents

Related Manuals for Kodak ADVANTIX T50 Auto


Summary of Contents for Kodak ADVANTIX T50 Auto
- Page 1 All manuals and user guides at all-guides.com Kodak T 50 Auto /T60 Auto-Focus Camera User’s Manual Consumer Imaging EASTMAN KODAK COMPANY Rochester, NY 14650 © Eastman Kodak Company, 2002 New 11/02 Pt. No. 20230097 ENGLISH/ESPAÑOL/FRANÇAIS...
- Page 2 All manuals and user guides at all-guides.com This device complies with part 15 of the FCC Rules. Operation is subject to the following two conditions: (1) this device may not cause harmful interference, and (2) this device must accept any interference received, including interference that may cause undesired operation.
- Page 3 9:00 a.m. to 7:00 p.m. (Eastern time) Monday through Friday at 1-800-242-2424. Kodak (Canada only) from 8:00 a.m. to 5:00 p.m. (Eastern time) Monday through Friday at 1-800-465-6325, ext. 36100; for the Toronto area, call 416-766-8233, ext. 36100. Have your camera available when you call.
-
Page 4: Table Of Contents
All manuals and user guides at all-guides.com CONTENTS Flash/camera-ready-lamp indicator ........19 CAMERA IDENTIFICATION ....3 Auto flash ........20 CAMERA FEATURES ......6 Fill flash ........20 ATTACHING THE STRAP ....... 8 Flash off ........20 Nightview with or without flash ..21 LOADING THE BATTERIES .... -
Page 5: Camera Identification
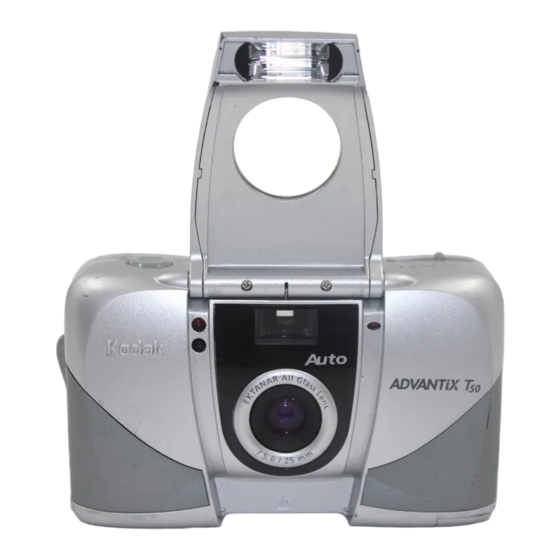
All manuals and user guides at all-guides.com CAMERA IDENTIFICATION 1 shutter button 2 self-timer bulb 3 lens cover/flash 4 print-format switch 5 meter-cell window 6 viewfinder sensors ( model T60 8 lens 9 strap post 10 film-door lever... - Page 6 All manuals and user guides at all-guides.com 12 13 11 LCD panel 12 film-rewind button 13 self-timer button 14 viewfinder eyepiece 15 flash/camera-ready- lamp indicator button MODE 17 film chamber 18 tripod socket 19 film door 20 battery door...
- Page 7 All manuals and user guides at all-guides.com 21 auto-flash symbol 22 fill-flash symbol 23 flash-off symbol AUTO 24 nightview symbol 25 mode-selector arrow 26 self-timer indicator 27 film-presence indicator 28 film-motion indicator 29 battery symbol 30 picture counter...
-
Page 8: Camera Features
• Easy, drop-in loading is fast and virtually error-free. The Double Exposure Protection (DEP) camera uses KODAK ADVANTIX • You don’t need to worry about Film. The film cassette accidentally re-exposing your communicates the status of film. - Page 9 All manuals and user guides at all-guides.com Safety-locked Film Door Film Status Indicator (FSI) • The safety interlock on the film • An indicator advances from door prevents the door from one symbol to another to opening before the film is identify the status of the film completely rewound.
-
Page 10: Attaching The Strap
All manuals and user guides at all-guides.com ATTACHING THE STRAP NOTE: You can use the knob on the clasp of the camera Thread the strap’s shorter looped strap to actuate the buttons on end under the strap post (9). Pull the camera. -
Page 11: Loading The Batteries
All manuals and user guides at all-guides.com LOADING THE BATTERIES 1. Open the battery door (20). 2. Insert the batteries into This camera uses 2 AAA-size the chamber. alkaline batteries that supply power for all camera operations. 3. Close the battery door. NOTE: Insert the batteries before you load the film. -
Page 12: Low-Battery Indicator
All manuals and user guides at all-guides.com Low-battery indicator Battery tips • Dispose of batteries according Replace the batteries when the to local and national regulations. battery symbol (29) appears in the LCD panel (11). • Keep spare batteries with you at all times. - Page 13 WARNING: In the unlikely event high temperature or fire. that battery fluid leaks inside the camera, U.S. customers can contact the Kodak Information Center (KIC) at 1-800-242-2424. Customers outside the U.S. can contact their local Kodak Customer Service representative.
-
Page 14: Power Shutdown
All manuals and user guides at all-guides.com LOADING THE FILM You can load film with the camera Power shutdown on or off. To conserve battery power, the NOTE: Insert the batteries before camera automatically goes to you load the film. sleep after 4 minutes of nonuse. - Page 15 All manuals and user guides at all-guides.com 2. Insert the film cassette completely 3. Close the film door to start the into the film chamber (17). automatic film advance. • Make sure the Film Status • The picture counter (30) in Indicator (FSI) on the film the LCD panel (11) displays “1.”...
-
Page 16: Taking Pictures
All manuals and user guides at all-guides.com TAKING PICTURES 1. Open the lens cover/flash (3) to raise the flash and to turn You can take Classic (C), Group/ on the camera. HDTV (H)*, and Panoramic (P) pictures on the same film cassette. Your photofinishing costs are based on the format used. -
Page 17: Typical Print Sizes (Formats)
All manuals and user guides at all-guides.com 2. Slide the print-format switch (4) to C, H, or P. The viewfinder changes to show the selected picture size. Typical print sizes (formats) Classic Group (HDTV) Panoramic 3.5 x 5 in. or 4 x 6 in. 3.5 x 6 or 4 x 7 in. - Page 18 All manuals and user guides at all-guides.com 3. Frame your subject within the 4. Press the hutter button (1) viewfinder eyepiece (14). to take the picture. Model T60 (Auto Focus): For a sharp picture, stand at least 2.6 ft (0.8 m) from your subject.
-
Page 19: Using The Focus Lock (T60 Af )
All manuals and user guides at all-guides.com Using the focus lock 3. With your finger still on the ( model T60 shutter button, move the camera until your subject is The T60 (Auto Focus) camera where you want it within the focuses on the subject that appears viewfinder eyepiece. -
Page 20: Tips For Better Pictures
All manuals and user guides at all-guides.com Tips for better pictures • Hold your camera vertically to • Hold your camera steady capture tall, narrow subjects, by keeping your elbows close such as a waterfall, to your body when you press skyscraper, or a person. -
Page 21: Flash And Picture- Taking Options
All manuals and user guides at all-guides.com FLASH AND PICTURE- Flash/camera-ready-lamp indicator TAKING OPTIONS When the flash/camera-ready- lamp indicator (15) “blinks” the Repeatedly press the MODE camera is not ready to take the button (16) to select the flash picture. In the fill-flash mode, the mode that best suits your mode-selector arrow (25) in the subject and surroundings or to... -
Page 22: Auto Flash
All manuals and user guides at all-guides.com Auto flash AUTO Flash off In dim light, such as indoors or When you do not want to use the outdoors in heavy shade, or on flash, especially indoors where dark overcast days, you need flash is prohibited, or to capture flash. -
Page 23: Nightview With Or Without Flash
All manuals and user guides at all-guides.com Nightview with Selecting the flash and or without flash picture-taking options Nightview with flash: The camera 1. Open the lens cover/flash (3) balances the flash and existing to raise the flash and to turn light exposure so you can take on the camera. - Page 24 All manuals and user guides at all-guides.com 3. Frame your subject within the NOTE: If you release the viewfinder eyepiece (14) shutter button before keeping your subject within 4 seconds, the nightview the distance range for the setting cancels. speed of film in your camera (see Flash-to-subject Fill flash and flash off modes remain distance table).
-
Page 25: Flash-To-Subject Distance
All manuals and user guides at all-guides.com USING THE SELF-TIMER Flash-to-subject distance Use this feature to include AUTO film yourself in pictures. speed 1. Attach a tripod to the camera 2.6 to 7 ft 3.3 to 7 ft tripod socket (18) or place the (0.8 to 2.1 m) (1.0 to 2.1 m) camera on a firm surface. - Page 26 All manuals and user guides at all-guides.com 3. Press the self-timer button (13). 6. Quickly position yourself in the composed picture. MODE • Before the shutter releases, the self-timer bulb (2) glows and then blinks during the ten seconds of countdown. •...
-
Page 27: Unloading The Film
UNLOADING THE FILM 3. Remove the film cassette from the camera and reload with Automatic rewind new KODAK ADVANTIX Film. The camera automatically rewinds the film into the cassette after the last exposure. 1. Wait for the camera motor to... -
Page 28: Manual Rewind
All manuals and user guides at all-guides.com CARING FOR YOUR CAMERA Manual rewind • Protect the camera from dust, If you do not want to use the entire moisture, sudden impact, and film, you can manually start the excessive heat. automatic rewind. - Page 29 All manuals and user guides at all-guides.com DISPOSAL: The camera CAUTION: Use solvents or solutions contains a small amount of lead designed for cleaning camera lenses. in the circuit board. Disposal of Do not use chemically treated tissues lead may be regulated due to intended for cleaning eyeglasses.
-
Page 30: Troubleshooting
All manuals and user guides at all-guides.com TROUBLESHOOTING What happened Probable cause Solution Camera will There are no more Rewind film and not operate pictures remaining remove from camera Batteries weak, Replace or reload the dead, missing, or batteries improperly inserted Film does not Batteries weak, Replace or reload the... - Page 31 All manuals and user guides at all-guides.com What happened Probable cause Solution LCD panel Batteries weak, Replace or reload is blank dead, missing, or the batteries improperly inserted Camera in sleep mode Press shutter button or close and reopen lens cover/flash Lens cover/flash closed Open lens cover/flash Flash/camera-ready Flash not fully charged...
-
Page 32: Specifications
All manuals and user guides at all-guides.com SPECIFICATIONS Film-Speed: DXIX (ISO) 50–800 Film Type: KODAK ADVANTIX Film for Flash Unit: Built-in, flip-up color and black-and-white prints Flash Range (ISO 200): Lens: KODAK EKTANAR Lens; : 2.6–13 ft (0.8–4.0 m) 3 elements, all-glass : 25 mm Auto Focus (AF) : 3.3–13 ft (1.0–4.0 m) - Page 33 All manuals and user guides at all-guides.com Kodak, Advantix, Ektanar, and the Advanced Photo System symbol and logotype are trademarks.
- Page 34 All manuals and user guides at all-guides.com Este dispositivo cumple con la parte 15 de las reglamentaciones de la FCC. El manejo está supeditado a las siguientes dos condiciones: (1) Este dispositivo puede no causar interferencia dañina, y (2) este dispositivo debe aceptar cualquier interferencia recibida, incluyendo interferencia la cual pudiese causar un funcionamiento indeseable.
- Page 35 ACERCA DEL ADVANCED PHOTO SYSTEM? Visite nuestro sitio en la red mundial electrónica (worldwide web) a la dirección http://www.kodak.com o llame a: Kodak (en los Estados Unidos solamente) al número 1 (800) 242-2424, de lunes a viernes de 9:00 a.m. a 7:00 p.m. (hora del este).
- Page 36 All manuals and user guides at all-guides.com CONTENIDO Indicador de flash/lámpara de cámara lista ......54 IDENTIFICACIÓN DE LA CÁMARA ..35 Flash automático ......54 CARACTERÍSTICAS DE LA CÁMARA ..38 Flash de relleno ......55 CÓMO AJUSTAR LA CORREA ..... 41 Flash apagado .......
-
Page 37: Identificación De La Cámara
All manuals and user guides at all-guides.com IDENTIFICACIÓN DE LA CÁMARA 1 disparador 2 bombilla de autodisparador 3 cubierta del lente/ flash 4 interruptor del formato de impresión 5 ventana del medidor de célula fotoeléctrica 6 visor 7 sensores AF ( Modelo T60 AF ) 8 lente 9 presilla de la correa... - Page 38 All manuals and user guides at all-guides.com 11 panel de cristal líquido 12 13 (LCD) 12 botón del rebobinado de la película 13 botón del autodisparador 14 ocular del visor 15 indicador de flash/ lámpara de cámara lista 16 botón de MODO 17 compartimiento de la película 18 montaje para trípode...
- Page 39 All manuals and user guides at all-guides.com 21 símbolo de flash automático 22 símbolo de flash de relleno 23 símbolo de flash apagado AUTO 24 símbolo de vista de noche 25 flecha del selector de modo 26 indicador de autodisparador 27 indicador de la presencia de la película 28 indicador del movimiento...
-
Page 40: Características De La Cámara
All manuals and user guides at all-guides.com CARACTERÍSTICAS DE Protección en contra de doble exposición (DEP) LA CÁMARA • No debe preocuparse de Selección triple de formato accidentalmente volver a • Usted puede escoger entre tres exponer su película ya usada. tamaños diferentes: Clásico (C), Su cámara lee el Indicador del Grupo/HDTV (H) o Panorámico (P). - Page 41 • La carga de rollo fácil es rápida la película antes de que la y virtualmente sin error. La película esté completamente cámara usa película KODAK rebobinada. ADVANTIX. El cartucho de la película comunica el estado de la película y se convierte en el cargador y envase de la película procesada.
- Page 42 All manuals and user guides at all-guides.com Busque este logo para asegurarse que la película que usted compre esté hecha para esta cámara. Busque este logo para seleccionar un servicio de fotoacabado certificado para revelar su rollo y para asegurarse de recibir todas las características del Advanced Photo System.
-
Page 43: Cómo Ajustar La Correa
All manuals and user guides at all-guides.com CÓMO AJUSTAR LA CORREA NOTA: Puede usar la perilla en la hebilla de la correa de la cámara Pase el extremo corto de la para activar los botones de lazada de la correa por debajo de la cámara. -
Page 44: Cómo Cargar Las Pilas
All manuals and user guides at all-guides.com CÓMO CARGAR LAS PILAS 1. Abra la puerta del compartimiento de las pilas (20). Esta cámara utiliza 2 pilas 2. Coloque las pilas en su alcalinas tamaño AAA que compartimiento. proporcionan la energía necesaria para todas las funciones de 3. -
Page 45: Indicador De Pilas Débiles
All manuals and user guides at all-guides.com Indicador de pilas débiles Consejos para usar las pilas Debe cambiar las pilas cuando el • Deseche las pilas usadas según las símbolo de las pilas (29) aparece regulaciones locales y nacionales. en el panel de cristal líquido (11). •... - Page 46 Unidos pueden ponerse en las pilas pueden calentarse. contacto con la información de PRECAUCIÓN: No intente desarmar, Kodak sobre Salud, Seguridad y recargar o causar un cortocircuito el Medio Ambiente llamando al en las pilas o exponerlas a altas 1-585-722-5151.
-
Page 47: Apagado Automático
Apagado automático póngase en contacto con su Cuando la cámara no se usa por representante local de Kodak. aproximadamente 4 minutos, ésta Los clientes en los Estados se apagará automáticamente para Unidos pueden ponerse en conservar la energía de las pilas. -
Page 48: Cómo Cargar La Película
All manuals and user guides at all-guides.com CÓMO CARGAR LA PELÍCULA 2. Coloque el cartucho de la película completamente dentro Puede cargar película con la del compartimiento de la cámara encendida o apagada. película (17). NOTA: Coloque las pilas en su •... -
Page 49: Cómo Tomar Fotografías
All manuals and user guides at all-guides.com • No fuerce el cartucho de la CÓMO TOMAR FOTOGRAFÍAS película en el compartimiento Puede tomar fotografías de la película. Clásicas (C), Grupo/HDTV (H)* y 3. Cierre la puerta del Panorámicas (P) usando el mismo compartimiento de la película cartucho de película. - Page 50 All manuals and user guides at all-guides.com 1. Abra la cubierta del lente/ 2. Deslice el interruptor del flash (3) para levantar el flash formato de impresión (4) para y encender la cámara. seleccionar el formato C, H, o P. El visor cambia según el tamaño de fotografía seleccionada.
-
Page 51: Tamaños Típicos De Impresión
All manuals and user guides at all-guides.com Tamaños típicos de impresión de fotografías (formatos) Clásicas Grupo (HDTV) Panorámico 3,5 x 5 plgds. ó 3,5 x 6 plgds. ó 3,5 x 8,5 plgds. a 4 x 6 plgds. 4 x 7 plgds. 4 x 11,5 plgds. -
Page 52: (T60 Af)
All manuals and user guides at all-guides.com 3. Encuadre a su sujeto dentro 4. Oprima el disparador (1) para del ocular del visor (14). tomar la fotografía. Modelo T60 AF (ENFOQUE AUTOMÁTICO) : Para una fotografía nítida, manténgase a una distancia mínima de 2,6 pies (0,8 m) de su sujeto. - Page 53 All manuals and user guides at all-guides.com Cómo usar el cerrojo de enfoque 3. Con el disparador parcialmente (Modelo T60 AF) oprimido, mueva la cámara hasta que el sujeto se encuentre La cámara modelo T60 AF en la posición que usted desee (ENFOQUE AUTOMÁTICO) se dentro del ocular del visor.
-
Page 54: Consejos Para Obtener Mejores Fotografías
All manuals and user guides at all-guides.com Consejos para obtener • Tome fotografías al nivel del mejores fotografías sujeto. Arrodíllese para fotografiar niños y animales. • Para evitar fotografías borrosas, sostenga la cámara • Manténgase de espalda al sol. estable al oprimir el disparador Así... -
Page 55: Opciones De Flash Y Toma De Fotografías
All manuals and user guides at all-guides.com • Párese en ángulo a superficies OPCIONES DE FLASH Y TOMA brillantes, tales como ventanas DE FOTOGRAFÍAS o espejos, para de esta forma Oprima repetidamente el botón evitar reflejos del flash o puntos de MODO (16) para seleccionar luminosos en sus fotografías. -
Page 56: Indicador De Flash/Lámpara
All manuals and user guides at all-guides.com Indicador de flash/lámpara Flash automático AUTO de cámara lista A poca luz, ya sea en interiores, Cuando el indicador de flash/ en exteriores donde hay mucha lámpara de cámara lista (15) sombra o en días oscuros o «parpadea»... -
Page 57: Flash De Relleno
All manuals and user guides at all-guides.com Flash apagado Flash de relleno Cuando no quiera usar el flash, Cuando al tomar fotografías haya especialmente en interiores donde un sol brillante o cuando los el uso del flash está prohibido o sujetos tengan como iluminación cuando quiera capturar el de fondo una luz brillante, esta... -
Page 58: Vista De Noche Con O Sin Flash
All manuals and user guides at all-guides.com Vista de noche con Cómo seleccionar las opciones o sin flash de flash y toma de fotografías Vista de noche con flash: La 1. Abra la cubierta del lente/ cámara crea un balance entre el flash (3) para levantar el flash flash y la luz presente para poder y encender la cámara. - Page 59 All manuals and user guides at all-guides.com 3. Encuadre a su sujeto dentro NOTA: Si no mantiene el del ocular del visor (14) disparador oprimido por manteniendo a su sujeto 4 segundos, la configuración dentro de la distancia indicada de vista de noche se cancelará. para la sensibilidad de la Los modos de flash de relleno película en su cámara (vea la...
-
Page 60: Distancia Del Sujeto Al Flash
All manuals and user guides at all-guides.com Distancia del sujeto al flash T60 AF T50 AUTO Sensibilidad ISO de la película 2,6 a 7 pies (0,8 a 2,1 m) 3,3 a 7 pies (1,0 a 2,1 m) 2,6 a 10 pies (0,8 a 3,1 m) 3,3 a 10 pies (1,0 a 3,1 m) 2,6 a 13 pies (0,8 a 4,0 m) 3,3 a 13 pies (1,0 a 4,0 m) -
Page 61: Cómo Usar El Autodisparador
All manuals and user guides at all-guides.com CÓMO USAR EL 3. Oprima el botón del autodisparador (13). AUTODISPARADOR Use esta característica cuando MODE quiera incluirse en las fotografías. 1. Use el montaje para trípode (18) para montar la cámara en el tripié... -
Page 62: Cómo Descargar La Película
All manuals and user guides at all-guides.com CÓMO DESCARGAR 5. Oprima el disparador (1) para activar el cronómetro. LA PELÍCULA 6. Sitúese rápidamente en el Rebobinado automático espacio que dejo libre. Después de la última fotografía, • Antes de que el disparador esta cámara rebobina funcione, la bombilla de automáticamente la película... - Page 63 (10) para abrir la cargarla con un rollo nuevo de puerta del compartimiento de película KODAK ADVANTIX. la película (19) y para • El FSI en el cartucho de desenganchar parcialmente el película completamente cartucho de película de su...
-
Page 64: Rebobinado Manual
All manuals and user guides at all-guides.com Rebobinado manual CUIDADO DE SU CÁMARA Si no quiere tomar el rollo • Proteja su cámara del polvo, completo de fotografías, puede humedad, golpe repentino y manualmente comenzar el calor excesivo. rebobinado automático. PRECAUCIÓN: No use 1. - Page 65 All manuals and user guides at all-guides.com PRECAUCIÓN: Use solventes ELIMINACIÓN: Esta cámara o soluciones específicamente contiene una pequeña cantidad diseñados para la limpieza de de plomo en la placa del lentes de cámaras. No use circuito. El desecho de plomo pañuelos con químicos puede estar regulado debido a diseñados para la limpieza...
-
Page 66: Problemas Y Soluciones
All manuals and user guides at all-guides.com PROBLEMAS Y SOLUCIONES Problema Causa probable Solución La cámara no No quedan más Rebobine la película y funciona fotografías retírela de la cámara Las pilas están débiles, Reemplace o vuelva a descargadas, mal cargar las pilas colocadas, o falta colocarlas La película no... - Page 67 All manuals and user guides at all-guides.com Problema Causa probable Solución El panel de Las pilas están débiles, Reemplace o vuelva a cristal líquido descargadas, mal colocadas, cargar las pilas está en blanco o falta colocarlas La cámara está en el modo Oprima el disparador o cierre de apagado automático y vuelva a abrir la cubierta...
-
Page 68: Especificaciones
All manuals and user guides at all-guides.com ESPECIFICACIONES Sensibilidad de película: DXIX (ISO) 50–800 Tipo de película: Película KODAK ADVANTIX Unidad del flash: Integrado, abatible para fotografías a color o blanco y negro Alcance del flash (ISO 200): Lente: KODAK EKTANAR: 3 elementos, todo de vidrio T60 AF : 2,6 - 13 pies (0,8–4,0 m) - Page 69 All manuals and user guides at all-guides.com El símbolo y logotipo de Kodak, Advantix, Ektanar y el Advanced Photo System son marcas registradas.
- Page 70 All manuals and user guides at all-guides.com Ce dispositif est conforme à la partie 15 des règlements de la FCC. Cet appareil numérique de Classe B répond à toutes les exigences du Règlement sur le matériel brouilleur du Canada.
- Page 71 OU DE RENSEIGNEMENTS SUR LES CARACTÉRISTIQUES ADVANCED PHOTO SYSTEM? Visitez notre site Web à l’adresse http://www.kodak.ca (au Canada) ou http://www.kodak.com (aux États-Unis), ou appelez Kodak, au Canada seulement, du lundi au vendredi, de 8 h à 17 h (heure de l’Est) au numéro 1 800 465-6325, poste 36102.
- Page 72 All manuals and user guides at all-guides.com TABLE DES MATIÈRES Indicateur du flash/appareil- photo prêt ........90 DESCRIPTION DE L’APPAREIL-PHOTO ... 71 Flash automatique ......90 FONCTIONS DE L’APPAREIL-PHOTO ... 74 Flash d’appoint ......91 Flash désactivé ......91 FIXATION DE LA DRAGONNE ....77 Vue nocturne avec ou sans flash ...
-
Page 73: Description De L'appareil-Photo
All manuals and user guides at all-guides.com DESCRIPTION DE L’APPAREIL-PHOTO 1 déclencheur 2 bouton du retardateur 3 couvre-objectif/flash 4 sélecteur du format de photo 5 fenêtre du posemètre 6 viseur 7 capteurs de mise au point ( modèle T60 AF ) 8 objectif 9 tige de la dragonne 10 loquet du... - Page 74 All manuals and user guides at all-guides.com 12 13 11 panneau ACL 12 bouton de rembobinage du film 13 bouton du retardateur 14 oculaire du viseur 15 témoin du flash/ appareil-photo prêt 16 bouton MODE 17 compartiment du film 18 écrou du trépied 19 couvercle du compartiment du film 20 couvercle du...
- Page 75 All manuals and user guides at all-guides.com 21 indicateur de flash automatique 22 indicateur de flash d’appoint 23 indicateur de flash AUTO désactivé 24 indicateur de vue nocturne 25 flèche de sélection du mode 26 indicateur du retardateur 27 indicateur de présence d’un film 28 indicateur de mouvement d’un film...
-
Page 76: Fonctions De L'appareil-Photo
All manuals and user guides at all-guides.com FONCTIONS DE Protection contre la double exposition L’APPAREIL-PHOTO • Vous ne courez aucun risque Choix de trois formats d’exposer accidentellement • Vous avez le choix entre votre film une seconde fois. trois formats différents : Votre appareil vérifie l’indicateur classique (C), groupe/HDTV (H) de l’état du film sur la cassette... - Page 77 évite pratiquement toute erreur. film. Le couvercle ne pourra L’appareil-photo utilise un Film être ouvert que lorsque le film KODAK ADVANTIX. Chaque sera complètement rembobiné. cassette de film indique l’état du film et constitue le support et la boîte de rangement du film...
- Page 78 All manuals and user guides at all-guides.com Ce symbole sur l’emballage du film vous garantit qu’il est compatible avec cet appareil-photo. Assurez-vous que le laboratoire de traitement photo auquel vous confiez vos films affiche ce symbole; vous profiterez ainsi de toutes les caractéristiques du système APS. Indicateur de l’état du film Non exposé...
-
Page 79: Fixation De La Dragonne
All manuals and user guides at all-guides.com FIXATION DE LA DRAGONNE NOTA : Vous pouvez utiliser le bouton du fermoir de la dragonne Enfilez d’abord la petite boucle pour activer les boutons de de la dragonne sous la tige de la contrôle de l’appareil-photo. -
Page 80: Installation Des Piles
All manuals and user guides at all-guides.com INSTALLATION DES PILES 1. Ouvrez le couvercle du compartiment des piles (20). Cet appareil-photo utilise 2 piles 2. Insérez les piles dans le alcalines AAA, qui fournissent compartiment. l’alimentation nécessaire à toutes les fonctions de l’appareil. 3. -
Page 81: Indicateur De Piles Faibles
All manuals and user guides at all-guides.com Indicateur de piles faibles Conseils au sujet des piles • Jetez les piles épuisées conformément Il faut remplacer les piles lorsque aux réglementations locales ou le symbole des piles (29) apparaît nationales en vigueur. sur le panneau ACL (11). - Page 82 AVERTISSEMENT : Dans communiquer avec le Centre l’éventualité peu probable où le d’information Kodak au 1 800 465-6325 fluide des piles entrerait en ou avec votre représentant du contact avec votre peau, rincez service à clientèle.
-
Page 83: Arrêt Automatique
All manuals and user guides at all-guides.com Fonctions automatiques CHARGEMENT DU FILM d’économie d’énergie Vous pouvez charger le film dans Arrêt automatique l’appareil-photo, que ce dernier soit sous tension ou hors tension. Pour préserver l’énergie des piles, cet appareil-photo se met NOTA : Insérez les piles avant de automatiquement en mode veille charger le film. - Page 84 All manuals and user guides at all-guides.com 2. Insérez complètement la • N’exercez pas de pression cassette de film dans le excessive pour insérer la compartiment du film (17). cassette dans le compartiment du film. • Assurez-vous que l’indicateur de l’état du film sur la cassette de 3.
-
Page 85: Pour Prendre Des Photos
All manuals and user guides at all-guides.com • Une fois que vous avez POUR PRENDRE DES PHOTOS refermé le couvercle du Vous pouvez prendre des photos compartiment du film avec de format classique (C), groupe/ verrouillage de sécurité et HDTV (H)* ou panoramique (P) que le mécanisme d’avance sur la même cassette de film. - Page 86 All manuals and user guides at all-guides.com 1. Ouvrez le couvre-objectif/ 2. Faites glisser le sélecteur du flash (3) afin de relever le format de photo (4) pour flash et mettre l’appareil-photo choisir le format C, H ou P. Le sous tension.
-
Page 87: Formats De Photo
All manuals and user guides at all-guides.com Formats de photo Classique Groupe (HDTV) Panoramique 3 ½ po x 5 po ou 3 ½ po x 6 po 3 ½ po x 8 ½ po à 4 po x 6 po ou 4 po x 7 po 4 po x 11 ½... - Page 88 All manuals and user guides at all-guides.com 3. Cadrez votre sujet en 4. Appuyez sur le déclencheur (1) regardant dans l’oculaire du pour prendre la photo. viseur (14). Modèle T60 AF (mise au point automatique) : Pour une photo nette, placez-vous à au moins 0,8 m (2,6 pi) de votre sujet.
-
Page 89: Mémorisation De La Mise Au
All manuals and user guides at all-guides.com Mémorisation de la mise au 3. Tout en maintenant le point ( modèle T60 AF ) déclencheur partiellement enfoncé, déplacez l’appareil L’appareil-photo T60 AF (à mise jusqu’à ce que votre sujet se au point automatique) effectue la trouve à... -
Page 90: Conseils Pour Prendre De Meilleures Photos
All manuals and user guides at all-guides.com Conseils pour prendre de • Placez-vous au même niveau meilleures photos que votre sujet. Quand vous photographiez des enfants ou • Tenez fermement votre appareil- des animaux de compagnie, photo en serrant les coudes agenouillez-vous. -
Page 91: Options De Flash Et De Prise De Vue
All manuals and user guides at all-guides.com • Mettez vos photos en valeur en OPTIONS DE FLASH ET DE les encadrant avec une branche PRISE DE VUE d’arbre, une fenêtre ou encore, Appuyez de façon répétée sur le avec les traverses d’une clôture. bouton MODE (16) pour choisir le •... -
Page 92: Indicateur Du Flash/Appareil- Photo Prêt
All manuals and user guides at all-guides.com Indicateur du flash/ Flash automatique AUTO appareil-photo prêt Dans des conditions de lumière Lorsque le témoin du flash/appareil-photo faible, à l’intérieur ou à l’extérieur, prêt (15) clignote, l’appareil-photo dans des lieux ombragés ou par n’est pas prêt à... -
Page 93: Flash D'appoint
All manuals and user guides at all-guides.com Flash d’appoint Flash désactivé Le plein soleil ou la lumière vive Lorsque vous ne voulez pas projeté sur des sujets éclairés à utiliser le flash, notamment à contre-jour peut créer des ombres l’intérieur, dans les endroits où on marquées (en particulier sur les l’interdit ou pour saisir visages). -
Page 94: Vue Nocturne Avec Ou Sans Flash
All manuals and user guides at all-guides.com Vue nocturne avec ou Sélection des options de flash et sans flash de prise de vue Vue nocturne avec flash : 1. Ouvrez le couvre-objectif/flash (3) l’appareil-photo équilibre l’intensité pour relever le flash et mettre du flash en fonction de l’éclairage l’appareil-photo sous tension. - Page 95 All manuals and user guides at all-guides.com 3. Cadrez votre sujet en NOTA : Si vous relâchez le regardant dans l’oculaire du déclencheur avant que les viseur (14) en conservant une 4 secondes se soient écoulées, distance appropriée à la l’option de vue nocturne est sensibilité...
-
Page 96: Distance Entre Le Sujet Et Le Flash
All manuals and user guides at all-guides.com Distance entre le sujet et le flash T60 AF T50 AUTO Sensibilité ISO du film 0,8 m à 2,1 m (2,6 pi à 7 pi) 1 m à 2,1 m (3,3 pi à 7 pi) 0,8 m à... -
Page 97: Utilisation Du Retardateur
All manuals and user guides at all-guides.com UTILISATION DU 3. Appuyez sur le bouton du retardateur (13). RETARDATEUR Utilisez ce mode si vous souhaitez MODE vous inclure dans la photo. 1. Fixez votre appareil-photo sur un trépied à l’aide de l’écrou du trépied (18) ou placez-le sur un autre support solide. -
Page 98: Retrait Du Film
All manuals and user guides at all-guides.com 5. Appuyez sur le déclencheur (1) RETRAIT DU FILM pour activer le retardateur. Rembobinage automatique 6. Prenez rapidement place dans L’appareil-photo rembobinera le cadre de la photo. automatiquement le film dans la • Avant le déclenchement, le cassette une fois la dernière témoin du retardateur (2) photo prise. - Page 99 (10) l’appareil-photo, puis rechargez pour ouvrir le couvercle du celui-ci avec une nouvelle compartiment du film (19) et cassette de Film KODAK dégager partiellement la ADVANTIX. cassette du compartiment • L’indicateur de l’état du film du film (17).
-
Page 100: Rembobinage Manuel
All manuals and user guides at all-guides.com Rembobinage manuel ENTRETIEN DE VOTRE APPAREIL-PHOTO Si vous ne souhaitez pas prendre toutes les photos du rouleau de • Préservez votre appareil-photo de la film, vous pouvez activer de poussière, de l’humidité, des chocs façon manuelle le dispositif de et de la chaleur excessive. - Page 101 All manuals and user guides at all-guides.com ATTENTION : N’utilisez pas de MISE AU REBUT : La carte de solvants ni de produits qui ne sont circuit imprimé de l’appareil-photo pas spécialement conçus pour contient une faible quantité de nettoyer les objectifs d’appareil- plomb.
-
Page 102: Dépannage
All manuals and user guides at all-guides.com DÉPANNAGE Problème Cause probable Solution L’appareil-photo ne Il ne reste plus de Rembobinez le film et fonctionne pas. photos à prendre. retirez-le de l’appareil-photo. Les piles sont faibles, Remplacez ou épuisées, manquantes réinstallez les piles. ou mal installées. - Page 103 All manuals and user guides at all-guides.com Problème Cause probable Solution Le panneau ACL L’appareil-photo est Appuyez sur le est vierge. en mode veille. déclencheur, ou fermez et rouvrez le couvre objectif/flash. Le couvre-objectif/flash Ouvrez le couvre- est fermé. objectif/flash. Le témoin du flash/ Le flash n’est pas Attendez que le témoin...
-
Page 104: Caractéristiques
All manuals and user guides at all-guides.com Viseur : Type Galilée inversé avec CARACTÉRISTIQUES affichage des formats C, H et P Type de film : Films KODAK ADVANTIX Sensibilité de film : DXIX 50 à 800 ISO pour photos couleur Flash : Intégré et rétractable ou noir et blanc Portée du flash (200 ISO) : T60 AF : 0,8... - Page 105 All manuals and user guides at all-guides.com Kodak, Advantix, Ektanar et les symbole et logo Advanced Photo System sont des marques de commerce.
- Page 106 All manuals and user guides at all-guides.com NOTA...
Need help?
Do you have a question about the ADVANTIX T50 Auto and is the answer not in the manual?
Questions and answers