Table of Contents
Advertisement
Quick Links
INSTALLATION AND OPERATION MANUAL
OSBURN 900
(OB00915 Model)
Distributed by
Glen Dimplex Australasia
NEW ZEALAND
AUSTRALIA
38 Harris Road, East Tamaki, Auckland
Unit 1, 21 Lionel Road
Ph: 09 274 8265
Fax 09 274 8472
Mount Waverley, Victoria 3149
Email:
sales@glendimplex.co.nz
Ph: 1 300 554 155 Fax 8787 3570
www.glendimplex.com.au
Email:
sales@glendimplex.com.au
www.glendimplex.com.au
This manual is available for free download on the manufacturer's web site. It is a copyrighted
document. Re-sale is strictly prohibited. The manufacturer may update this manual from time to
time and cannot be responsible for problems, injuries, or damages arising out of the use of
information contained in any manual obtained from unauthorized sources.
READ AND KEEP THIS MANUAL FOR REFERENCE
45972A
Printed in Canada
2019-01-21
Advertisement
Table of Contents

Related Manuals for Osburn OB00915


Summary of Contents for Osburn OB00915
- Page 1 INSTALLATION AND OPERATION MANUAL OSBURN 900 (OB00915 Model) Distributed by Glen Dimplex Australasia NEW ZEALAND AUSTRALIA 38 Harris Road, East Tamaki, Auckland Unit 1, 21 Lionel Road Ph: 09 274 8265 Fax 09 274 8472 Mount Waverley, Victoria 3149 Email: sales@glendimplex.co.nz...
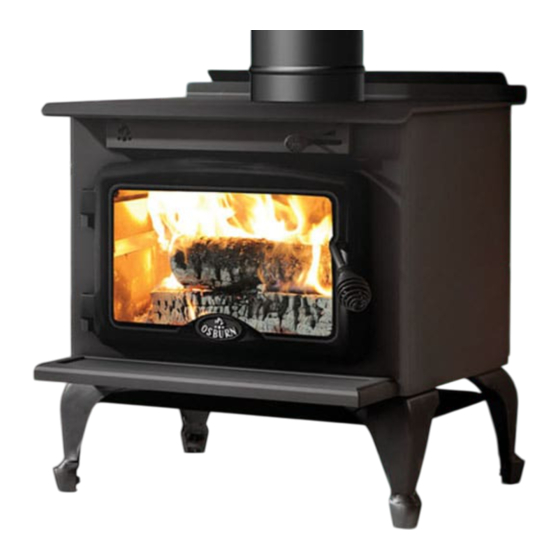
- Page 2 Osburn 900 Installation and Operation Manual THANK YOU FOR CHOOSING THIS WOOD FIRE We want to congratulate you on your purchase and wish to help you get maximum satisfaction from your wood fire. In the pages that follow, we will give you advice on wood heating and controlled combustion as well as technical specifications regarding installation, operation and maintenance of the model you have chosen.
-
Page 3: Table Of Contents
Zone Heating and How to Make it Work for You ..............9 The Benefits of Low Emissions and High Efficiency ............. 10 Osburn’s Commitment to You and the Environment ............10 2.4.1 What is Your New Wood fire Made Of? ................10 Fuel .................... - Page 4 Osburn 900 Installation and Operation Manual Maintaining Your Wood Heating System ........22 Wood fire Maintenance....................... 22 5.1.1 Cleaning Door Glass ......................22 5.1.2 Door Adjustment ......................23 5.1.3 Replacing the Door Gasket ....................24 5.1.4 Replacing the Glass Gasket and/or the Glass ..............24 5.1.5...
- Page 5 Osburn 900 Installation and Operation Manual Appendix 1: Installing the Optional Fresh Air Intake Kit (AC01331) ..40 Appendix 2: Installing the Optional Fire Screen (AC01318) ....41 Appendix 3: Installation and Use of Optional Blower and Thermodisc . 42 Appendix 4: Exploded Diagram and PARTS LIST ........
-
Page 6: Part A - Operation And Maintenance
Osburn 900 Installation and Operation Manual PART A - OPERATION AND MAINTENANCE Please see Part B for installation instructions. 1 SAFETY INFORMATION 1.1 SUMMARY OF OPERATION AND MAINTENANCE CAUTIONS AND WARNINGS HOT WHILE IN OPERATION, KEEP CHILDREN, CLOTHING AND FURNITURE AWAY. CONTACT •... -
Page 7: General Information
Osburn 900 Installation and Operation Manual GENERAL INFORMATION 2.1 OSBURN 900 SPECIFICATIONS Combustible: Dry cordwood Heating capacity* 120 m Maximum average heat output – hardwood (Australia): 7.0 kW Average efficiency – hardwood (Australia): 63 % Average emissions – hardwood (Australia): 1.4 g/kg... - Page 8 Osburn 900 Installation and Operation Manual 8 _______________________________________________________________________________...
-
Page 9: Zone Heating And How To Make It Work For You
2.2 ZONE HEATING AND HOW TO MAKE IT WORK FOR YOU Your new Osburn 900 wood fire is a space heater, which means it is intended to heat the area it is installed in, as well as spaces that connect to that area, although to a lower temperature. This is called zone heating and it is an increasingly popular way to heat homes or spaces within homes. -
Page 10: The Benefits Of Low Emissions And High Efficiency
2.4 OSBURN’S COMMITMENT TO YOU AND THE ENVIRONMENT The Osburn team is committed to protecting the environment, so we do everything we can to use only materials in our products that will have no lasting negative impact on the environment. -
Page 11: Fuel
Osburn 900 Installation and Operation Manual 3 FUEL 3.1 MATERIALS THAT SHOULD NOT BE BURNED GARBAGE OF ANY KIND, • COAL OR CHARCOAL, • TREATED, PAINTED OR COATED WOOD, • PLYWOOD OR PARTICLE BOARD, • FINE PAPER, COLORED PAPER OR CARDBOARD, •... -
Page 12: Piece Size
Osburn 900 Installation and Operation Manual The pieces should be a consistent length, with a maximum of 25 mm (1”) variation from piece to piece. 3.2.4 PIECE SIZE Firewood dries more quickly when it is split. Large unsplit rounds can take years to dry enough to burn. -
Page 13: How To Dry Firewood
Osburn 900 Installation and Operation Manual 3.2.5 HOW TO DRY FIREWOOD Firewood that is not dry enough to burn is the cause of most complaints about wood fires. The complaints usually involve a lack of heat and dirty door glass. -
Page 14: Judging Firewood Moisture Content
Osburn 900 Installation and Operation Manual 3.2.6 JUDGING FIREWOOD MOISTURE CONTENT You can find out if some firewood is dry enough to burn by using these guidelines: cracks form at the ends of logs as they dry • as it dries in the sun, the wood turns from white or cream coloured to grey or yellow, •... -
Page 15: Operating Your Wood Fire
Osburn 900 Installation and Operation Manual 4 OPERATING YOUR WOOD FIRE NEVER OVERFIRE YOUR WOOD FIRE. IF ANY PART OF THE WOOD FIRE STARTS TO GLOW • RED, OVER FIRING IS HAPPENING. READJUST THE AIR INTAKE CONTROL AT A LOWER SETTING. -
Page 16: Lighting Fires
Osburn 900 Installation and Operation Manual 4.3 LIGHTING FIRES Each person who heats with wood develops their own favorite way to light fires. Whatever method you choose, your goal should be to get a hot fire burning quickly. A fire that starts fast produces less smoke and deposits less creosote in the flue system. -
Page 17: Two Parallel Logs
Osburn 900 Installation and Operation Manual 4.3.3 TWO PARALLEL LOGS Place two spit logs in the firebox. Place a few sheets of twisted newspaper between the logs. Now place some fine kindling across the two logs and some larger kindling across those, log cabin style. -
Page 18: Ash Removal
Osburn 900 Installation and Operation Manual 4.4.2 ASH REMOVAL Ash should be removed from the firebox every two or three days of full time heating. Do not let the ash build up in the firebox because it will interfere with proper fire management. -
Page 19: Firing Each New Load Hot
Osburn 900 Installation and Operation Manual 4.4.4 FIRING EACH NEW LOAD HOT Place the new load of wood on and behind the charcoal and not too close to the glass. Close the door and open the air control fully. Leave the air control fully open until the firebox is full of flames, the wood has charred to black and its edges are glowing red. -
Page 20: Building Different Fires For Different Needs
Osburn 900 Installation and Operation Manual 4.4.6 BUILDING DIFFERENT FIRES FOR DIFFERENT NEEDS Using the air control is not the only way to match the wood fire’s heat output to the heat demand. Your house will need far less heat in April than in July to be kept at a comfortable temperature. If you fill the firebox full in fall weather, you will either overheat the space or turn the wood fire down so much that the fire will be smoky and inefficient. - Page 21 Osburn 900 Installation and Operation Manual 4.4.6.4 Maximum Burn Cycle Times The burn cycle time is the period between loading wood on a coal bed and the consumption of that wood back to a coal bed of the same size. The flaming phase of the fire lasts for roughly the first half of the burn cycle and the second half is the coal bed phase during which there is little or no flame.
-
Page 22: Maintaining Your Wood Heating System
Osburn 900 Installation and Operation Manual 5 MAINTAINING YOUR WOOD HEATING SYSTEM 5.1 WOOD FIRE MAINTENANCE Your new wood fire will give many years of reliable service if you use and maintain it correctly. Some of the internal components of the firebox, such as firebricks, baffles and air tubes, will wear over time under intense heat. -
Page 23: Door Adjustment
Osburn 900 Installation and Operation Manual 5.1.2 DOOR ADJUSTMENT In order for your wood fire to burn at its best efficiency, the door must provide a perfect seal with the firebox. Therefore, the gasket should be inspected periodically making sure to obtain an air tight fit. -
Page 24: Replacing The Door Gasket
Osburn 900 Installation and Operation Manual 5.1.3 REPLACING THE DOOR GASKET It is important to maintain the gasket in good condition. After a year or more of use, the door gasket will compress and become hard, which may allow air to leak past it. You can test the condition of the door gasket by closing and latching the door on a strip of paper. -
Page 25: Cleaning And Painting The Wood Fire
Osburn 900 Installation and Operation Manual 5.1.5 CLEANING AND PAINTING THE WOOD FIRE Do not attempt to clean or paint the wood fire when the unit is hot. Painted surfaces can be wiped down with a damp cloth. Plated surfaces may be scratched by abrasive cleaners. To maintain the finish at its original brilliance, use only a damp soft cloth to clean plated surfaces. -
Page 26: Cleaning The Flue System
Osburn 900 Installation and Operation Manual 5.2.3 CLEANING THE FLUE SYSTEM Flue system cleaning can be a difficult and dangerous job. don’t have experience cleaning flue systems, you might want to hire a professional flue system sweep to clean and inspect the system for the first time. -
Page 27: Part B - Installation
Osburn 900 Installation and Operation Manual PART B – INSTALLATION It is very important to position the wood fire as close as possible to the flue system, and in an area that will favour the most efficient heat distribution possible throughout the house. The wood fire must therefore be installed in the room where the most time is spent, and in the most spacious room possible. -
Page 28: Regulations Covering Wood Fire Installation
Osburn 900 Installation and Operation Manual 6.2 REGULATIONS COVERING WOOD FIRE INSTALLATION IT IS RECOMMENDED THAT THE INSTALLATION OF YOUR OSBURN WOOD FIRE BE CARRIED OUT BY A QUALIFIED SPECIALIST INSTALLER. IF ANY ELECTRICAL WORK IS REQUIRED, IT MUST BE CARRIED OUT BY A LICENSED ELECTRICIAN. -
Page 29: Clearances To Heat-Sensitive Materials
Osburn 900 Installation and Operation Manual 7 CLEARANCES TO HEAT-SENSITIVE MATERIALS It is of outmost importance that the clearances to heat-sensitive materials be carefully maintained upon installation of the wood fire you have selected. Refer to the tables below. No part of the wood fire or flue may be located closer to combustibles than the minimum clearance figures given. -
Page 30: Floor Protector
Osburn 900 Installation and Operation Manual Clearances to heat-sensitive materials and floor protection 7.3 FLOOR PROTECTOR If the wood fire is to be installed on top of a combustible floor, it must be guarded by a non combustible material as shown on the dotted line area of the above figures. Install a 780 mm (W) x 800 mm (D) floor protection of 6 mm of thickness with thermal resistance of 0.8 m... -
Page 31: Reducing Wall And Ceiling Clearances Safely
Osburn 900 Installation and Operation Manual 7.4 REDUCING WALL AND CEILING CLEARANCES SAFELY You may decrease the minimum clearances to heat-sensitive materials by installing heat radiation shields between the walls or the ceiling and the stove. These heat radiation shields... - Page 32 Osburn 900 Installation and Operation Manual CONSTRUCTIONS AND CLEARANCES FACTORS FOR APPLIANCES HEAT SHIELDS WHICH ARE MORE THAN 45 OFF THE VERTICAL Minimum air gap HEAT SHIELD CONSTRUCTIONS Clearances factor dimensions (mm) Single layer of continuous material 0.80 Single layer of continuous material 0.60...
-
Page 33: The Flue System
Osburn 900 Installation and Operation Manual 8 THE FLUE SYSTEM 8.1 GENERAL The flue system, made up of the flue system and the flue between the wood fire and the flue system, acts as the engine that drives your wood heating system. Even the best wood fire will not function safely and efficiently as intended if it is not connected to a suitable flue system. -
Page 34: Masonry Flue Systems
Osburn 900 Installation and Operation Manual 8.2.2 MASONRY FLUE SYSTEMS The wood fire may also be connected to a masonry flue system, provided the flue system complies with AS/NZS 2918 or with the construction rules found in the building code enforced locally. -
Page 35: Minimum Flue System Height
Osburn 900 Installation and Operation Manual 8.3 MINIMUM FLUE SYSTEM HEIGHT Flue heights and lengths from AS/NZS 2918:2001 The top of the flue system should be tall enough to be above the air turbulence caused when wind blows against the house and its roof. -
Page 36: The Relationship Between The Flue System And The House
Osburn 900 Installation and Operation Manual 8.4 THE RELATIONSHIP BETWEEN THE FLUE SYSTEM AND THE HOUSE Because the flue system is the engine that drives the wood heating system, it must have the right characteristics. The signs of bad system design are cold downdraught when there is no fire in the wood fire, slow kindling of new fires, and smoke roll-out when the door is opened for loading. -
Page 37: Why The Flue System Should Penetrate The Highest Heated Space
Osburn 900 Installation and Operation Manual 8.4.2 WHY THE FLUE SYSTEM SHOULD PENETRATE THE HIGHEST HEATED SPACE When it is cold outside, the warm air in the house is buoyant so it tends to rise. This tendency of warm air to rise creates a slight pressure difference in the house. Called ‘stack effect’, it produces a slightly negative pressure low in the house (relative to outside) and a slightly positive pressure zone high in the house. - Page 38 Osburn 900 Installation and Operation Manual Use 45° elbows where possible, instead of 90° elbows. 38 ______________________________________________________________________________...
- Page 39 Osburn 900 Installation and Operation Manual The rules below are based on those found in the AS/NZS 2918:2001 installation code. Please carefully follow these installation instruction rules, or those enforced where you live. Maximum overall length of straight flue system: not less than 4.6 m above the top of the floor •...
- Page 40 Osburn 900 Installation and Operation Manual APPENDIX 1: INSTALLING THE OPTIONAL FRESH AIR INTAKE KIT (AC01331) The installation instructions are provided with the Fresh Air Intake Kit (AC01331), sold separately. 40 ______________________________________________________________________________...
- Page 41 Osburn 900 Installation and Operation Manual APPENDIX 2: INSTALLING THE OPTIONAL FIRE SCREEN (AC01318) Open the door. Hold the fire screen by the two handles and bring it close to the door opening. Lean the upper part of the fire screen against...
- Page 42 You can purchase this option through your OSBURN dealer. Make sure to specify this part number: # AC02052.
- Page 43 Osburn 900 Installation and Operation Manual When using a blower (optional), allow the wood fire to reach operating temperature (approximately one hour), before turning it on. The increased airflow from the blower cools the firebox and could affect the start-up combustion efficiency if the blower is turned on too early.
- Page 44 Osburn 900 Installation and Operation Manual APPENDIX 4: EXPLODED DIAGRAM AND PARTS LIST 44 ______________________________________________________________________________...
- Page 45 30050 LEVELING BOLT 3/8-16 X 1 1/2" 23 AC01331 5" FRESH AIR INTAKE KIT 99999 BUILD TO ORDER 25 SE45639 OSBURN 900 INSTRUCTION MANUAL KIT (AUSTRALIA) 60284 POWERCORD 27 AC07866 1/4" BLACK COIL HANDLE 30125 MECHANICAL SCREW #8 X 1 1/4" QUADREX ZINC...
- Page 46 Osburn 900 Installation and Operation Manual Qty per Item Description wood fire 29011 4'' X 9" X 1 1/4" REFRACTORY BRICK HD 29020 4 1/2'' X 9'' X 1 1/4'' REFRACTORY BRICK HD 21386 BACK INSULATION BAFFLE 44 PL63339 BAFFLE INSULATION WEIGHT 30363 HING PIN 5/16"...
- Page 48 Manufactured by: STOVE BUILDER INTERNATIONAL INC. 250, de Copenhague, Saint-Augustin-de-Desmaures (Quebec), Canada G3A 2H3 Tel: 418-878-3040 Fax: 418- 878-3001 www.osburn-australia.com Distributed by Glen Dimplex Australasia NEW ZEALAND AUSTRALIA 38 Harris Road, East Tamaki, Auckland Unit 1, 21 Lionel Road For servicing your heater...
Need help?
Do you have a question about the OB00915 and is the answer not in the manual?
Questions and answers