Hans Grohe Axor Starck 10651 1 Series Installation/User Instructions/Warranty
Hide thumbs
Also See for Axor Starck 10651 1 Series:
- User instructions (16 pages) ,
- Installation instructions / warranty (16 pages) ,
- Installation/user instructions/warranty (16 pages)

Related Manuals for Hans Grohe Axor Starck 10651 1 Series


Summary of Contents for Hans Grohe Axor Starck 10651 1 Series
- Page 1 EN Installation / User Instructions / Warranty FR Instructions de montage / Mode d'emploi / Garantie ES Instrucciones de montaje / Manejo / Garantía Starck 10651xx1...
-
Page 2: Technical Information
English Français Technical Information Données techniques Flow rate - handshower 2.0 GPM (7.6 L/min) Capacité nominale - douchette 2.0 GPM (7.6 L/min) Installation Considerations À prendre en considération pour l’installation • For best results, Hansgrohe recommends that this unit be installed by a licensed, professional plumber. • Pour de meilleurs résultats, Hansgrohe recommande que ce produit soit installé par un plombier • Please read over these instructions thoroughly professionnel licencié. -
Page 3: Datos Tecnicos
Español Datos tecnicos Tools Required / Outiles Utiles / Herramientas Útiles Caudal máximo - teleducha 2.0 GPM (7.6 L/min) Consideraciones para la instalación • Para obtener mejores resultados, Hansgrohe recomienda que la instalación de esta unidad esté a cargo de un plomero profesional matriculado. 12 mm • Antes de comenzar la instalación, lea estas 17 mm instrucciones detenidamente. Asegúrese de tener las herramientas y los insumos necesarios para completar la instalación. -
Page 4: Installation / Installation / Instalación
Installation / Installation / Instalación English Français Español Cut the plaster shield so that it Coupez le protecteur de façon à Corte el protector de yeso de extends ¹⁄₁₆" outside the surface of ce qu’une partie de ¹⁄₁₆ po soit à modo que sobresalga ¹⁄₁₆" de la the finished wall. l’extérieur de la surface du mur superficie de la pared terminada. fini. Seal the wall around Scellez le mur autour du Selle la pared alred- the plaster shield with protecteur à l’aide d’un edor del protector de waterproof sealant. - Page 5 English Français Español Cut the slip connector so that it ex- Coupez le raccord à glissement Corte el acoplamiento deslizante tends ⅜" - ½" outside the surface de façon à ce qu’une partie de ⅝ de modo que sobresalga ⅝" de la of the finished wall. po soit à l’extérieur de la surface superficie de la pared terminada. du mur fini. Install the extension spindle. Instale el husillo de extensión. Installez la tige d’extension. Cut the extension spindle so that Coupez la tige d’extension de fa- Corte el husillo de extensión de it extends ¾" - 1" outside the çon à ce qu’une partie de ¾" - 1" modo que sobresalga ¾" - 1" surface of the finished wall. po soit à l’extérieur de la surface de la superficie de la pared du mur fini. terminada.
- Page 6 English Français Español Remove the plug from the rough Retirez le bouchon à l’aide d’une Retire el tapón con una llave de correa de17 mm. using a 17mm wrench. clé de 17 mm. Install the connecting adapter on Installez l'adapteur à l’aide d'une Instale el adaptador con una llave the cover using a 12mm wrench. clé de 12 mm. de correa de12 mm. Follow the appropriate diagram Installez les trois vis. Instale los tres tornillos. for vertical (5a) or horizontal (5b) installation. Install the three screws.
- Page 7 English Français Español Insert the cut extension spindle in Installez la tige d’extension sur Instale el husillo de extensión en el the handle adapter. l'adapteur pour poignée. adaptador para mando. Push the handle adapter assem- Poussez l'adapteur sur le Instale el adaptador en la tapa. bly into the cover and over the couvercle. cartridge stem. Tighten the handle adapter using Serrez-le à l’aide d’une clé de 17 Apriételo con una llave de 17 mm. a 17mm wrench.
- Page 8 English Français Español Place dabs of waterproof sealant Appliquer une petite quantité de Coloque un poco de sellador a on the wall at the grout joints. l’agent d’étanchéité aux joints de prueba de agua en las uniones de coulis. la lechada de cemento. Push the snap connector and Installez le connecteur à Instale el conector a presión. handle over the handle adapter encliqueter. stem. Coloque el mando sobre el conec- Poussez la poignée sur le con- tor a presión. Install and tighten the handle necteur à encliqueter. screw. Instale el tornillo. Installez la vis. Install the screw cover. Instale la tapa del tornillo. Installez le cache-vis.
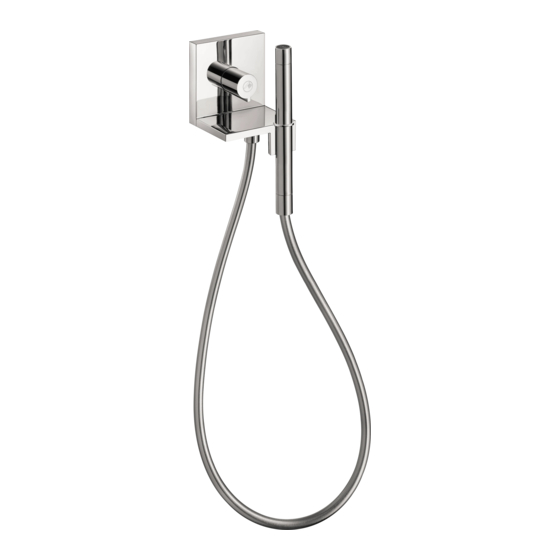
- Page 9 English Français Español Install the check valve housing. Installez le clapet anti-retour dans Coloque la válvula antirretorno en le coude de raccordement. la toma de agua. Place a black rubber washer in Placez un joint dans l’extrémité du Coloque una junta en el extremo one end of the hose. tuyau. Connectez cette extrémité de la manguera. Conecte este du tuyau à le clapet anti-retour. extremo a la válvula antirretorno. Connect this end to the check valve housing. Placez l’autre joint dans l’extrémité Coloque la otra junta en el ex- du tuyau. Connectez cette ex- tremo de la manguera. Conecte trémité du tuyau à la douchette. este extremo de la manguera a la Place the screen washer in the other end of the hose. teleducha. Déposez la douchette dans son Connect this end to the support. Apoye la ducha de mano en el handshower. soporte. Rest the handshower in the holder.
- Page 10 Replacement Parts / Pièces détachées / Repuestos 95391000 94246000 95153xx0 92338xx1 96737000 check valve 26 x 2 mm 95392xx0 94074000 28282xx0 check valve xx = colors / couleurs / acabados 02 = Polished Chrome 13 = Polished Bronze 14 = Brushed Bronze 25 = Brushed Gold-Optic 26 = Brushed Chrome 30 = Polished Redgold 31 = Brushed Redgold 33 = Polished Black Chrome...
- Page 11 User Instructions / Instructions de service / Manejo Maintenance / Entretien / Mantenimiento...
- Page 12 Cleaning Recommendation for Hansgrohe Products Modern bathroom faucets, kitchen faucets and shower products are made from different materials to comply with the needs of the market with regard to design and functionality. To avoid damage to the product, it is necessary to take proper care of it. For best results: • P revent the buildup of mineral scale and /or soap residue by cleaning your Hansgrohe product(s) when needed. • S elect a cleaning agent specifically intended for the type of product. • Do not use these types of cleaners as they will cause damage to your Hansgrohe product: ´ Any cleaning agent containing hydrochloric acid, formic acid, lye, or acetic acid. ´ Abrasive cleaning powders, pads, or brushes. ´ Steam cleaners. ´ “No rinse” cleaning agents. • Always follow the instructions provided by the manufacturer of the cleaning agent. • Do not mix cleaning agents, unless directed by the manufacturer. • Do not spray cleaners directly onto the product as drops could enter openings and gaps and cause damage. When using spray cleaners, spray the cleaner onto a soft cloth or sponge.
- Page 13 Important • Les residus de produits pour le corps comme les savons liquides, shampooings, gels de douche, teintures pour cheveux, parfums, apres-rasage et vernis a ongles peuvent causer des deteriorations. Rincez le produit avec de l’eau propre après chaque utilisation. • Le résidu provenant des nettoyants pour cuvette/baignoire/carrelage peut endommager les robinets et les raccords de tuyauterie. Rincez immédiatement toute surpulvérisation sur le produit Hansgrohe. • De meme, il est interdit de stocker des detergents ou des produits chimiques sous les produits, par ex. dans un meuble sous lavabo, car les vapeurs qui s’en degagent risquent d’abimer les produits. • Les dommages au produit causés par un mauvais entretien ou par l’utilisation de produits de nettoyage inadéquats ne sont pas couverts par la garantie. • Si un composant du produit est endommagé, remplacez-le, car il existe un risque de blessure. Recomendación de limpieza para los productos de Hansgrohe Hoy en día, las griferías de baño y de cocina así como duchas modernas se componen de materiales muy distintos para satisfacer las exigencias del mercado respecto al diseño y la funcionalidad. Para evitar daños y reclamaciones hay que tener...
-
Page 14: Limited Consumer Warranty
Limited Consumer Warranty the product in any manner contrary to the product This warranty is limited to products manufactured by Hansgrohe, Inc. (“Hansgrohe”) that are purchased by a instructions; or (3) conditions in the home such as consumer in the United States or Canada after March 1, excessive water pressure or corrosion. - Page 16 Hansgrohe, Inc. • 1490 Bluegrass Lakes Parkway • Alpharetta, GA 30004 Tel. 770-360-9880 • Fax 770-889-1783 www.hansgrohe-usa.com...
Need help?
Do you have a question about the Axor Starck 10651 1 Series and is the answer not in the manual?
Questions and answers