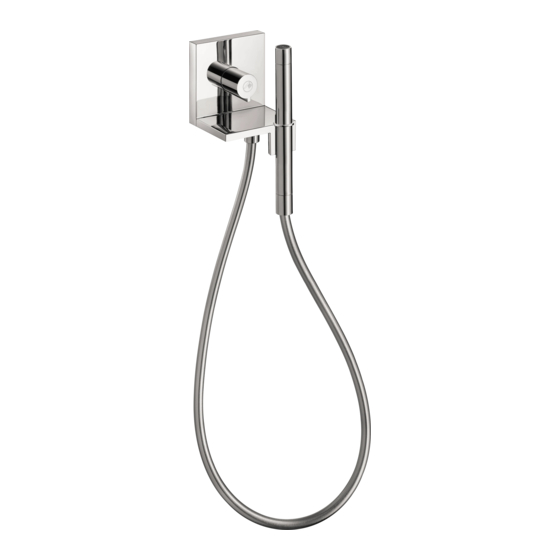
Hans Grohe AXOR Starck 10651 1 Series User Instructions
Hide thumbs
Also See for AXOR Starck 10651 1 Series:
- Installation instructions / warranty (16 pages) ,
- Installation/user instructions/warranty (16 pages) ,
- Installation/user instructions/warranty (16 pages)

Related Manuals for Hans Grohe AXOR Starck 10651 1 Series


Summary of Contents for Hans Grohe AXOR Starck 10651 1 Series
- Page 1 Installation / User Instructions / Warranty Instructions de montage / Mode d'emploi / Garantie Instrucciones de montaje / Manejo / Garantía Starck 10651xx1...
-
Page 2: Installation Considerations
3¾" Installation Considerations 4¾" 2½" 1" • For best results, Hansgrohe recommends that ⅞" this unit be installed by a licensed, professional plumber. 1⅜" • Please read over these instructions thoroughly before beginning installation. Make sure that you have all tools and supplies needed to complete the installation. -
Page 3: Consideraciones Para La Instalación
À prendre en considération pour Consideraciones para la instalación l’installation • Para obtener mejores resultados, Hansgrohe re- comienda que la instalación de esta unidad esté • Pour de meilleurs résultats, Hansgrohe recom- a cargo de un plomero profesional matriculado. mande que ce produit soit installé par un plom- bier professionnel licencié. -
Page 4: Installation / Installation / Instalación
Installation / Installation / Instalación English Français Español Cut the plaster shield so that it Coupez le protecteur de façon à Corte el protector de yeso de extends ¹⁄₁₆" outside the surface of ce qu’une partie de ¹⁄₁₆ po soit à modo que sobresalga ¹⁄₁₆"... - Page 5 English Français Español Cut the slip connector so that it ex- Coupez le raccord à glissement Corte el acoplamiento deslizante tends ⅜" - ½" outside the surface de façon à ce qu’une partie de ⅝ de modo que sobresalga ⅝" de la of the finished wall.
- Page 6 English Français Español Remove the plug from the rough Retirez le bouchon à l’aide d’une Retire el tapón con una llave de using a 17mm wrench. clé de 17 mm. correa de17 mm. Install the connecting adapter on Installez l'adapteur à l’aide d'une Instale el adaptador con una llave the cover using a 12mm wrench.
- Page 7 English Français Español Insert the cut extension spindle in Installez la tige d’extension sur Instale el husillo de extensión en el the handle adapter. l'adapteur pour poignée. adaptador para mando. Push the handle adapter assem- Poussez l'adapteur sur le cou- Instale el adaptador en la tapa.
- Page 8 English Français Español Place dabs of waterproof sealant Appliquer une petite quantité de Coloque un poco de sellador a on the wall at the grout joints. l’agent d’étanchéité aux joints de prueba de agua en las uniones de coulis. la lechada de cemento. Push the snap connector and handle over the handle adapter Installez le connecteur à...
- Page 9 English Français Español Install the check valve housing. Installez le clapet anti-retour dans Coloque la válvula antirretorno en le coude de raccordement. la toma de agua. Place a black rubber washer in one end of the hose. Placez un joint dans l’extrémité du Coloque una junta en el extremo tuyau.
- Page 10 Replacement Parts / Pièces détachées / Repuestos 95390xx1 95391000 94246000 95153xx0 92338xx1 96737000 check valve 26 x 2 mm 95392xx0 94074000 28282xx0 check valve...
- Page 11 User Instructions / Instructions de service / Manejo Maintenance / Entretien / Mantenimiento...
- Page 12 Cleaning / Nettoyage / Limpieza scale remover S cale détartrant commercial R e m o v e r desincustante comercial > 1 min.
- Page 13 Cleaning Recommendation for Hansgrohe Products Modern bathroom faucets, kitchen faucets and shower products are made from different materials to comply with the needs of the market with regard to design and functionality. To avoid damage to the product, it is necessary to take proper care of For best results: •...
- Page 14 • Ne pulvérisez pas les nettoyants directement sur le produit car des gouttes pourraient entrer dans les ouvertures et les fentes et causer des dommages. Lorsque vous utilisez des nettoyants par pulvérisation, pulvérisez le nettoyant sur un chiffon ou une éponge douce. Important •...
-
Page 15: Limited Consumer Warranty
Limited Consumer Warranty This product has been manufactured and tested to the highest quality standards by Hansgrohe, Inc. (“Hansgrohe”). This warranty is limited to Hansgrohe products that are purchased by a consumer in the United States or Canada after March 1, 1996, and installed in either in the United States or in Canada. WHO IS COVERED BY THE WARRANTY This warranty extends to the original purchaser only. -
Page 16: Exclusions And Limitations
EXCLUSIONS AND LIMITATIONS REPAIR OR REPLACEMENT (OR, IN LIMITED CIRCUMSTANCES, REFUND OF THE PURCHASE PRICE) AS PROVIDED UNDER THIS WARRANTY IS THE EXCLUSIVE REMEDY OF THE PURCHASER. HANSGROHE NEITHER ASSUMES NOR AUTHORIZES ANY PERSON TO CREATE FOR IT ANY OTHER OBLIGATION OR LIABILITY IN CONNECTION WITH THIS PRODUCT.
Need help?
Do you have a question about the AXOR Starck 10651 1 Series and is the answer not in the manual?
Questions and answers