Comfee CDC22P4AWW - Portable Countertop Dishwasher Manual
- Instruction manual (36 pages)
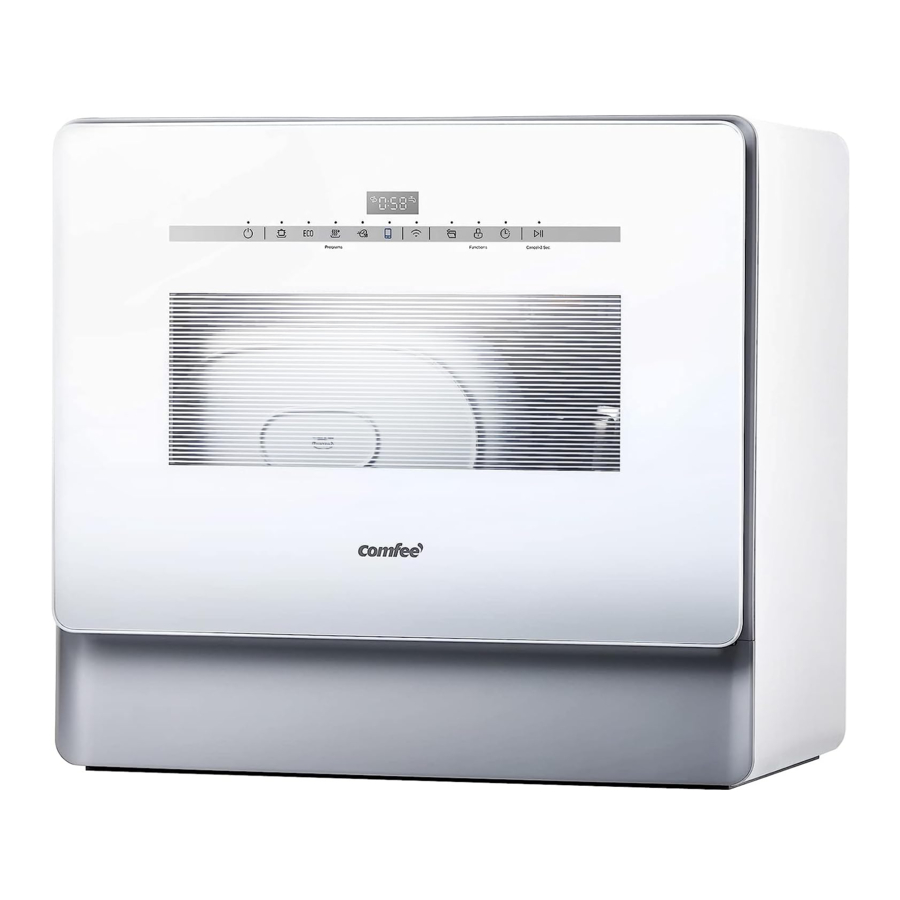
Advertisement
Starting A Wash
- Discard scraps
Scrape large food particles off and remove any foreign objects.
![]()
- Load dishes carefully
For better washing result, place the dishes properly avoiding any contact or overlapping between them.
![]()
- Check spray arm
Ensure there are no items blocking the spray arm from rotating.
![]()
- Add detergent
![]()
- Set up program and function
Choose the proper program and function.
![]()
- Start washing
![]()


IMPORTANT SAFETY INSTRUCTIONS

When using your dishwasher, follow basic precautions, including the following
- Read all instructions before using the dishwasher.
- Use the dishwasher only for its intended function.
- Use only detergents or wetting agents recommended for use in a dishwasher and keep them out of the reach of children.
- When loading items to be washed
- Locate sharp items so that they are not likely to damage the door seal;
- Load sharp knives with the handles up to reduce the risk of cut-type injuries.
- Do not wash plastic items unless they are marked " dishwasher safe or the equivalent. For plastic items not so marked, check the manufacturer's recommendations.
NOTE: This statement may be omitted for an appliance that employs a heating element that is located or guarded such that melted plastic items are not likely to contact it. - Do not touch the heating element during or Immediately after use.
- Do not operate your dishwasher unless all enclosure panels are properly in place.
- Do not tamper with controls.
- Do not abuse, sit on, or stand on the door or dish rack of the dishwasher.
- To reduce the risk of injury, do not allow children to play in or on a dishwasher.
- Under certain conditions, hydrogen gas may be produced in a hot-water system that has not been used for two weeks or more. HYDROGEN GAS IS EXPLOSIVE. If the hot-water system has not been used for such a period, before using the dishwasher turn on all hot-water faucets and let the water flow from each for several minutes. This will release any accumulated hydrogen gas. As the gas is flammable, do not smoke or use an open flame during this time.
- Remove the door to the washing compartment when removing an old dishwasher from service or discarding it.
- This appliance can be used by children aged from 8 years and above and persons with reduced physical, sensory or mental capabilities or lack of experience and knowledge if they have been given supervision or instruction concerning use of the appliance in a safe way and understand the hazards involved. Children shall not play with the appliance. Cleaning and user maintenance shall not be made by children without supervision.
GROUNDING INSTRUCTIONS
- This appliance must be grounded. In the event of a malfunction or breakdown, grounding will reduce the risk of electric shock by providing a path of least resistance for electric current. This appliance is equipped with a cord having an equipment-grounding conductor and a grounding plug.
- The plug must be plugged into an appropriate outlet that is installed and grounded in accordance with all local codes and ordinances.

- Improper connection of the equipment-grounding conductor can result in a risk of electric shock. Check with a qualified electrician or service representative if you are in doubt whether the appliance is properly grounded.
- Do not modify the plug provided with the appliance, if it will not fit the outlet, have a proper outlet installed by a qualified electrician.
PRODUCT DESCRIPTION

To get the best performance from your dishwasher, read all operating instructions before using it for the first time.
Part Names
- Front

- Back

- Baskets


List of accessories (PROVIDED)

Control Panel

| 1 Power | Press this button to turn on your dishwasher, the screen will light up. |
| 2 Cycles | Press these buttons to select the appropriate washing program, the selected program icon will light up. HEAVY For hard-to-clean, heavily soiled dishes, pots and pans. NORMAL For normally soiled dinner dishes and silverware. HYGIENE Use to sanitize your dishes and glassware. 58MIN WASH For lightly soiled loads that need quick wash. RAPID A shorter wash for lightly soiled loads that do not need drying. SELF CLEANING This program provides an effective cleaning of the dishwasher itself. |
| 3 Options | CHILD LOCK This option allows you to lock the buttons on the control panel, so children cannot accidently start the dishwasher by pressing the buttons on the panel. Only the Power button remains active. To lock or unlock the buttons on the control panel, press and hold the button for 3 seconds. AUTO OPEN The dishwasher door opens automatically at the end of the program, which improves the drying performance. Press the button for 3 seconds to select this function. DELAY Press the button to increase the delay start time. Delay a cycle for up to 24 hours in one-hour increments. |
| 4 Start/Cancel | START-Press this button to start the dishwasher, the lamp will keep light when the dishwasher is running. PAUSE -If you need to pause a cycle in process, open the door slightly and wait a few seconds until the wash action stop. And the lamp will be blinking. CANCEL -Press and hold "Start/Cancel" button for 3 seconds to cancel a cycle when the dishwasher is running. |
| 5 Screen |  WATER FAUCET WATER FAUCETIf you use a tap to get in the water, the "  " indicator is lit, it means the water faucetclosed. " indicator is lit, it means the water faucetclosed.If you use the self-priming pump to get in the water, the " " indicator is blinking, it means that there is shot of water in the bucket. The machine will enter into a pause state. Please add enough water to the bucket and press the "Start/Cancel" button. The machine will continue to run. |
 Displays the remaining program time and delay time, error codes etc. Displays the remaining program time and delay time, error codes etc. |
USING YOUR DISHWASHER
Preparing And Loading Dishes
- Consider buying utensils which are identified as dishwasher-proof.
- For particular items, select a program with the lowest possible temperature.
- To prevent damage, do not take glass and cutlery out of the dishwasher immediately after the program has ended.
For washing the following cutlery/dishes
Are not suitable
- Cutlery with wooden, horn china or mother-of-pearl handles
- Plastic items that are not heat resistant
- Older cutlery with glued parts that are not temperature resistant
- Bonded cutlery items or dishes
- Pewter or copper items
- Crystal glass
- Steel items subject to rusting
- Wooden platters
- Items made from synthetic fibres
Are of limited suitability
- Some types of glasses can become dull after a large number of washes
- Silver and aluminum parts have a tendency to discolor during washing
- Glazed patterns may fade if machine washed frequently
Recommendations for loading the dishwasher
Scrape off any large amounts of leftover food. Soften remnants of burnt food in pans. It is not necessary to rinse the dishes under running water.
For best performance of the dishwasher, follow these loading guidelines.
Place objects in the dishwasher in following way:
- Items such as cups, glasses, pots/pans, etc. are faced downwards.
- Curved items, or ones with recesses, should be loaded on a slant so that water can run off.
- All utensils are stacked securely and can not tip over.
- Be sure that no wash items protrude through the basket base where they will likely foul the spray arm.
- Load hollow items such as cups, glasses, pans etc. With the opening facing downwards so that water cannot collect in the container or a deep base.
- Dishes and items of cutlery must not lie inside one another, or cover each other.
- To avoid damage, glasses should not touch one another.
- Please do not overload your dishwasher. This is important for good results and for reasonable consumption of energy.
![]() NOTE:
NOTE:
Very small items should not be washed in the dishwasher as they could easily fall through the basket.

 Items will be hot! To prevent damage, do not take glass and cutlery out of the dishwasher for around 15 minutes after the program has ended.
Loading the dishwasher
The loading pattern in the illustration is recommended for the design of basket.
It is the pattern used for the Standards Wash Test.
![]() NOTE:
NOTE:
Cups and glasses face downwards.
Plates face the back of each other, as do side plates, soup plates and saucers.
Upper basket

| Number | Item | Number | Item |
| 1 | Serving spoons | 5 | Knives |
| 2 | Serving fork | 6 | Tea spoons |
| 3 | Dinner forks | 7 | Saucers |
| 4 | Salad forks |
Lower basket

| Number | Item | Number | Item |
| 1 | Bread butter plates | 5 | Dessert bowls |
| 2 | Dinner plates | 6 | Saucers |
| 3 | Oval platter | 7 | Glasses |
| 4 | Serving bowl | 8 | Cups |
Basket Use Tips
Folding down the tines
- The spacing between the tines can be increased by folding them down. This will help the loading of large bowls and deep pot and pans.


Adding Detergent
- Only use detergent specifically for dishwashers.
Never use any other detergents.This will damage the appliance. - Dishwasher detergent is corrosive!
Keep dishwasher detergent out of the reach of children.
Detergent Tablets
Detergent tablets of different brands dissolve at different speeds. For this reason some detergent tablets cannot dissolve and develop their full cleaning power during short programs. Therefore please use long programs when using detergent tablets, to ensure the complete removal of detergent residuals.
Detergent
The detergent must be refilled before the start of each wash cycle following the instructions provided in the Wash Cycle Table. Your dishwasher uses less detergent then conventional dishwasher. Generally, only one tablespoon of detergent is needed for a normal wash load. More heavily soiled items need more detergent. Always add the detergent just before starting the dishwasher, otherwise it could get damp and will not dissolve properly.
Adding detergent

OPERATING THE APPLIANCE
Wash Cycle Table
The table below shows which programs are best for the levels of food residue on them and how much detergent is needed. It also show various information about the programs.
| Program | Description Of Cycle | Running Time(min) | Water (Gal) |
| HEAVY | Mainwash(149℉) Rinse Rinse Rinse Rinse(158℉) Drying | 140 | 2.99 |
| NORMAL | Mainwash(131℉) Rinse Rinse Rinse Rinse(149℉) Drying | 130 | 2.85 |
| HYGIENE | Mainwash(158℉) Rinse Rinse Rinse Rinse(162℉) Drying | 150 | 2.85 |
| 58MIN WASH | Mainwash(131℉) Rinse Rinse Rinse Rinse(149℉) Drying | 58 | 2.85 |
| RAPID | Mainwash(122℉) Rinse Rinse(131℉) | 29 | 1.85 |
| SELF CLEANING | Mainwash(149℉) Rinse Rinse Rinse Rinse(158℉) Drying | 85 | 2.64 |
Starting A Cycle Wash
- Draw out the lower and upper basket, load the dishes and push them back. It is recommended to load the lower basket first, then the upper one.
- Pour in the detergent.
- Insert the plug into the socket. The power supply refer to Electrical Connection. Make sure that the water supply is properly set up.(i.e water turned on or bucket filled)
- Close the door, press the Power button, to switch on the machine.
- Choose a program, the response light will turn on. Then press the Start/Cancel button, the dishwasher will start its cycle.
Changing The Program Once Started
A wash cycle can only be changed if it has been running for a short time otherwise, the detergent may have already been released and the dishwasher may have already drained the wash water. If this is the case, the dishwasher needs to be reset and the detergent dispenser must be refilled. To reset the dishwasher, follow the instructions below:
- Press and hold Start/Cancel for more than 3 seconds, the machine will drain 60 seconds. Then the machine will be in stand by state.
- Press a new program button to select the desired program.
- Press the Start/Cancel button, the dishwasher will start.
Adding Items While A Wash Is In Progress
You can add items after the wash program has begun.
However if it is no longer in the wash cycle, anything added may not be well washed, and other items soiled as well. Check that it is not rinsing.
Follow these instructions:
- Open the door a little to stop the washing.
- After the spray arms stop working, you can open the door completely.
- Add the extra items.
- Close the door.
- Press the Start/Cancel button.
It is dangerous to open the drawer mid-cycle, as hot steam may scald you.

![]() NOTE:
NOTE:
If you open the door during washing, the machine will pause.
When you press the Start/Pause Button, the machine will keep on working. If the electric power to the dishwasher is interrupted during a wash program, it will continue to the end of the program when the power is restored.
MAINTENANCE AND CLEANING
External Care
The door and the door seal
Clean the door seals regularly with a soft damp cloth to remove food deposits. When the dishwasher is being loaded, food and drink residues may drip onto the sides of the dishwasher door. These surfaces are outside the wash cabinet and are not accessed by water from the spray arm. Any deposits should be wiped off before the door is closed.
The control panel
If cleaning is required, the control panel should be wiped with a soft damp cloth only.
- To avoid penetration of water into the door lock and electrical components, do not use a spray cleaner of any kind.
- Never use abrasive cleaners or scouring pads on the outer surfaces because they may scratch the finish. Some paper towels may also scratch or leave marks on the surface.
Internal Care
Filtering system
The filtering system in the base of the wash cabinet retains coarse debris from the washing cycle. The collected coarse debris may cause the filters to clog. Check the condition of the filters regularly and clean them if necessary under running water.
Follow the steps below to clean the filters in the wash cabinet.
![]() NOTE:
NOTE:
Pictures are only for reference, different models of the filtering system and spray arm may be different. Please prevail in kind.

- Hold the coarse filter and rotate it anticlockwise to unlock the filter. Lift the filter upwards and out of the dishwasher.
![]()
- Lift fine filter up from main filter.
![]()
- Larger food remnants can be cleaned by rinsing the filter under running water.
For a more thorough clean, use a soft cleaning brush.
![]()
- Reassemble the filters in the reverse order of the disassembly, replace the filter insert, and rotate clockwise to the close arrow.
![]()


Spray arms
It is necessary to clean the spray arm regularly for hard water chemicals will clog the spray arm jets and bearings.
To clean the spray arm, follow the instructions below:

- To remove the spray arm, hold one end of the spray arm first, then press down firmly to release the button and pull it up and out.
![]() NOTE:
NOTE:
Hold one side of both ends of the spray arm to avoid hitting the upper bowl basket when pulling out.
![]()
- Wash the spray arm in soapy and warm water and use a soft brush to clean the jets. Replace them after rinsing them thoroughly.
![]()


Caring For The Dishwasher
Frost precaution
If your dishwasher could be subjected to freezing temperatures, care needs to be taken to avoid possible damage if the water in the dishwasher freezes.
- Turn off the mains power to the dishwasher.
- Turn off the water supply and disconnect the Water Inlet Hose. Drain the water inside the hose then reconnect.
- Remove the course filters in the tubs and soak up all water possible with a sponge. Then re-assemble.
Cleaning
Only use gentle cleaning products on the exterior of the dishwasher, no solvents or abrasive compounds.
Products specifically for cleaning the stainless steel interior are effective in restoring the original bright interior.
Long term storage
Disconnect the power supply and the water supply.
Remove the coarse filters and soak up all water possible with a sponge.
This reduces the chance of any odors developing inside the tubs.
INSTALLATION INSTRUCTION
Product Dimensions

| Height | 500 mm(19.68 in) |
| Width (W) | 550 mm(21.65 in) |
| Depth (D1) | 345 mm(13.58)(with the door closed) |
| Depth (D2) | 713 mm(28 in) (with the door opened 90°) |
| Voltage connected Load | See rating label |
| Water pressure | 0.04-1.0MPa (5.8-145 psi) |
| Power supply | See rating label |
| Capacity | 3 place setting |
Inlet Pipe Connected
There are two ways to connect the water.
- Connect the inlet pipe to the faucet
- Take the existing aerator off your faucet.
![]()
- Screw the faucet adapter onto (or into) the faucet tap. Check for leaks (Use Teflon tape Take the existing aerator off your faucet.

- Attach the quick connect onto the faucet adapter by pulling down the locking collar. Then pull up the locking collar to fix the connection.
![]()
- Slowly open the hot water line and check for any sign of water leaks at all hose connections.
- Take the existing aerator off your faucet.


Please confirm whether the supplied adapter is suitable for your faucet tap. If not, please contact our customer service where adapter is available for purchase. Customer Service Phone: 1-866-646-4332
Connect the inlet pipe to the dishwasher

Please keep the soft cover on the suction hose after you connect the inlet pipe to the dishwasher. A little water will flow out if the soft cover is pulled out

- Connect the suction pipe and add water into the suction bucket
- Connect suction pipe.
![]()
- Connect the suction pipe to the bucket.
![]()
![]()
Please make sure Bucket is filled up over 12L(3.17 Gal)-tick mark. Otherwise the dishwasher may show E1 code on the screen due to insufficient supply water, and it will not work properly - Fill the bucket with water at the maximun water level.
![]()
- Power on, choose the program and run.
![]()
- Connect suction pipe.


Drain Pipe Connected
Fix the drain pipe with the back pipe of the machine. The interface is fitted with clamps and tightened with a screwdriver.

The connection of the drain pipe: Put end of the drain pipe into a sink or bucket.

How to Drain Excess Water From Hoses
If a portion of the drain hose or the drain location is higher than the drain exit on the dishwasher, the excess water in hoses cannot be drained directly into the sink. It will be necessary to drain excess water from hoses into a bowl or suitable container that is held outside and lower than the sink.
Water Outlet
Connect the water drain hose. The drain hose must be correctly fitted to avoid. water leaks. Ensure that the water drain hose is not kinked or squashed.
Extension Hose
If you need a drain hose extension, make sure to use a similar drain hose. It must be no longer than157.5. inches, otherwise the cleaning effect of the dishwasher could be reduced.
Electrical Requirements
Electrical Shock Hazard
Disconnect electrical power before installing dishwasher.
Failure to do so could result in death or electrical shock.

The installation of the pipes and electrical equipments should be done by professionals.
About Power Connection
For personal safety:
- Do not use an extension cord or an adapter plug with this appliance.
- Do not, under any circumstances, cut or remove the earthing connection from the power cord.
Electrical requirements
Please look at the rating label to know the rating voltage and connect the dishwasher to the appropriate power supply. Use the required fuse 10 amp, time delay fuse or circuit breaker recommended and provide separate circuit serving only this appliance.
Electrical connection
Ensure the voltage and frequency of the power being corresponds to those on the rating plate. Only insert the plug into an electrical socket which is grounded properly. If the electrical socket to which the appliance must be connected is not appropriate for the plug, replace the socket, rather than using a adaptors or the like as they could cause overheating and burns.
 Ensure that proper grounding exists before use
The power supply is 120V AC 60Hz, 10 Amp circuit.

TROUBLESHOOTING TIPS
Before Calling For Service
Before calling for service, check the following list for problems probable causes and what you can do.
| Problem | Possible causes | Solution |
| Dishwasher doesn't start | Fuse blown, or the circuit breaker tripped. | Replace fuse or reset circuit breaker. Remove any other appliances sharing the same circuit with the dishwasher. |
| Power supply is not turned on. | Make sure the dishwasher is turned on and the door is closed securely. Make sure the power cord is properly plugged into the wall socket. | |
| Door of dishwasher not properly closed. | Make sure to close the door property and latch it. | |
| Water not pumped from dishwasher | Kink in drain hose | Check drain hose. |
| Filter clogged. | Check the coarse filter. (see section titled "Internal Care") | |
| Kitchen sink clogged. | Check the kitchen sink to make sure it is draining well. If the problem is the kitchen sink that is not draining, you may need a plumber rather than a serviceman for dishwashers. | |
| Suds in the tub | Improper detergent | Use only the special dishwasher detergent to avoid suds. If this occurred, open the dishwasher and let suds evaporate. Add 1 gallon of cold water to the tub. Close and latch the dishwasher, then Start any wash cycle to drain out the water. Repeat if necessary. |
| White film on inside surface | Hard water minerals. | To clean the interior, use a damp sponge with dishwasher detergent and wear rubber gloves. Never use any other cleaner than dishwasher detergent for the risk of foaming or suds. |
| Problem | Possible Causes | What To Do |
| There are rust stains on cutlery | The affected items are not corrosion resistant. | Avoid washing items that are not corrosion resistant in the dishwasher. |
| Knocking noise in the wash cabinet | The spray arm is knocking against an item in a basket. | Interrupt the program, and rearrange the items which are obstructing the spray arm. |
| Rattling noise in the wash cabinet | Item of crockery are loose in the wash cabinet. | Interrupt the program, and rearrange the items of crockery. |
| Knocking noise in the water pipes | This may be caused by on-site installation or the cross-section of the piping. | This has no influence on the dishwasher function. If in doubt, contact a qualified plumber. |
| The dishes are not clean | The dishes were not loaded correctly. | See "Preparing And Loading Dishes". |
| The programme was not powerful enough. | Select a more intensive programme. | |
| Not enough detergent was dispensed. | Use more detergent, or change your detergent. | |
| Item are blocking the path of spray arm. | Rearrange the items so that the spray can rotate freely. | |
| The filter combination in the base of wash cabinet is not clean or is not correctly fitted. This may cause the spray arm jets to get blocked. | Clean and/or fit the filter correctly. Clean the spray arm jets. | |
| Cloudiness on glassware. | Combination of soft water and too much detergent. | Use less detergent if you have soft water and select a shorter cycle to wash the glassware and to get them clean. |
| Black or grey marks on dishes | Aluminium utensils have rubbed against dishes | Use a mild abrasive cleaner to eliminate those marks. |
| Detergent left in dispenser cups | Dishes block detergent dispenser cups | Re-loading the dishes properly. |
| The dishesare not drying | Improper loading | Load the dishwasher as suggested in the directions to help shed water from the dishes. |
| Dishes are removed too soon | Do not empty your dishwasher immediately after washing. Open the door slightly so that the steam can escape. Begin unloading the dishwasher only once the dishes are barely warm to the touch. | |
| Wrong program has been selected. | In short programs the washing temperature is lower. This also lowers drying performance. Choose a program with a long washing time. | |
| High amount of plastic dishes | Drying plastic dishes is more difficult than glass, ceramic or metal or metal objects due to plastics inability to gain and retain heat. |
Error Codes
If there is a malfunction, the dishwasher will display error codes to identify the symptom.
| Codes | Meanings | Possible Causes |
| E1 | Extended Water Inlet Time. | Water supply failure, closed faucet, insufficient supply water pressure, self-priming pump damaged, inlet valve damaged or flowmeter damaged. |
| E4 | Leak Detected. | For some reason water has leaked from the wash system. Possibilities are over height item in the washload stopping lid from sealing; internal plumbing or seal failure. |
| Ed | Failure of connection between Display Unit and the Control System. | Contact customer service. |
Customer Service Phone: 1-866-646-4332
DISPOSAL
- For disposing of package and the appliance please go to a recycling centre. Therefore cut off the power supply cable and make the door closing device unusable.
![]()
- Cardboard packaging is manufactured from recycled paper and should be disposed in the waste paper collection for recycling.
- By ensuring this product is disposed of correctly, you will help prevent potential negative consequences for the environment and human health, which could otherwise be caused by inappropriate waste handling of this product.
- For more detailed information about recycling of this product, please contact your local city office and your household waste disposal service.
- DISPOSAL: Do not dispose this product as unsorted municipal waste. Collection of such waste separately for special treatment is necessary.

Free 3 months extension of the original limited warranty period!* Simply text a picture of your proof of purchase to: 1-884-224-1614
*The warranty extension is for the three months immediately following the completion of the product's original warranty period.

Documents / ResourcesDownload manual
Here you can download full pdf version of manual, it may contain additional safety instructions, warranty information, FCC rules, etc.
Download Comfee CDC22P4AWW - Portable Countertop Dishwasher Manual
Advertisement


Need help?
Do you have a question about the CDC22P4AWW and is the answer not in the manual?
Questions and answers