
Related Manuals for Hans Grohe PuraVida 15771001


Summary of Contents for Hans Grohe PuraVida 15771001
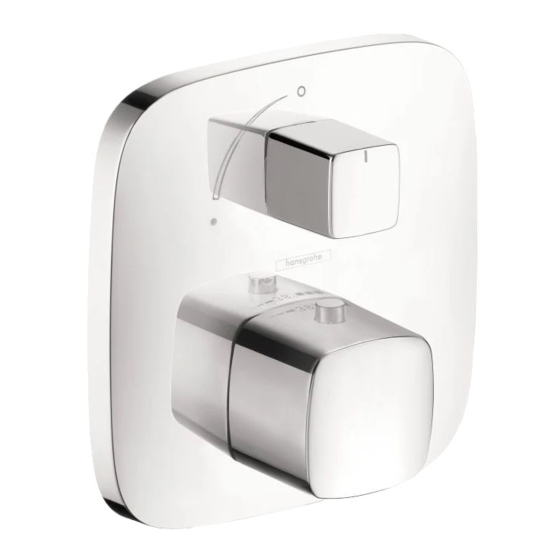
- Page 1 EN Installation / User Instructions / Warranty FR Instructions de montage / Mode d'emploi / Garantie ES Instrucciones de montaje / Manejo / Garantía PuraVida 15775xx1...
-
Page 2: Technical Information
English Technical Information 2⅜"-3½" Recommended water pressure 15 - 75 psi Max. water pressure 145 psi Recommended hot water temp. 120° - 140° F* Max. hot water temp 176°F* Flow rate @ 44 psi 6.9 GPM *Please know and follow all applicable local plumbing codes when setting the temperature on the water heater. Installation Considerations • For best results, Hansgrohe recommends that 2⅝"-3¾" this unit be installed by a licensed, professional plumber. • Please read over these instructions thoroughly before beginning installation. Make sure that you have all tools and supplies needed to complete the installation. -
Page 3: Données Techniques
Français Español Données techniques Datos tecnicos Pression d’eau recommandée 15 - 75 psi Presión recomendada en servicio 15 - 75 psi Pression d’eau maximum 145 psi Presión en servicio max. 145 psi Température recommandée 120° - 140° F* Temperatura recomendada del 120º - 140º F* d'eau chaude agua caliente Température maximum d'eau chaude 176°F* Temperatura del agua caliente max. 176ºF* Capacité nominale @ 44 psi 6.9 GPM Caudal máximo @ 44 psi 6.9 GPM * Vous devez connaître et respecter tous les codes de *Debe conocer y cumplir todos los códigos locales plomberie locaux applicables pour le réglage de la aplicables para ajustar la temperatura del calentador température du chauffe-eau. de agua. À prendre en considération Consideraciones para la pour l’installation instalación • Pour de meilleurs résultats, Hansgrohe... -
Page 4: Service Stops
English Service Stops 4 mm closed open Flush the hot and cold supplies (1) Remove the dust cover. (2) Open the cold stop using a 4 mm Allen wrench. 4 mm (3) Allow the cold supply to flush for at least five minutes. (4) Close the cold stop. (1) Remove the flushing block using a 5 mm Allen wrench. Turn it 90° and reinstall. 4 mm (2) Open the hot stop. (3) Allow the hot supply to flush for at least 5 minutes. (4) Close the hot stop. - Page 5 Français Español Butées d’arrêt d’isolation Cierres de servicio ferme cerrado ouvert abierto Rincez les conduites d’alimentation de Lave los suministros frío y caliente l’eau chaude et de l’eau froide (1) Retire la etiqueta. (1) Retirez l’étiquette. (2) Abra el paso del agua fría en el cierre de (2) Ouvrez l’eau froide à la butée d'arrêt servicio con una llave Allen de 4 mm. d'isolation à l’aide d’une clé hexagonale de 4 (3) Lave el suministro de agua fría para por lo mm.. menos cinco minutos. (3) Rincez le conduite de l’eau froide pour au (4) Cierre el paso del agua fría en el cierre de moins 5 minutes.
-
Page 6: Installation
English Installation Make sure that both stops are closed. Cut the plaster shield so that it extends ¹⁄₁₆" - ⅛" from the finished wall surface. Seal the wall around the plaster shield with waterproof sealant (1). Failure to seal the wall can lead to possible water damage. Remove the flush insert screw using a 5 mm Allen wrench (2). Remove the flush insert and seals. Insert the function block. Install and tighten the function block screws using a 4 mm Allen wrench. 4 mm... -
Page 7: Instalación
Français Español Installation Instalación Fermez l’eau à les butées d'arrêt Cierre el paso del agua en la d'isolation à l’aide d’une clé entrada del suministro o los hexagonale de 4 mm. cierres de servicio con una llave Allen de 4 mm. Coupez le protecteur de façon à ce qu’une partie de ¹⁄₁₆ à ⅛ po soit à l’extérieur de la surface du Corte el protector de yeso de modo que sobre-... - Page 8 English Measure the distance from the front of the plas- ter shield to one of the screw-in flanges ("X"). Add ½" to this measurement. Cut each screw so that it is X + ½" long. Open the stops. Install the carrier plate so that the notch is at the bottom. Install the carrier plate screws.
- Page 9 Français Español Mesurez la distance entre la surface du mur et la Mida la distancia entre la superficie de la pared y bride du vis. Notez la longueur mesurée (« X »). la brida de tornillo. Anote esta medida (“x”). Ajoutez ½ po à cette longueur « X ». Notez cette Agregue ½" a X. Anote esta medida. nouvelle longueur. Corte el tornillo de modo que sobresalga ½" + X. Coupez les vis de façon à ce que celui-ci dépasse de ½ po + la longueur X. Ouvrez l’eau à les butées d'arrêt d'isolation. Abra el paso del agua en los cierres de servicio. Installez la plaque-support de façon à ce que Instale la placa del portador de manera que la l’encoche soit vers le bas. ranura quede en la parte inferior. Installez les vis de la plaque-support. Coloque los tornillos de la placa del portador.
- Page 10 English Install the thermostatic mixer sleeve. Install the volume control sleeve. Install the escutcheon. Place a dab of waterproof sealant at each grout joint. Lubricate the adapter stems with a small amount of white plumber's grease (1). Install the handle adapters and screws (2). Tighten the screws using a 3 mm Allen wrench. Install the volume control handle (3). Tighten the screw using a 2 mm Allen wrench. Install the thermostatic mixer handle so that the safety stop override button is at the 12:00 position (4). Tighten the handle screw using a small slot- head screwdriver.
- Page 11 Français Español Installez la douille thermostatique. Instale el casquillo termostatico. Installez la douille inverseur. Instale el casquillo del llave de paso. Installez le rosace. Instale el florón. Appliquer une petite quantité de l’agent Coloque un poco de sellador a prueba de agua d’étanchéité aux joints de coulis. en las uniones de la lechada de cemento. Lubrifiez la tige de manoeuvre avec une petite Lubrique el vástago de la válvula con una peque- quantité de graisse de plomberie blanche (1). ña cantidad de grasa blanca para plomería (1). Installez l’adaptateur de poignée (2). Serrez la Instale el adaptador del mando (2). Apriete el vis à l’aide d’une clé hexagonale de 3 mm. tornillo con una llave Allen de 3 mm. Installe le poignée d'arrêt (3). Serrez la vis à Instale el mando del llave de paso (3). Ajuste el l’aide d’une clé hexagonale de 2 mm tornillo con una llave Allen de 2 mm. Installez la poignée thermostatique de façon à Instale el mando termostatico de manera que el ce que le bouton de surpassement de la butée de botón de vencimiento de tope de seguridad se sécurité soit à la position 9:00 (4). encuentre en una posición de 90 grados (4). Ajuste el tornillo del mando con con una llave. Serrez la vis à l’aide d’une clé.
- Page 12 English Set the high temperature limit stop** Remove the clip and stop ring from the car- tridge stem. Turn the water on to one of the functions. Turn the cartridge stem until the output water is the desired high temperature, usually 110° - 112° F**. Replace the stop ring so that the tooth is against the cartridge stop. Replace the clip. It should not be possible to turn the stem further counter-clockwise. **Follow all applicable local plumbing codes when setting the high temperature limit stop. To prevent scald injury, the maximum output tem- perature of the shower valve must be no higher than 120°F. In Massachusetts, the maximum output temperature can be no higher than 112° F.
- Page 13 Français Español Réglez la butée de limite d’eau Fije el tope de límite de alta chaude** temperatura** Retirez l’étrier et la bague de retenue de la tige Retire la presilla y el aro de tope del vástago del de la cartouche. cartucho. Faites couler l’eau en utilisant l’une des fonctions. Abra el paso del agua a una de las funciones. Tournez la tige de la cartouche jusqu’à ce que Gire el vástago del cartucho hasta que el agua l’eau chaude soit à la température souhaitée, nor- de salida tenga la temperatura alta deseada, nor- malement entre 43 et 44 °C (110 et 112 °F)**. malmente entre 43 et 44 °C (110 et 112 °F)** Remettez la bague de retenue en place de façon Reemplace el aro de tope de manera que el di- à ce que la dent s’appuie sur la butée de la ente esté contra el tope del cartucho. Reemplace cartouche. Remettez l’étrier en place. la presilla. La tige ne doit pas pouvoir tourner plus loin dans No debería ser posible girar más el vástago en le sens antihoraire. sentido antihorario.
- Page 14 English Justify the handle Loosen the handle screw. Remove the handle. Turn the cartridge stem until the output water is 100° F. Install the handle so that the override button is next to the sleeve indexing mark. Tighten the handle screw.
- Page 15 Français Español Réglez la poignée Ajuste el mando Desserrez la vis de la poignée. Retirez la Afloje el tornillo del mando Retire el mando. poignée. Tournez la tige de la cartouche jusqu’à ce que Gire el vástago del cartucho hasta que el agua l’eau soit à une température de 100 °F. de salida esté en100 °F. Installez la poignée de façon à ce que le bouton Instale el mando de manera que el botón de de surpassement soit près de la marque de repère vencimiento se encuentre al lado de la marca du manchon. indicadora del casquillo. Serrez la vis de la poignée. Apriete el tornillo del mando.
-
Page 16: Troubleshooting
Troubleshooting Problem Possible Cause Solution Insufficient water Supply pressure inadequate Check water pressure Cartridge filters dirty Clean the filters (see page 18) Showerhead or handshower filter Clean the filter dirty Crossflow: hot water forced into Check valves dirty or worn Clean check valves, replace if cold water supply or vice versa necessary when mixture is closed Output temperature does not Handle not justified Justify the handle correspond with temperature marked on handle Water heater set too low Increase the hot water tem- perature Safety stop button not operating Button and/or spring are dirty or Clean spring and button, worn replace if necessary Handle hard to turn Cartridge dirty or worn Replace cartridge Shower or spout dripping Volume control cartridge dirty or Clean or replace volume worn control cartridge Temperature regulation not (new installation) Hot and cold Turn the function block 180°... - Page 17 Dysfonctionnement Origine Solution Bouton à pression du verrouillage Ressort défectueux Nettoyez le ressort ou bien le de sécurité défectueux Bouton à pression entartré bouton à pression, le changez éventuellement Fonctionnement de la poignée Mécanisme d´arrêt défectueux Changez le mécanisme d´arrêt difficile La douchette ou le bec verseur De la saleté ou de l´incrustation Nettoyez le mécanisme d´arrêt goutte sur le siège, mécanisme d´arrêt ou le changez éventuellement défectueux Troubleshooting Problema Causa Solución Sale poca agua presión insuficiente comprobar presión filtro del termoelemento sucio limpiar filtro (ver página 18) filtro de la ducha sucio limpiar / cambiar filtros entre flexo y ducha Flujo de agua cruzada agua válvula antirretorno sucia o pierde limpiar / cambiar válvula caliente entra en la tubería del agua fría o al revés Temperatura del agua no corre- termostato no ha sido ajustado ajustar termostato sponde a lo marcado No es posible regular la tempe-...
- Page 18 Cleaning / Nettoyage / Limpieza 4 mm 4 mm 24 mm 24 mm 4 mm...
- Page 19 Replacement Parts / Pièces détachées / Repuestos 94074000 94009000 98793000 13595000 94073000 96446000 96525000 95037000 29x3 94282000 96451000 96454000 48x3 96439000 95191000 96435000 11791xx1 95356xx1 15597000 = Colors / Couleurs / Acabados 00 chrome 40 white/chrome...
- Page 20 Cleaning Recommendation for Hansgrohe Products Modern bathroom faucets, kitchen faucets and shower products are made from different materials to comply with the needs of the market with regard to design and functionality. To avoid damage to the product, it is necessary to take proper care of it. For best results: • Prevent the buildup of mineral scale and /or soap residue by cleaning your Hansgrohe product(s) when needed. • Select a cleaning agent specifically intended for the type of product. • Do not use these types of cleaners as they will cause damage to your Hansgrohe product: Any cleaning agent containing hydrochloric acid, formic acid, lye, or acetic acid. Abrasive cleaning powders, pads, or brushes. Steam cleaners. “No rinse” cleaning agents. • Always follow the instructions provided by the manufacturer of the cleaning agent. • Do not mix cleaning agents, unless directed by the manufacturer. • Do not spray cleaners directly onto the product as drops could enter openings and gaps and cause damage. When using spray cleaners, spray the cleaner onto a soft cloth or sponge. • Always rinse your Hansgrohe product thoroughly with clear water and polish dry with a soft cloth after cleaning. Important • Residue from soaps and shampoos can cause damage. Rinse the product with clean water after each use.
- Page 21 • Ne pulvérisez pas les nettoyants directement sur le produit car des gouttes pourraient entrer dans les ouver- tures et les fentes et causer des dommages. Lorsque vous utilisez des nettoyants par pulvérisation, pulvérisez le nettoyant sur un chiffon ou une éponge douce. Important • Le résidu provenant des savons et des shampoings peut causer des dommages. Rincez le produit avec de l'eau propre après chaque utilisation. • Le résidu provenant des nettoyants pour cuvette/baignoire/carrelage peut endommager les robinets et les raccords de tuyauterie. Rincez immédiatement toute surpulvérisation sur le produit Hansgrohe. • De meme, il est interdit de stocker des detergents ou des produits chimiques sous les produits, par ex. dans un meuble sous lavabo, car les vapeurs qui s'en degagent risquent d'abimer les produits. • Les dommages au produit causés par un mauvais entretien ou par l'utilisation de produits de nettoyage inadéquats ne sont pas couverts par la garantie. • Si un composant du produit est endommagé, remplacez-le, car il existe un risque de bles- sure.
-
Page 22: Limited Consumer Warranty
Limited Consumer Warranty This product has been manufactured and tested to the highest quality standards by Hansgrohe, Inc. (“Hansgrohe”). This warranty is limited to Hansgrohe products that are purchased by a consumer in the United States or Canada after March 1, 1996, and installed in either in the United States or in Canada. WHO IS COVERED BY THE WARRANTY This warranty extends to the original purchaser only. This warranty is non-transferable. WHAT IS COVERED BY THE WARRANTY The warranty covers only your Hansgrohe manufactured product. Hansgrohe warrants this product against defects in material or workmanship as follows: Hansgrohe will replace at no charge for parts only or, at its option, replace any product or part of the product that proves defective because of improper workmanship and/or material, under normal installation, use, service and maintenance. If Hansgrohe is unable to provide a replacement and repair is not practical or cannot be made in timely fashion, Hansgrohe may elect to refund the purchase price in exchange for the return of the product. LENGTH OF WARRANTY Replacement or repaired parts of products will be covered for the term of this warranty, as stated in the following two sentences. If you are a consumer who purchased the product for use primarily for personal, family or household purposes, this warranty extends for as long as you own the product and the home in which the product is originally installed. If you purchased the product for use primarily for any other purpose, including, without limitation, a commercial purpose, this warranty extends only (i) for 1 year, with respect to Hansgrohe & Commercial products, and (ii) for 5 years, with respect to Axor products. THIS WARRANTY DOES NOT COVER, AND HANSGROHE WILL NOT PAY FOR: A. Conditions, malfunctions or damage not resulting from defects in material or workmanship. - Page 23 EXCLUSIONS AND LIMITATIONS REPAIR OR REPLACEMENT (OR, IN LIMITED CIRCUMSTANCES, REFUND OF THE PURCHASE PRICE) AS PROVIDED UNDER THIS WARRANTY IS THE EXCLUSIVE REMEDY OF THE PURCHASER. HANSGROHE NEITHER ASSUMES NOR AUTHORIZES ANY PERSON TO CREATE FOR IT ANY OTHER OBLIGATION OR LIABILITY IN CONNECTION WITH THIS PRODUCT.
- Page 24 Hansgrohe, Inc. • 1490 Bluegrass Lakes Parkway • Alpharetta, GA 30004 Tel. 800-334-0455 • Fax 770-360-9887 www.hansgrohe-usa.com...
Need help?
Do you have a question about the PuraVida 15771001 and is the answer not in the manual?
Questions and answers