
Related Manuals for Hans Grohe Raindance Connect 27164 1 Series


Summary of Contents for Hans Grohe Raindance Connect 27164 1 Series
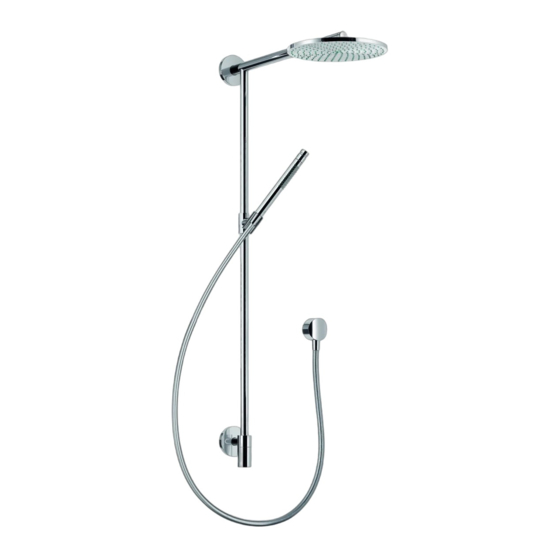
- Page 1 EN Installation / User Instructions / Warranty FR Instructions de montage / Mode d'emploi / Garantie ES Instrucciones de montaje / Manejo / Garantía Raindance Connect 27164xx1...
-
Page 2: Technical Information
English Français Données techniques Technical Information Flow rate - showerhead 2.5 GPM Capacité nominale - pomme de douche 2.5 GPM Capacité nominale - douchette 2.5 GPM Flow rate - handshower 2.5 GPM Installation Considerations À prendre en considération pour l’installation • For best results, Hansgrohe recommends that this unit be installed by a licensed, professional • Pour de meilleurs résultats, Hansgrohe recom- plumber. mande que ce produit soit installé par un plom- bier professionnel licencié. • Please read over these instructions thoroughly be- fore beginning installation. Make sure that you • Veuillez lire attentivement ces instructions avant have all tools and supplies needed to complete de procéder à l’installation. Assurez-vous de dis- the installation. poser de tous les outils et du matériel nécessaires pour l’installation. • The installer should be sure that the mounting location for this product is flat (no projecting • Lors du montage du produit par un ouvrier... -
Page 3: Datos Tecnicos
Español Datos tecnicos Tools Required / Outiles Utiles / Herramientas Útiles Caudal máximo - ducha 2.5 GPM Caudal máximo - teleducha 2.5 GPM Consideraciones para la ¼" / 6 mm instalación • Para obtener mejores resultados, la instalación debe estar a cargo de un plomero profesional matriculado. • Antes de comenzar la instalación, lea estas 3 mm instrucciones detenidamente. Asegúrese de tener las herramientas y los insumos necesarios para completar la instalación. • En el momento del montaje del producto por 8 mm parte de personal especializado y cualificado se deberá prestar una atención especial a que la superficie de fijación en toda el área de la fijación sea plana (sin juntas que sobresalen ni azulejos desplazados),que la estructura de... - Page 4 Installation Suggestions / Suggestions d'installation / Sugerencias para la instalación The installation dimensions shown here are ideal for people of approximately 5'11" (1800 mm) in height. The dimensions can be altered if required. Alter all the required measure- ments, including the minimum ceiling height. Les dimensions d’ installation données dans la notice de montage sont idéales pour une personne de1800 mm de hau- teur et doivent être ajustées selon le besoin. A ce sujet il faut tenir compte, pour un changement de hauteur, que la côte minimum donnée de 2190 mm à partir de la base du recev- eur change et la modification du montage sera à prendre en considération. Las medidas indicadas en las instrucciones de montaje resul- tan ideales para personas de 1800 mm de altura, por lo que deberán ajustarse siempre que sea necesario. En este sentido, es importante tener en cuenta que, en caso de modificación de la altura de montaje, será necesario respetar el requisito de 2190 mm de altura mínima desde la base de la ducha y observar las medidas de conexión. This unit meets or exceeds the following: • ASME A112.18.1 • CSA B125.1 • Listed by IAPMO for use in the US and Canada...
- Page 5 Replacement Parts / Pièces détachées / Repuestos 95687000 (72x2) 95690xx0 (25x2) 98716000 98675xx0 (10x1.5) (15x2.5) (15x2.5) 98681xx0 (10x1.5) 98855xx0 (72x2) 98716000 96770xx0 95794xx0 27158xx0 98714xx0 95687000 (72x2) (15x2.5) 98716000 95691xx0 (20x2) 28276xx3 98821xx0 98812000 xx = Colors / Couleurs 94246000 / Acabados 00 = Chrome 82 = Brushed Nickel...
-
Page 6: Installation
English Installation Drill the screw holes using a ¼" (6 mm) bit. ¼" / 6 mm... -
Page 7: Instalación
Français Español Installation Instalación Percez les trous pour la plaque de montage à l’aide Perfore los orificios para la placa de montaje con d’un foret de 6 mm. una broca de 6 mm. - Page 8 English Install the anchors. Seal the wall around the anchors with waterproof sealant. Failure to seal the wall can lead to possible water damage. If both ends of the showerpipe are mounted on tile, install the top and bottom mounting wall flanges. Do not fully tighten the screws. 8 mm If the bottom of the showerpipe is mounted on tile, but the top is not, install the top wall flange with the tile matching disk. Do not fully tighten the screws.
- Page 9 Français Español Installez les chevilles. Instale los pernos de anclaje. Scellez le mur autour des chevilles à Selle la pared alrededor de los l’aide d’un agent d’étanchéité. pernos de anclaje con un sellador impermeable. Si le mur n’est pas scellé, l’eau pourrait éventuellement causer des Si la pared no se sella, pueden pro- dommages.
- Page 10 English Push the shower arm and lower support into the riser. Install the escutcheons. Push the showerpipe assembly over the wall flanges. Tighten the screws. 3 mm 3 mm...
- Page 11 Français Español Poussez le bras de douche et le support sur la Presione el brazo de ducha y el soporte en la tubería colonne. de subida. Installez les écussons. Instale los escudos.. Poussez la colonne montante fermement sur les Presione la tubería de subida firmemente sobre las plaques de montage. placas de montaje. Serrez les vis à l’aide d’une clé hexagonale de 3 Apriete los tornillos con una llave Allen de 3 mm. mm.
- Page 12 English Install the showerhead on the shower arm. Level the shower arm. Tighten the screws. 8 mm Connect the escutcheons to the flanges.
- Page 13 Français Español Installez la pomme de douche sur le bras de douche. Instale la ducha en el brazo de ducha. Placez le bras de douche au niveau. Nivele el brazo de ducha. Serrez les vis de montage. Apriete los tornillos de montaje. Raccordez les écussons à les plaques de montage. Conecte los escudos a las placas de montaje.
- Page 14 English Place a hose washer in one end of the hose. Connect this end to the water supply (not included). Place the screen washer in the other end of the hose. Connect this end to the handshower. Rest the handshower in the holder.
- Page 15 Français Español Placez la rondelle de tuyau en caoutchouc noir dans Coloque la arandela de goma negra en un extremo l’une des extrémités du tuyau. Vissez cette extrémité de la manguera. Enrosque este extremo al puerto de du tuyau à la sortie pour douchette sur la valve (ne la ducha de mano en la válvula (no incluidos). pas inclus). Coloque la arandela de filtro en el otro extremo de Placez le tamis dans l’autre extrémité du tuyau. Vissez la manguera. Enrosque este extremo a la ducha de cette extrémité à la douchette. mano. Placez la douchette dans son support. Coloque la ducha de mano en el soporte.
- Page 16 Installation with 27158000 / Installation avec 27158000 / Instalación con 27158000 27158000 1 ½ " ± ⅛ " " " ± ⅛ 1 ½ ₁ ₆ " 1 ³ ⁄ 1 ½ " ± ⅛ " " " " ± ⅛ ³...
- Page 17 8 mm...
- Page 18 3 mm 8 mm 3 mm...
- Page 20 User Instructions / Instructions de service / Manejo ca. 1 quart / 1 liter...
- Page 21 Cleaning / Nettoyage / Limpieza scale remover détartrant desincrustante ¾" scale remover détartrant desincrustante 5 mm...
- Page 22 Cleaning / Nettoyage / Limpieza 5 mm...
- Page 23 Cleaning Recommendation for Hansgrohe Products Modern bathroom faucets, kitchen faucets and shower products are made from different materials to comply with the needs of the market with regard to design and functionality. To avoid damage to the product, it is necessary to take proper care of For best results: • Prevent the buildup of mineral scale and /or soap residue by cleaning your Hansgrohe product(s) when needed. • Select a cleaning agent specifically intended for the type of product. • Do not use these types of cleaners as they will cause damage to your Hansgrohe product: Any cleaning agent containing hydrochloric acid, formic acid, lye, or acetic acid. Abrasive cleaning powders, pads, or brushes. Steam cleaners. “No rinse” cleaning agents. • Always follow the instructions provided by the manufacturer of the cleaning agent. • Do not mix cleaning agents, unless directed by the manufacturer. • Do not spray cleaners directly onto the product as drops could enter openings and gaps and cause damage. When using spray cleaners, spray the cleaner onto a soft cloth or sponge. • Always rinse your Hansgrohe product thoroughly with clear water and polish dry with a soft cloth after cleaning. Important • Residue from soaps and shampoos can cause damage. Rinse the product with clean water after each use. • Residue from basin/tub/tile cleaner can cause damage to faucets and fittings. Immediately rinse any overspray from the Hansgrohe product.
- Page 24 • Ne pulvérisez pas les nettoyants directement sur le produit car des gouttes pourraient entrer dans les ouvertures et les fentes et causer des dommages. Lorsque vous utilisez des nettoyants par pulvérisation, pulvérisez le nettoyant sur un chiffon ou une éponge douce. Important • Le résidu provenant des savons et des shampoings peut causer des dommages. Rincez le produit avec de l'eau propre après chaque utilisation. • Le résidu provenant des nettoyants pour cuvette/baignoire/carrelage peut endommager les robinets et les raccords de tuyauterie. Rincez immédiatement toute surpulvérisation sur le produit Hansgrohe. • Les dommages au produit causés par un mauvais entretien ou par l'utilisation de produits de nettoyage inadéquats ne sont pas couverts par la garantie. • Si un composant du produit est endommagé, remplacez-le, car il existe un risque de blessure. Recomendación de limpieza para los productos de Hansgrohe Hoy en día, las griferías de baño y de cocina así como duchas modernas se componen de materiales muy distintos para satisfacer las exigencias del mercado respecto al diseño y la funcionalidad. Para evitar daños y reclamaciones hay que...
-
Page 25: Limited Consumer Warranty
Limited Consumer Warranty This product has been manufactured and tested to the highest quality standards by Hansgrohe, Inc. (“Hansgrohe”). This warranty is limited to Hansgrohe products that are purchased by a consumer in the United States or Canada after March 1, 1996, and installed in either in the United States or in Canada. WHO IS COVERED BY THE WARRANTY This warranty extends to the original purchaser only. This warranty is non-transferable. WHAT IS COVERED BY THE WARRANTY The warranty covers only your Hansgrohe manufactured product. Hansgrohe warrants this product against defects in material or workmanship as follows: Hansgrohe will replace at no charge for parts only or, at its option, replace any product or part of the product that proves defective because of improper workmanship and/or material, under normal installation, use, service and maintenance. If Hansgrohe is unable to provide a replacement and repair is not practical or cannot be made in timely fashion, Hansgrohe may elect to refund the purchase price in exchange for the return of the product. LENGTH OF WARRANTY Replacement or repaired parts of products will be covered for the term of this warranty, as stated in the following two sentences. If you are a consumer who purchased the product for use primarily for personal, family or household purposes, this warranty extends for as long as you own the product and the home in which the product is originally installed. If you purchased the product for use primarily for any other purpose, including, without limitation, a commercial purpose, this warranty extends only (i) for 1 year, with respect to Hansgrohe & Commercial products, and (ii) for 5 years, with respect to Axor products. THIS WARRANTY DOES NOT COVER, AND HANSGROHE WILL NOT PAY FOR: A. Conditions, malfunctions or damage not resulting from defects in material or workmanship. - Page 26 EXCLUSIONS AND LIMITATIONS REPAIR OR REPLACEMENT (OR, IN LIMITED CIRCUMSTANCES, REFUND OF THE PURCHASE PRICE) AS PROVIDED UNDER THIS WARRANTY IS THE EXCLUSIVE REMEDY OF THE PURCHASER. HANSGROHE NEITHER ASSUMES NOR AUTHORIZES ANY PERSON TO CREATE FOR IT ANY OTHER OBLIGATION OR LIABILITY IN CONNECTION WITH THIS PRODUCT.
- Page 28 Hansgrohe, Inc. • 1490 Bluegrass Lakes Parkway • Alpharetta, GA 30004 Tel. 800-334-0455 • Fax 770-360-9887 www.hansgrohe-usa.com...
Need help?
Do you have a question about the Raindance Connect 27164 1 Series and is the answer not in the manual?
Questions and answers