Table of Contents
Advertisement
Quick Links
Operator's Manual
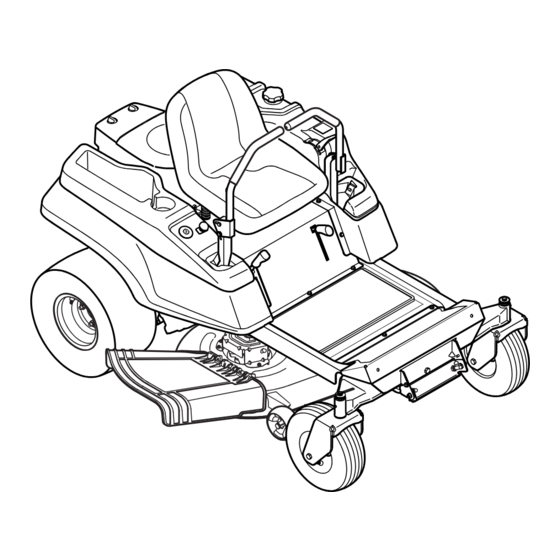
ZERO-TURN RIDER
22 HP, 42" MOWER DECK
Model No. C459.60453
This product has a low emission engine which operates differently
from previously built engines. Before you start the engine, read and
understand this Operator's Manual.
CAUTION
Before using this equipment,
read this manual and follow
all safety rules and operating
instructions.
Sears Canada Inc., 290 Yonge Street, Toronto, On M5B 2C3
®
Visit our web site: sears.ca
Form No. 769-09744
(2.24.14)
Advertisement
Table of Contents

Subscribe to Our Youtube Channel
Related Manuals for Craftsman C459.60453


Summary of Contents for Craftsman C459.60453
- Page 1 Operator’s Manual ® ZERO-TURN RIDER 22 HP, 42” MOWER DECK Model No. C459.60453 This product has a low emission engine which operates differently from previously built engines. Before you start the engine, read and understand this Operator’s Manual. CAUTION Before using this equipment,...
-
Page 2: Table Of Contents
TABLE OF CONTENTS Safety Instructions . . . . . . . . . . . . . . . . . . . . . . . . . . . 3 General Emission Control Assembly . -
Page 3: Safety Instructions
SAFETY INSTRUCTIONS WARNING DANGER This machine was built to be operated according to the safe opera- This symbol points out important safety instructions which, if not tion practices in this manual. As with any type of power equipment, followed, could endanger the personal safety and/or property of carelessness or error on the part of the operator can result in serious yourself and others. - Page 4 SAFETY INSTRUCTIONS SLOPE OPERATION • Muffler and engine become hot and can cause a burn. Do not touch. Slopes are a major factor related to loss of control and tip-over • Check overhead clearances carefully before driving under low accidents which can result in severe injury or death. All slopes require hanging tree branches, wires, door openings etc., where the extra caution.
- Page 5 SAFETY INSTRUCTIONS CHILDREN SERVICE Tragic accidents can occur if the operator is not alert to the presence Safe Handling of Gasoline: of children. Children are often attracted to the machine and the mowing To avoid personal injury or property damage use extreme care in activity.
- Page 6 SAFETY INSTRUCTIONS DO NOT MODIFY ENGINE • Check the blade(s) and engine mounting bolts at frequent intervals for proper tightness. Also, visually inspect blade(s) for To avoid serious injury or death, do not modify engine in any way. damage (e.g., excessive wear, bent, cracked). Replace the Tampering with the governor setting can lead to a runaway engine and blade(s) with the original equipment manufacturer’s (O.E.M.) cause it to operate at unsafe speeds.
- Page 7 SAFETY INSTRUCTIONS SAFETY SYMBOLS This page depicts and describes safety symbols that may appear on this product. Read, understand, and follow all instructions on the machine before attempting to assemble and operate. Symbol Description READ THE OPERATOR’S MANUAL(S) Read, understand, and follow all instructions in the manual(s) before attempting to assemble and operate WARNING—...
- Page 8 SLOPE GAUGE...
-
Page 9: Assembly
ASSEMBLY SET-UP Remove the two shoulder bolts and lock nuts in the seat pan as shown in Figure 2. Moving The Riding mower Manually Your riding mower’s transmission is equipped with a hydrostatic relief valve for occasions when it is necessary to move the riding mower manually. - Page 10 ASSEMBLY Position Drive Control levers Connecting the Battery Cables The drive control levers of the riding mower are lowered for shipping WARNING purposes. The flange lock nuts, hex screws, and flat washers that Battery posts, terminals, and related accessories contain lead and normally secure the control levers in their operating position are lead compounds, chemicals known to the State of California to cause unfastened and installed in the slotted holes of the control levers for...
- Page 11 ASSEMBLY Lower Deck Discharge Chute Deflector Checking Tire Pressure WARNING WARNING Never operate the mower deck without the chute deflector installed Do not overinflate tires. Check sidewall of tires for maximum psi. and in the down position. Equal tire pressure should be maintained at all times. The discharge chute deflector must be installed before operating the The tires on your riding mower may be over inflated for shipping mower.
- Page 12 ASSEMBLY Adjusting the Seat Replace the fuel cap and tighten securely. Wipe up spilled fuel before starting engine. If fuel is spilled DO NOT start engine. Move To adjust the position of the seat, pull up and hold the seat adjustment riding mower away from area of spillage.
-
Page 13: Operation
CUP HOLDER The cup holder is located toward the rear of the RH console to the right of the operator’s seat. Meets ANSI Safety Standards Craftsman Tillers conform to the safety standard of the American National Standards Institute (ANSI). - Page 14 OPERATION IGNITION SWITCH HOUR METER/INDICATOR The ignition switch is located on PANEL the RH console to the right of the The hour meter/indicator panel is located on the operator’s seat. The ignition switch LH console to the left of the operator’s seat. has three positions.
- Page 15 OPERATION THROTTLE/CHOKE CONTROL GENERAL SAFETY The throttle/choke control is located on the LH console to • RECEIVE INSTRUCTION — Entirely read this operator’s manual. the left of the operator’s seat. When set in a given position, a Learn to operate this machine SAFELY. Do not risk INJURY or uniform engine speed will be maintained.
- Page 16 OPERATION BEFORE OPERATING YOUR RIDING MOWER STARTING THE ENGINE WARNING • Before you operate the riding mower, study this manual carefully to familiarize yourself with the operation of all the instruments and This riding mower is equipped with a safety interlock system designed controls.
- Page 17 OPERATION DRIVING THE RIDING MOWER Cold Weather Starting When starting the engine at temperatures near or below freezing, WARNING ensure the correct viscosity motor oil is used in the engine and the Avoid sudden starts, excessive speed and sudden stops. battery is fully charged.
- Page 18 OPERATION Driving the Riding mower Forward Turning the Riding mower While Driving Forward WARNING WARNING Keep all movement of the drive control levers slow and smooth. When reversing the direction of travel, we recommend performing Abrupt movement of the control levers can affect the stability of the gradual ‘U’...
- Page 19 OPERATION Turning While Driving Rearward To execute a zero turn move the turn side drive control lever to the inward neutral position, while moving the other control lever To turn the riding mower while driving rearward, move the control forward. levers as necessary so that one lever is forward of the other.
- Page 20 OPERATION Executing a Zero Turn Push the PTO switch downward to the DISENGAGED position. WARNING Use the deck lift handle to raise the deck to its highest position. If dismounting the riding mower, move the drive control levers fully When executing a zero turn, the riding mower MUST BE STOPPED. outward in the neutral position, engage the parking brake , move Executing a zero turn while the riding mower is moving can signifi-...
- Page 21 OPERATION USING THE MOWER DECK CHECKING SAFETY INTERLOCK CIRCUITS WARNING Periodically check the safety interlock circuits to ensure they are working properly. If a safety circuit is not working as designed, call Make certain the area to be mowed is free of debris, sticks, stones, 1-800-659-5917 to schedule riding mower inspection service from wire or other objects that can be thrown by the rotating blades.
-
Page 22: Service And Maintenance
SERVICE AND MAINTENANCE MAINTENANCE SCHEDULE Follow the maintenance schedule given below. This chart describes WARNING service guidelines only. Use the Service Log column to keep track Before performing any type of maintenance/service, disengage all of completed maintenance tasks. To schedule service from Sears controls and stop the engine. - Page 23 SERVICE AND MAINTENANCE Draining the Oil WARNING Run the engine for a short time to warm the engine oil. The oil Before performing any maintenance or repairs, disengage the PTO, will flow more freely and carry away more impurities. Use care to move the drive control levers fully outward in the neutral position, avoid burns from hot oil.
- Page 24 SERVICE AND MAINTENANCE Place the new filter in an open pan with the open side facing up. Spark Plug Fill with new oil until the oil reached the bottom of the threads. WARNING Wait two minutes for the oil to be absorbed by the filter material. DO NOT check for a spark with the spark plug removed.
- Page 25 SERVICE AND MAINTENANCE Measure the plug gap with a feeler gauge. Correct as necessary To Drain the Fuel: by bending the side electrode, Figure 27. The gap should be set Locate the fuel filter, which is routed on the right side of the to .02-.03 inches (0.60-0.80 mm).
- Page 26 SERVICE AND MAINTENANCE LUBRICATION BATTERY REMOVAL • Using a pressure lubricating gun, lubricate the front castor wheel WARNING axles and the front pivot axle with No. 2 multipurpose lithium Battery posts, terminals and related accessories contain lead and grease after every 10 hours of service. lead compounds.
- Page 27 SERVICE AND MAINTENANCE Charging the Battery Pull back the lock collar of the nozzle adapter and push the adapter onto the deck wash nozzle at the left end of the mower Test and, if necessary, recharge the battery after the riding deck.
- Page 28 SERVICE AND MAINTENANCE USING THE TRANSMISSION BYPASS RODS ADJUSTMENTS If for any reason the riding mower will not drive or you wish to move the WARNING riding mower, the two hydrostatic transmissions are equipped with a Shut the engine off, remove the ignition key and engage the parking bypass rod that will allow you to manually move the riding mower short brake before making adjustments.
- Page 29 SERVICE AND MAINTENANCE Front to Back Leveling Tighten the flange lock nut to fix the control lever in the adjusted position The front of the deck should be approximately 1⁄4” lower than the rear Repeat the above procedure to adjust the other control lever into of the deck.
- Page 30 SERVICE AND MAINTENANCE DECK REMOVAL Adjusting the Gauge Wheels WARNING Remove the mower deck from the riding mower as follows: Move the riding mower to a level surface, disengage the PTO, Keep hands and feet away from the discharge opening of the cutting deck. stop the engine, and set the parking brake.
- Page 31 SERVICE AND MAINTENANCE Raise the deck lift arms out of the rear hanger bracket slots by WARNING raising the deck lift handle on the riding mower to its highest Use caution to avoid pinching your fingers when rolling the belt off the position.
- Page 32 SERVICE AND MAINTENANCE Mower Blade Care 11. Rolling the Belt into the PTO Pulley. Using the deck lift handle, raise the deck to the position that WARNING provides the longest horizontal run of the belt between the deck Before performing any maintenance, place the PTO switch in the “OFF” idler pulleys and the PTO pulley on the bottom of the engine.
- Page 33 Wheel rotation NOTE: If the stop bolt is adjusted too far, the tracking problem will change should stop. If it does not, call the Craftsman Help Line, contact sides. Make fine tuning adjustments by shortening the same bolt.
-
Page 34: Off-Season Storage
OFF-SEASON STORAGE WARNING Never store garden riding mower with fuel in tank indoors or in poorly ventilated areas where fuel fumes may reach an open flame, spark, or pilot light as on a furnace, water heater, clothes dryer, or gas appliance. -
Page 35: Troubleshooting
TROUBLESHOOTING WARNING Before performing any type of maintenance/service, disengage all controls and stop the engine. Wait until all moving parts have come to a complete stop. Disconnect spark plug wire and ground it against the engine to prevent unintended starting. Always wear safety glasses during operation or while performing any adjustments or repairs. -
Page 36: System Warranty Statement
FEDERAL and/or CALIFORNIA EMISSION CONTROL WARRANTY STATEMENT YOUR WARRANTY RIGHTS AND OBLIGATIONS MTD Consumer Group Inc, the United States Environmental Protection Agency (EPA), and for those products certified for sale in the state of California, the California Air Resources Board (CARB) are pleased to explain the evaporative emission control system (ECS) warranty on your 2013-2014 small off-road equipment (outdoor equipment). - Page 37 Any replacement part may be used in the performance of any warranty maintenance or repairs and must be provided without charge to the owner. Such use will not reduce the warranty obligations of MTD Consumer Group Inc. Add-on or modified parts that are not exempted by the Air Resources Board may not be used. The use of any non-exempted add-on or modified parts by the ultimate purchaser will be grounds for disallowing a warranty claim.
-
Page 38: Sears Emission Control
(This page applicable in the U.S.A. and Canada only.) Sears Brands Management Corporation (Sears), the California Air Resources Board (CARB) and the United States Environmental Protection Agency (U.S. EPA) Emission Control System Warranty Statement (Owner’s Defect Warranty Rights and Obligations) EMISSION CONTROL WARRANTY COVERAGE IS APPLICABLE TO CERTI- YEAR 1997 AND LATER ENGINES WHICH ARE PURCHASED AND USED FIED ENGINES PURCHASED IN CALIFORNIA IN 1995 AND THEREAF-... -
Page 39: Warranty Statement
WARRANTY STATEMENT General: Craftsman products are warranted to be free from defects in materials or workmanship for a specific time period as set-out below (the “Warranty Period”). Warranties extend to the original purchaser of a Craftsman product only. Purchases made through an online auction or through any website other than www.sears.ca are excluded. -
Page 40: Repair Protection Agreement
REPAIR PROTECTION AGREEMENT Congratulations on making a smart purchase. Your new Craftsman® Once you purchase the Agreement, a simple phone call is all that it product is designed and manufactured for years of dependable opera- takes for you to schedule service. You can call anytime day or night, or tion. - Page 41 02488 Trademarks of Sears Brands Management Corp. used under license by Sears Canada Marque déposée / Marque de commerce de Sears Brands Management Corp. utilisée en vertu d’une licence de Sears Canada...
- Page 42 NOTES...
Need help?
Do you have a question about the C459.60453 and is the answer not in the manual?
Questions and answers