ZENEC E-GO Z-E3776 Operating Instructions Manual
Infotainer
Hide thumbs
Also See for E-GO Z-E3776:
- Setup (9 pages) ,
- Mounting instruction (10 pages) ,
- User manual (43 pages)
Table of Contents
Advertisement
Advertisement
Table of Contents

Related Manuals for ZENEC E-GO Z-E3776


Summary of Contents for ZENEC E-GO Z-E3776
- Page 1 Z-E3776 INFOTAINER OPERATING INSTRUCTIONS...
-
Page 2: Zenec Welcomes You
At the point in time of production in the factory, the operating instructions which have been printed beforehand are the most up to date medium, and do not only apply to the ZENEC system in the original condition. Because of possible updates to the device software, deviations from the descriptions or functions of your ZENEC system and these operating instructions are possible. -
Page 3: Validity Of Document
All technical data and descriptions contained within this document have been checked and are applicable at the time of printing. However, since continuous improvement is one of the main goals of ZENEC, we also reserve the right to make change to the hardware and software of the products at any time. -
Page 4: Table Of Contents
Table of contents ZENEC WELCOMES YOU..................................2 VALIDITY OF DOCUMENT ..................................3 Illustrations ......................................3 Technical data of the product ................................. 3 Orientation ......................................3 Additional information sources ................................3 Internet ........................................3 TABLE OF CONTENTS .................................... 4 SAFETY INSTRUCTIONS ..................................6 SWITCHING ON AND OFF .................................. - Page 5 REMOTE CONTROL APP FOR SMARTPHONES (REMOTE CONTROL VIA SMARTPHONE) ..........44 AV IN / HDMI ......................................45 NAVIGATION ......................................45 Navigation update ....................................46 Maps ........................................46 Start-up of the navigation software ..............................47 Navi initial start-up (Sat Fix creation) ..............................49 NAVIGATION SPLIT SCREEN ................................49 FM TUNER ........................................
-
Page 6: Safety Instructions
(e.g. signal horns or sirens). CAUTION: Incorrect assembly or start-up of the ZENEC system may result in damage to the ZENEC system or the vehicle electronics. The device should only be installed by qualified personnel who have been authorized by ZENEC. -
Page 7: Switching On And Off
THEFT PROTECTION DIEBSTAHLSICHERUNG The ZENEC system is equipped with a theft protection function. If this is active, when the ZENEC Das ZENEC-System ist mit einer Diebstahlschutzfunktion ausgestattet. Ist diese aktiv, werden Sie nach system is switched on again after disconnecting the power supply, you are asked to enter a Trennung der Stromversorgung bei erneutem Einschalten des ZENEC-Systems aufgefordert, das von password. -
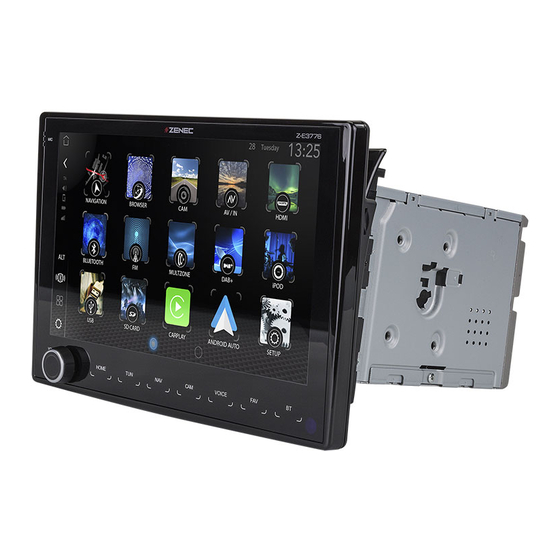
Page 8: Around The Front Of The Device
Around the front of the device The main components of the front of the device are shown and explained here. The front of the device contains various controls, including several sensor buttons for manually opening the source, a volume / power button for regulating the volume of the device and switching it on and off, an IR receiver for the remote control, and an opening in the frame for the internal microphone or speaker phone. - Page 9 Number Symbol Function Tap to start the Android Auto or CarPlay voice control, and press again to stop the voice control. VOICE Hold down to restart the voice input. Tap to select favourite content or a favourite function. Hold down to jump to the audio settings. Tap to call up the Bluetooth handsfree facility.
-
Page 10: Remote Control
Number Function Change playback source. Playback/Pause. Acknowledge LED. Switch ZENEC device on/off. Radio source Press to jump forward a radio station. Press to skip forward a track Media source Hold down to start fast forwarding of the track. -
Page 11: Connection To Steering Wheel Remote Control
Connection to steering wheel remote control The ZENEC system has direct support for the Fiat Ducato III Series 8 / 9 steering wheel remote control functions for the front and (if present) rear telephone buttons, with deviating manual assignment of several functions if required. The steering wheel buttons of the older Ducato generations are also fully supported. -
Page 12: Steering Wheel Remote Control Teach-In Mode 1 - Mode 1
NOTE: These functions are only usable if a multifunction steering wheel is present in the vehicle and the ZENEC system is connected via an analogue LFB adapter cable + LIN bus or a vehicle-specific CAN/Stalk interface. STEERING WHEEL REMOTE CONTROL TEACH-IN MODE 1 – MODE 1... -
Page 13: Steering Wheel Remote Control Teach-In Mode 2 - Mode 2
The rear LFB button functions (volume, camera, skip, BT etc.) are displayed to you visually in the system setup of the ZENEC under [Settings] ➔ [Other] ➔ [LFB Assignment (Analogue) ] under Mode 2. Analogue mode 2 is already preset for Series 8 and 9 in the factory. The BT handsfree telephone is connected via multiple assignment, as shown graphically in Mode 2. - Page 14 Number Description / function Mode changeover Tap to change the analogue mode. buttons: Mode 1 = Fiat Ducato III Series 7; Possible settings: Mode 2 = Fiat Ducato III Series 8 and 9. Radio source Press to jump forward a radio station. ...
- Page 15 (CAM) function to the top left LFB button and also in the virtual LFB display on your ZENEC. The camera source can be called up later by pressing the top left LFB button instead of the default setting “Skip forwards” [>>I].
-
Page 16: Main Menu
The main menu is subdivided into five sub-areas via which several functions and sources can be called up directly. In the left-hand area there is the standard Zenec control bar with the ALT (alternative button which can be assigned with a function), App List (overview of all apps) and device settings buttons, plus the BT A2DP SRC Mode (Audio Streaming to an external Bluetooth speaker on / off) und TA traffic news (on / off). -
Page 17: Main Menu Structure
Roaming active. MAIN MENU STRUCTURE The new Zenec main menu structure contains a new type of graphical user interface with simultaneous display of the three sources Navigation / Smartphone + Bluetooth / Media + Radio in a type of widget display on the large touch screen. This gives you an overview of the internal and external sources at all times, which can therefore be operated in as simple a way as possible at the same time in the main menu of the device display. -
Page 18: Operating Concept
OPERATING CONCEPT The Zenec operating concept includes numerous functions. These functions can be operated via the touch screen, some via the CarPlay and Android Auto voice function or the various sensor buttons and, depending on the configuration, via steering wheel operation. -
Page 19: Change Source Of A Widget
CarPlay Navigation Android Auto Navigation Widget 2 Bluetooth handsfree device Icon Available Bluetooth sources ZENEC Bluetooth CarPlay Bluetooth Android Auto Bluetooth Widget 3 Media & Tuner Icon Available audio sources DAB+ FM Tuner NOTE: Only with models which use the SD cards as an A/V source. - Page 20 Each source can be called up directly via the App List. 1. Tap on the App Lists icon in the standard Zenec toolbar to display the App Overview List. 2. Tap required source to call up the source. Widget controls and displays each widget contains standard controls which make simplified quick operation possible.
-
Page 21: App Overview List
Search and basic entry function The ZENEC system contains a general search function which uses different sources with different search criteria. The entry keyboard is an “Android OS” operating system keyboard which is connected to the respective language system selection (Quertz / Querty). -
Page 22: Connections
List view Tap to display all search results. Open keyboard Tap to open an entry keyboard. Tap the “Back” button in the Zenec toolbar to end the search or Back entry and go back step by step. Connections In order to be able to use mobile devices in the vehicle, various types of connection are available. -
Page 23: Bluetooth Handsfree Device
In order to be able to use mobile devices in the vehicle via Bluetooth, a one-off Bluetooth connection between your ZENEC system and the mobile phone is required. After the one-off connection with the ZENEC system, the mobile phone is automatically detected and connected in future. -
Page 24: Status Information
Tap to call up the most important Bluetooth settings directly. Settings STATUS INFORMATION The status field which displays various items of status information in the form of symbols can be found in the status bar above the widgets if your ZENEC control display. Smartphone / iPhone symbols Symbol Meaning Mobile radio network reception strength. -
Page 25: Set Up Bluetooth Connection (Coupling)
All BT devices that are connected or already coupled with the ZENEC system are displayed in a device list, where they can be managed. • A maximum of 7 devices can be connected to the ZENEC system via Bluetooth. A maximum of 20 devices are recognised. -
Page 26: General Bluetooth Settings
An arrow symbol displayed in the direction of the Bluetooth device name shows that an active connection to the ZENEC system exists. The arrow symbol is shown in the other direction if the function of the device is inactive or not connected. -
Page 27: Call Up Bluetooth Settings
ACCEPT AND TERMINATE CALLS Incoming calls can be accepted in different ways depending on the configuration of the vehicle in combination with the ZENEC system and interface / analogue LFB (Key 1 / Key 2) and the LIN bus connection. -
Page 28: Setting Up A Call Via The Phone Book
Option 2: Press the relevant button on the front / rear of the steering wheel. Reject call Option 1: Via the ZENEC system, by tapping ”Reject” Option 2: Press the relevant button on the front / rear of the steering wheel. -
Page 29: Outgoing Call" Connection View
“OUTGOING CALL” CONNECTION VIEW NOTE: The name of the incoming call is exclusively displayed if the number of the caller is stored in the phone book and also transferred by the network operator. Otherwise only the phone number is displayed. Calls which are carried out via the handsfree device can be continued on the mobile phone and vice-versa. -
Page 30: Contact Search
CONTACT SEARCH The contact search is available after successful synchronisation. 1. Tap on Search on the Bluetooth control bar/toolbar to call up the contact search window. 2. Enter letters using the keyboard. INFO: The list of hits is displayed beneath the input field. 3. -
Page 31: Call Lists
Play, Pause and Skip from coupled terminal devices which are in audio playback mode to be used via the ZENEC. The display of iD3 Tag metadata is only possible is this is present on the tracks streamed via the Smartphone. -
Page 32: Starts Bt Music (A2Dp) Audio Playback
Media Player - USB / SD / iPOD / BT Music A2DP AUDIO Be it a music track, audio books, film music or podcasts: The ZENEC system can play many of the digital audio media formats via the two powerful USB 3.0 and USB 2.0 interfaces. The audio output takes place via the vehicle speakers. -
Page 33: Choose Between Two Usb Sticks
5. Select and tap the required USB stick or the name of the USB device. NOTE: After a USB source has been selected, the information about the current track or playback file is displayed on the ZENEC system. The content and scope depends on the selected audio source. -
Page 34: Pause And Continue Audio Playback
PAUSE AND CONTINUE AUDIO PLAYBACK On the ZENEC device: Tap on the following button to pause or continue the playback. Function Symbol Meaning Playback Tap to play back the track. Pause Tap to play back the track. CHANGE TRACK AND FAST FORWARD / REWIND... -
Page 35: Search For An Audio File, E.g. Track
4. Select required track and tap to start playback. Starting with the selected track, every track in the playback list or the audio files in the folder are played back one after the other. SEARCH FOR AN AUDIO FILE, E.G. TRACK The possible search criteria depend on the selected audio source. -
Page 36: Favourite List
The following repeat types can be selected: Function Symbol Meaning Repeat track Repeat a music track. Repeat folder Repeat the entire folder with music. Repeat the entire music collection of the selected audio Repeat all source. FAVOURITE LIST Favourite list principle: The current track can be simply and quickly added to a personal favourite playback list. -
Page 37: Smart Playlist (Audio Playback List)
SMART PLAYLIST (AUDIO PLAYBACK LIST) Create a playlist for a road trip or in accordance with your own requirements. You can also manage the playlists created using the Smart Playlist function. The playlists can be given their own names. Call up Smart Playlist overview: 1. -
Page 38: Video
INFO Tap on “Cancel” to cancel all procedures and changes. VIDEO Be it films, YouTube videos or music videos: The ZENEC system can play many of the digital video files via the two USB interfaces, HDMI or AV IN. The audio output takes place via the vehicle speakers. -
Page 39: Select Video Source
Media Player. NOTE: After a video source has been selected, the information about the current video or playback file is displayed on the ZENEC system. The content and the scope depend on the selected video source. -
Page 40: Shuffle
Repeat the entire video collection of the selected video source. APPLE CARPLAY With Apple CarPlay you can operate certain functions and online services of a compatible Apple iPhone via the Siri voice operation and intuitively via the ZENEC screen. 40 Rev.A... -
Page 41: Wired Connection Via Usb
Prerequisite: • Before you couple your phone with your ZENEC system, ensure that Siri is enabled. If Siri is not activated on the phone, select [Settings] ➔ [Siri & Search and one of the following options to activate: › ”Press side button for Siri” (on an iPhone with Face ID – newer models) ›... -
Page 42: Wireless Carplay Autostart
7. Compare the ID control number displayed on the ZENEC system with the number on the display of the iPhone. Then confirm the respective pop-up with the ID control number on the iPhone and on the ZENEC device. 8. Confirm the use of CarPlay on the iPhone by tapping on “Allow”. -
Page 43: Wired Connection Via Usb
1. Connect a compatible Android Smartphone to the USB-1 connection on the rear of your ZENEC device. 2. Follow the dialogues on the screen of the Smartphone and the ZENEC device to set up Android Auto and configure the starting behaviour. The selected starting behaviour can also be changed later in the Smartphone device settings [Device Settings] ➔... -
Page 44: Wireless Android Auto Autostart
Android Auto when the next trip takes place. OPERATING ANDROID AUTO Android Auto can be operated via the ZENEC screen and the Google Voice Assistant. Press the Voice [CAM/Voice] button on the steering wheel or the [Voice] sensor button to activate or start up the Google Voice Assistant on the Smartphone. -
Page 45: Av In / Hdmi
3. Establish the Bluetooth connection between the Smartphone and ZENEC. Apple iOS Version: In order to be able to control the audio functions of the ZENEC system directly via your iPhone/iPad, proceed as follows: 1. Open the Apple App Store and search for the “ZENEC SP-REM App”. -
Page 46: Navigation Update
3. Up to date Naviextra Toolbox software installed on your computer. Download link: https://zenec.naviextras.com/shop/portal/downloads In order to be able to update your ZENEC system with newer maps, proceed as follows: 1. Go to https://zenec.naviextras.com/shop/portal and create a user account there with a password and the personal data for your navigation device. -
Page 47: Start-Up Of The Navigation Software
START-UP OF THE NAVIGATION SOFTWARE Software installation The Zenec device (Z-E3776) must be prepared by installing some software before you can use the Z-E3776 navigation software on the micro SD card. a. Insert the micro SD card of the navigation software bundle into the side card slot on the rear of the TFT screen on the device. - Page 48 Figure 1 Figure 2 c. The navigation software installs itself automatically in several steps. An animated installation screen informs you about the current installation step (Figure 3). The software installation takes about 30-60 seconds. Figure 3 d. The loading procedure of navigation mode should now start automatically (Figure 4). INFO: Pay attention to the NOTES for Sat-Fix.
-
Page 49: Navi Initial Start-Up (Sat Fix Creation)
NAVIGATION SPLIT SCREEN The ZENEC system allows you to activate a Navi split screen in the audio sources with the display of street names and the distance to the next turn-off, the so-called “Turn to Turn” information. In this way, you also never lose track during active navigation in an audio playback source while driving. - Page 50 Function Area Operation ZENEC placeholder: Tap to activate the Navigation split screen Media Player Album Art / in the Media Player.
-
Page 51: Fm Tuner
Distance to manoeuvre. FM TUNER Principle of the FM tuner: Receivable radio stations can be played with the ZENEC UKW RDS tuner. An integrated DSP provides a clearer sound with weaker stations by means of noise interference masking. The radio stations can be stored in a station list. -
Page 52: Call Up Station Information
Tap to call up the station information. CHANGE STATION (SEARCH, PRESETS) On the ZENEC device: Call up station information. 2. < > Tap on right or left arrow key to start the automatic search “up” or “down” or searching in +/- 0.1 MHz transmission frequency steps. -
Page 53: Save Station
3. Hold down the required storage location to save the current station. INFO: Short tap to play the stored FM station. TA TRAFFIC ANNOUNCEMENTS ACTIVATE / DEACTIVATE On the ZENEC device: Tap the “TA” button in the ZENEC operating bar. 53 Rev.A... -
Page 54: Interrupt
You get clear, stable digital radio reception with the ZENEC DAB+ Twin Tuner. The background scan function updates the dynamic station list in the background so that you are always offered the DAB stations which are currently receivable. -
Page 55: Call Up Station Information
CALL UP STATION INFORMATION Tap to call up the station information. CHANGE STATION On the ZENEC device: Call up DAB+ information page / main page. 2. < > Operate left or right arrow key to play the previous or next station. -
Page 56: Switch Ensemble
SWITCH ENSEMBLE On the ZENEC device: Option 1: To call up DAB+ information page / main page. 2. < > Long press of left or right arrow key to switch to the previous or next ensemble. Option 2: Call up DAB+ information page / main page Call up DAB+ list. -
Page 57: Save Station
Call up DAB settings: 1. Call up DAB+ source. 2. In the Tuner control bar/toolbar, tap on to call up the DAB settings. 3. Make the required settings. The changes are taken over automatically. Function Meaning DAB-DAB Tap to switch DAB-DAB transmitter following transmitter following ON and OFF. -
Page 58: Kamera
INFO: Short tap to play the stored DAB+ station. KAMERA The ZENEC system supports up to three camera systems which can be controlled directly via the screen, the [CAM] sensor button or via the steering wheel remote control. The camera image of camera 1 switches itself on automatically when reverse gear is selected. -
Page 59: Multiview Camera Image Mode
The ZENEC system supports the new ZENEC multiview camera models for simple camera monitoring in the vehicle. The multiview function allows direct manual control of the required image view on the ZENEC device. The required image section is selected via the multiview toolbar at the bottom of the device screen. -
Page 60: Call Up Multiview Source
Different key assignments can be defined or a required background selected, and the LED colour (amber / white) of the key lighting on the front of the device can be selected in the various or general settings. To configure your ZENEC system in accordance with requirements. Call up various settings Call up settings. - Page 61 Possible Navigation key assignment: Queries, Last, iGO Navi (native navigation), AAP Navi (Android Auto), CP Navi (CarPlay). Queries (source query): Whenever the ZENEC system is restarted, a pop- up appears containing a list of all available navigation sources. Tap on the symbol of the required source to use it.
-
Page 62: Audio Settings
Possible timer settings: OFF, 15min, 30min, 45min. INFO: After switching off the ignition, the ZENEC system remains on for Delayed device the set timer time. when the timer time expires, the ZENEC is automatically shut-off shut down and switched off. -
Page 63: Make Quick Audio Settings
Setting Operation Tap to make quick audio settings. Can be called up by means of a long Quick audio settings press of the “HOME” button. Equalizer / Presets Tap to set the 10-band equalizer. Volume Tap to set the start and source volume. Balance/Fader Tap to set the fader and the balance. -
Page 64: Call Up And Set Equalizer / Sound Settings
Setting Operation Tap to activate or deactivate the Bass Boost module. Bass Boost On: Bass Boost activated. Off: Bass Boost deactivated. < > < > Tap the arrow keys to set the Subwoofer Gain. Subwoofer Gain Possible setting range: -6 < 0 > +6 Tap to call up the audio profile list. -
Page 65: Fine Adjustment Of Source Volumes (Gain)
volume value list and the possible settings. 4. Choose between last or manually defined (set) volume. Tap on “Last” to deactivate the “Last set volume function” and define a required volume yourself. If the volume is defined manually, the device starts with the manually defined volume value, e.g. the media volume is set to “30”, the volume always starts with Vol. -
Page 66: Set Balance And Fader
X-OVER AUDIO CROSSOVER, GENERAL The ZENEC X-Over function allows you to set high pass crossover frequencies, and is the frequency range which lies at the transition from one frequency band to the next higher band. The audio crossover kicks in at the crossover frequency and separates the frequencies into different channels. -
Page 67: Set Subwoofer
Because of the given arrangement of the individual speakers in your vehicle, it may be that the platform depiction is not optimal. The ZENEC run-time correction allows you to delay the audio signal to the respective speakers in such a way that you have a central auditory experience. -
Page 68: Activate Or Deactivate Navi-Mixer Media Muting
3. Define central hearing position. Measure the distance from this position to the respective speaker. 4. Set the relevant delay depending on the speaker with the furthest distance for shifting the speaker from the selected position. Enter the relevant delay times (distance values) so that all speakers have the same distance. -
Page 69: Wireless Connection Settings
Call up ZENEC settings. 4. Call up wireless connection settings on the ZENEC. 5. Start Wifi device search on your ZENEC system. To do this, tap “Wifi Connection”. The Hotspot name of your mobile phone appears in a ZENEC search list. -
Page 70: Set Up Wifi Connection With The Home Wlan (Couple)
5. Start Wifi device search on your ZENEC system. To do this, tap “Wifi Connection”. The home network name / router name e.g. FritzBox xy of your routers is displayed in a ZENEC search list. 6. Select the required router (router name) from the list and tap to “Connect the ZENEC with the Home LAN / Network”. -
Page 71: Camera Input Settings
Overview of important operating and display fields in the driver assistant settings: Setting Operation < > Tap the arrow keys to set the display source of the park assist. Possible settings: Camera / Multiview / Off Park Assist Camera: Camera inputs activated (factory setting). Multiview: Multiview function activated at camera 1 input. -
Page 72: System And Device Settings
Possible setting range: -10 to +10 SYSTEM AND DEVICE SETTINGS You can change various ZENEC system settings in order to adapt the ZENEC system in accordance with requirements. For example, you can change the device language, set a password, switch the system and key sound on and off, select the volume of the system and key sound, perform a software update or simply load the factory settings and more. -
Page 73: Tft Display Screen Settings
Password Tap to store a password. Back up on USB Tap and confirm to save your profile settings in the ZENEC system on an external data medium (USB) with FAT32 formatting. Loading from Tap and confirm to load your saved profile settings from an external data medium (USB) to the ZENEC system. -
Page 74: Time And Date Setting
Favourites (FAV) button if this has been occupied with the DISP function.. TIME AND DATE SETTING The ZENEC system has several synchronisation sources which can be set in the time and date settings. You can also set the time format, change the displayed time and also select the time source (system time, DAB time or navigation time) for the time display. -
Page 75: Vehicle Display Options (Navi Widget)
You can change various vehicle display parameters for adapting the navigation widget arranged on the left in the ZENEC home screen (menu) in accordance with requirements, see following illustration. For example, you have the possibility of changing the vehicle models or the vehicle display, and choose between two speed and height units. -
Page 76: Call Up Vehicle Display Options
Possible widget display units: Metres / feet. SOFTWARE VERSION In the ZENEC device settings under Software Version Info you can see the currently installed software version, together with version information about MCU, System OS, APP, BT, UBLOX Gyro Firmware and UUID including the model name [Settings] ➔ [System] ➔ “Software Version Info”. -
Page 77: Password Protection
NOTE: ● The ZENEC Z-E3776 is equipped with an integrated DAB+ receiver. To use it, you need a suitable DAB antenna (not supplied), which must be connected to the ZENEC system. ● If the target vehicle is already fitted with an original DAB antenna, it can still be used in conjunction with the ZENEC system. -
Page 78: Disassembly And Preparation
3. Start to disassemble the original device. 4. Do not switch the ignition back on until all the points in the assembly manual have been completed and the ZENEC system has been fully installed. NOTE: ●... -
Page 79: Overview Of Installation And Connection Accessories
OVERVIEW OF INSTALLATION AND CONNECTION ACCESSORIES No. Item Quantity Installation frame Remote control Phillips screws GPS antenna with metal plate and double-sided adhesive pad for installation USB2.0 extension cable USB3.0 extension cable Bluetooth microphone with installation accessories... -
Page 80: Z-E3776 Connection Diagram
Z-E3776 CONNECTION DIAGRAM Bluetooth Antenna E HDMI USB 1/2 USB1: USB2: • Apple CarPlay, Apple MFI and Google Android Auto • Apple MFI • USB Media Playback, Software Updates • USB Media Playback, Software Updates • Power charging ~1000mA • Power charging ~1000mA 16 PIN CONNECTOR A1 A3 A5 A7 A9 A11 A13 A15... - Page 81 Z-E3776 CONNECTION DIAGRAM (page 2) Key2 Key1 (reserved Schaudt) Input 81 Rev.A...
-
Page 82: Abbreviations
ABBREVIATIONS Abbreviation Description Manufacturer-encompassing Bluetooth technology which makes it possible to ® A2DP transmit audio signals wirelessly (Advanced Audio Distribution Profile) Alternative Frequency The CAN bus (Controller Area Network) is a serial bus system for communication CAN-Bus between the control units in a vehicle. Apple CarPlay Transmission standard for terrestrial reception of digital radio (Digital Audio DAB/DAB+... - Page 83 83 Rev.A...
-
Page 84: Warranty
Is ZENEC liable for other defects or damage? ZENEC will only repair or replace products if they are covered by the terms of this warranty. ZENEC is not liable for any material or intangible losses or damage such as the purchase price, loss of profits, loss... - Page 85 How will ZENEC fulfil its warranty? ZENEC or its service partner will have the choice of either repairing or replacing the product or its defec- tive parts covered by the warranty, and assume the material and labour costs at its own discretion and in accordance with the prevailing conditions.
-
Page 86: Certification / Manufacturer
Do not use this device in locations in which wireless devices are not permitted. ZENEC cannot guarantee that no accidents or damage will occur if the device is used incorrectly. Use this product with care and at your own risk. - Page 87 Legal representative in EU: ACR S & V GmbH ∙ Industriestraße 35 ∙ D-79787 Lauchringen ∙ Germany www.zenec.com ACR Brändli + Vögeli AG hereby declares that the ZENEC -E3776 CE is compliant – the EU conformity declaration can be accessed at the following Internet address: https://www.zenec.com...
- Page 88 © Copyright 2023 RevA / Editorial deadline: Q2-2023 German Manufacturer: ACR AG ∙ Bohrturmweg 1 ∙ CH-5330 Bad Zurzach ∙ Switzerland Legal representative in EU: ACR S & V GmbH ∙ Industriestraße 35 ∙ D-79787 Lauchringen ∙ Germany...
Need help?
Do you have a question about the E-GO Z-E3776 and is the answer not in the manual?
Questions and answers