Table of Contents
Advertisement
Advertisement
Table of Contents

Related Manuals for Hillrom PST 300+


Summary of Contents for Hillrom PST 300+
- Page 1 Service Manual PST 300+ Mobile operating table ENGLISH en-GB...
- Page 2 This page is left intentionally blank.
- Page 3 07318 Saalfeld Germany Telephone: +49 3671 586-0 Fax: +49 3671 586-41165 surgical@hillrom.com hillrom.com Trumpf Medizin Systeme GmbH + Co. KG is a subsidiary of Hill- Rom Holdings, Inc. The manufacturer is hereinafter referred to as Trumpf Medizin Systeme. Technical Customer Service...
- Page 4 PST 300+ This page is left intentionally blank. 4990851_002_00 – 2082262 – 2022-01-10...
- Page 5 KG expressly reserves all rights under copyright law. PATENTS / PATENT hillrom.com/patents May be subject to one or more patents. See above internet address. Hillrom companies have proprietary rights to European, American and other patents and to outstanding patent applications. 4990851_002_00 – 2082262 – 2022-01-10...
- Page 6 PST 300+ This page is left intentionally blank. 4990851_002_00 – 2082262 – 2022-01-10...
-
Page 7: Table Of Contents
Contents Contents Safety ............... . 11 Service technician . - Page 8 Contents Column head cover ............. . 55 Bellows .
- Page 9 Contents Control modules ............. . 108 Fuse layout.
- Page 10 Contents This page is left intentionally blank. 4990851_002_00 – 2082262 – 2022-01-10...
-
Page 11: Safety
Safety Safety Service technician The service technician is a qualified specialist who has been authorised, trained and certified by Trumpf Medizin Systeme. The service technician may perform only the work for which they have been authorised, trained and certified by Trumpf Medizin Systeme. -
Page 12: Protection Against Infection
Safety Protection against infection Risk of infection throughout the entire medical facility. Adhere to all the protective measures and behavioural regulations of the medical facility. Obtain additional advice regarding protection against infection from a medical doctor. Perform maintenance and repair work only on a cleaned and disinfected operating table. -
Page 13: Disposal
Safety Disposal Within the European Union the product is governed by Directive 2012/19/EU on waste electrical and electronic equipment and complies with the requirements of Directive 2011/65/EU of the European Parliament and of the Council of 8 June 2011 on the restriction of the use of certain hazardous substances in electrical and electronic equipment as amended by Commission Delegated Directive (EU) 2015/863 of 31 March 2015 as regards the list of... -
Page 14: Components With Serial Number
Safety Components with serial number Individual, safety-relevant components or assemblies of the operating table are marked with an additional serial number. When replacing one of the listed parts, the serial numbers of the removed and new parts must be reported to Trumpf Medizin Systeme using the “Service Report”... - Page 15 Safety Column: Pos. Material description Material number Lift motor 2077111 Edging motor 1957801 Spindle nut lift 2072460 Spindle nut Trendelenburg/tilt 2072201 Main cardan 1957806 Upper section of lift column 2077103 Bottom section of lift column 2077854 Lift spindle mount 2077851 Main Controller Unit 2072001 Trendelenburg motor...
-
Page 16: Getting Information Online (Online Info System)
Getting information online (Online Info System) Getting information online (Online Info System) Trumpf Medizin Systeme provides additional important and up-to- date information for the product range in electronic form on the online information system. Only authorised personnel have electronic access to the online information system of Trumpf Medizin Systeme. - Page 17 Tools – Electronic spirit level The level is used to calibrate the incline sensors. – Spring balance with a measuring range up to 10 N The spring balance is used to check the cogged belt tension. Auxiliary tools The following auxiliary tools are required (and are not available from Trumpf Medizin Systeme): –...
-
Page 18: Overview
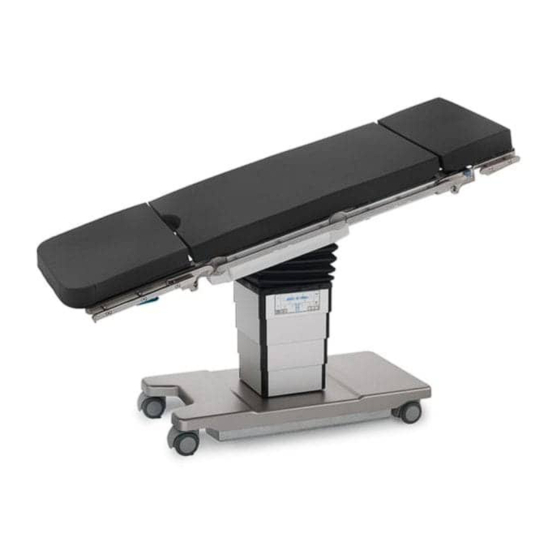
Overview Overview Column keypad Seat section Back section Operating table S with short back section Operating table L with long back section Side rail Hinge, leg section, adjustable by motor Hinge, back section, adjustable by motor Coupling point mount L Coupling point mount S/M Operating table S with M mount coupling point Operating table L with S mount coupling point... -
Page 19: Cable Overview
Overview Insertion aperture for the extension adapter The extension adapter is available as an accessory from Trumpf Medizin Systeme. [10] Support block for extension adapter The extension adapter is available as an accessory from Trumpf Medizin Systeme. [11] Control module connection socket in the IR housing [12] Running gear [13]... - Page 20 Overview Material Cable Cable routing Description number 2025264 W302 Cable from the distributor board (sensor Chapter 13.2, page 93 connection to end position of leg section) through the power chain to cable W506 (plug connection in right strut) 2025266 W303 Cable from the distributor board (sensor Chapter 13.2, page 93 connection to zero position of back...
- Page 21 Overview Material Cable Cable routing Description number Column 2025241 W101 (power Cable from the main board (Main Chapter 14.2, page 103 supply) Controller Unit) through the power chain to the power supply unit 2025242 W102 Cable from the main board (Main Chapter 14.2, page 103 Controller Unit) through the power chain to the lift motor and the jack-up unit motor...
- Page 22 Overview Material Cable Cable routing Description number 2025215 W702 (protective Protective conductor from the power Chapter 15.2, page 105 conductor) socket to the running gear 2025219 W703 (jack-up unit Cable from switch to cable W103 (plug Chapter 12.3, page 82 switch) connection on power supply unit) 2025216...
-
Page 23: Preparing The Operating Table
Preparing the operating table [15] On/Off switch [16] Jack-up unit motor [17] Battery fuse [18] OR sensor [19] Leg section hinge [20] Back section hinge Preparing the operating table Before beginning maintenance or repair work, prepare the operating table in accordance with the following work steps: Activate the parking brake of the operating table. -
Page 24: Basic Work
Basic work Basic work Disconnecting the external power supply Switch off the operating table using the switch at the head end of the running gear. Remove the plug of the mains power cable from the power socket. Remove the mains power cable plug from the connector socket on the running gear. -
Page 25: Open Column Top
Basic work Open column top To obtain access to the internal components, remove the column cover from the bellows and lower it onto the running gear. Next, the bellows are detached from the column head. Prepare the operating table (Chapter 5). Disconnect the power supply on the operating table (Chapter 6.1). -
Page 26: Closing The Column Cover On The Bellows
Basic work Remove the bracket [13] for the bellows on the head end of the guide column [14] (2 screws [15]). Carefully guide the bellows with the cover plates [7] downwards. Closing the column cover on the bellows Carefully guide the bellows with the cover plates upwards. Switch on the operating table using the switch at the running gear. -
Page 27: Turn Over The Operating Table
The operating tabletop should be placed onto a soft surface to prevent scratches and other damage to the operating table. Hillrom offers the tail wheel as a special auxiliary tool, which is to be attached to the side rail before tilting. The operating table is subsequently placed onto the tail wheels. -
Page 28: Restore The Operating Table To The Upright Position
Basic work CAUTION! High weight of the operating table. Correct the wheel position as required and tilt the operating table with the help of a second person. Align the wheels in parallel to the long side of the operating table, so that the operating table does not roll away while it is being tilted. -
Page 29: Emergency Adjustment For The Lift
Basic work Emergency adjustment for the lift If the lift motor has a defect, the column can no longer be moved upwards. The manual emergency adjustment must be performed to access the column. This emergency adjustment is not possible if the lift spindle is defective. Prepare the operating table (Chapter 5). -
Page 30: Operating Tabletop Mechanical Components
Operating tabletop mechanical components Operating tabletop mechanical components Safety – Prior to performing any repair or maintenance work, disconnect the operating table from the external power supply. – Do not allow screws, nuts or other parts to fall into the operating table. -
Page 31: Pad Plate
Operating tabletop mechanical components Pad plate The struts are joined together by pad plates and the transverse web. After loosening or removing both pad plates, the struts can be moved to a certain extent in relation to each other. If possible, loosen and remove a maximum of 1 pad plates. -
Page 32: Tabletop
Operating tabletop mechanical components Tabletop Removal Prepare the operating table (Chapter 5). Disconnect the power supply on the operating table (Chapter 6.1). Open the column top and guide the column cover downwards (Chapter 6.5). Remove the pad plate [1] from the seat section (Chapter 7.2). Attention: Leave the pad plate on the back section attached so that the adjustment of the struts is maintained. - Page 33 Operating tabletop mechanical components Mount the edging assembly on top of the tabletop (4 screws). Tighten the screws with a torque of 10 Nm. Remove the cable ties from the edging assembly and column. Install the retaining plate W401 (2 screws). Attention! Do not interchange the plug connections on the circuit board.
-
Page 34: Leg Section Gear
Operating tabletop mechanical components Leg section gear Removal Prepare the operating table (Chapter 5). Disconnect the power supply on the operating table (Chapter 6.1). Remove the pad plate from the seat section (Chapter 7.2). Attention: Leave the pad plate on the back section attached so that the adjustment of the struts is maintained. - Page 35 Operating tabletop mechanical components Mount the inner coupling plate (3 screws). Stick a new protective self-adhesive sheet onto the inner coupling plate. Pay attention to the positioning. The screws of the coupling plate must be covered. Restore the original cable routing. Insert the sensor into the outer coupling plate and secure with the threaded pin.
-
Page 36: Leg Section Cogged Belt
Operating tabletop mechanical components Leg section cogged belt Removal Prepare the operating table (Chapter 5). Disconnect the power supply on the operating table (Chapter 6.1). Remove the pad plate from the seat section (Chapter 7.2). Attention: Leave the pad plate on the back section attached so that the adjustment of the struts is maintained. -
Page 37: Gear Unit Back Section
Operating tabletop mechanical components Gear unit back section Removal Prepare the operating table (Chapter 5). Disconnect the power supply on the operating table (Chapter 6.1). Remove the pad plate from the seat section and the back section (Chapter 7.2). Remove the back section drive unit (Chapter 8.4). Note the mounting position of the motor. -
Page 38: Cogged Belt Back Section
Operating tabletop mechanical components Cogged belt back section Removal Prepare the operating table (Chapter 5). Disconnect the power supply on the operating table (Chapter 6.1). Remove the pad plate from the seat section (Chapter 7.2). Attention: Leave the pad plate on the back section attached so that the adjustment of the struts is maintained. -
Page 39: Power Chain (Right Side)
Operating tabletop mechanical components Power chain (right side) Removal Prepare the operating table (Chapter 5). Disconnect the power supply on the operating table (Chapter 6.1). Unscrew the cover [1] of the power chain (4 screws [2], do not unscrew completely) and disengage. Remove the power chain on the top end [4] (2 screws). -
Page 40: Power Chain (Left Side)
Operating tabletop mechanical components Power chain (left side) Removal Prepare the operating table (Chapter 5). Disconnect the power supply on the operating table (Chapter 6.1). Open the column top and guide the column cover downwards (Chapter 6.5). Unscrew the cover [1] of the power chain (4 screws [2], do not unscrew completely) and disengage. -
Page 41: Tooth Rod
Operating tabletop mechanical components 7.11 Tooth rod No repair work of the tooth rod is performed at the customer’s site. The repairs are carried out at Trumpf Medizin Systeme. Please contact the Trumpf Medizin Systeme Technical Customer Service in the event of a defect. The operating table is replaced entirely. -
Page 42: Tabletop Electric Components
Tabletop electric components Tabletop electric components Safety – Prior to performing any repair or maintenance work, disconnect the operating table from the external power supply. – Do not allow screws, nuts or other parts to fall into the operating table. Loose parts could damage other components or cables when adjustments are made to the operating table. -
Page 43: Drive Unit For Leg Section
Tabletop electric components Drive unit for leg section Attention: the drive unit requires a serial number. Observe Chapter 1.9 when replacing the drive unit. Removal Prepare the operating table (Chapter 5). Disconnect the power supply on the operating table (Chapter 6.1). Remove the pad plate from the seat section (Chapter 7.2). - Page 44 Tabletop electric components Remove the cable clip [17] in the foot-end opening of the seat section bar (1 screw [18]). Note the cable routing. Pull the plug of the sensor cable W520 from the socket of cable W220/W320 through the opening in the strut.
- Page 45 Tabletop electric components b) The gap between the sensor and hinge must be 0.3 mm to 0.5 mm. Position the sensor accordingly. Switch off the operating table using the switch at the running gear. Suspend the cogged belt. Ensure that the cogged belt is properly guided over the clamp roller.
-
Page 46: Motor For Leg Section Hinge
Tabletop electric components Motor for leg section hinge Attention: the motor requires a serial number. Observe Chapter 1.9 when replacing the motor. Removal Prepare the operating table (Chapter 5). Disconnect the power supply on the operating table (Chapter 6.1). Remove the pad plate from the seat section (Chapter 7.2). Attention: Leave the pad plate on the back section attached so that the adjustment of the struts is maintained. -
Page 47: Drive Unit For Back Section
Tabletop electric components Drive unit for back section Attention: the drive unit requires a serial number. Observe Chapter 1.9 when replacing the drive unit. Removal Prepare the operating table (Chapter 5). Disconnect the power supply on the operating table (Chapter 6.1). Remove the pad plate from the seat section and the back section (Chapter 7.2). - Page 48 Tabletop electric components Mount the sensor back section hinge and the retaining plate (1 screw). Attach the cover next to the power chain (3 screws). Position and install the cover for the power chain (4 screws). Check the alignment of the right and left hinges in relation to each other.
-
Page 49: Motor For Back Section Hinge
Tabletop electric components Motor for back section hinge Attention: the motor requires a serial number. Observe Chapter 1.9 when replacing the motor. Removal Prepare the operating table (Chapter 5). Disconnect the power supply on the operating table (Chapter 6.1). Remove the pad plate from the seat section and the back section (Chapter 7.2). -
Page 50: Longitudinal Slide Drive Unit
Tabletop electric components Longitudinal slide drive unit Attention: the drive unit requires a serial number. Observe Chapter 1.9 when replacing the drive unit. Removal Prepare the operating table (Chapter 5). CAUTION! The tabletop must be in horizontal position. If the tabletop is tilted, the tabletop will independently slide to the mechanical end stop while removing the drive. - Page 51 Tabletop electric components Slowly move the longitudinal slide of the tabletop manually in the direction of the foot end. At the same time, the dummy linear guides on both sides (#2067885) [11] must be inserted as soon as the guide rail of the linear guide releases the running groove of the track carriage.
-
Page 52: Pcba Distributor Board
Tabletop electric components PCBA distributor board Attention: the distributor board requires a serial number. Observe Chapter 1.9 when replacing the distributor board. Removal Prepare the operating table (Chapter 5). Disconnect the power supply on the operating table (Chapter 6.1). Remove the pad plate from the seat section (Chapter 7.2). Attention: Leave the pad plate on the back section attached so that the adjustment of the struts is maintained. -
Page 53: Column Mechanical Components
Column mechanical components Column mechanical components Safety – Prior to performing any repair or maintenance work, disconnect the operating table from the external power supply. – Do not allow screws, nuts or other parts to fall into the operating table. Loose parts could damage other components or cables when adjustments are made to the operating table. -
Page 54: Column Cover
Column mechanical components Column cover The column cover consists of 4 rings that are not firmly connected to each other. A ring consists of 2 segments. The column cover is bolted to the frame of the guide column on top and to the casing of the running gear at the bottom. Removal Prepare the operating table (Chapter 5). -
Page 55: Column Head Cover
Column mechanical components Column head cover Removal Prepare the operating table (Chapter 5). Disconnect the power supply on the operating table (Chapter 6.1). Remove the pad plate from the seat section (Chapter 7.2). Attention: Leave the pad plate on the back section attached so that the adjustment of the struts is maintained. -
Page 56: Bellows
Column mechanical components Bellows Removal Prepare the operating table (Chapter 5). Disconnect the power supply on the operating table (Chapter 6.1). Open the column top and guide the column cover downwards (Chapter 6.5). Remove the tabletop (Chapter 7.3). Release the bellows [1] from the guide column (both the inner screws [2] below the bellows at the head and foot end). -
Page 57: Power Chain
Column mechanical components Power chain Removal Prepare the operating table (Chapter 5). Disconnect the power supply on the operating table (Chapter 6.1). Open the column cover on the running gear (Chapter 6.3). Remove the cable fastenings [1] (1 screw each). Release the power chain at the ends (3 screws each [2]/[4]). -
Page 58: Lift Spindle
Column mechanical components Lift spindle Attention: the lift spindle requires a serial number. Observe Chapter 1.9 when replacing the lift spindle. Removal Prepare the operating table (Chapter 5). Disconnect the power supply on the operating table (Chapter 6.1). Turn over the operating table (Chapter 6.7). Remove the protective sheet [1] from the bottom of the running gear. - Page 59 Column mechanical components Place the cogged belt around the toothed washer of the spindle. Be careful that the teeth of the sprocket and on the cogged belt grip securely into each other (and tooth-to-tooth contact is avoided). Mount the cover plate on the sprocket (lift motor) (5 screws). Fix the lift motor into place on the column end (4 screws, do not tighten yet!).
-
Page 60: Lift Spindle Cogged Belt
Column mechanical components Lift spindle cogged belt Removal As far as is still possible, prepare the operating table (Chapter 5). Disconnect the power supply on the operating table (Chapter 6.1). Turn over the operating table (Chapter 6.7). Remove the protective sheet [1] from the bottom of the running gear. - Page 61 Column mechanical components Tighten the cogged belt. a) A second person is required for tensioning the cogged belt and mounting the lift motor assembly. b) Press the spring scale [10] against the cogged belt [9] from the inside, in accordance with the diagram. c) Press the spindle [11] and lift motor assembly [5] apart using a tommy bar.
-
Page 62: Column Electric Components
Column electric components Column electric components 10.1 Safety – Prior to performing any repair or maintenance work, disconnect the operating table from the external power supply. – Do not allow screws, nuts or other parts to fall into the operating table. Loose parts could damage other components or cables when adjustments are made to the operating table. -
Page 63: Lift Motor Assembly
Column electric components 10.2 Lift motor assembly Attention: the lift motor assembly requires a serial number. Observe Chapter 1.9 when replacing the assembly. Removal As far as is still possible, prepare the operating table (Chapter 5). Disconnect the power supply on the operating table (Chapter 6.1). - Page 64 Column electric components If all work on the lift is complete, fasten the cover plate [3] to the spindle end (securing ring pliers and omniFIT 100M thread locking agent). Attach the underbody cover on the running gear (7 screws). Glue a new protective sheet over the bearing housing of the spindle.
-
Page 65: Trendelenburg Assembly
Column electric components 10.3 Trendelenburg assembly Attention: the Trendelenburg assembly requires a serial number. Observe Chapter 1.9 when replacing the assembly. The Trendelenburg assembly must be replaced in each case, if the incline sensor and 1 limit switch are defective. The assembly drive may have travelled against the position stop of the spindle and may be defective. - Page 66 Column electric components Remove 2 cable clips [8] above the Main Controller Unit [10] (1 screw each [9]). Loosen the Main Controller Unit [10] from the Trendelenburg mount (3 screws [11]). Note the cable routing. Disconnect the plug of the Trendelenburg assembly connecting cable from the main board in the Main Controller Unit [10].
- Page 67 Column electric components Switch off the operating table using the switch at the running gear. 22. Mount the sensor plate for the Trendelenburg end stops (2 screws). 23. Guide the column cover upwards and close (Chapter 6.6). 24. Mount the column head cover (Chapter 9.3). 25.
-
Page 68: Edging Assembly
Column electric components 10.4 Edging assembly Attention: the edging assembly requires a serial number. Observe Chapter 1.9 when replacing the assembly. Removal Prepare the operating table (Chapter 5). Disconnect the power supply on the operating table (Chapter 6.1). Remove the pad plate from the seat section (Chapter 7.2). Attention: Leave the pad plate on the back section attached so that the adjustment of the struts is maintained. - Page 69 Column electric components Check the tension of the cogged belt and tighten if necessary (Chapter 16.3). Attention: Do not interchange the plug connections. Observe the wiring diagram. Restore the original cable routing. Connect the plug of the tilt assembly connecting cable to the main board (Main Controller Unit).
-
Page 70: Main Controller Unit
Column electric components 10.5 Main Controller Unit Attention: the Main Controller Unit assembly requires a serial number. Observe Chapter 1.9 when replacing the Main Controller Unit. Removal Prepare the operating table (Chapter 5). Disconnect the power supply on the operating table (Chapter 6.1). - Page 71 Column electric components Mount the 2 cable clips above the Main Controller Unit (1 screw each). Reattach any cable fastenings that have been removed. Guide the column cover upwards and mount it at the head and foot end of both guide column brackets (2 screws each). Return the flat conductor to its original mounting position.
-
Page 72: Running Gear Mechanical Parts
Running gear mechanical parts Running gear mechanical parts 11.1 Safety – Prior to performing any repair or maintenance work, disconnect the operating table from the external power supply. – Do not allow screws, nuts or other parts to fall into the operating table. -
Page 73: Running Gear Metal Cover
Running gear mechanical parts 11.2 Running gear metal cover Removal Prepare the operating table (Chapter 5). Disconnect the power supply on the operating table (Chapter 6.1). Remove the column cover (Chapter 9.2). Remove the tabletop (Chapter 7.3). Remove the bellows (Chapter 9.4). Loosen the running gear metal cover [1] (4 screws [2]). -
Page 74: Retractable Feet On The Wheel
Running gear mechanical parts 11.3 Retractable feet on the wheel Removal Prepare the operating table (Chapter 5). Disconnect the power supply on the operating table (Chapter 6.1). Turn over the operating table (Chapter 6.7). Remove the screw [2] on the frame (slot screwdriver). CAUTION! The spiral spring is tensioned and may unwind erratically when released. -
Page 75: Wheel
Running gear mechanical parts 11.4 Wheel Removal Prepare the operating table (Chapter 5). Disconnect the power supply on the operating table (Chapter 6.1). Turn over the operating table (Chapter 6.7). Remove the retractable foot [1]: a) Remove the screw [2] on the frame (slot screwdriver). b) CAUTION! The spiral spring is tensioned and may unwind erratically when released. -
Page 76: Wheel Suspension
Running gear mechanical parts 11.5 Wheel suspension Removal Prepare the operating table (Chapter 5). Disconnect the power supply on the operating table (Chapter 6.1). Turn over the operating table (Chapter 6.7). Remove the retractable foot [1] (Chapter 11.3). Remove the wheel [2] (Chapter 11.4). Remove the 3 securing rings [3] on the rod system (outside). -
Page 77: Emergency Release Lever
Running gear mechanical parts 11.6 Emergency release lever Removal Prepare the operating table (Chapter 5). Disconnect the power supply on the operating table (Chapter 6.1). Open the column cover on the running gear (Chapter 6.3). Loosen the running gear metal cover [1] (4 screws [2]). Push up the running gear metal cover [1] and fix in the upper position. -
Page 78: Emergency Release For Jack-Up Unit
Running gear mechanical parts 11.7 Emergency release for jack-up unit Removal Prepare the operating table (Chapter 5). Release the parking brake of the operating table. Disconnect the power supply on the operating table (Chapter 6.1). Open the column cover on the running gear (Chapter 6.3). Loosen the running gear metal cover [1] (4 screws [2]). -
Page 79: Locking Bolt/Locking Bolt Hinge Jack-Up Unit
Running gear mechanical parts 11.8 Locking bolt/locking bolt hinge jack-up unit Removal Prepare the operating table (Chapter 5). Release the parking brake of the operating table. Disconnect the power supply on the operating table (Chapter 6.1). Open the column cover on the running gear (Chapter 6.3). Loosen the running gear metal cover [1] (4 screws [2]). -
Page 80: Running Gear Electric Components
Running gear electric components Running gear electric components 12.1 Safety – Prior to performing any repair or maintenance work, disconnect the operating table from the external power supply. – Do not allow screws, nuts or other parts to fall into the operating table. -
Page 81: Jack-Up Unit Linear Drive
Running gear electric components 12.2 Jack-up unit linear drive Attention: The jack-up unit linear drive requires a serial number. Observe Chapter 1.9 when replacing the jack-up unit linear drive. Removal Prepare the operating table (Chapter 5). Release the parking brake of the operating table or if necessary operate the emergency release of the operating table running gear. -
Page 82: Limit Switch For Jack-Up Unit (W703)
Running gear electric components 12.3 Limit switch for jack-up unit (W703) Removal Prepare the operating table (Chapter 5). Release the parking brake of the operating table. Disconnect the power supply on the operating table (Chapter 6.1). Open the column cover on the running gear (Chapter 6.3). Loosen the running gear metal cover [1] (4 screws [2]). -
Page 83: Power Supply Unit
Running gear electric components 12.4 Power supply unit Attention: the power supply unit requires a serial number. Observe Chapter 1.9 when replacing the power supply unit. Removal Prepare the operating table (Chapter 5). Disconnect the power supply on the operating table (Chapter 6.1). -
Page 84: Mains Bushing
Running gear electric components 12.5 Mains bushing Removal Prepare the operating table (Chapter 5). Disconnect the power supply on the operating table (Chapter 6.1). Raise the cover [1] from the mains socket on the running gear and remove the 2 screws [3] on the mains socket [2]. Carefully remove the mains socket [2] from the housing until the connections are accessible. -
Page 85: Fuses For Mains Input
Running gear electric components 12.6 Fuses for mains input Removal Prepare the operating table (Chapter 5). Disconnect the power supply on the operating table (Chapter 6.1). Lift the lid [1] of the mains socket on the running gear. Pull out the fuse shaft [2], fold out and remove the fuse [3]. Check the fuses individually and replace if necessary. -
Page 86: Voltage Selector Circuit Board
Running gear electric components 12.7 Voltage selector circuit board Attention: the voltage selector circuit board requires a serial number. Observe Chapter 1.9 when replacing the circuit board. Removal Prepare the operating table (Chapter 5). Disconnect the power supply on the operating table (Chapter 6.1). -
Page 87: Main Switch
Running gear electric components 12.8 Main Switch Removal Prepare the operating table (Chapter 5). Disconnect the power supply on the operating table (Chapter 6.1). Open the column cover on the running gear (Chapter 6.3). Loosen the running gear metal cover [1] (4 screws [2]). Push up the running gear metal cover [1] and fix in the upper position. -
Page 88: Transformer
Running gear electric components 12.9 Transformer Attention: the transformer requires a serial number. Observe Chapter 1.9 when replacing the transformer. Removal Prepare the operating table (Chapter 5). Disconnect the power supply on the operating table (Chapter 6.1). Open the column cover on the running gear (Chapter 6.3). Loosen the running gear metal cover [1] (4 screws [2]). -
Page 89: Switching Relay Transformer
Running gear electric components 12.10 Switching relay transformer Removal Prepare the operating table (Chapter 5). Disconnect the power supply on the operating table (Chapter 6.1). Open the column cover on the running gear (Chapter 6.3). Loosen the running gear metal cover [1] (4 screws [2]). Push up the running gear metal cover [1] and fix in the upper position. -
Page 90: Battery Fuses
Running gear electric components 12.11 Battery fuses Removal Prepare the operating table (Chapter 5). Disconnect the power supply on the operating table (Chapter 6.1). Open the column cover on the running gear (Chapter 6.3). Loosen the running gear metal cover [1] (4 screws [2]). Push up the running gear metal cover [1] and fix in the upper position. -
Page 91: Battery
Running gear electric components 12.12 Battery Removal Prepare the operating table (Chapter 5). Disconnect the power supply on the operating table (Chapter 6.1). Open the column cover on the running gear (Chapter 6.3). Loosen the running gear metal cover [1] (4 screws [2]). Push up the running gear metal cover [1] and fix in the upper position. -
Page 92: Tabletop Cables
Tabletop cables Tabletop cables 13.1 Safety – Prior to performing any repair or maintenance work, disconnect the operating table from the external power supply. – Do not allow screws, nuts or other parts to fall into the operating table. Loose parts could damage other components or cables when adjustments are made to the operating table. -
Page 93: Tabletop Cables
Tabletop cables 13.2 Tabletop cables Removal Prepare the operating table (Chapter 5). Disconnect the power supply on the operating table (Chapter 6.1). Remove the pad plate from the seat section (Chapter 7.2). Attention: Leave the pad plate on the back section attached so that the adjustment of the struts is maintained. -
Page 94: Leg Section Hinge Sensor (W503/W506)
Tabletop cables 13.3 Leg section hinge sensor (W503/W506) Removal Prepare the operating table (Chapter 5). Disconnect the power supply on the operating table (Chapter 6.1). Remove the pad plate from the seat section (Chapter 7.2). Attention: Leave the pad plate on the back section attached so that the adjustment of the struts is maintained. - Page 95 Tabletop cables Mount the sensor leg section hinge and the retaining plate (1 screw). Mount the cable clip in the seat section bar through the opening (1 screw). Apply new self-adhesive protective sheets to the openings on the strut. Mount the pad plate onto the strut (Chapter 7.2). Put the pad in place.
-
Page 96: Back Section Hinge Sensor (W502/W507)
Tabletop cables 13.4 Back section hinge sensor (W502/W507) Removal Prepare the operating table (Chapter 5). Disconnect the power supply on the operating table (Chapter 6.1). Remove the pad plate from the seat section (Chapter 7.2). Attention: Leave the pad plate on the back section attached so that the adjustment of the struts is maintained. - Page 97 Tabletop cables Mount the cable clip in the seat section bar through the opening (1 screw). Apply new self-adhesive protective sheets to the openings on the strut. Mount the pad plate onto the strut (Chapter 7.2). Put the pad in place. Connect the power supply to the operating table (Chapter 6.2).
-
Page 98: Replace The Operating Sensor (W508)
Tabletop cables 13.5 Replace the operating sensor (W508) Removal Prepare the operating table (Chapter 5). Disconnect the power supply on the operating table (Chapter 6.1). Remove the pad plate from the seat section (Chapter 7.2). Attention: Leave the pad plate on the back section attached so that the adjustment of the struts is maintained. - Page 99 Tabletop cables Switch on the operating table using the switch at the running gear. Mount the bellows with the head-end and foot-end cover plates on the column head. Ensure that the cover plates fit underneath the column head cover. Move the longitudinal slide of the operating tabletop as necessary, so that the lateral screws on the cover plates are accessible.
-
Page 100: Hook Sensor (W520)
Tabletop cables 13.6 Hook sensor (W520) Removal Prepare the operating table (Chapter 5). Disconnect the power supply on the operating table (Chapter 6.1). Remove the pad plate from the seat section (Chapter 7.2). Attention: Leave the pad plate on the back section attached so that the adjustment of the struts is maintained. - Page 101 Tabletop cables Assembly Remove any adhesive residue from the outer coupling plate and degrease. Restore the original cable routing. Insert the sensor into the outer coupling plate and secure with the threaded pin. The sensor must end flush with the coupling plate.
-
Page 102: Column Cables
Column cables Column cables 14.1 Safety – Prior to performing any repair or maintenance work, disconnect the operating table from the external power supply. – Do not allow screws, nuts or other parts to fall into the operating table. Loose parts could damage other components or cables when adjustments are made to the operating table. -
Page 103: Column Cables
Column cables 14.2 Column cables Removal Prepare the operating table (Chapter 5). Disconnect the power supply on the operating table (Chapter 6.1). Open the column top and guide the column cover downwards (Chapter 6.5). Note the cable positions and cable fastenings. Remove the cable fastenings along the cable. -
Page 104: Running Gear Cables
Running gear cables Running gear cables 15.1 Safety – Prior to performing any repair or maintenance work, disconnect the operating table from the external power supply. – Do not allow screws, nuts or other parts to fall into the operating table. Loose parts could damage other components or cables when adjustments are made to the operating table. -
Page 105: Running Gear Cables
Running gear cables 15.2 Running gear cables Removal Prepare the operating table (Chapter 5). Disconnect the power supply on the operating table (Chapter 6.1). Open the column cover on the running gear (Chapter 6.3). Loosen the running gear metal cover [1] (4 screws [2]). Push up the running gear metal cover [1] and fix in the upper position. -
Page 106: Adjustments
Adjustments Adjustments 16.1 Align the struts lengthwise The struts are joined together by pad plates and the transverse web. After loosening or removing both pad plates, the struts can be moved to a certain extent in relation to each other. If possible, loosen and remove a maximum of 1 pad plates. -
Page 107: Align The Hinges
Adjustments 16.2 Align the hinges The two motors for the leg section hinge and the two motors for the back section hinge are connected by a cogged belt. Once the cogged belt or drive unit has been removed, the positions of the two associated hinges may deviate from one another. -
Page 108: Tightening Trendelenburg/Tilting Drive Belt
Control modules 16.3 Tightening Trendelenburg/tilting drive belt Remove the cogged belt cover (3 screws). Release the motor mount [1] (4 screws [2]) and push slightly in the direction of the spindle [3]. Press the spindle and motor apart using an assembly lever. Using the spring scale [4], press directly onto the cogged belt [5] until the cogged belt is touching the first screw on the motor assembly plate. -
Page 109: Maintenance
Maintenance Maintenance Maintenance must be performed using a maintenance log and taking the list of parts subject to wear and the lubrication schedule into account. Maintenance log The “maintenance log” can be downloaded from our online information system. After completing the maintenance, a copy of the fully completed log must be sent to the Technical Customer Service by fax or e-mail. -
Page 110: List Of Parts Subject To Wear
Maintenance Visual inspection of adhesive labels for any damage and whether they are easy to read Verification of column covers Verification of bellows Verification of all seals and cogged belts in the operating table Verification of all mechanical coupling elements 19.1 List of parts subject to wear 1All wearing parts are to be changed as part of the regular... -
Page 111: Troubleshooting
Troubleshooting Troubleshooting Error Possible cause No operation possible via the The batteries are flat. Connect the power supply from column keyboard. Only ready for the mains. use display [a5] on the column The batteries are defective. Replace the batteries. keypad lights up. The column keypad is not Check and establish cable correctly connected to the main... - Page 112 Troubleshooting Error Possible cause No acoustic signals sound. The main board (Main Controller Replace the Main Controller Unit. Unit) is defective. The operating table cannot be The mains power cable is Check the mains power cable for charged. The Ready display [a5] defective.
-
Page 113: Functional Overview Of Electrical Components
Functional overview of electrical components Functional overview of electrical components Component Function Tabletop PCBA distributor board – Provides the interfaces for communicating with the operating table system – Connection for switches of the longitudinal slide – Connect the sensors of the leg section hinge –... - Page 114 Functional overview of electrical components Component Function Column Main board (Main – Connection basis for edging, Trendelenburg, longitudinal Controller Unit) slide and lift motors – Connection basis for motors for the leg section hinge, back section hinge and brake – Connection for switches from lift motor and brake –...
- Page 115 Functional overview of electrical components Component Function Transformer – Transforms the power supply – Adjust the transformer to the power supply with a specific configuration Switching relay – Electronic relay to switch transformers transformer – Switches the transformer without an inrush current 4990851_002_00 –...
-
Page 116: Wiring Diagram
Wiring diagram Wiring diagram 4990851_002_00 – 2082262 – 2022-01-10... - Page 117 TABLE TOP PCBA MAT:2081702 W704 WHT 0V GNR 10 0V YEL 115V RED 127V BLU 0 V BRN 100V GRY 11 5V BLK 127V W720 W721...
- Page 119 This page is left intentionally blank.
- Page 120 4990851_002_00 – 2082262 – 2022-01-10...
Need help?
Do you have a question about the PST 300+ and is the answer not in the manual?
Questions and answers