Table of Contents
Advertisement
Quick Links
Advertisement
Table of Contents

Related Manuals for Hillrom Centrella Smart+ Bed


Summary of Contents for Hillrom Centrella Smart+ Bed
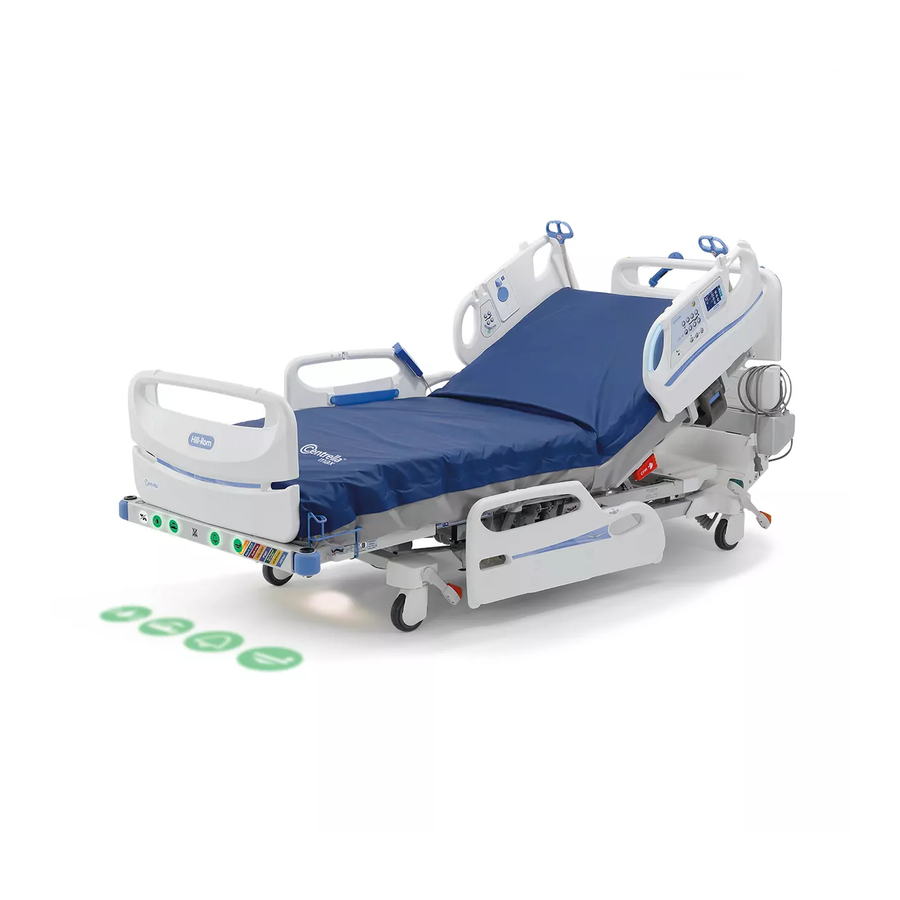
- Page 1 Centrella Smart+ Bed ® Instructions for Use Product No. P7900 193587 REV 10...
-
Page 3: Quick View™ List Of Bed Features
QUICK VIEW™ LIST OF BED FEATURES Item Feature Page Item Feature Page Transport/push handle (optional) 124 Drainage bag holder Line Managers SafeView®+ Alerts indicator with floor projections (optional) Graphical Caregiver Interface Corner bumpers and equipment (GCI)® Control sockets Caregiver control panel Footboard cord storage Headboard cord storage Patient storage area... - Page 4 To learn more about FOSS that may be used in this product, please visit our FOSS website at hillrom.com/opensource. Where required, a copy of FOSS source code is available on our FOSS website...
- Page 5 Wex-Cide™ is a trademark of Wexford Labs, Inc. The UL logo is a registered trademark of Underwriter’s Laboratories, Inc. Auto Contour™, FlexAfoot™, Hillrom™, Quick View™, and WallGuard™ are trademarks of Hill-Rom Services, Inc. Boost®, Centrella®, Dining Chair®, Experience Pod®, Graphical Caregiver Interface (GCI)®, IntelliDrive®, IllumiGuide®, Line-of-Site®, Microclimate Management®, NaviCare®, Obstacle Detect®, Point-Of-Care ®,...
- Page 6 NOTES: Centrella® Smart+ Bed Instructions for Use (193587 REV 10)
-
Page 7: Table Of Contents
Table of Contents Quick View™ List of Bed Features..............i Intended Use . - Page 8 Table of Contents Drainage Bag Holders ..............17 Power Cord .
- Page 9 Table of Contents Head Up/Down ............... 38 Knee Up/Down.
- Page 10 Table of Contents Required Bed Position to Zero the Scale..........58 Zero (New Patient) .
- Page 11 Table of Contents GCI Symbols—HR/RR Monitoring System powered by EarlySense ..... . . 84 HR/RR Monitoring System powered by EarlySense Specification ......84 HR and RR Monitoring System powered by EarlySense Safety Information.
- Page 12 Table of Contents X-Ray Sleeve ............... . 110 Mattress Removal .
- Page 13 Table of Contents Decommissioning and Disposal Instructions..........132 Service Calls .
- Page 14 Table of Contents NOTES: Centrella® Smart+ Bed Instructions for Use (193587 REV 10)
-
Page 15: Intended Use
Intended Use INTENDED USE The Centrella® Smart+ Bed is intended for use in healthcare environments as a patient support system to prevent and/or treat pressure injuries. It is intended for a broad patient population as determined appropriate by the caregiver or institution. It is intended for patient populations weighing at least 70 lb (32 kg) and is capable of supporting patients up to 500 lb (227 kg). - Page 16 Warning—Air pressure in the Centrella® max mattress is controlled automatically and may adjust without notice. Use care when you perform medical procedures on the patient. • Warning—Only use an approved Hillrom™ mattress on the Centrella® Smart+ Bed or a risk of patient entrapment could occur. •...
- Page 17 Safety Information WARNING: (Warnings continued) Obey all warnings throughout the manual. Failure to do so could cause injury and/or equipment damage: • Warning—Do not transfer the patient from one bed frame to another using the mattress with a patient on it. •...
-
Page 18: Symbols
Symbols SYMBOLS This instructions for use contains different typefaces and symbols to make the content easier to read and understand: • Standard text—used for regular data. • Boldface text—emphasizes a word or phrase. • NOTE:—sets apart special data or important instruction clarification. •... -
Page 19: Product Symbols
Symbols RODUCT YMBOLS These symbols may or may not be on your configuration of the bed. For more information about a feature, go to the page number shown for the feature in the tables below. NOTE: For product symbols for the pro+ mattress, see the pro+ Mattress Instructions for Use (209196). Caregiver Control Panel Item Description... -
Page 20: Graphical Caregiver Interface (Gci)® Control (Touchscreen)
Symbols Graphical Caregiver Interface (GCI)® Control (Touchscreen) Item Description Page Item Description Page Help (?) control HR/RR Menu control Service required indicator Settings/Preferences Menu control Bed battery charge indicator MCM control (only on beds with a pro+ mattress) NaviCare® System Connec- Chair control tion (optional) Location control (optional) -
Page 21: Other Touchscreen Symbols
Symbols Other Touchscreen Symbols Symbol Description Page Symbol Description Page Position Mode Bed Exit Turn Assist—patient right Alert—ON indicator indicator Exiting Mode Bed Exit Alert— Turn Assist—patient left ON indicator indicator Out of Bed Mode Bed Exit Max Inflate status indicator Alert—ON indicator (only on Centrella®... -
Page 22: Patient Pendant (Handheld Remote) Option
Symbols Symbol Description Page Symbol Description Page MCM—OFF indicator for Room associated indicator beds equipped with the pro+ (home and status screens)— mattress (integrated) beds with Bedside Associa- tion WiFi connected indicator— Room associated indicator beds with Bedside Associa- (bed/patient locate screen)— tion beds with Bedside Associa- tion... -
Page 23: Siderails
Symbols Item Description Page NOTE: https://yourbed.hill-rom.com A patient can visit to learn more about this bed. Symbol Description Symbol Description Siderails Hip Position Locator Head angle (page 21) (page 21) Trendelen- USB charging port burg/Reverse Trende- (page 24) lenburg angle (page Bed Frame CPR control label for Identifies patient... - Page 24 Symbols Symbol Description Symbol Description Identifies battery Identifies mains fuse installation location Electrical shock warn- Electrical connection ing: unplug all power location cords before service Turn Assist warning Set Foley Limit warn- (page 108) ing (page 72) Mattress install Warning: no equip- sequence ment storage Mattress connection...
-
Page 25: Foot-End Safeview®+ Alerts Option
Symbols Symbol Description Symbol Description Foot-End SafeView®+ Alerts Option Bed Exit Alert—OFF Siderail position indi- indicator (page 26) cator (page 26) Bed Exit Alert—ON or Bed in the lowest posi- SILENCE indicator tion indicator (page (page 26) Heart rate or Respira- WatchCare®... -
Page 26: Alarm, Alerts, And Information Indicators
Alarm, Alerts, and Information Indicators Symbol Description Symbol Description ATTENTION: Consult MEDICAL—GENERAL accompanying docu- MEDICAL EQUIPMENT ments AS TO ELECTRICAL SHOCK, FIRE AND MECHANICAL HAZ- ARDS ONLY IN ACCOR- DANCE WITH AAMI ES60601-1, IEC 60601- 1, IEC 60601-2-52, CAN/CSA C22.2 NO 60601-1 AND IEC 60601-2-49 Manufacturer... -
Page 27: Low Priority Alarm
Alarm, Alerts, and Information Indicators RIORITY LARM If the HR and RR Monitoring System option is active, a two tone alarm (e - c) will sound every 3 seconds to indicate that a HR or RR alarm is active and a priority nurse call is sent to the nurses station (for beds equipped and connected to a Nurse Call System). -
Page 28: Brake Not Set Alert
Alarm, Alerts, and Information Indicators RAKE LERT The Brake Not Set alert is a visual and audible alert. When the bed is plugged into AC power, and you release the brake, the alert indicator on the caregiver control panel will come on, an audible alert will sound, and a message will show on the touchscreen. -
Page 29: Powered Transport Battery Charge Indicator
Alarm, Alerts, and Information Indicators NOTE: The battery does not support these: Patient controls, Auxiliary Outlet, Scale, Bed Exit Alert System, HR and RR monitoring, or the air support system. The battery stays engaged for 1 minute after the last control is pressed, then goes into a sleep mode. If the Battery Indicator changes from Charged to Low consistently within four hours of being unplugged from AC power, replace the battery. -
Page 30: Bed Frame Features
Bed Frame Features Beds equipped with powered transport have a Transport Pod on the right-side push handle, at the head end of the bed. The battery charge indicator on the Transport Pod shows the status of the battery: • On = The battery is charged. •... -
Page 31: Patient Restraints And Drainage Bag Holders
Bed Frame Features Activation of the CPR mode affects these unit alerts and functions: • If the Bed Exit Alert and/or <30° Head Angle Limit are armed prior to the CPR transition, they will be canceled. • Controls that were locked out will be unlocked. ATIENT ESTRAINTS AND RAINAGE... -
Page 32: Power Cord
Bed Frame Features • Caution—When you use the Chair control, lower the bed, or use the Reverse Trendelenburg control, make sure that the drainage bags do not touch the floor. Remove them if necessary. Follow facility protocol if the drainage bags touch the floor. The bed is equipped with a drainage bag holder on each side of the bed at the foot end. -
Page 33: Brake And Steer Controls
Bed Frame Features RAKE AND TEER ONTROLS WARNING: To help prevent injury and/or equipment damage, obey these warnings: • Warning—Unless you are to transport a patient, always set the brakes when the unit is occupied. Make sure the brakes are set before any patient transfer on to or off the bed. Failure to do so may cause injury or equipment damage. -
Page 34: Headboard
Bed Frame Features When the unit is connected to AC power, and you release the brake, these will occur to let you know that the brake is not set: • The Brake Not Set alert will sound. • The alert indicator on the caregiver control panel will show. -
Page 35: Equipment Sockets
Bed Frame Features To Install Align the footboard pins with the sockets in the frame and then lower the footboard into the sockets. Push the footboard down until the bottom rests on the frame. QUIPMENT OCKETS There are four equipment sockets for the attachment of accessories. -
Page 36: Head And Intermediate Siderails
Bed Frame Features • The Line-of-Site® Trendelenburg/Reverse Trendelenburg Angle indicators on the intermediate siderails give an estimated degree of the bed’s angle. EAD AND NTERMEDIATE IDERAILS WARNING: To help prevent serious injury and/or death, obey these warnings: • Warning—Evaluate patients for entrapment and fall risk according to facility protocol, and monitor patients appropriately. -
Page 37: Illumiguide® Siderail Handgrip Option
Bed Frame Features To Lower a Siderail WARNING: Warning—When the bed is in its lowest position, make sure that your feet are out from under the siderail before you lower the siderail. Otherwise, injury could occur. Lift up on the recessed blue release handle that is on the lower part of the main siderail support. -
Page 38: Line Manager
Bed Frame Features Line Manager WARNING: Warning—Make sure that the lines are not pinched or kinked and that there is sufficient slack in the lines for bed articulations and patient movement. Failure to do so could cause injury or equipment damage. -
Page 39: Urinal Holder
Bed Frame Features Urinal Holder Each intermediate siderail has an integrated Urinal Holder on the top of the siderail. Patient Storage Patient storage is provided on both intermediate siderails. OTION CTIVATED IGHT IGHT The night light is on the base frame, at the foot end. The light is on when the bed is plugged into AC power. -
Page 40: Safeview®+ Alerts Option
Bed Frame Features ®+ A LERTS PTION Beds equipped with SafeView®+ Alerts indicators show the bed status at the foot end of the bed for these alerts: fewer siderails up than the set protocol, Bed Exit Alert, Bed in Lowest position, and HR and RR Alert. -
Page 41: Experience Pod® Device (Overhead Arm) (P7926A And P7926A07) Option
Bed Frame Features WatchCare® Alert Status—On A green WatchCare® Alert indicator shows when the WatchCare® Incontinence Management System is On and a smart pad is present and is being monitored. The indicator will flash amber when an incontinence event occurs. If the indicator is solid white, the incontinence system is On, but the reader does not detect any smart pads on the bed. - Page 42 Bed Frame Features WARNING: To help prevent injury and/or equipment damage, obey these warnings: • Warning—Do not exceed the 1 kg (2.2 lb) load capacity of the Overhead Arm. • Warning—Do not remove or install the Overhead Arm assembly while it is in a position over a patient.
- Page 43 Bed Frame Features WARNING: Warning—Make sure that the arm is correctly attached in step 4. Otherwise, it may fall. Injury or equipment damage could occur. 4. Rotate the base tube until the plunger locks into the accessory socket. You will hear a click when the plunger locks into position.
- Page 44 Bed Frame Features 3. Put the Experience Pod® Device in the transport position as shown. 4. Disconnect the communication cable from the bed. 5. Pull straight up on the Experience Pod® Device to remove it from the accessory socket. For the P7926A07, from underneath the bed frame, remove the retaining ring and pin from the base tube.
-
Page 45: Auxiliary Outlet Option
Bed Frame Features 6. To store the Experience Pod® Device, turn the device over and safely stand it up against a wall or put the device in a storage location. UXILIARY UTLET PTION WARNING: To help prevent injury and/or equipment damage, obey these warnings: •... -
Page 46: Point-Of-Care® Bed Controls
Point-Of-Care® Bed Controls POINT-OF-CARE® BED CONTROLS WARNING: To help prevent injury and/or equipment damage, obey these warnings: • Warning—Mechanical parts under the bed pose a risk of serious injury. Exercise control over visitors, especially children, to keep people out from under the bed and prevent unauthorized access to the bed articulation controls. -
Page 47: Bed Exit Alert System
Point-Of-Care® Bed Controls Bed Exit Alert System To Activate the Bed Exit Alert System The Bed Exit Alert system is activated through the touchscreen, see “Bed Exit Alert System” on page When a Bed Exit mode is armed, the Bed Exit indicator will be green. When the system is armed and it detects an alert condition for the Bed Exit mode setting, the following occur even if the patient returns to the bed: •... -
Page 48: Bed Up/Down
Point-Of-Care® Bed Controls Automatically Locks Out these functions: Locking Out: Boost Trendelenburg Reverse Bed Flat Chair <30° Stand Trendelenburg and level Limit Assist Head Up/Down X Knee Up/Down Foot Up/Down Bed Up/Down Foot Lon- ger/Shorter Extend/Retract To Lock—press and hold the Lockout control, then press the Up or Down control of the bed function or the Foot Longer/Shorter control on the touchscreen. -
Page 49: Obstacle Detect® System
Point-Of-Care® Bed Controls NOTES: • When the bed reaches its lowest position, you will hear a single beep and the Bed in Lowest Position indicator will be green. • The Bed up/down and head up/down controls can be used at the same time. Obstacle Detect®... -
Page 50: Knee Up/Down
Point-Of-Care® Bed Controls Knee Up/Down The caregiver can raise or lower the knee section. The knee section has a maximum travel of 30°. To raise—press and hold the Knee Up control until the bed is at the desired position. To lower—press and hold the Knee Down control until the bed is at the desired position. -
Page 51: Boost® Position System
Point-Of-Care® Bed Controls Reverse Trendelenburg—press and hold the Reverse Trendelenburg control until the head end of the bed raises relative to the foot end to the desired angle. Reverse Trendelenburg NOTES: • If the Foley Position Limit is set, it will limit the degree of Reverse Trendelenburg. •... -
Page 52: Patient Controls
Point-Of-Care® Bed Controls ATIENT ONTROLS The patient controls are on the patient side of the head siderails. The standard patient controls include: Nurse Call, Head Up/Down, and Knee Up/Down. There are head of bed (HOB) angle indicators that patients can use to help them comply with HOB orders. -
Page 53: Knee Up/Down
Point-Of-Care® Bed Controls Knee Up/Down To raise—press and hold the Knee Up control until the bed is at the desired height. To lower—press and hold the Knee Down control until the bed is at the desired height. Auto Contour™ Feature The Auto Contour™... - Page 54 Point-Of-Care® Bed Controls • Room Light—turns the room light off and on. • Reading Light—turns the reading light off and on. • Television Control—turns the television on and off. The volume and channel are controlled by the Volume and Channel controls. •...
-
Page 55: Sidecom® Communication System
SideCom® Communication System SIDECOM® COMMUNICATION SYSTEM The SideCom® Communication System provides a control for Nurse Call and other entertainment features. The SideCom® Communication System connector is at the head end of the bed below the headboard. URSE ONTROL There is a Nurse Call control on the caregiver control panel, the patient controls, and the patient pendant (if installed). -
Page 56: Wireless And Bed Location Indicators On The Touchscreen
SideCom® Communication System The Wireless Connectivity module permits bed and mattress data to be sent to a hospital’s information system without a communication cable; the module does not communicate nurse call information. The module has a Location feature that identifies the location of the bed when it is in a facility that has a real-time location system (RTLS) installed. -
Page 57: Asset Tag
(refer to “Wireless Connectivity Option” on page 41). NAVICARE® SYSTEM The NaviCare® System is an enterprise system that connects and monitors Hillrom™ beds and mattresses. The system sends bed and mattress data to the network applications for caregivers to view and receive alerts. - Page 58 Graphical Caregiver Interface (GCI)® Controls Home Screen Item Description Item Description Status indicators Menu list Information indicators Bed controls To Activate—touch the screen. The Home screen will show. The screen will dim after 1 minute of no activity. After 3 minutes of no activity, the status screen shows (see “Status Screen”...
-
Page 59: Use The Touchscreen Menu Controls
Graphical Caregiver Interface (GCI)® Controls The color on the upper border of the screen indicates these: • Orange = warning • Yellow = caution • Blue = instructions or information • Green = task was successful NOTE: If a triple beep sounds, look at the touchscreen and follow the on-screen instructions. SE THE OUCHSCREEN ONTROLS... -
Page 60: Help (?) Menu
Graphical Caregiver Interface (GCI)® Controls To see more detail associated with the Status indicators that are on the left side of the screen, touch the applicable indicator. (?) M Through the Help menu control, you can access additional instruction for many of the bed functions and features. -
Page 61: Stand Assist
Graphical Caregiver Interface (GCI)® Controls CAUTION: Caution—Do not transport a patient with the bed in the Dining Chair® position. Equipment damage could occur. Caution—When you use the Chair control, lower the bed, or use the Reverse Trendelenburg control, make sure that the drainage bags do not touch the floor. Remove them if necessary. Follow facility protocol if the drainage bags touch the floor. -
Page 62: Flexafoot™ Bed Length Adjustment
Graphical Caregiver Interface (GCI)® Controls To activate—press and hold the Bed Flat and Level control until the system stops its articulations. You will hear a single beep when the bed is at its flat position. NOTE: If any frame function is locked, the Bed Flat and Level control will not operate, an audible alert will sound, and a message will show on the touchscreen. -
Page 63: To Silence The Bed Exit Alert Without Deactivating The System
Graphical Caregiver Interface (GCI)® Controls 3. Press one of these modes: • Changes position. • Moves towards edge. • Has left the bed. When the system beeps one time and the Bed Exit On indicator shows on the Home screen, the system is armed. To Deactivate the Alert 1. - Page 64 Graphical Caregiver Interface (GCI)® Controls NOTES: • For the Position and Exiting modes, center the patient in the bed before you resume the Bed Exit monitoring. • For the Out of bed mode, the bed will resume the Bed Exit monitoring when the patient gets in the bed.
-
Page 65: Scale
Graphical Caregiver Interface (GCI)® Controls CALE There are two scale systems available for the bed. Scale System A has an operating range of 0 kg to 227 kg (0 lb to 500 lb). Scale System B (NAWI Compliant EN 45501) has an operating range of 10 kg to 250 kg (22 lb to 551 lb). -
Page 66: To Zero The Scale
Graphical Caregiver Interface (GCI)® Controls • Zero scale Reminder and patient Weigh Instructions screens will show to instruct you to check items to be included in the scale reading. To Zero the Scale Required Bed Position to Zero the Scale The required bed position is as follows: •... -
Page 67: New Patient (Zero)
Graphical Caregiver Interface (GCI)® Controls 7. Press Zero. New Patient (Zero) Use New Patient zero every time a new patient is admitted to the bed. The New Patient control will— • Clear the previous and current weight history • Zero the scale •... -
Page 68: Re-Zero (Same Patient)
Graphical Caregiver Interface (GCI)® Controls NOTES: • If the “Not In Required Position” screen shows, press the Adjust Bed Button on the touchscreen. • If the “Difference from Last Zero” caution screen shows, re- check the bed for items that should be included during the zero. -
Page 69: To Weigh The Patient
Graphical Caregiver Interface (GCI)® Controls 4. A single beep will sound and the screen will show that the Re-Zero is complete. To Weigh the Patient Required Bed Position to Weigh the Patient The required bed position is as follows: • Bed level •... - Page 70 Graphical Caregiver Interface (GCI)® Controls 5. Make sure not to touch the bed as the scale weighs the patient. NOTE: If the bed is in the required position but not in the best position to weigh, the Not in Optimal Position screen may show.
-
Page 71: Scale "A" Specifications
Graphical Caregiver Interface (GCI)® Controls When the weight is saved, a beep will sound and a confirmation screen will show. Scale “A” Specifications Scale accuracy: 0.5 kg (1.1 lb) or 0.5% of the patient weight, whichever is greater, when the bed is in the required bed position. -
Page 72: To Zero/Tare The Scale
Graphical Caregiver Interface (GCI)® Controls If the scale reading shows dashes, the scale is unable to weigh the patient. This may occur when— • The bed weighs below -0.25 kg. • The bed weighs above 254.5 kg. • The measured weight is unstable. If the measured weight is unstable, make sure the patient and bed are not moving. -
Page 73: Zero (New Patient)
Graphical Caregiver Interface (GCI)® Controls 3. Put all standard linens, blankets, pillows, and the patient pendant on the bed. A list of these items posted near the bed may be helpful for future reference. 4. The scale is very sensitive. Make sure the bed is not touching anything that could affect the patient weight (other beds or carts, headwall, miscellaneous drainage lines, etc.). -
Page 74: Re-Zero (Same Patient)
Graphical Caregiver Interface (GCI)® Controls • Info will show what bed features will be reset if you continue to Zero. 3. The touchscreen will show that the bed is zeroing. Do not touch the bed while the bed zeroes. NOTE: If the “Not In Required Position”... -
Page 75: (Change Zero Items)
Graphical Caregiver Interface (GCI)® Controls 3. Press Re-Zero. 4. A reminder message shows. Follow the on-screen instructions, and press Continue. NOTE: Cancel will return the touchscreen to the previous screen. 5. The touchscreen will show that the bed is zeroing/taring. Do not touch the bed while the bed zeroes/tares. - Page 76 Graphical Caregiver Interface (GCI)® Controls 1. Press the Scale menu control. 2. Press Zero. 3. Press +/-. 4. Follow the on-screen instructions, and press Weigh. 5. After the bed is done weighing, add or remove the items, and press Continue. 6.
-
Page 77: To Weigh The Patient
Graphical Caregiver Interface (GCI)® Controls To Weigh the Patient Optimum Bed Position to Weigh the Patient The optimum bed position is as follows: • The bed in the highest position. If the bed is not in the optimum bed position to weigh the patient, a Not in Optimum Position screen will show on the touchscreen. -
Page 78: Scale "B" Specifications
Graphical Caregiver Interface (GCI)® Controls • The headboard and devices mounted to the head end of the bed will not be included in the patient’s weight. • Cancel will return the touchscreen to the previous screen. 6. Make sure not to touch the bed as the scale weighs the patient. 7. -
Page 79: To Troubleshoot Scale Messages
Graphical Caregiver Interface (GCI)® Controls The maximum scale capacity is 250 kg; however, the maximum patient weight for the bed is 227 kg. To Troubleshoot Scale Messages Weight Limit Issue (weigh problem)—this message shows when the scale system can not weigh because the weight is more than 500 lb (227 kg). - Page 80 Graphical Caregiver Interface (GCI)® Controls Not in Optimum Position (Scale “B”)—this message shows when the bed is not in the optimum position to weigh. Press the Hold to Adjust control on the touchscreen, or use the caregiver or patient controls to adjust the bed to the optimum position.
-
Page 81: Settings/Preferences
Graphical Caregiver Interface (GCI)® Controls ETTINGS REFERENCES Through the Settings menu control, you can— • Set these bed features: SafeView®+ Alerts option Floor Projections, Siderail Lights, Siderail Protocol, USB Charging Port, Voice Alerts, and Mattress Features. • Adjust the touchscreen brightness. •... -
Page 82: Illumiguide® Siderail Handgrip (Blue Light Only)-On/Off
Graphical Caregiver Interface (GCI)® Controls IllumiGuide® Siderail Handgrip (blue light only)—ON/OFF Beds equipped with the IllumiGuide® siderail handgrip allow the patient to easily find the grip location on the siderail when the patient exits the bed. The light will stay on for 15 minutes after the patient exits the bed and 2 minutes after the patient returns to the bed. -
Page 83: Usb Charging Port-On/Off
Graphical Caregiver Interface (GCI)® Controls 3. Press Rail Protocol. 4. Select the patient siderail protocol. A green check shows when the siderail is being monitored. 5. Press Accept. NOTE: Some rail combination settings may be unsafe for some patients. A message may show on the touchscreen to confirm your selection. -
Page 84: Voice Alerts
Graphical Caregiver Interface (GCI)® Controls Voice Alerts Beds equipped with the Voice Alerts feature provide audible messages through the siderail speakers to provide guidance to the patient or caregiver. You may select English, Spanish, or French for the voice alerts. For more information about Voice Alerts, see page 13. 1. -
Page 85: Mattress Features
Graphical Caregiver Interface (GCI)® Controls 5. Select the patient’s language, and then press Accept. Mattress Features Beds equipped with the pro+ mattress have the Microclimate Management® (MCM) feature. The MCM menu control can be visible or hidden from the Home screen menu. 1. -
Page 86: Screen Brightness
Graphical Caregiver Interface (GCI)® Controls Screen Brightness 1. Press the Settings menu control. 2. Press Brightness. 3. Press - to decrease the brightness, or press + to increase the brightness. 4. Press Accept. Foley Position Limit Beds equipped with Foley Position Limit restrict how much the foot section can lower to reduce the likelihood of a drainage bag touching the floor. -
Page 87: Adjust Time/Date
The Bedside Association feature permits the caregiver to associate the bed to a room and patient through WiFi. You must have the Hillrom™ Digital Health Gateway version 1.2 or greater for this feature to operate. This feature uses the facility’s electronic chart to associate a room and patient to the bed. -
Page 88: Set Up The Bed Association Through The Settings Menu
Graphical Caregiver Interface (GCI)® Controls The Room and Patient icons on the Home screen tell you the status of the association and also permits you to associate a room and patient to the bed. Room/Patient Home Screen Description Icons No room associated; no patient verified Room associated;... - Page 89 The Other Location control allows you to scroll through the available location levels. • You may see a “Retrieving data” screen as the bed gets the information from the Hillrom™ Digital Health Gateway. 5. One of two Bed Associated screens will show, depending on the facility’s preference. Do as applicable: •...
-
Page 90: Set Up The Bed Association Using The Room/Patient Icon
Location control allows you to scroll up and down through the levels. • You may see a “Retrieving data” screen as the bed gets the information from the Hillrom™ Digital Health Gateway. 2. After you select the room number, the bed will retrieve the room data, then associate the room to the bed. -
Page 91: Verify The Patient Identity
Graphical Caregiver Interface (GCI)® Controls Confirm the Room to Bed Association When a room is in the bed’s memory, a room number shows on the Patient Room control and you are asked where you are located— • Room number—press this control if the room number is correct. -
Page 92: Verify The Patient Identity When Zeroing The Scale
Graphical Caregiver Interface (GCI)® Controls At the Patient Identity screen, you have these options: • Yes—press this control if the patient identity shown is correct. The Home screen will show with the Room Associated and Patient Verified icons. • No—press this control if the patient identity shown on the screen is not correct. The Patient ID Issue screen will show to let you know that a different patient is assigned to the room through the Admit, Discharge, Transfer (ADT) system. -
Page 93: New Patient Assignment And Bedside Association
Graphical Caregiver Interface (GCI)® Controls – New Room—press this control to associate a different room to the bed. The Available rooms screen will show. See “Associate a Room to the Bed” on page 76. After you make the room selection, the zeroing process will continue. –... -
Page 94: Hr/Rr Monitoring And Bedside Association
Graphical Caregiver Interface (GCI)® Controls • Patient Identity not Verified—you will be asked where to save the weight. You have these options: – Bed—press this control if you want the weight saved to the bed only. The weighing process will continue. At the end of the weighing process, a confirmation screen will show “Current weight saved to bed.”... -
Page 95: Bedside Association Notes
Close to go to the Home screen. • If Bedside Association is On and the connection to the Hillrom™ Digital Health Gateway is lost, this screen will show. Press OK to go to the Home screen. -
Page 96: Heart And Respiration Rate Monitoring System Powered By Earlysense
Heart and Respiration Rate Monitoring System powered by EarlySense HEART AND RESPIRATION RATE MONITORING SYSTEM POWERED BY EARLYSENSE NTENDED The Hill-Rom® Heart and Respiration Rate Monitoring System powered by EarlySense is used with compatible bed system models and is intended for continuous measurement of respiration rate (RR) and heart rate (HR) in an automatic, contact-less manner. -
Page 97: Product Symbols
Heart and Respiration Rate Monitoring System powered by EarlySense Product Symbols Symbol Description Symbol Description Ground plug—only Electrical shock warn- use grounded plug ing: unplug all power outlets cords before service Transport warning (page 111) WARNING (yellow and HR/RR monitoring sen- black) sor—According to IEC 60529, rating for pro-... -
Page 98: Gci Symbols-Hr/Rr Monitoring System Powered By Earlysense
Heart and Respiration Rate Monitoring System powered by EarlySense GCI Symbols—HR/RR Monitoring System powered by EarlySense Symbol Description Page Symbol Description Page Heart Rate—ON Out of Room Alarm—ON indi- cator Respiration Rate—ON Out of Room Alarm—OFF indicator Heart Rate—OFF In-room Alarm—OFF indica- Respiration Rate—OFF In-room Alarm—ON indicator 99 Unstable signal... - Page 99 Heart and Respiration Rate Monitoring System powered by EarlySense • Contraindication—An explosive atmosphere or in the presence of flammable anesthetics or gases. WARNING: To prevent injury or equipment damage obey these warnings: • Warning—Read and understand all warnings on the unit itself prior to use with a patient. •...
- Page 100 Heart and Respiration Rate Monitoring System powered by EarlySense WARNING: (Warnings continued) To prevent injury and/or equipment damage obey these warnings: • Warning—The HR and RR Monitoring System powered by EarlySense is not intended for monitoring high risk situations where ECG monitoring is required. The most reliable method of patient monitoring combines close personal surveillance with correct operation of the monitoring equipment.
-
Page 101: Introduction
Heart and Respiration Rate Monitoring System powered by EarlySense NOTES: • The HR/RR Monitoring sensor must be replaced after three years of continuous use to make sure the system operates correctly. A notification will show on the GCI when it is time to replace the sensor. -
Page 102: Alarm, Alerts, And Information Indicators
Heart and Respiration Rate Monitoring System powered by EarlySense look at the HR and RR data over time, see “HR and RR Trends Screen” on page 95. The heart and respiration rate are shown in several screen views, see below. Home Screen Status Screen Trends Screen... -
Page 103: Activate The Trial Mode
Heart and Respiration Rate Monitoring System powered by EarlySense CTIVATE THE RIAL Hill-Rom offers a free 90-day trial of the HR and RR Monitoring System. When the 90-day trial has passed, the system will turn off or you can contact Hill-Rom for a licensed a activation code to continue to use the system. - Page 104 Heart and Respiration Rate Monitoring System powered by EarlySense 10. Follow the on-screen instructions, and press Exit when complete. 11. Press the Home menu control. The HR and RR symbols will show in the bed indicators section of the Home screen. NOTES: •...
-
Page 105: Activate The Licensed Mode
Heart and Respiration Rate Monitoring System powered by EarlySense CTIVATE THE ICENSED HR and RR Monitoring must be activated prior to use. Contact Hill-Rom to activate this feature. When you contact Hill-Rom, be prepared to give the bed’s serial number. The serial number is on the right side of the upper frame at the head end of the bed. -
Page 106: Reset Hr And Rr Data
Heart and Respiration Rate Monitoring System powered by EarlySense • After approximately five minutes, the touchscreen will default to the Status screen. 7. Reset the bed as follows: Unplug the bed. d. Press and hold the Lockout control (A) until you hear a beep (approximately 20 seconds). - Page 107 Heart and Respiration Rate Monitoring System powered by EarlySense Use New Patient zero every time a new patient is admitted to the bed. The New Patient control will— • Clear the previous and current weight history • Zero the scale •...
-
Page 108: Turn On/Off Hr And Rr Display
Heart and Respiration Rate Monitoring System powered by EarlySense 4. A single beep will sound and the touchscreen will show that the bed is ready for a new patient. To return to the Home screen, touch the screen or place a patient in the bed. ON/OFF HR RR D ISPLAY... -
Page 109: And Rr Trends Screen
Heart and Respiration Rate Monitoring System powered by EarlySense RR T RENDS CREEN HR and RR trends screen shows measurements over time. HR/RR Trend Screen Item Description Item Description Current heart rate in beats per min- Respiration Rate Alarm ute (BPM) Respiration rate trend Time period view options (10 minutes, 1 hour, 4 hours, 8 hours, 24 hours, 7 days) -
Page 110: To View Hr And Rr Trends
Heart and Respiration Rate Monitoring System powered by EarlySense To View HR and RR Trends 1. Press the HR/RR menu control. 2. Press Trends. 3. Press Accept. 4. Select the time period view. NOTES • The Trends screen default is 8 hours. •... -
Page 111: Alarms
Heart and Respiration Rate Monitoring System powered by EarlySense 2. Press the number for the alarm threshold that you want to change. 3. Press the Up or Down arrows to the desired threshold. NOTES: • The Up and Down arrows will no longer show after 4 seconds if an arrow is not pressed. - Page 112 Heart and Respiration Rate Monitoring System powered by EarlySense The HR or RR alarm can be silenced or suspended. The Silence or Suspend control allows the caregiver to temporarily stop alarms from being sent to the bed and/or nurse call system, if connected. When the Suspend control is pressed, these will occur: •...
-
Page 113: Turn On/Off In-Room Alarms
Heart and Respiration Rate Monitoring System powered by EarlySense Sensor Expires Soon—the sensor will expire in 30 days. Contact Hill- Rom for a replacement sensor. (This is a message screen with no audible notification.) Sensor Expires Soon—the sensor will expire in 7 days. Contact Hill- Rom for a replacement sensor. -
Page 114: Turn On/Off Remote Alarms
Heart and Respiration Rate Monitoring System powered by EarlySense 4. Make sure the screen shows a message that the alarm is on and audio is off. 5. Make sure the HR/RR Alarm Sound control shows that it is silenced. 6. Press the HR/RR Alarm Sound control again to enable the audible alarm. -
Page 115: View Hr/Rr Alarm Log
Heart and Respiration Rate Monitoring System powered by EarlySense View HR/RR Alarm Log The HR/RR Alarm Log provides a list of alarms, the time when the alarm occurred, and the type of alarm. The log will show the last 7 days of alarms. Alarms older than 7 days can not be viewed. 1. -
Page 116: Turn On/Off Hr And Rr Monitoring
Heart and Respiration Rate Monitoring System powered by EarlySense ON/OFF HR RR M ONITORING 1. Press the Settings/Preferences menu control. 2. Press HR/RR Monitoring. 3. Press System ON/OFF. 4. Press Off or On, and then press Accept. 5. Press Yes or No. Centrella®... -
Page 117: View Sensor Expiration Information
YSTEM ONITORING The NaviCare® System is an enterprise system that connects and monitors certain Hillrom™ products including the HR/RR Monitoring System. When there is an HR/RR alarm, the NaviCare® System sends the alarm status to the network applications for caregivers to view and receive. For complete operational instructions for the NaviCare®... -
Page 118: Mattress Information
“Lockout” on page 33. NOTE: Hill-Rom recommends the use of Hillrom™ mattresses that have been designed and tested specifically for the Centrella® Smart+ Bed. If you purchase a replacement mattress from Hill-Rom or another manufacturer, make sure that the safety features of the bed have been tested and verified to operate correctly with the replacement mattress. -
Page 119: Modes
Mattress Information CONTRAINDICATION: Contraindication—Use of active therapy surfaces (mattresses) with patients with unstabilized spinal cord injury could cause serious injury to the patient. Use loose fitted sheets (preferably knitted) for maximum pressure redistribution. The Centrella® max mattress is a powered air mattress that has a MicroClimate Management® (MCM) cover that operates continuously while the patient is on the bed. -
Page 120: Patient Comfort
Mattress Information To Activate 1. Press the Mattress menu control. 2. Press Max Inflate. To Deactivate Let the mode time out, or press the Mattress menu control, and then press Normal. Patient Comfort Patient Comfort lets you adjust the pressure settings for the patient’s comfort and still provide pressure redistribution. -
Page 121: Remote)
Mattress Information To Turn On/Off the Patient Comfort Controls on the Patient Pendant (Handheld Remote) 1. Press the Mattress menu control. 2. Press Comfort. 3. Press On or Off to allow the use of the comfort controls on the patient pendant. pro+ Mattress 1. -
Page 122: Turn Assist
Mattress Information To Troubleshoot Messages MCM Off for 12 Hours (MCM problem)—this message shows when the MCM has been turned off for over 12 hours. Press Remain Off or Turn On for the MCM feature. WARNING: Warning—Failure to correct the error in a timely manner may cause patient injury. Error (technical problem)—this message shows when the MCM blower does not operate as intended. - Page 123 Mattress Information To Activate 1. Press the Mattress menu control. 2. If a personal electronic device is plugged into the USB port, unplug the device from the siderail. 3. Press Continue. 4. If the bed is not in the correct position to do Turn Assist, this screen will show.
-
Page 124: X-Ray Sleeve
Mattress Information X-Ray Sleeve WARNING: Warning—When anything is inserted within the x-ray sleeve, the HR/RR monitoring system powered by EarlySense may not be accurate and should not be depended upon or patient injury could occur. An x-ray cassette sleeve is available on the Centrella® max and pro+ mattresses. The caregiver can insert a cassette into the sleeve from either side of the mattress through a zipper pocket in the top cover. -
Page 125: Transport The Patient
Transport The Patient WARNING: Warning—Failure to remove power from the bed could cause injury or equipment damage. 5. Unplug the bed. 6. Lower the siderails. 7. Disconnect the mattress’s four attachment knobs from the bed frame. 8. If the bed has the pro+ mattress (P7923A), see the pro+ Mattress Instructions for Use (209196) to remove the mattress. - Page 126 Transport The Patient • Warning—Unless you are to transport a patient, always set the brakes when the unit is occupied. Make sure the brakes are set before any patient transfer on to or off the bed. • Warning—Do not transport a patient with the bed in the Chair position. •...
-
Page 127: Prepare The Bed For Transport
Transport The Patient Powered Transport Only • If no bars show on the battery indicator that is on the Transport Pod, the battery is too low for transport. Either plug the bed in to charge the battery, or put the bed in Neutral to transport the patient. -
Page 128: Use The Powered Transport System
Transport The Patient Use the Powered Transport System 1. At the Transport Pod, look at the battery indicator, and make sure that at least one bar shows. 2. Adjust the transport pod into a position for easy access. 3. Do these steps as shown on the Transport Pod: a. -
Page 129: Power Loss During Transport
Transport The Patient • The amount of pressure applied to the handles will regulate the speed of the bed. Increasing the forward applied pressure will move the bed forward faster. Increasing the reverse applied pressure will move the bed in reverse faster. •... -
Page 130: Accessories
Accessories ACCESSORIES Part Number Description P7512 Line Managers P2217 IV Pole P7511 Permanent IV Pole P158 Infusion Support System P7524 Transport shelf P7934 or P7936 Patient Helper P7928 or P7938 Patient Helper support P7939 HD Patient Helper mount P3212 Patient Helper sleeve P276 and P27601 O2 tank holder P7927 or P7937... -
Page 131: Removable Iv Pole (P2217)
Accessories • Warning—Correctly attach the IV pole; otherwise, it may fall. • Warning—Uneven loading of the IV pole could cause the contents to fall. • Warning—When you lower the upper section of an IV pole, always hold the upper section of the pole before you pull the release knob. -
Page 132: Infusion Support System (P158)
Accessories (P158) NFUSION UPPORT YSTEM WARNING: To help prevent personal injury or equipment damage, obey these warnings: • Warning—Do not exceed the 9 kg (20 lb) load capacity (safe working load) of the infusion support system (ISS) pole. • Warning—Correctly attach the ISS pole; otherwise, it may fall. -
Page 133: Oxygen Tank Holder, E-Size (P276 And P27601)
Accessories To Use 1. Make sure the foot section is flat. 2. Lift the shelf up and over the footboard toward the mattress until the shelf stops in the horizontal position. To Store 1. Remove all the equipment from the shelf, and connect the hook and loop straps. -
Page 134: Patient Helper (P7934 Or P7936)
Accessories NOTES: • Make sure that when you put an oxygen tank in a head-end holder the tank does not interfere with the head section articulation. • If the holder is placed at the foot end of the bed, make sure the holder does not contact the ground when lowering the bed. - Page 135 Accessories 3. Remove the pull pin from the Patient Helper mount on the head end of the bed. 4. Install the arm assembly into the Patient Helper mount. Make sure the arm assembly is fully inserted in the mount. 5. Insert the pull pin to hold the Patient Helper arm assembly in position.
-
Page 136: Patient Helper Bracket Support (P7928) And Patient Helper Sleeve (P3212)
Accessories 8. Make sure the pin is through the retainer. 9. Install the clamp of the trapeze handle assembly on to the horizontal arm, and tighten the clamp to attach the trapeze handle assembly to the horizontal arm. To Remove 1. -
Page 137: Patient Helper Bracket Support (P7938) And Patient Helper Sleeve (P3212)
Accessories (P7938) (P3212) ATIENT ELPER RACKET UPPORT ATIENT ELPER LEEVE WARNING: Warning—Do not exceed the 113.5 kg (250 lb) load capacity of the Patient Helper Bracket Support when used with the Patient Helper Sleeve. Injury or equipment damage could occur. The patient helper bracket support is for use with patient helper sleeves from traction equipment manufacturers. -
Page 138: Push Handles Option
Cleaning and Disinfecting The Traction Frame permits the bed to be used with traction equipment. For safe installation and operation, refer to the traction equipment manufacturer’s installation and operation instructions. ANDLES PTION The push handles at the head end of the bed can be used to steer the bed and adjust the bed’s position. -
Page 139: Recommendations
Cleaning and Disinfecting b. Remove the patient from the bed. Clean the fluid spill from the bed system. d. Have maintenance examine the system completely. e. Do not put the bed back into service until it is completely dry, tested, and found to be safe to operate. -
Page 140: Prepare The Bed For Cleaning And Disinfecting
Cleaning and Disinfecting Recommended for Recommended for Maintain Wetness Disinfection against Cleaner/Disinfectant Routine Cleaning (Disinfection Clostridium Difficile and Disinfection Contact Time) (C.Diff) Clorox HealthCare® Bleach 3 minutes Germicidal Cleaner ready-to- Clorox HealthCare® Bleach 3 minutes Germicidal Wipes *Bleach is not recommended as the primary cleaner/disinfectant. Remove any disinfectant residue prior to and after the use of bleach with a new or clean cloth/wipe soaked in tap water. - Page 141 Cleaning and Disinfecting b. With a new wiping cloth soaked in an approved cleaner/disinfectant, use firm pressure to wipe all surfaces of the bed and mattress (including laundered covers). Use a new or clean wiping cloth as often as necessary. Make sure the following items are cleaned: •...
- Page 142 Cleaning and Disinfecting • Mattress - top and bottom • X-ray cassette sleeve – Clean the inside of the x-ray cassette sleeve. Give special attention to the area indicated in the picture below. • To raise the mattress to clean underneath, find the mattress retention knobs on the underside of the mattress, and slide the knobs to the center of bed.
-
Page 143: Step 2: Disinfection
Cleaning and Disinfecting NOTE: Clean the folds of the mattress sleeve. Examine the following for damage: • Top mattress cover • Bottom mattress cover and white attachment knobs • Zipper closure d. The damaged items should be replaced. STEP 2: Disinfection a. -
Page 144: Preventive Maintenance
Preventive Maintenance NOTE: The zipper tabs are located on the left side at the head end of the mattress. b. Machine wash the top cover per your facility protocol. The cover can be washed at a maximum water temperature of 54°C (130°F). •... -
Page 145: Batteries
Preventive Maintenance Do annual preventive maintenance procedures to make sure the Centrella® Smart+ Bed operates as originally designed. The procedures include examinations of these: • Overall condition • Siderails • Controls and motors • Battery Backup • Brakes and casters •... -
Page 146: Decommissioning And Disposal Instructions
Decommissioning and Disposal Instructions DECOMMISSIONING AND DISPOSAL INSTRUCTIONS Customers should adhere to all federal, state, regional, and/or local laws and regulations as it pertains to the safe disposal of medical devices and accessories. If in doubt, the user of the device shall first contact Hill-Rom Technical Support for guidance on safe disposal protocols. -
Page 147: Troubleshooting
Troubleshooting TROUBLESHOOTING WARNING: Warning—Only facility-authorized persons should service the bed. Service done by unauthorized persons could cause injury or equipment damage. OWER A power loss can occur under these conditions: • The bed power cord has been unplugged from the AC power outlet. •... - Page 148 Specifications Model Description P7923 Centrella® pro+ mattress (integrated) P7924 Centrella® pro+ mattress (non-integrated) P200898 HR/RR Monitoring System P00697905 WatchCare® reader and antennas a. Beds with the HR/RR Monitoring System are equipped with a sensor under the mattress on the head section. Bed Specifications Feature Dimension...
- Page 149 Specifications AC/Mains Power Requirements Condition Range Rated voltage 100-240 V AC Input current rating 10 A Frequency 50-60 Hz Auxiliary Outlet Power Specifications Fuse Type Receptacle 10 A outlet, electrically isolated from the bed’s mains power (120 V) There are no user accessible fuses. Refer to the Centrella® Smart+ Bed Service Manual (193588) for fuse ratings and replacement procedures.
- Page 150 Specifications Electromagnetic Compatibility Guidance CAUTION: This device meets all requirements for electromagnetic compatibility per IEC 60601-1-2. It is unlikely that the user will encounter problems with this device because of inadequate electromagnetic immunity. However, electromagnetic immunity is always relative, and standards are based on anticipated environments of use.
- Page 151 Specifications Electromagnetic Immunity Guidance Guidance and Manufacturer's Declaration - Electromagnetic Immunity The P7900 and HR and RR Monitoring System are intended for use in the electromagnetic environment specified below. The customer or the user should make sure they are used in such an environment. IEC 60601 Electromagnetic Immunity Test...
- Page 152 Specifications Electromagnetic Immunity Guidance Guidance and Manufacturer's Declaration - Electromagnetic Immunity The P7900 and HR and RR Monitoring System are intended for use in the electromagnetic environment specified below. The customer or the user should make sure they are used in such an environment. IEC 60601-1-2 Compliance Immunity Test...
- Page 153 Specifications IMMUNITY to Proximity Fields from Radio Frequency Wireless Communications Equipment In addition to the Radiated RF IEC 61000-4-3 as shown in the table above, the P7900 and HR and RR Monitoring System have been tested as specified in the table below. Test Band Service...
-
Page 154: Wireless Connectivity Specifications
Specifications IRELESS ONNECTIVITY PECIFICATIONS The Wireless Connectivity module supports these security protocols: Standards • Wired Equivalent Privacy (WEP) • Wireless Protected Access (WPA) • IEEE 802.11i (WPA2) Encryption The Wireless Connectivity module supports these encryption protocols: • Wired Equivalent Privacy (WEP, RC4 Algorithm) •... -
Page 155: Wireless System Characteristics
Hill-Rom is not responsible for any radio or television interference caused by unauthorized modification of the devices included with the Hillrom™ module, or the substitution or attachment of connection cables and equipment other than that specified by Hill-Rom Co., Inc. The correction of interference caused by such unauthorized modification, substitution, or attachment is the responsibility of the user. -
Page 156: Usa-Federal Communications Commission (Fcc) Radiation Exposure Statement
Specifications USA—Federal Communications Commission (FCC) Radiation Exposure Statement The radiated output power of the module is below the FCC radio frequency exposure limits. The module must be used in such a manner that the potential for human contact during normal operation is minimized. To avoid the possibility to exceed the FCC radio frequency exposure limits, you should keep a distance of at least 8"... -
Page 157: Department Identification Label Placement
Department Identification Label Placement Operation is subject to these two conditions: (1) this device may not cause interference, and (2) this device must accept any interference, which include interference that may cause unwanted operation of this device. The term "IC" before the equipment certification number only signifies that the Industry Canada technical specifications were met. - Page 158 Department Identification Label Placement NOTES: Centrella® Smart+ Bed Instructions for Use (193587 REV 10)
Need help?
Do you have a question about the Centrella Smart+ Bed and is the answer not in the manual?
Questions and answers
My father is using the centrally bed in the hospital. I **** wondering if wedges for turning are needed to be placed under the patient or if it is unnecessarily because it is a sand bed.
No, wedges for turning should not be placed under a patient using a Hillrom sand bed. Padding the bed with turning sheets or drawsheets may defeat the purpose of the shifting sand or beads.
This answer is automatically generated