Table of Contents
Advertisement
Quick Links
E N
O D IN P L U S
PO RTABLE AI R CO N DIT IO N ER ( L O CA L )
OPERATING INSTRUCTIONS
Read the instructions carefully before operating the appliance or carrying out maintenance work. Observe
all the safety instructions; failure to do so may lead to accidents and/or damage. Store these instructions in
a safe place for future reference.
V 02/23
Advertisement
Table of Contents

Related Manuals for Argo ODIN PLUS


Summary of Contents for Argo ODIN PLUS
- Page 1 O D IN P L U S PO RTABLE AI R CO N DIT IO N ER ( L O CA L ) OPERATING INSTRUCTIONS Read the instructions carefully before operating the appliance or carrying out maintenance work. Observe all the safety instructions; failure to do so may lead to accidents and/or damage. Store these instructions in a safe place for future reference.
- Page 2 Appliance is filled with flammable Before installing and using the appliance, read the owner gas R290. manual. Before installing the appliance, Any repairs you need, contact the nearest read the installation manual. authorized Service Centre and strictly follow manufacturer’s Service Manual. THE REFRIGERANT R290 •...
- Page 3 GENERAL OPERATING AND SAFETY INSTRUCTIONS • This appliance is a local air conditioner designed for domestic use. • Only use this air-conditioner as described in this manual. • Ensure that the required voltage and frequency (220-240V~/50 Hz) match the available power source. •...
- Page 4 • Before moving or cleaning the device, ensure that it is unplugged from the socket. • Do not move the air conditioner while it is operating; first turn the appliance off, check for any condensate build-up and empty it if necessary. •...
- Page 5 In the event of a malfunction, contact the service centre directly. WARNING! • Do not expose the air conditioner to direct sunlight, as the colour of the materials may change; moreover, the appliance may overheat causing the protection mechanism to intervene and switch the appliance off. •...
-
Page 6: Description Of The Appliance
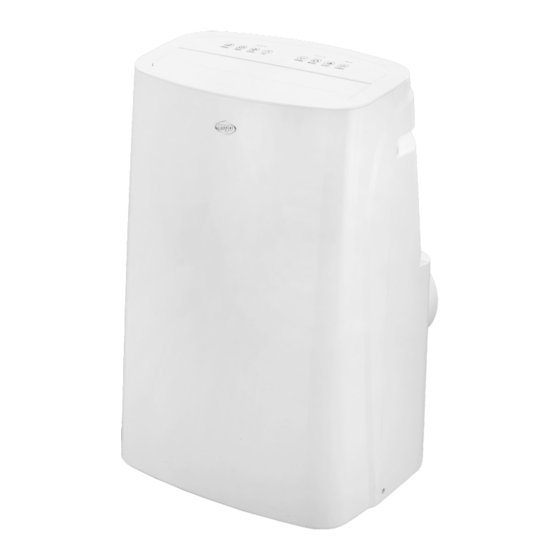
DESCRIPTION OF THE APPLIANCE 1. Control panel 10. Hole for condensate drainage (in cooling mode) 2. Front panel 11. Power cord 3. Wheels 12. Power cord plug 4. Upper panel 13. Side handle 5. Air outlet with motorized flap 14. Hole for condensate drainage (in dehumidification 6. -
Page 7: Appliance Start-Up
APPLIANCE START-UP Open the packaging and pull out the box. Remove the product and the other elements supplied (illustrated in the box below). Remote Battery for remote controller Fitting to apply Hose Terminal flat fitting controller type AAA – LR03 – 1,5 V on the unit to which of expulsion to be placed between... -
Page 8: How To Use The Appliance
Avoid tight bends or folds in the hose. If the air conditioner is not used for prolonged periods, disconnect the pipe and plug the window unit. HOW TO USE THE APPLIANCE This appliance can be used for Cooling, Heating, Dehumidification and Fan. Before using the appliance, leave it in an upright position for at least two hours. -
Page 9: Operating Modes
OPERATING MODES 1. COOLING MODE (COOL) • Press the MODE button to select Cooling. The LED COOL on the control panel lights up. • The temperature adjustment range goes from 16 °C to 31 °C. • In this mode, every time the unit is switched off by pressing the Power button, the appliance stores the set temperature and when it is switched on again it will keep the setting. -
Page 10: Function Controls
Dehumidification Warning: when using the air conditioner in dehumidification mode, it is advisable to always arrange for continuous drainage, so as to maximise dehumidification efficiency. Connect one end of the supplied PVC pipe to the upper discharge hole and place the other end above a drain. Manual drainage Continuous drainage (Cooling and Heating) - Page 11 Improper use of batteries can cause them to leak, overheat, or explode. This liquid is corrosive and can be toxic. It can cause skin and eye burns, and is harmful to ingest. To reduce the risk of injury: • Keep batteries out of the reach of children. •...
- Page 12 CONTROL BY CONTROL PANEL 1. Power button 6. Swing button 2. Mode button 7. Up/Down buttons 3. Sleep button 8. Wifi button 4. Fan Speed button 9. Water tank full indicator 5. Timer button FUNCTION OF THE BUTTONS ON THE REMOTE CONTROLLER AND CONTROL PANEL (the numbers below refer to the control panel drawing) 1.
- Page 13 When the unit is on in COOL mode, set the time after which you want the unit to turn off. Remote controller: press “TIMER” to set a time to turn off the unit. Press UP/DOWN to set the hour. The G icon stays on and indicates that the OFF TIMER is on.
-
Page 14: Care And Maintenance
WIFI GUIDE INFORMATION ON THE APP “SMART LIFE - SMART LIVING” The app Smart Life - Smart Living is available for Android and iOS. Scan the corresponding QR code to get directly to the download. Download Smart Life - Smart Living App INFORMATION ON HOW TO USE THE APP This appliance allows you to operate the appliance via your home net-work. - Page 15 2. Cleaning of casing Use a damp and soft cloth to clean the outer surface of the appliance. Do not use excessively hot water, solvents, petrol or other aggressive chemical compounds, talcum powder or brushes: these may damage the surface or colour of the casing.
- Page 16 SPECIALIST’S MANUAL Aptitude requirement for maintenance man (repairs should be done only be specialists). • Any person who is involved with working on or breaking into a refrigerant circuit should hold a current valid certificate from an industry-accredited assessment authority, which authorises their competence to handle refrigerants safely in accordance with an industry recognised assessment specifìcation.
- Page 17 manufacturer’s technical department for assistance. The following checks shall be applied to installations using flammable refrigerants: • The actual refrigerant charge is in accordance with the room size within which the refrigerant containing parts are installed; • The ventilation machinery and outlets are operating adequately and are not obstructed; •...
- Page 18 employed, and the appropriate percentage of gas (25 % maximum) is confirmed. Leak detection fluids are suitable for use with most refrigerants but the use of detergents containing chiarine shall be avoided as the chiarine may react with the refrigerant and corrode the copper pipe-work. If a leak is suspected, all naked flames shall be removed/extinguished.
- Page 19 checked. • Labelling Equipment shall be labelled stating that it has been de-commissioned and emptied of refrigerant. The label shall be dated and signed. For appliances containing flammable refrigerants, ensure that there are labels on the equipment stating the equipment contains flammable refrigerant. •...
- Page 20 www.argoclima.com Argoclima assumes no responsibility for any errors or inaccuracies in the content of this manual and reserves the right to make to this, at any time and without notice, any changes deemed appropriate for any technical or commercial need. V 02/23...
Need help?
Do you have a question about the ODIN PLUS and is the answer not in the manual?
Questions and answers