Table of Contents
Advertisement
Quick Links
Advertisement
Table of Contents

Summary of Contents for Midea MO5BL
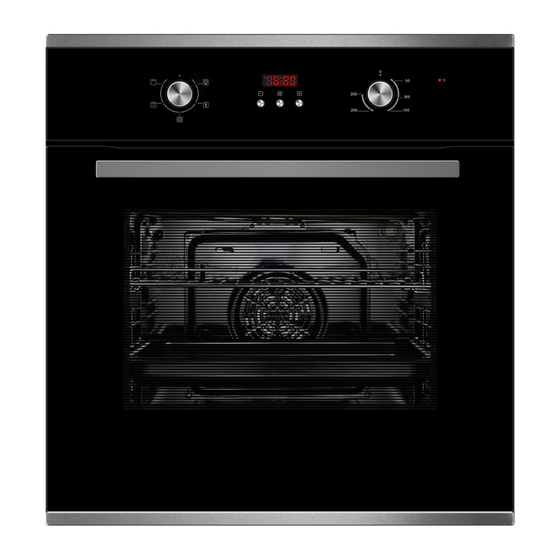
- Page 1 INSTRUCTION MANUAL Built-in Electric Oven MO5BL Read these instructions carefully before using your gas cooker, and keep it carefully. Oven photo is only for reference, there might little difference for different models. www.midea.net.au EN-1...
-
Page 2: Safty Information
SAFTY INFORMATION ▲ ACKNOWLEDGMENT Thank you for purchasing our product. We hope you enjoy using the many features and benefits it provides. Before using this product please study this entire Instruction Manual carefully. Keep this manual in a safe place for future reference. - Page 3 and knowledge if they have been given supervision or instruction concerning use of the appliance in a safe way and understand the hazards involved. Children shall not play with the appliance. Cleaning and user maintenance shall not be made by children without supervision.
-
Page 4: Safety Hints
scrapers to clean the oven door glass since they can scratch the surface, which may result in shattering of the glass. 17. A steam cleaner is not to be used. 18. The appliances are not intended to be operated by means of an external timer or separate remote- control system. -
Page 5: Declaration Of Compliance
an upright cupboard. Fix the oven in position by screwing into place, using the two fixing holes in the frame. To locate the fixing holes, open the oven door and look inside. To allow adequate ventilation, the measurements and distances adhered to when fixing the oven. -
Page 6: How To Use
HOW TO USE ● To set functions by turning the function knob to desired level. ● To set the temperature by turning the temperature knob. If the unit is not in use, always set the knobs to "0". EN-6... -
Page 7: Product Description
PRODUCT DESCRIPTION Cooking function Increasing control Temperture knob Decreasing control Time function Symbol Function description Oven Lamp: Which enables the user to observe the progress of cooking without opening the door. Defrost: The circulation of air at room temperature enables quicker thawing of frozen food, (without the use of any heat). - Page 8 OPERATION INSTRUCTION When the oven is first connected to the electrical supply, wait for the display automatically show " 12.30 ", a beep sound once and the " 12 " " . " flash. Ensure the correct time of the day is set before using the oven. Please note: that is 24 hour clock, for example 2PM shown as 14.00.
- Page 9 ▲ Manual mode : In manual mode, only the day's time and the symbol " " lights up. The cooking duration has to be controlled by the user. Notes: In manual mode, to ensure the oven is not left on accidentally, after 5 hours no any button pressed, the timer will flash once a second to warn you the oven will enter standby mode.
- Page 10 on the "screen and the symbols "A" " "will light on the screen. While doing this the oven will also start to operate. 3). At the completion of the set duration, the timer will stop the oven and give an audible warning. Also, the symbol " A "will begin to flash on the screen.After bringing the cooking function and oven temperature knob to "...
- Page 11 " - " button to adjust finishing time, Press " " button to confirm, the day's time will appear on the screen and the symbol " A " will begin to continuously light on the screen.The symbol " " disappears until the time cooking starts.
- Page 12 ▲ ACCESSORIES Wire shelf: For grill, dishes, cake pan with items for roasting and grilling. Slider bracket : For cooking larger size food, these shelf support rails on the right and left sides of the oven can be removed, dishes and tray can be put on the oven floor, using functions as Radiant grilling, Double grilling,Double grill with fan.
-
Page 13: Installation Instructions
INSTALLATION INSTRUCTIONS ▲ SHELF PLACEMENT WARNING: To ensure the oven shelves operate safely, correct placement of the shelves between the side rail is imperative. Shelves and the pan only can be used between the first and fifth layers. The shelves should be used with the right direction, it will ensure that during careful removal of the shelf or tray, hot food items should not slide out. -
Page 14: Ventilating Openings
▲ VENTILATING OPENINGS When cooking is finished, the cavity temperature is over 70 degree. the ventilating opening will continue working for 15 minutes after the oven stop cooking. Ventilating openings ▲ CONNECTION OF THE OVEN ▲ INSTALLATION 56 0 25 0 10 0 60 0 57 0... - Page 15 ▲ REMOVING THE DOOR FROM OVEN (OPTIONAL) Removable door allows full access to entire interior of the oven for easier and quicker maintenance. 1. To remove the door, open the door to the maximum angle. Then pull the buckle at the door hinge backward.
-
Page 16: Cleaning And Maintenance
CLEANING AND MAINTENANCE For the sake of a good appearance and reliability, keep the unit clean. The modern design of the unit facilitates maintenance to a minimum. The parts of the unit which come into contact with food have to be cleaned regularly ●... - Page 19 3 years for the life of the appliance. FOR SPARE PARTS OR TO FIND THE ADDRESS OF YOUR NEAREST STATE SPARE PARTS CENTRE IN AUSTRALIA Midea Appliances Australia 7 Ordish Road, Dandenong South VIC 3175 www.midea.net.au TEL: 1300 793 216 Email: info@midea.net.au...


Need help?
Do you have a question about the MO5BL and is the answer not in the manual?
Questions and answers