Table of Contents
Advertisement
Quick Links
Midea
Built-in Combination Steam Oven
Instruction
MODEL: MCOS34BL
SAVE THESE INSTRUCTIONS CAREFULLY
Read these instructions carefully before using your combination steam oven, and keep
it carefully. If you follow the instructions, your combination steam oven will provide
you with many years of good service.
Advertisement
Table of Contents

Subscribe to Our Youtube Channel
Related Manuals for Midea MCOS34BL


Summary of Contents for Midea MCOS34BL
- Page 1 Midea Built-in Combination Steam Oven Instruction MODEL: MCOS34BL SAVE THESE INSTRUCTIONS CAREFULLY Read these instructions carefully before using your combination steam oven, and keep it carefully. If you follow the instructions, your combination steam oven will provide you with many years of good service.
-
Page 2: Table Of Contents
CONTENTS CONTENTS ............................2 PRECAUTIONS TO AVOID POSSIBLE EXPOSURE TO EXCESSIVE MICROWAVE ENERGY..3 ADDENDUM ............................3 SPECIFICATIONS ..........................3 IMPORTANT SAFETY INSTRUCTION ....................4-5 TO REDUCE THE RISK OF INJURY TO PERSONS GROUNDING INSTALLATION .......6-8 SETTING UP YOUR OVEN ........................8 IMPORTANT INFORMATION ABOUT INSTALLING ................ -
Page 3: Precautions To Avoid Possible Exposure To Excessive Microwave Energy
If the oven is not maintained in a good state of cleanliness it will result in the degradation of its surface and affect its lifespan, even a dangerous situation. SPECIFICATIONS Model: MCOS34BL Rated Voltage: 230-240V ~ 50Hz Rated Input Power (Microwave):... -
Page 4: Important Safety Instruction
IMPORTANT SAFETY INSTRUCTIONS WARNING To reduce the risk of fire, electric shock, injury to persons or exposure to excessive microwave oven energy when using your appliance, follow the basic precautions, including the following: 1. Warning: Liquids and other foods must not before place them in the oven according to be heated in sealed containers since they the instructions provided. - Page 5 23. Microwave heating of beverages can result in delayed eruptive boiling; therefore care must be taken when handling the container. 24. Children shall be supervised to ensure that they do not play with the appliance. 25. The oven is not designed to be operated by means of an external timer or separate remote- control system.
-
Page 6: To Reduce The Risk Of Injury To Persons Grounding Installation
TO REDUCE THE RISK OF INJURY TO PERSONS GROUNDING INSTALLATION DANGER 3) The long cord shall be arranged well so that it will not drape over the counter top Electric Shock Hazard or tabletop where children can easily Touching some of the internal components can reach and pull the cord or be tripped over cause serious personal injury or even death. - Page 7 UTENSILS See the instructions on "Materials you can use in oven or to be avoided in oven." There may be certain non-metallic utensils that are not safe to use for microwaving. If in doubt, CAUTION you can test the utensil in question following Personal Injury Hazard the procedure below.
-
Page 8: Setting Up Your Oven
Materials to be avoided in oven Utensils Remarks Aluminum tray May cause arcing. Transfer food into microwave-safe dish. Food carton May cause arcing. Transfer food into microwave-safe dish. with metal handle Metal or metal- Metal shields the food from microwave energy. Metal trim may cause arcing. trimmed utensils Metal twist ties May cause arcing and could cause a fire in the oven. -
Page 9: Important Information About Installing
IMPORTANT INFORMATION ABOUT INSTALLING • The appliance is NOT intended for use in a commercial environment. • Please observe the installation instructions provided and note that the appliance shall only be installed by a qualified technician. • The appliance is fitted with a plug and must only be connected to a properly installed earthed socket. -
Page 10: Placement
FITTED UNITS • The appliance is only designed to be fully fitted in a kitchen. • The appliance is not designed to be used as a tabletop appliance or inside a cupboard. • The fitted cabinet must not have a back wall behind the appliance. •... - Page 11 Fully insert the appliance and centre it. Do not kink the connecting cable. Screw the appliance into place. The gap between the worktop and the appliance must not be closed by additional battens. Important information Electrical connection The appliance is fitted with a plug and must only be connected to a properly installed earthed socket.
-
Page 12: Before First Use
BEFORE FIRST USE Initial cleaning and heating Remove all the protective foil on the front of the oven. For more information see the "CLEANING". Before the first use of the appliance, ■ Remove all accessories and wash out of the microwave. ■... -
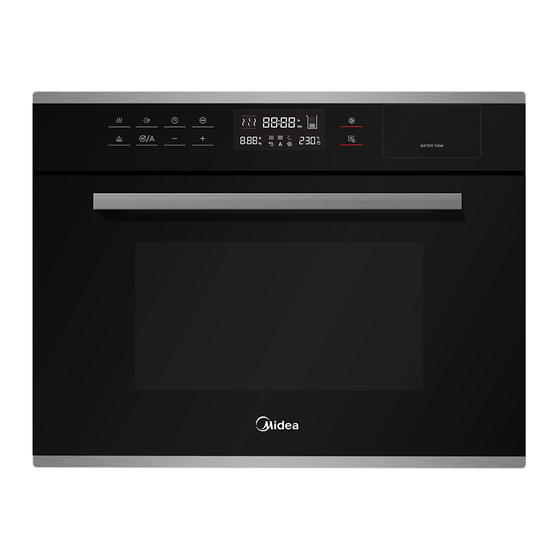
Page 13: Operation Instruction
OPERATION INSTRUCTION Control Panel The oven uses modern electronic control to adjust cooking parameters to meet your needs for better cooking. 1. Clock Setting When the oven is electrified, "00:00" will blink, buzzer will ring once. 1) Press “ ” or “ ”... - Page 14 Microwave Power Chart Microwave Power 100% Display 900W 700W 450W 300W 100W You can see from the table below from which power levels you can choose and for which foods the power levels are suitable. Power level Food 900 W - Boiling water, reheating - Cooking chicken, fish, vegetables 700 W...
- Page 15 5) Press “ ” to select the time setting mode. The default time is 10 minutes. Press “ ” or “ ” to select the cooking time. The max. time is 5 hours. 6) Press “ ” button to start cooking. 5.
- Page 16 5) Press “ ” to enter to the microwave power level selection. 6) Press “ ” or “ ” to select the microwave power (700W, 450W, 300W, 100W). The default power is 300W. 7) Press “ ” to select the time setting mode. The default time is 10 minutes. 8) Press “...
- Page 17 NOTE: 1) After the auto steam program is completed you will hear the water pump. 2) The oven cavity and front surface must be cleaned after each use. All food remains and condensed water must be removed. 3) If the menu needs preheating, don’t put the food in the oven during preheating. Only when the temperature is reached, you can put the food in to start cooking.
- Page 18 13. Convection+Steam Function 1) In standby mode, press “ ” button to enter the steam mode, time lights up by default 10:00. Press “ ” or “ ” or “ ” repeatedly to select Conv. + Steam mode, the icon is displayed, the default temperature is 180 degrees.
- Page 19 15. Lock-out Function for Children Lock: In standby mode, press “ ” for 3 seconds, there will be a long “beep” denoting entering into the children-lock state and “ ” indicator will light. Unlock: In locked mode, press “ ” for 3 seconds, there will be a long “beep” denoting that the lock is released, and “...
- Page 20 Defect codes The defect codes below may occur during steam functions: E-06: 1-Water tank is not close well. E-05: water system abnormal, need to contact for engineer to check, below is the possibilities. 1- The water sensor is abnormal. 2- The water pipe is abnormal. 3- The water pump is abnormal.
- Page 21 STEAM MENU AUTO-MENU DISPLAY WEIGHT POWER Trout Steam100°C +300W Salmon filet Steam100°C +100W Pike perch Steam100°C +300W Prawns Steam100°C Halibut filet Steam100°C +300W Cockles Steam100°C +100W Cod filet Steam100°C +300W Herring Steam100°C +300W Tuna filet Steam100°C +100W...
- Page 22 Crab Steam100°C +300W Chicken leg Steam100°C +300W Chicken breast Steam100°C +300W Meatball Steam100°C +300W Steam100°C Turkey escalope +300W Pork filet, whole Steam100°C +300W Steam100°C Sausages +100W Runny eggs Steam100°C Eggs, hard Steam100°C Eggs, soft Steam100°C 200g+400mL Steam100°C+ 450W/ Brown rice + water Steam100°C+ 300W 400g+800mL 200g+300mL...
- Page 23 Eggplant/ Steam100°C+300W Aubegine Beans Steam100°C+300W Broccoli Steam100°C Cauliflower Steam100°C +300W Peas Steam100°C +300W Potatoes with skin Steam100°C + 300W (whole, small) Potatoes with skin Steam100°C (whole, big) Potatoes without Steam100°C +300W skin (pieces) Carrots Steam100°C +300W Corn cobs Steam100°C +300W...
- Page 24 Bell peppers Steam100°C Hot peppers Steam100°C Mushrooms Steam100°C Leeks Steam100°C+300W Brussels sprouts Steam100°C Celery Steam100°C + 300W Asparagus Steam100°C Spinach Steam100°C +300W Courgette Steam100°C+300W...
- Page 25 NO-STEAM MENU AUTO-MENU DISPLAY WEIGHT POWER 450W Melt chocolate 450W 450W 450W Melt butter 450W 450W 100W+220°C Sweet potato 100W+220°C 100W+220°C 100W+220°C Chicken whole 1000 100W+220°C 1200 100W+220°C 450W+220°C 450W+220°C 450W+220°C Chicken leg 450W+220°C 450W+220°C 450W+220°C 450W+220°C 300W+220°C 300W+220°C 300W+220°C Chicken wings 300W+220°C 300W+220°C...
- Page 26 450W+220°C 450W+220°C 450W+220°C Roast pork 450W+220°C 450W+220°C 450W+220°C 1000 450W+220°C 100W+220°C 100W+220°C Chicken kebabs 100W+220°C 100W+220°C 100W+220°C Pre-heat/220°C Shrimp Pre-heat/220°C Pre-heat/220°C 100W+220°C 100W+220°C 100W+220°C Beef steak 100W+220°C 100W+220°C 100W+220°C 1000 100W+220°C 100W+220°C Barbecued 100W+220°C 100W+220°C Chocolate cookies Pre-heat/180°C Lemon cookies Pre-heat/200°C Pre-heat/220C Sausage...
- Page 27 (+800ml cold water) Pasta 700W (+1000ml cold water) (+1200ml cold water) Soup 900W Pizza 900W Muffin 900W 50+500ml water Oatmeal 100+1000ml water 900W/450W 150+1500ml water Baked apple 700W Sandwich 900W Popcorn 900W Fudge brownies 100W+180°C Bread Grill Level3 Chicken nuggets 100W+220°C French fries 100W+220°C...
- Page 28 Peanut chocolate Pre-heat/180°C cookies Hamburger 100W+220°C Muffin 840 (70g*12) Pre-heat/180°C...
-
Page 29: Troubleshooting
TROUBLE SHOOTING Normal Microwave oven interfering with Radio and TV reception may be interfered when microwave TV reception oven is operating. It is similar to the interference of small electrical appliances, like mixer, vacuum cleaner, and elec- tric fan. It is normal. Dim oven light In low power microwave cooking, oven light may become dim. - Page 30 3 years for the life of the appliance. FOR SPARE PARTS OR TO FIND THE ADDRESS OF YOUR NEAREST STATE SPARE PARTS CENTRE IN AUSTRALIA MIDEA HOME APPLIANCES AUSTRALIA PTY LTD 11/75 Lorimer Street, Docklands, Melbourne, 3008 After-sales service No.: 1800 88 60 10...
Need help?
Do you have a question about the MCOS34BL and is the answer not in the manual?
Questions and answers