Advertisement
QUICK START GUIDE
CAREFULLY UNPACK ALL THE ITEMS AND RETAIN THE PACKAGING FOR LATER USE
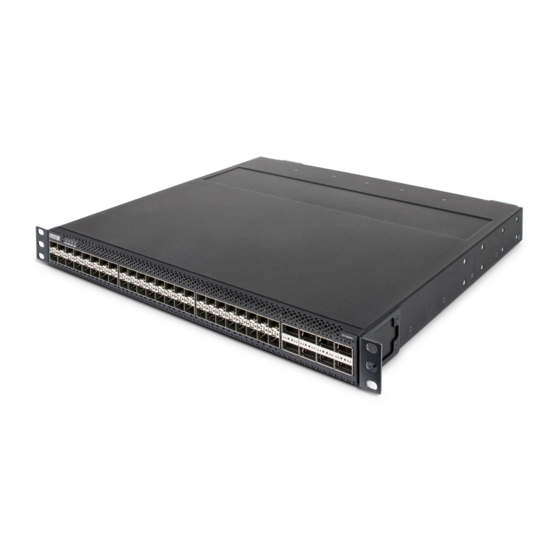
X2-3200G
is shipped with the following items:
X2-3200G main unit
2 x C13 AC power cord
1 x RJ45 female to 9-pin serial adapter
1 x rack mounting kit (front brackets, rear brackets, and the necessary screws)
4 x rubber foot with adhesive patch
CONNECTING POWER & START UP
A
Power on the device by connecting the included AC power cord(s) to device and main power.
B
The unit starts up and boots once it is powered. You can follow its status by observing the activity LEDs [2].
C
BOOT SEQUENCE ~
Stage 1 (~35 secs):
Stage 2 (~2 secs):
D
NORMAL OPERATION MODE
PS1, PS2:
Green if present and operational, yellow if absent or inoperational
FAN, SYS:
Green
20
22
19
21
2
E1 / 33
E2 / 34
1
3
INITIAL SETUP OVER SERIAL CONNECTION
NOTE:
If you are planning on using the device on a dynamic IP network, you can skip this step. The device will get an IP address
automatically and will be accessible via GUI or CLI with the default credentials:
User: admin
Password: Adminadmin1
X2-3200G features a serial management port, located on its front panel [1]. Connecting through this port allows the users to make the
initial setup on the device, configuring its network interface.
A
Connect the X2-3200G serial administration port to a computer, using the supplied cable and adapters.
B
Use the following settings when connecting to the device: 115200 baud rate, 8 bit, no parity, 1 bit stop.
C
Login, using the following default credentials:
Default username: admin
Default password: Adminadmin1
D
Change network configuration using the .system.network.set command.
SECS
SYS LED yellow, PS1/PS2 LEDs green, FAN LED o , fans at full speed
SYS, FAN, PS1/PS2 LEDs green, fans at normal speed
24
26
23
25
X2-3200G
4
6
8
10
12
5
7
9
11
28
30
27
29
14
16
18
20
22
13
15
17
19
21
X2-3200G is designed to be rack
mounted. Make sure the unit is
properly grounded and secured in
the rack using the included screws
and pre-mounted brackets.
32
31
24
26
28
30
32
23
25
27
29
31
X2-3200G
[1]
[2]
[3]
Advertisement
Table of Contents

Summary of Contents for ProfiTap X2 Series
- Page 1 QUICK START GUIDE X2-3200G CAREFULLY UNPACK ALL THE ITEMS AND RETAIN THE PACKAGING FOR LATER USE X2-3200G is shipped with the following items: X2-3200G main unit X2-3200G is designed to be rack 2 x C13 AC power cord mounted. Make sure the unit is 1 x RJ45 female to 9-pin serial adapter properly grounded and secured in 1 x rack mounting kit (front brackets, rear brackets, and the necessary screws)
- Page 2 For more information on available CLI commands, please refer to the User Manual. Download the latest user manual from https://resources.profitap.com/ Profitap HQ B.V. — High Tech Campus 84 — 5656AG Eindhoven — The Netherlands info@profitap.com — +31 (0) 40 782 0880 — www.profitap.com v1.7 — 03/22...


Need help?
Do you have a question about the X2 Series and is the answer not in the manual?
Questions and answers