Table of Contents
Advertisement
Quick Links
Field Disassembly and
Reassembly Instructions
For use by heating contractor
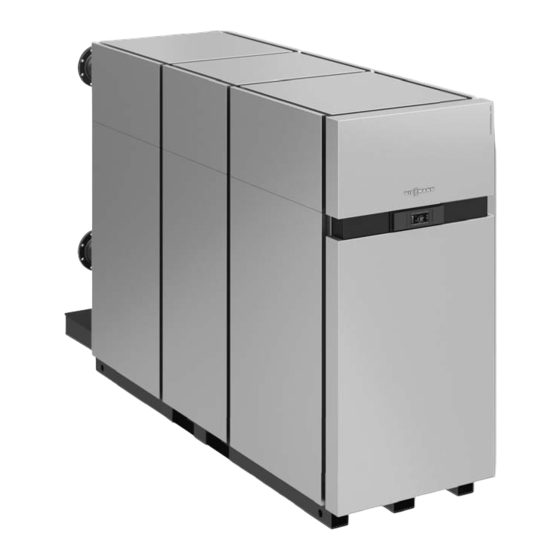
Vitocrossal 300 CA3B
Single Fuel and Dual Fuel
Product may not be exactly as illustrated.
Vitocrossal 300 CA3B
Single and Dual Fuel Series Boilers
This document is to be used where access for the
placement of the boiler is restricted and when height
reduction as described in the Installation Instructions has
been completed and further disassembly is still required.
5831 907 - 04
11/2018
IMPORTANT
Review the applicable boiler Installation
Instructions, Service Instructions and this Field
Disassembly and Reassembly Instructions prior to
proceeding with the further disassembly of the boiler.
Please file in Service Binder
Advertisement
Table of Contents

Subscribe to Our Youtube Channel
Related Manuals for Viessmann Vitocrossal 300 CA3B


Summary of Contents for Viessmann Vitocrossal 300 CA3B
- Page 1 Field Disassembly and Reassembly Instructions For use by heating contractor Vitocrossal 300 CA3B Single Fuel and Dual Fuel Product may not be exactly as illustrated. Vitocrossal 300 CA3B IMPORTANT Single and Dual Fuel Series Boilers This document is to be used where access for the...
-
Page 2: Safety, Installation And Warranty Requirements
Follow the ultimate owner with all equipment, as well as safety Viessmann maintenance schedule of the boiler contained precautions/requirements, shutdown procedure, and in this manual. the need for professional service annually before the... -
Page 3: Fiberglass Wool And Ceramic Fiber Materials
- Avoid breathing fiberglass dust and contact with Mechanical room skin and eyes. Viessmann recommends installation of an additional - Use NIOSH approved dust/mist respirator. electrical disconnect switch and a fuel shut-off valve (if - Wear long-sleeved, loose fitting clothing, gloves possible) outside the mechanical room or enclosed area and eye protection. -
Page 4: Table Of Contents
Table of Contents Vitocrossal 300, CA3B Series 2.5 to 6.0 Technical Data Page Safety Safety, Installation and Warranty Requirements ....2 Product documentation...........2 Warranty...............2 Licensed professional heating contractor....2 Contaminated air ...........2 Advice to owner............2 Carbon monoxide...........2 Fresh air ...............2 Equipment venting..........2 Fiberglass wool and ceramic fiber materials....3 First aid measures ..........3 Codes ..............3... - Page 5 Table of Contents Vitocrossal 300, CA3B Series 2.5 to 6.0 Technical Data Page Reassembly Installing the Sealing Cord .........26 Installing the Boiler Heat Exchanger Sections ....27 Installing the Burner Assembly ........28 Installing the Gas Lines and Thermal Insulation .....30 Installing the Supply and Return Header (Single Fuel) ..31 Installing the Supply and Return Header (Dual Fuel) ..32 Installing the Frame Posts ..........33 Installing the Cable Guide and Cable Trays ....34...
-
Page 6: Vitocrossal 300
Service Equipment Vitocrossal 300, CA3B Series 2.5 to 6.0 Technical Data Vitocrossal 300 Lifting the boiler Assembly kit for use with; CA3B 2.5/3.0 Dual Fuel ......Part # 7551301 It is essential to use appropriate lifting devices CA3B 2.5/3.0 Single Fuel ......Part # 7551296 certified of lifting to a minimum of the boiler weight. -
Page 7: Compact Cylinder Radiant Burner (Ca3B Models 2.5 To 3.0 Sf)
Specifications Vitocrossal 300, CA3B Series 2.5 to 6.0 Technical Data Compact Cylinder Radiant Burner (CA3B models 2.5 to 3.0 SF) Burner Model 1250 Compact 1500 Compact in. (mm) 27b (699) 27b (699) in. (mm) 33b (845) 33b (845) in. (mm) 21c (550) 21c (550) Weight SF... -
Page 8: Compact Cylinder Radiant Burner (Ca3B Models 3.5 To 6.0 Sf & 2.5 To 6.0 Df)
Specifications Vitocrossal 300, CA3B Series 2.5 to 6.0 Technical Data Compact Cylinder Radiant Burner (CA3B models 3.5 to 6.0 SF & 2.5 to 6.0 DF) Burner Model 1250 1500 2000 in. (mm) 33 (838) 29b (749) 29b (749) in. (mm) 33a (843) 33a (843) 34b (878) -
Page 9: Boiler Supply And Return Headers
Specifications Vitocrossal 300, CA3B Series 2.5 to 6.0 Technical Data Boiler Supply and Return Headers Boiler Supply Headers 2.5 to 5.0 Single/Dual Fuel 6.0 Single/Dual Fuel Boiler Supply Headers Boiler Model 2.5 and 3.0 SF 3.5 and 4.0 SF 5.0 SF 6.0 SF 2.5 and 4.0 DF 5.0 DF... -
Page 10: Gas Pipes
Specifications Vitocrossal 300, CA3B Series 2.5 to 6.0 Technical Data Gas Pipes Gas Pipes 2.5 to 6.0 Single Fuel 2.5 to 4.0 Dual Fuel 5.0 and 6.0 Dual Fuel Gas Pipes Boiler Model 2.5 and 3.0 SF 3.5 and 4.0 SF 5.0 and 6.0 SF in. -
Page 11: Heat Exchangers And Base (Single Fuel)
Specifications Vitocrossal 300, CA3B Series 2.5 to 6.0 Technical Data Heat Exchangers and Base (Single Fuel) Lead Lag 1 Lag 2 Single Fuel CA3B Boilers Section 1 (Lead) Section 2 (Lag 1) Section 3 (Lag 2) 1.25/1.5 Compact 1.25/1.5 Compact 1.25/1.5 Compact 1.25/1.5 Compact CA3B Boilers... -
Page 12: Heat Exchangers And Base (Dual Fuel)
Specifications Vitocrossal 300, CA3B Series 2.5 to 6.0 Technical Data Heat Exchangers and Base (Dual Fuel) Lead Lag 1 Lag 2 Dual Fuel CA3B Boilers Section 1 (Lead) Section 2 (Lag 1) Section 3 (Lag 2) CA3B Boilers Dimensions in. (mm) 58e (1483) 58e (1483) in. -
Page 13: Base And Control Panel
Specifications Vitocrossal 300, CA3B Series 2.5 to 6.0 Technical Data Base and Control Panel Base and control panel REMOVEABLE AS PER MANUFACTURER 9.5" not including the flue Boiler Model 2.5 and 3.0 SF 3.5 and 4.0 SF 2.5 to 4.0 DF 5.0 and 6.0 SF 5.0 and 6.0 DF in. -
Page 14: Boiler Heat Exchanger Sections
Specifications Vitocrossal 300, CA3B Series 2.5 to 6.0 Technical Data Boiler Heat Exchanger Sections 24" diameter drum Single Fuel Boiler 1.25/1.5 Section Compact in. (mm) 30a (767) 38a (970) 38a (970) in. (mm) 28a (717) 38b (978) 38b (978) in. (mm) 53a (1351) 58a (1482) 58a (1482) -
Page 15: Removing The Boiler Panels
Disassembly Vitocrossal 300, CA3B Series 2.5 to 6.0 Technical Data Removing the Boiler Panels Remove the screws from the right side of the top Remove the screws from the lower front cover plate panels. and remove plate. Lift and remove the top right-side panels. Lift and remove the top front panel. -
Page 16: Removal Of The Upper Frame Profiles
Disassembly Vitocrossal 300, CA3B Series 2.5 to 6.0 Technical Data Removal of the Upper Frame Profiles 1. Remove the lower M8 nut and bolt from each side of the lower portion of the upper frame profiles. 2. Lift all upper parts of the frame and set aside. -
Page 17: Disconnecting The Burner Assembly
Disassembly Vitocrossal 300, CA3B Series 2.5 to 6.0 Technical Data Disconnecting the Burner Assembly Disconnect the burner gas line. Note: Do not lose gasket. Disconnect plugs 145, 41, 53 and 40 on the burner control unit. Remove sensors 15A/B and 3A/B from the sensor wells. -
Page 18: Removing The Temperature Limit Switches
Disassembly Vitocrossal 300, CA3B Series 2.5 to 6.0 Technical Data Removing the Temperature Limit Switches Remove the screw holding the limit switches B and C. Remove limit switches B and C from wells. Label B supply water temperature limit switch and C flue gas temperature limit switch. -
Page 19: Removing Cable Guide And Cable Trays
Disassembly Vitocrossal 300, CA3B Series 2.5 to 6.0 Technical Data Removing Cable Guide and Cable Trays Release the cables from the cable guide and remove the cable guide at the front and rear. Remove the screws and the frame crossbar on both sides. -
Page 20: Removing The Frame Posts
Disassembly Vitocrossal 300, CA3B Series 2.5 to 6.0 Technical Data Removing the Frame Posts Remove screws and lock washers A8.4. Remove spacer bracket from the corner rails. Release the mounting brackets on the boiler sections by removing the hexagon bolts, washers and nuts . Remove the corner posts with washers 10.5 and M10 nuts to the base frame. -
Page 21: Removing The Supply And Return Headers (Single Fuel)
Disassembly Vitocrossal 300, CA3B Series 2.5 to 6.0 Technical Data Removing the Supply and Return Headers (Single Fuel) 1. Remove the thermal insulation jacket from the supply header. 2. To disassemble the supply header, remove the flange bolts and lift off the supply header. 3. -
Page 22: Removing The Supply And Return Headers (Dual Fuel)
Disassembly Vitocrossal 300, CA3B Series 2.5 to 6.0 Technical Data Removing the Supply and Return Headers (Dual Fuel) 1. Remove the thermal insulation jacket from the supply header. 2. To disassemble the supply header, disconnect the flange bolts and lift off the supply header. 3. -
Page 23: Removing The Gas Lines And Thermal Insulation
Disassembly Vitocrossal 300, CA3B Series 2.5 to 6.0 Technical Data Removing the Gas Lines and Thermal Insulation Remove the thermal insulation. -
Page 24: Removal Of The Boiler Heat Exchanger Sections
Disassembly Vitocrossal 300, CA3B Series 2.5 to 6.0 Technical Data Removal of the Boiler Heat Exchanger Sections Section 3 (Lag 2) Section 2 (Lag 1) Section 1 (Lead) 1. Remove the section mounting nuts. WARNING 2. Lift the boiler section from the base frame and place on a flat clean surface. -
Page 25: Transporting The Lower Frame And Control Panel
Disassembly Vitocrossal 300, CA3B Series 2.5 to 6.0 Technical Data Transporting the Lower Frame and Control Panel WARNING Transport the lower frame to the installation location. The lower frame may cause injury if handled improperly. Use suitable lifting equipment (e.g. crane or gantry). -
Page 26: Installing The Sealing Cord
Reassembly Vitocrossal 300, CA3B Series 2.5 to 6.0 Technical Data Installing the Sealing Cord 1. Use the supplied high temperature silicon around the heat exchanger ring or it’s base. 2. Place the new sealing cord around the heat exchanger ring on top of the silicon. 3. -
Page 27: Installing The Boiler Heat Exchanger Sections
Reassembly Vitocrossal 300, CA3B Series 2.5 to 6.0 Technical Data Installing the Boiler Heat Exchanger Sections 1. Place the boiler sections carefully on the base frame, aligning with mounting bolts. 2. Use A12 lock washers and M12 nuts to attach the boiler modules to the base frame. -
Page 28: Installing The Burner Assembly
Reassembly Vitocrossal 300, CA3B Series 2.5 to 6.0 Technical Data Installing the Burner Assembly 1. Lift up the upper part of the burner and place WARNING into position. 2. Tighten the 6x M12 nuts evenly torque to 9 lb.ft (12 Nm). The burner weighing up to 176 lb. - Page 29 Reassembly Vitocrossal 300, CA3B Series 2.5 to 6.0 Technical Data Installing the Burner Assembly (continued) Install upper burner section. Install the 6 nuts around the burner mounting plate. Connect wiring and install electrode block. Install sensors 15A/B and 3A/B from the sensor wells.
-
Page 30: Installing The Gas Lines And Thermal Insulation
Reassembly Vitocrossal 300, CA3B Series 2.5 to 6.0 Technical Data Installing the Gas Lines and Thermal Insulation Wrap thermal insulation mats around the boiler WARNING sections. Fix all thermal insulation mats with tension springs. Mechanically loaded connections can cause equipment Thread on gas lines with gasket to the burner and damage. -
Page 31: Installing The Supply And Return Header (Single Fuel)
Reassembly Vitocrossal 300, CA3B Series 2.5 to 6.0 Technical Data Installing the Supply and Return Header (Single Fuel) 1. Reinstall the return header and isolation valves WARNING together with the lower flange of the boiler sections. Mechanically loaded connections can cause equipment 2. -
Page 32: Installing The Supply And Return Header (Dual Fuel)
Reassembly Vitocrossal 300, CA3B Series 2.5 to 6.0 Technical Data Installing the Supply and Return Header (Dual Fuel) 1. Reinstall the return header and isolation valves WARNING together with the lower flange of the boiler sections. 2. Reinstall the actuators onto the isolation valves. Mechanically loaded connections can cause equipment 3. -
Page 33: Installing The Frame Posts
Reassembly Vitocrossal 300, CA3B Series 2.5 to 6.0 Technical Data Installing the Frame Posts 1. Fit the center posts to the base frame using the M10 nuts and washers. 2. Mount the center posts with the mounting brackets on the boiler sections. For this purpose, use the hexagon bolts M8x25, washers and nuts. -
Page 34: Installing The Cable Guide And Cable Trays
Reassembly Vitocrossal 300, CA3B Series 2.5 to 6.0 Technical Data Installing the Cable Guide and Cable Trays 1. On the left side (facing the front of the boiler), screw the cable trays to the posts using the cylinder screws and the toothed lock washers. 2. -
Page 35: Installing The Temperature Limit Switches
Reassembly Vitocrossal 300, CA3B Series 2.5 to 6.0 Technical Data Installing the Temperature Limit Switches Replace cabling in cable trays and secure with cable ties. Ensure all wiring is returned to it’s correct location. Insert sensor assembly into the sensor wells. Install limit switches B and C to the correct location. -
Page 36: Installation Of The Upper Frame Profiles
Reassembly Vitocrossal 300, CA3B Series 2.5 to 6.0 Technical Data Installation of the Upper Frame Profiles 1. Insert the upper parts to the lower parts of the frame. 2. Tighten the lower nuts torque to 8 lb.ft (10 Nm). -
Page 37: Installing The Boiler Panels
Reassembly Vitocrossal 300, CA3B Series 2.5 to 6.0 Technical Data Installing the Boiler Panels Note: The Vitocrossal 300, CA3B having two boiler Install the top front cover plate with 4 screws heat exchanger sections will have reduced number (for CA3B 5.0 and 6.0 only). of assembly steps compared to a Vitocrossal 300, Install the lower front cover plate with 6 screws from CA3B having three boiler heat exchanger sections. - Page 38 Vitocrossal 300, CA3B Series 2.5 to 6.0 Technical Data...
- Page 39 Vitocrossal 300, CA3B Series 2.5 to 6.0 Technical Data...
- Page 40 Vitocrossal 300, CA3B Series 2.5 to 6.0 Technical Data...
Need help?
Do you have a question about the Vitocrossal 300 CA3B and is the answer not in the manual?
Questions and answers